
Table of Contents
Gordon Ramsay Fried chicken represents the pinnacle of comfort food perfection, but most home cooks struggle with soggy coating and dry meat. After years of cooking in high-pressure situations at the firehouse, I’ve learned that great fried chicken isn’t just about following a recipe—it’s about understanding the science behind crispy perfection. The same precision we used preparing meals for exhausted firefighters applies to creating restaurant-quality fried chicken that rivals any establishment. According to the USDA’s poultry safety guidelines, proper preparation and temperature control are crucial for both safety and quality. If you’re looking to expand your Gordon Ramsay repertoire, his herb butter technique pairs beautifully with fried chicken for an elevated dining experience.
Why This Gordon Ramsay Fried chicken Recipe Works (And Where Most Go Wrong)
The biggest mistake I see home cooks make with Gordon Ramsay Fried chicken is rushing the brining process. Professional kitchens understand that moisture retention starts hours before the chicken hits the oil. The science is simple: salt draws out moisture initially, then the proteins break down and reabsorb that liquid along with the seasoning, creating incredibly flavorful, juicy meat that won’t dry out during frying.
Temperature control separates amateur from professional results. Most people think hotter oil means crispier coating, but that’s dead wrong. Oil that’s too hot creates a barrier that prevents even cooking, leaving you with burnt exteriors and raw centers. The sweet spot sits at exactly 325°F—hot enough for proper Maillard reaction but controlled enough for thorough cooking.
The third critical principle involves coating technique. Food science research shows that double-dredging creates superior texture, but timing matters. Let that first flour coating hydrate for at least 15 minutes before the final dredge. This creates those coveted crispy bits that make restaurant fried chicken so addictive.
Ingredients That Actually Matter for Gordon Ramsay Fried chicken
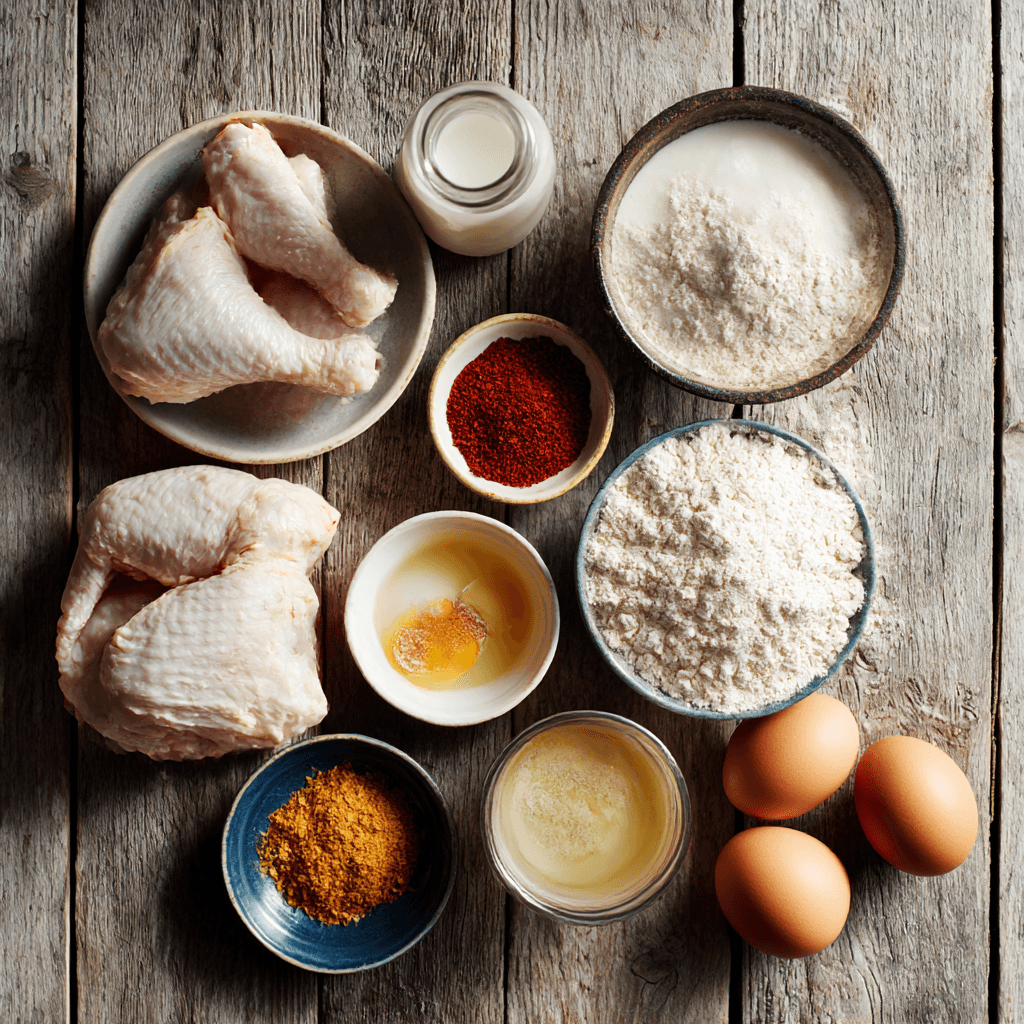
Quality starts with the bird itself. Free-range chicken contains more developed muscle fibers and better fat distribution, resulting in superior flavor and texture. Look for chicken pieces that feel firm to the touch with skin that appears tight and slightly translucent—signs of freshness that directly impact your final product.
Buttermilk serves as your secret weapon for tenderness. The acidity breaks down tough protein fibers while adding tangy complexity that balances the rich, fried coating. If buttermilk isn’t available, create a substitute by adding one tablespoon of lemon juice to regular milk, but real buttermilk delivers superior results.
Flour choice dramatically affects texture. All-purpose flour works well, but mixing in 20% cornstarch creates an incredibly light, crispy coating. The cornstarch absorbs moisture more effectively and fries to a delicate crunch that stays crispy longer. Avoid self-rising flour—the leavening agents can create unpredictable bubbling in hot oil.
Seasoning beyond salt and pepper transforms ordinary into extraordinary. Paprika adds color and mild heat, garlic powder provides savory depth, and a touch of cayenne creates subtle warmth without overwhelming the palate. For inspiration on seasoning techniques, check out this comprehensive guide to Gordon Ramsay’s seasoning methods.
Step-by-Step Instructions for Gordon Ramsay Fried chicken
Preparation Phase
Start by cutting your whole chicken into eight pieces or selecting quality individual pieces from the butcher. Pat each piece completely dry with paper towels—excess moisture is the enemy of crispy coating. Combine two cups buttermilk with two tablespoons salt, creating your brining solution. Submerge chicken pieces completely and refrigerate for minimum four hours, preferably overnight.
Coating Setup
Remove chicken from buttermilk thirty minutes before cooking, allowing it to reach room temperature for even cooking. Combine three cups all-purpose flour, half cup cornstarch, two tablespoons paprika, one tablespoon garlic powder, one tablespoon onion powder, two teaspoons black pepper, two teaspoons salt, and one teaspoon cayenne in a large shallow dish. **Never add wet ingredients directly to your flour mixture—this creates clumps that won’t stick properly to the chicken.**
Double-Dredging Technique
Dredge each piece thoroughly in the seasoned flour mixture, pressing gently to ensure complete coverage. Place coated pieces on a wire rack and let rest for 15 minutes—this hydration period is crucial for proper adherence. After resting, dredge each piece again, pressing firmly to create that signature textured coating. The same double-coating principle applies to other breaded dishes in Gordon Ramsay’s repertoire.
Frying Process
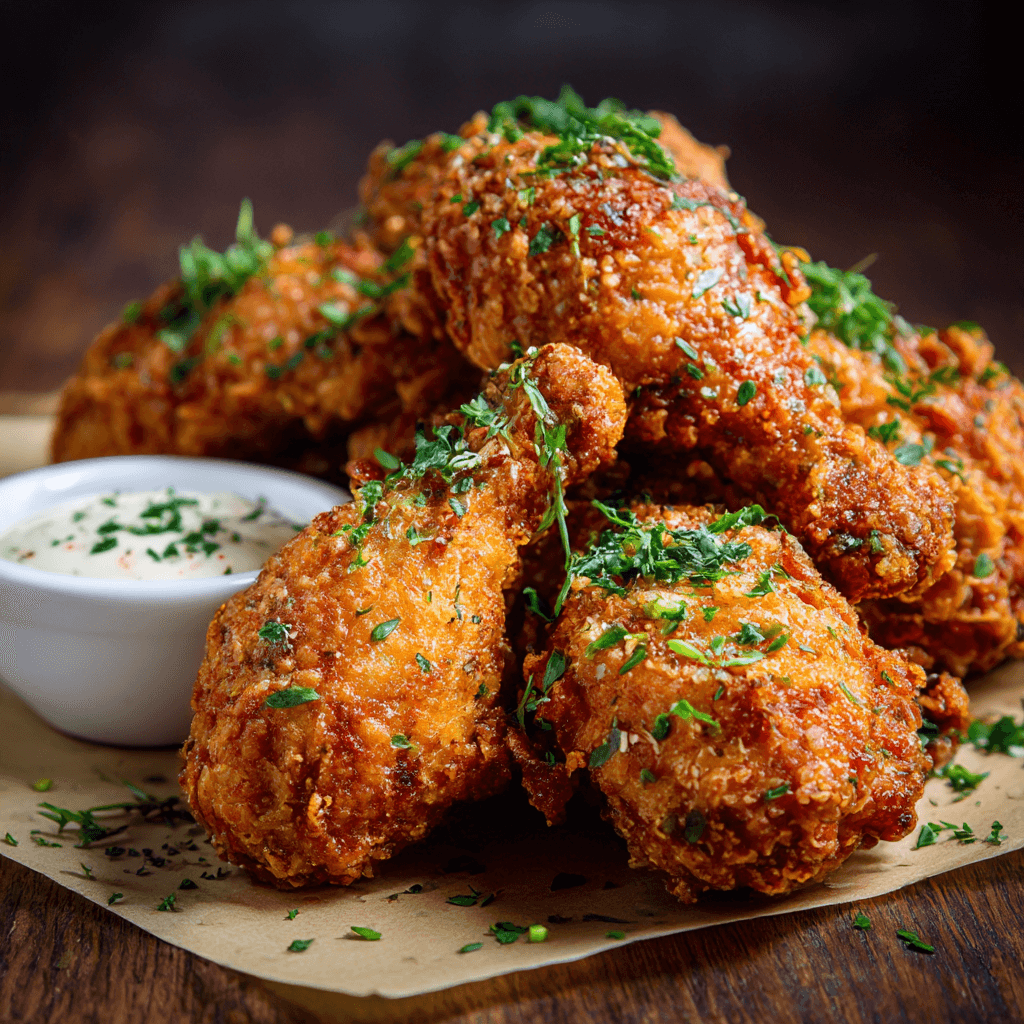
Heat oil to exactly 325°F in a heavy-bottomed pot or deep fryer. **Use a reliable thermometer—guessing oil temperature leads to dangerous splattering and uneven cooking.** Fry pieces in small batches to avoid temperature drops, starting with dark meat (thighs and drumsticks) as they require longer cooking times. Maintain oil temperature between 320-330°F throughout the process.
**Never overcrowd the pot—this drops oil temperature dramatically and creates soggy coating.** Fry dark meat pieces for 14-16 minutes, white meat for 10-12 minutes, turning once halfway through. Check for proper doneness using an instant-read thermometer: 165°F internal temperature for all pieces. According to FDA cooking guidelines, this temperature ensures food safety while maintaining juiciness.
Pro-Tips That Change the Game
- Add a tablespoon of pickle juice to your buttermilk brine—the extra acidity and subtle flavor complexity mimics high-end restaurant techniques
- Save and strain your frying oil through coffee filters when cool—properly maintained oil can be reused 3-4 times for even better flavor development
- Rest finished chicken on a wire rack over a baking sheet in a 200°F oven to keep warm without losing crispiness while you finish remaining batches
- Season immediately after frying while the coating is still hot and slightly oily—salt adheres better and penetrates the crust more effectively
- Make extra seasoned flour and store it in the freezer—it keeps for months and makes weeknight fried chicken much more manageable
- Use a splatter screen but leave gaps for steam to escape—trapped moisture softens that perfect crispy coating you worked so hard to achieve
Storage & Leftovers for Gordon Ramsay Fried chicken
Proper storage maintains food safety and preserves that coveted crispy texture. Allow fried chicken to cool completely before refrigerating, but don’t leave it at room temperature for more than two hours. Store pieces in a single layer on a wire rack placed over a baking sheet, loosely covered with foil to prevent moisture accumulation that creates soggy coating.
Refrigerated Gordon Ramsay Fried chicken stays fresh for three to four days. For reheating, avoid the microwave which steams the coating into sogginess. Instead, reheat in a 375°F oven for 8-10 minutes, placing pieces on a wire rack to allow air circulation. This method re-crisps the coating while heating the meat evenly throughout.
Freezing works well for longer storage, up to three months when wrapped properly in freezer-safe containers. Thaw overnight in the refrigerator before reheating. The FDA’s complete guide to safe food handling provides comprehensive information about proper storage temperatures and timeframes for all poultry products.
Gordon Ramsay Fried chicken
Ingredients
Equipment
Method
- 1️⃣ Pat chicken pieces completely dry with paper towels. Combine buttermilk with 2 tablespoons salt. Submerge chicken pieces completely and refrigerate for minimum 4 hours, preferably overnight.
- 2️⃣ Remove chicken from buttermilk 30 minutes before cooking to reach room temperature. Combine flour, cornstarch, paprika, garlic powder, onion powder, black pepper, remaining 2 tablespoons salt, and cayenne in a large shallow dish.
- 3️⃣ Dredge each piece thoroughly in seasoned flour mixture, pressing gently for complete coverage. Place coated pieces on wire rack and let rest for 15 minutes.
- 4️⃣ After resting, dredge each piece again in flour mixture, pressing firmly to create textured coating.
- 5️⃣ Heat oil to exactly 325°F in heavy-bottomed pot or deep fryer. Use reliable thermometer for accuracy.
- 6️⃣ Fry pieces in small batches, starting with dark meat (thighs and drumsticks). Maintain oil temperature between 320-330°F.
- 7️⃣ Fry dark meat pieces for 14-16 minutes, white meat for 10-12 minutes, turning once halfway through.
- 8️⃣ Check doneness using instant-read thermometer – internal temperature should reach 165°F for all pieces.
- 9️⃣ Rest finished chicken on wire rack over baking sheet. Season immediately while coating is hot for best salt adherence.
Nutrition
Notes
Tried this recipe?
Let us know how it was!Frequently Asked Questions About Gordon Ramsay Fried chicken
What are some interesting facts about fried chicken?
Fried chicken actually originated in ancient Rome, not the American South as many believe. The technique traveled through Scotland to America, where African cooking traditions transformed it into the version we know today. Modern Gordon Ramsay Fried chicken techniques incorporate elements from multiple culinary traditions, creating complex flavors through scientific understanding of protein chemistry and fat rendering processes.
What are 5 interesting facts about Gordon Ramsay?
Gordon Ramsay originally pursued professional soccer before a knee injury redirected him to cooking. He holds 16 Michelin stars throughout his career, though currently maintains 7. His restaurants serve over 220,000 covers weekly across 35 locations worldwide. Ramsay completed multiple marathons and ironman competitions, demonstrating the same intensity in athletics as in his kitchens. His Gordon Ramsay Fried chicken represents his ability to elevate simple comfort foods into restaurant-quality masterpieces.
What is Gordon Ramsay’s most famous dish?
While Gordon Ramsay Fried chicken showcases his technique mastery, his signature Beef Wellington remains his most iconic creation. This complex dish features beef tenderloin wrapped in mushroom duxelles and puff pastry, requiring precise timing and temperature control. The dish appears frequently on Hell’s Kitchen and represents Ramsay’s commitment to classical French techniques executed with modern precision and presentation standards.
Who was the first person to come up with fried chicken?
Archaeological evidence suggests ancient Egyptians first fried chicken around 2500 BCE, though their methods differed significantly from modern techniques. Scottish immigrants brought their frying traditions to America in the 1600s, where enslaved Africans added complex seasoning techniques that created Southern fried chicken’s distinctive flavor profiles. Today’s Gordon Ramsay Fried chicken builds upon centuries of culinary evolution and scientific understanding.
How do I prevent oil splatter when making Gordon Ramsay Fried chicken?
Oil splatter occurs when moisture meets hot fat, creating dangerous conditions in your kitchen. Pat chicken completely dry before dredging, and never add wet ingredients directly to hot oil. Lower pieces gently into oil using tongs, moving away from your body to avoid burns. A splatter screen provides protection while allowing steam to escape, maintaining coating crispiness.
Can I make Gordon Ramsay Fried chicken ahead of time for parties?
Gordon Ramsay Fried chicken actually improves when allowed to rest after initial frying. Fry pieces completely, then cool on wire racks before refrigerating. For serving, reheat in a 375°F oven for 8-10 minutes to restore crispiness. This method works perfectly for meal prep or entertaining, allowing you to enjoy the party instead of standing over hot oil while guests wait. Consider pairing with Gordon Ramsay’s signature potato salad for a complete meal.
Mastering Gordon Ramsay Fried chicken requires patience, precision, and respect for proper technique, but the results justify every minute spent perfecting your method. Remember that great cooking, like firefighting, demands attention to safety and systematic approach to complex processes.
Stay safe,
Jack Sullivan

