Author

Jack Sullivan

Browsing

My biggest kitchen disaster? It involved Gordon Ramsay tomato butter sauce and nearly ended my marriage.

I’m Jack Sullivan, and after twenty years as a firefighter, I thought I could handle anything the kitchen threw at me. Boy, was I wrong. My wife had invited her Italian mother over for dinner, and I confidently announced I’d make Gordon Ramsay’s famous tomato butter sauce from scratch. How hard could it be?

Three hours later, I had managed to burn garlic, break the butter emulsion twice, and somehow turn what should have been a silky red sauce into something that looked like orange cottage cheese. The smoke alarm went off so many times that my old crew showed up thinking there was an actual emergency.

That embarrassing disaster taught me everything I needed to know about respecting this Gordon Ramsay tomato butter sauce recipe. Now, after perfecting it through countless attempts, I can make it blindfolded. This sauce has become my go-to for impressing guests and, more importantly, keeping my mother-in-law happy.

The beauty of Gordon Ramsay’s approach lies in understanding that simplicity requires precision. This isn’t just another pasta sauce – it’s a masterclass in technique that transforms basic ingredients into restaurant-quality results.

What Is Gordon Ramsay’s Recipe for Pasta Sauce?

Gordon Ramsay’s tomato butter sauce recipe focuses on building layers of flavor through careful technique rather than complicated ingredients. The foundation starts with a proper soffritto of shallots and garlic, followed by high-quality San Marzano tomatoes that are hand-crushed to maintain texture.

The secret lies in Ramsay’s butter mounting technique. Unlike traditional marinara sauces, this Gordon Ramsay tomato butter sauce incorporates cold butter at the end, creating an emulsion that gives the sauce its signature glossy finish and rich mouthfeel. The process requires patience – rushing the butter incorporation will cause the sauce to break.

Temperature control is crucial throughout. The initial cooking happens at medium-low heat to prevent the aromatics from browning, while the tomatoes simmer gently to concentrate their natural sweetness. This methodical approach ensures the Gordon Ramsay tomato butter sauce maintains its bright flavor while developing depth.

Professional kitchens use this technique because it creates a sauce that clings perfectly to pasta without being heavy. The butter doesn’t just add richness – it creates a proper emulsion that coats each strand evenly, which is why restaurant pasta always tastes better than homemade attempts.

Why Does Gordon Ramsay Use So Much Butter?

Gordon Ramsay’s liberal use of butter in his tomato sauce isn’t about indulgence – it’s about achieving specific textural and flavor outcomes that separate professional cooking from home cooking. The butter serves three critical functions in this Gordon Ramsay tomato butter sauce recipe.

First, butter creates emulsification. When cold butter is whisked into the hot sauce off the heat, it forms microscopic fat droplets suspended in the liquid, creating that restaurant-quality glossy finish. This technique, called “monte au beurre” in French cooking, transforms a simple tomato sauce into something luxurious.

Second, butter provides temperature stability. The fat content helps the sauce maintain consistent texture when tossed with hot pasta, preventing it from breaking or becoming watery. Professional cooks rely on this technique because it ensures the Gordon Ramsay tomato butter sauce performs consistently under service conditions.

Finally, butter adds complexity without overwhelming the tomatoes. Unlike cream, which can mask flavors, butter enhances the natural sweetness of the tomatoes while providing richness. The result is a sauce where you taste the tomatoes first, followed by the luxurious mouthfeel that only proper butter technique can achieve.

According to nutrition experts, when used in proper proportions, butter provides essential fatty acids that actually help your body absorb the lycopene and other nutrients from tomatoes more effectively.

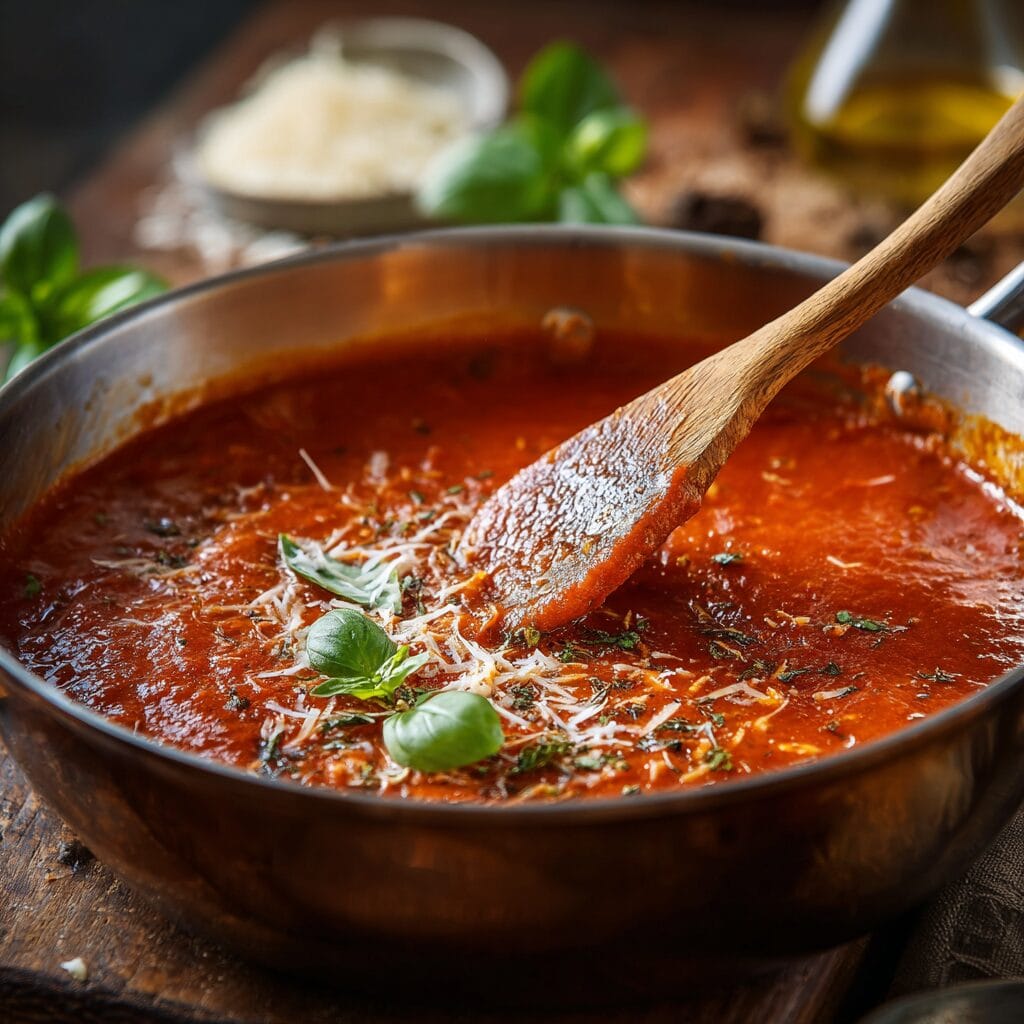
Ingredients That Actually Matter for Gordon Ramsay Tomato Butter SauceGordon Ramsay style tomato butter sauce being stirred in professional pan with fresh herbs

Fresh ingredients for Gordon Ramsay tomato butter sauce recipe laid out on marble counter

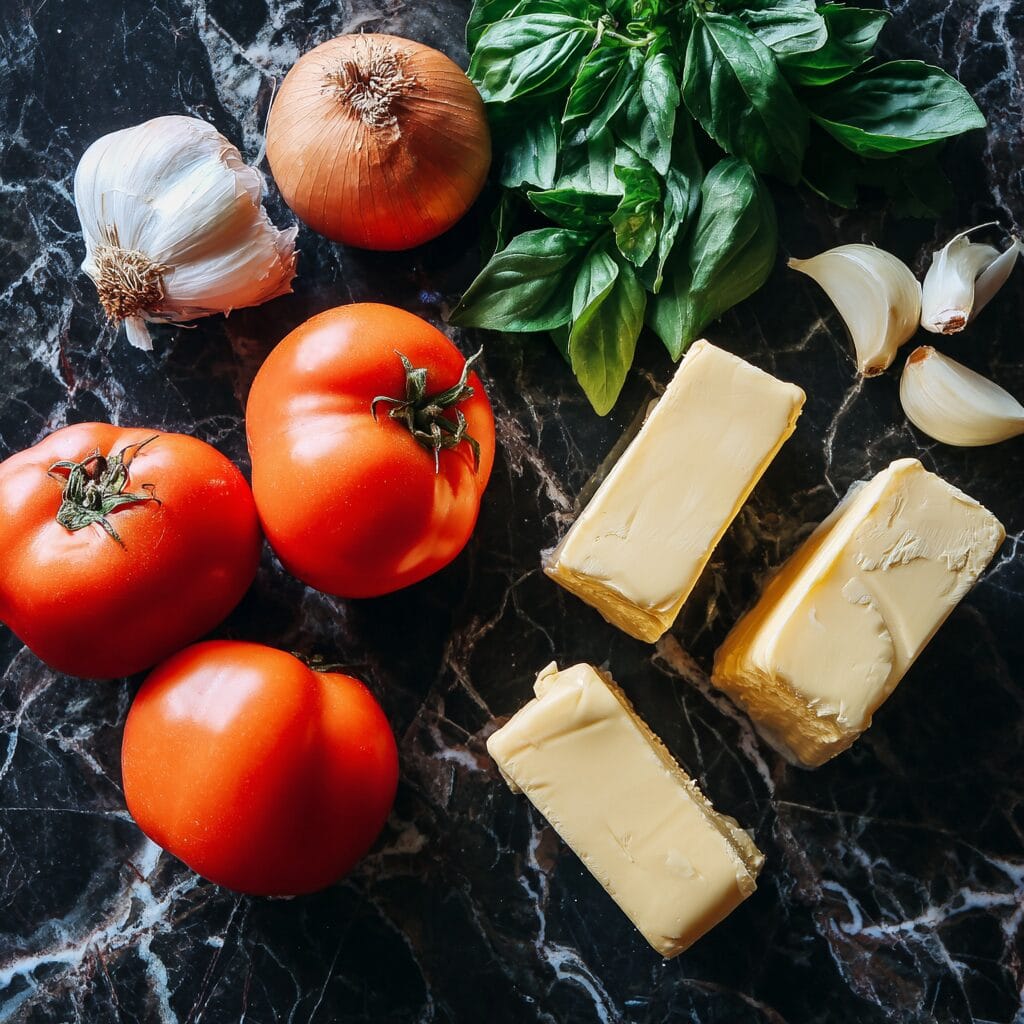
The difference between mediocre and exceptional Gordon Ramsay tomato butter sauce comes down to ingredient quality and proper preparation. After destroying several batches learning this lesson, I can tell you exactly what works and what doesn’t.

San Marzano tomatoes are non-negotiable. These Italian tomatoes have lower acidity and sweeter flavor than regular canned tomatoes. I’ve tried substitutions, and while other tomatoes work, they don’t deliver the same depth. For this Gordon Ramsay tomato butter sauce, buy the real deal – look for the DOP certification on the can.

European butter makes a significant difference. The higher fat content (82% versus 80% in American butter) creates better emulsification and richer flavor. I keep mine refrigerated until the moment I add it to the sauce. Room temperature butter won’t create the proper emulsion that makes this technique work.

Shallots over onions every time. Shallots provide subtle sweetness without the sharp bite that can overpower delicate tomato flavor. Mince them finely – large pieces will brown unevenly and create bitter notes in your Gordon Ramsay tomato butter sauce.

Fresh garlic, sliced thin rather than minced, cooks more evenly and provides better flavor control. Minced garlic burns easily, while thin slices give you visual cues about doneness. For serving four people, you’ll want to pair this sauce with complementary pasta dishes that won’t compete with its refined flavors.

Step-by-Step Instructions

Creating perfect Gordon Ramsay tomato butter sauce requires methodical execution. Rush any step, and you’ll end up with broken sauce like I did on that first disastrous attempt.

Start with a heavy-bottomed saucepan over medium-low heat. Add two tablespoons of your European butter and let it melt gently. The key word is gently – if the butter starts browning, your heat is too high. This initial fat provides the cooking medium for your aromatics and prevents sticking.

Add your minced shallots to the melted butter and cook for 2-3 minutes until they become translucent and fragrant. Stir constantly to ensure even cooking. The shallots should soften without taking on any color – browning at this stage will make your Gordon Ramsay tomato butter sauce bitter.

Introduce the sliced garlic and cook for exactly 30 seconds. Garlic burns quickly, so watch it carefully. You’ll smell the aroma intensify when it’s ready – that’s your cue to add the tomatoes immediately.

Add your hand-crushed San Marzano tomatoes with their juice. Season with kosher salt and fresh cracked pepper, then bring the mixture to a gentle simmer. The key to exceptional Gordon Ramsay tomato butter sauce is maintaining this gentle simmer for 15-20 minutes, allowing natural reduction without aggressive boiling.

Here’s where most home cooks mess up – the butter mounting. Remove the pan completely from heat before adding the remaining cold butter cubes. Whisk vigorously as you add each cube, ensuring each one is fully incorporated before adding the next. This creates the signature glossy emulsion that makes the sauce special.

For perfect texture every time, consider learning proper sauce-making fundamentals that apply to all butter-based sauces.

Pro Tips from a Former Firefighter

Twenty years of cooking under pressure taught me that Gordon Ramsay tomato butter sauce success comes from understanding what can go wrong and preventing it before it happens.

Temperature control is everything. Use a heavy-bottomed pan that distributes heat evenly. Thin pans create hot spots that will brown your aromatics unevenly. I learned this the hard way when my first attempt resulted in burnt garlic specks throughout the sauce.

Cold butter is crucial for proper emulsification. I keep my butter cubes in the refrigerator until the exact moment I need them. Room temperature butter won’t create the same emulsion, and melted butter will break the sauce completely.

Timing the pasta is critical. Start your Gordon Ramsay tomato butter sauce when your pasta water comes to a boil. The sauce should finish just as your pasta reaches al dente. This timing ensures the butter emulsion stays stable when you toss everything together.

Taste constantly and adjust seasoning gradually. Tomato acidity varies between cans, so salt requirements change accordingly. Start with less salt than you think you need – you can always add more, but you can’t take it back.

Never let the sauce boil once you’ve added the butter. The emulsion will break, and you’ll have oily sauce instead of the silky texture that makes this Gordon Ramsay tomato butter sauce special. If it does break, add a tablespoon of cold butter off the heat and whisk vigorously to re-emulsify.

Storage and Leftovers

Proper storage of Gordon Ramsay tomato butter sauce requires understanding how butter emulsions behave when cooled and reheated. The good news is that this sauce keeps well with the right technique.

Store leftover sauce in the refrigerator for up to three days in a covered container. The butter will solidify, causing the sauce to thicken considerably. This is normal and doesn’t indicate spoilage.

Reheating requires patience. Never microwave Gordon Ramsay tomato butter sauce – the rapid heating will break the emulsion permanently. Instead, reheat gently in a saucepan over low heat, stirring constantly. Add a tablespoon of cold butter while reheating to refresh the emulsion.

For best results, make the sauce fresh each time. While it stores adequately, the texture and flavor are always superior when prepared just before serving. The butter emulsion provides the most luxurious mouthfeel when it’s freshly made.

If you’re meal prepping, consider making the tomato base without the final butter addition. Store this base for up to a week, then add fresh butter when you reheat individual portions. This gives you the convenience of advance preparation while maintaining the superior texture of fresh Gordon Ramsay tomato butter sauce.

This approach works particularly well when you’re planning multiple Italian-inspired meals throughout the week that can share the same base preparation.

Frequently Asked Questions

Why did Gordon Ramsay apologize?

Gordon Ramsay has made several public apologies throughout his career, most notably for past controversial comments and behavior on his shows. His apologies typically address his harsh treatment of contestants and inflammatory remarks, showing growth as both a chef and public figure.

What are 5 interesting facts about Gordon Ramsay?

Gordon Ramsay originally trained to be a professional footballer before a knee injury ended that career. He holds 17 Michelin stars across his restaurants, appeared in over 40 television shows, runs a successful social media presence with millions of followers, and maintains an impressive physical fitness routine including marathons and triathlons.

How do I know when the butter emulsion is perfect?

The sauce should have a glossy, silk-like appearance when properly emulsified. If you drag a spoon through it, the sauce should coat the spoon evenly without looking oily or separated. Proper Gordon Ramsay tomato butter sauce clings to pasta without being thick or heavy.

Can I make this sauce dairy-free?

While you can substitute plant-based butter, the results won’t match the original. Dairy butter contains specific proteins and fats that create the signature emulsion. Plant-based alternatives may work but expect different texture and flavor outcomes.

My embarrassing kitchen disaster taught me that Gordon Ramsay tomato butter sauce demands respect, patience, and proper technique. Master these fundamentals, and you’ll create restaurant-quality results that impress even the most discerning Italian mothers-in-law. The key lies in understanding that great cooking isn’t about complex ingredients – it’s about executing simple techniques flawlessly.

Stay safe,
Jack Sullivan

Gordon Ramsay style tomato butter sauce being stirred in professional pan with fresh herbs
Jack Sullivan

Gordon Ramsay Tomato Butter Sauce

Rich, restaurant-quality tomato butter sauce with Gordon Ramsay’s signature techniques for perfect flavor balance and silky texture.
Prep Time 15 minutes
Cook Time 25 minutes
Total Time 40 minutes
Servings: 4 servings
Course: sauce
Cuisine: Italian
Calories: 145

Ingredients
  

  • 2 lbs San Marzano tomatoes crushed by hand
  • 6 tbsp unsalted European butter cold, cubed
  • 2 large shallots finely minced
  • 4 cloves garlic thinly sliced
  • 1 tsp kosher salt or to taste
  • 1/2 tsp fresh cracked black pepper
  • 8-10 leaves fresh basil torn by hand

Equipment

  • Heavy-bottomed saucepan Essential for even heat distribution
  • Wooden spoon For gentle stirring without scratching
  • Fine mesh strainer For smooth sauce texture

Method
 

  1. 1️⃣ Heat a heavy-bottomed saucepan over medium-low heat. Add 2 tablespoons of butter and let it gently melt without browning.
  2. 2️⃣ Add minced shallots to the melted butter and cook for 2-3 minutes until softened and fragrant, stirring constantly.
  3. 3️⃣ Add sliced garlic and cook for another 30 seconds, being careful not to let it brown or burn.
  4. 4️⃣ Add the hand-crushed San Marzano tomatoes with their juice. Season with salt and pepper, then bring to a gentle simmer.
  5. 5️⃣ Reduce heat to low and let the sauce simmer for 15-20 minutes, stirring occasionally, until it reduces and thickens naturally.
  6. 6️⃣ Remove from heat and immediately whisk in the remaining cold butter cubes one at a time until the sauce becomes glossy and emulsified.
  7. 7️⃣ Stir in torn fresh basil leaves and adjust seasoning with salt and pepper. Serve immediately over pasta or store covered.

Nutrition

Serving: 1gCalories: 145kcalCarbohydrates: 12gProtein: 3gFat: 11gSaturated Fat: 7gPolyunsaturated Fat: 0.5gMonounsaturated Fat: 2.8gCholesterol: 30mgSodium: 380mgPotassium: 420mgFiber: 3gSugar: 8gVitamin A: 850IUVitamin C: 15mgCalcium: 45mgIron: 1.2mg

Notes

Always use cold butter and add it off the heat to prevent the sauce from breaking.
San Marzano tomatoes are worth the investment for authentic Italian flavor.
The sauce can be made ahead but add fresh butter just before serving for best texture.

Tried this recipe?

Let us know how it was!

The first time I attempted Gordon Ramsay gnocchi, I thought it would be simple. After all, how hard could it be to combine potatoes and flour? Twenty years of firefighting had taught me to handle pressure, but Gordon Ramsay’s exacting standards for gnocchi nearly broke my confidence in the kitchen.

I was wrong about everything. The potato variety mattered. The flour ratio was critical. Even the temperature of ingredients could make or break the entire dish. What I learned that day changed how I approach not just gnocchi, but every recipe that demands precision.

This Gordon Ramsay gnocchi recipe represents years of refining the master chef’s techniques into something achievable for home cooks. The result? Pillowy-soft potato dumplings with the perfect texture that made Ramsay famous across his restaurants worldwide.

What Are Some Interesting Facts About Gnocchi?

Gordon Ramsay gnocchi carries fascinating culinary history that most home cooks never discover. Traditional Italian gnocchi dates back to Roman times, but Ramsay’s approach incorporates modern precision techniques that ensure consistent results every time.

The science behind perfect gnocchi lies in starch content. Russet potatoes contain 18-22% starch, creating the ideal foundation for Gordon Ramsay’s signature texture. This high starch content allows the potatoes to absorb less flour, preventing the dense, heavy results that plague most home attempts.

Gordon Ramsay’s restaurants serve over 10,000 portions of gnocchi monthly across his establishments. His technique emphasizes the potato ricer – a tool many home cooks skip, but which creates the smooth, lump-free base essential for professional-quality gnocchi. According to USDA nutritional guidelines, proper potato preparation maintains maximum nutritional value while achieving optimal cooking results.

The master chef’s approach also involves specific timing. Potatoes must be riced while still warm – this prevents moisture absorption that leads to tough, chewy gnocchi. This timing technique separates amateur attempts from restaurant-quality results.

What Are Common Gnocchi Mistakes?

Every Gordon Ramsay gnocchi disaster I’ve witnessed in home kitchens stems from five critical errors that sabotage even the best intentions.

Overworking the dough ranks as mistake number one. Heavy-handed mixing develops gluten strands that create rubber-textured gnocchi instead of the light, airy dumplings Ramsay demands. The dough should come together with minimal handling – just enough to incorporate ingredients.

Wrong potato choice destroys more gnocchi attempts than any other factor. Waxy potatoes like red or Yukon contain too much moisture and insufficient starch. Gordon Ramsay exclusively uses russet potatoes for their ideal starch-to-moisture ratio, creating naturally fluffy results without excess flour additions.

Flour measurement errors plague home cooks who measure by volume rather than weight. Too little flour creates gnocchi that disintegrates during cooking. Too much flour produces dense, heavy dumplings that sink like stones. Professional kitchens measure flour by weight for consistency – a technique worth adopting at home.

Temperature timing mistakes occur when cooks let potatoes cool completely before ricing. Cold potatoes require more flour incorporation, leading to tough results. Gordon Ramsay’s technique demands working with warm potatoes that rice smoothly and accept minimal flour additions.

Inadequate water salting represents the final common error. Under-salted cooking water produces bland gnocchi that no amount of sauce can remedy. Ramsay’s restaurants use heavily salted water – it should taste like seawater to properly season the gnocchi during cooking.

What Is Gordon Ramsay’s Favorite Pasta Dish?

Gordon Ramsay gnocchi holds special significance in the chef’s culinary repertoire, representing his mastery of Italian fundamentals combined with modern precision techniques.

While Ramsay has mastered countless pasta preparations throughout his career, gnocchi demonstrates technical skill that separates accomplished chefs from mere cooks. The dish requires understanding ingredient ratios, timing, temperature control, and texture development – all hallmarks of advanced culinary technique.

Ramsay’s London restaurants feature seasonal gnocchi variations that showcase his creativity within traditional frameworks. Spring versions incorporate pea purée and mint. Summer preparations highlight tomato confit and basil oil. Fall menus feature butternut squash gnocchi with sage brown butter – the same preparation technique adapted for different base ingredients.

The chef’s preference for gnocchi stems from its versatility as both comfort food and fine dining centerpiece. Simple preparations like this sage butter version satisfy casual diners, while elaborate presentations featuring truffle shavings and aged parmigiano-reggiano impress sophisticated palates. You might also enjoy exploring Gordon Ramsay’s homemade pasta techniques for additional Italian-inspired dishes.

Ingredients That Actually Matter for Gordon Ramsay Gnocchi

Fresh ingredients for Gordon Ramsay gnocchi recipe arranged on marble counter

Every ingredient in this Gordon Ramsay gnocchi recipe serves specific purposes that directly impact final results. Understanding these roles prevents substitution mistakes that compromise texture and flavor.

Russet potatoes provide the starch foundation essential for proper gnocchi structure. Their low moisture content minimizes flour requirements while their high starch creates natural binding. Never substitute waxy potato varieties – the results will disappoint.

All-purpose flour offers sufficient gluten development for structure without creating tough, chewy textures. Bread flour contains too much protein, while cake flour lacks adequate strength. The 1½ cup measurement provides starting quantity – final amounts depend on potato moisture content.

Fresh eggs bind ingredients while adding richness that elevates basic potato-flour combinations. Room temperature eggs incorporate more easily than cold ones, preventing uneven distribution that creates texture variations throughout the batch.

Fine sea salt seasons the dough from within rather than relying solely on cooking water or finishing salt. This internal seasoning creates more complex flavor development than surface applications alone.

Unsalted butter allows precise salt control while providing rich flavor that complements potato and sage combinations perfectly. European-style butter with higher fat content creates more luxurious results than standard American varieties.

Fresh sage leaves deliver the aromatic component that makes this Gordon Ramsay gnocchi memorable. Dried sage lacks the bright flavor notes essential for proper sage brown butter preparation. Consider pairing this dish with Gordon Ramsay’s bechamel sauce for variation.

Storage and Leftovers

Fresh Gordon Ramsay gnocchi keeps best when stored properly before and after cooking. Uncooked gnocchi can be frozen directly on baking sheets, then transferred to freezer bags for up to three months. Cook frozen gnocchi directly from frozen – no thawing required.

Cooked gnocchi should be consumed immediately for optimal texture. Refrigerated leftovers become gummy and lose their signature light texture. If storage becomes necessary, toss cooked gnocchi with olive oil to prevent sticking, then reheat gently in butter or sauce.

For meal prep purposes, prepare gnocchi through the shaping stage, then freeze on baking sheets. This approach maintains texture quality while providing convenient weeknight dinner options. Fresh gnocchi cook faster than dried pasta – perfect for quick, satisfying meals.

Frequently Asked Questions

What is Gordon Ramsay’s most iconic dish?

While Gordon Ramsay is famous for many signature dishes including Beef Wellington and pan-seared scallops, his restaurants are equally renowned for perfectly executed classics like gnocchi that showcase fundamental technique mastery.

Ready to master Gordon Ramsay gnocchi? The key lies in understanding that this isn’t just about combining potatoes and flour – it’s about respecting ingredients, timing, and technique. Start with quality russet potatoes, work quickly while they’re warm, and don’t overthink the process. The results will speak for themselves.

For your next Italian adventure, try Gordon Ramsay’s bolognese sauce or explore his signature pasta dishes for more inspiration.

Stay safe,
Jack Sullivan

Gordon Ramsay style gnocchi in cast iron pan with sage and parmesan garnish
Jack Sullivan

Gordon Ramsay Gnocchi Recipe

Master Chef Gordon Ramsay’s professional gnocchi recipe with step-by-step technique for perfectly fluffy, restaurant-quality results every time.
Prep Time 45 minutes
Cook Time 15 minutes
Total Time 1 hour
Servings: 4 servings
Course: Main Course
Cuisine: Italian
Calories: 385

Ingredients
  

  • 2 lbs russet potatoes peeled and quartered
  • cups all-purpose flour plus extra for dusting
  • 1 large egg lightly beaten
  • 1 tsp salt fine sea salt
  • 3 tbsp butter unsalted
  • 8 leaves fresh sage whole leaves
  • ½ cup parmesan cheese freshly grated

Equipment

  • Large Pot For boiling potatoes
  • Potato Ricer Essential for smooth texture
  • Large Skillet For finishing gnocchi

Method
 

  1. 1️⃣ Boil the quartered russet potatoes in salted water until fork-tender, about 20-25 minutes. Drain thoroughly and let cool for 5 minutes.
  2. 2️⃣ Pass the warm potatoes through a potato ricer onto a clean work surface. This creates the smooth texture Gordon Ramsay demands for perfect gnocchi.
  3. 3️⃣ Create a well in the center of the riced potatoes. Add the beaten egg, salt, and 1 cup of flour to start.
  4. 4️⃣ Using a bench scraper, gradually incorporate ingredients until a soft dough forms. Add remaining flour as needed – the dough should be slightly sticky but manageable.
  5. 5️⃣ Divide dough into 6 portions. Roll each into a ¾-inch thick rope on a floured surface, then cut into ¾-inch pieces.
  6. 6️⃣ Roll each piece over a gnocchi board or fork tines to create the signature ridges that hold sauce perfectly.
  7. 7️⃣ Bring a large pot of salted water to boil. Cook gnocchi in batches until they float to the surface, about 2-3 minutes.
  8. 8️⃣ Heat butter in a large skillet over medium-high heat. Add sage leaves and fry until crispy, about 1 minute.
  9. 9️⃣ Transfer cooked gnocchi directly to the sage butter using a slotted spoon. Toss gently to coat, creating Gordon Ramsay’s signature finish.

Nutrition

Serving: 1gCalories: 385kcalCarbohydrates: 68gProtein: 12gFat: 8gSaturated Fat: 5gPolyunsaturated Fat: 1gMonounsaturated Fat: 2gCholesterol: 75mgSodium: 620mgPotassium: 890mgFiber: 4gSugar: 3gVitamin A: 320IUVitamin C: 12mgCalcium: 180mgIron: 3mg

Notes

Use russet potatoes for the best texture – their high starch content creates fluffy gnocchi.
Don’t overwork the dough or your gnocchi will become tough and chewy.
Fresh gnocchi can be frozen on baking sheets, then stored in freezer bags for up to 3 months.

Tried this recipe?

Let us know how it was!

I saw Gordon Ramsay cauliflower cheese on a menu and said, “I could make that.” Famous last words.

Three hours later, my kitchen looked like a cheese explosion hit it, the smoke alarm had sounded twice, and I was staring at what could generously be called “cauliflower soup with lumps.” That overconfident moment taught me everything about why Gordon Ramsay cauliflower cheese deserves serious respect.

After twenty years of cooking – including feeding hungry firefighters who’ll complain about anything – I thought I understood cheese sauces. Gordon Ramsay cauliflower cheese humbled me quickly. The difference between restaurant-quality and home cooking isn’t just technique; it’s understanding why each step matters.

This Gordon Ramsay cauliflower cheese recipe delivers the same creamy, perfectly balanced result you’d get in his restaurants. I’ve tested this method countless times, refining it until even my pickiest crew members stopped asking for seconds and started demanding thirds.

How Do You Make Gordon Ramsay Cauliflower Purée?

Gordon Ramsay’s approach to cauliflower purée forms the foundation of exceptional cauliflower cheese. The key lies in proper blanching technique and moisture control. Start with perfectly fresh cauliflower, cut into uniform florets to ensure even cooking.

The USDA recommends cooking cauliflower until fork-tender but not mushy – typically 8-10 minutes in boiling salted water. Gordon’s method involves immediate drainage and brief resting to eliminate excess water, preventing the dreaded watery sauce that ruins so many home attempts.

For Gordon Ramsay cauliflower cheese, you want cauliflower that holds its structure while absorbing the rich cheese sauce. This means stopping the cooking process at exactly the right moment – when a fork pierces easily but the floret doesn’t fall apart.

Temperature control matters enormously. Overcooked cauliflower releases too much moisture during baking, diluting your carefully crafted sauce. Undercooked cauliflower won’t absorb the flavors properly, leaving you with bland vegetables swimming in sauce.

Ingredients That Actually Matter for Gordon Ramsay Cauliflower Cheese

Fresh ingredients for Gordon Ramsay cauliflower cheese recipe arranged on marble surface

Quality ingredients make the difference between good and exceptional Gordon Ramsay cauliflower cheese. Fresh cauliflower beats frozen every time – the texture and moisture content simply can’t compare.

Sharp cheddar provides the primary flavor foundation, but the magic happens when you add freshly grated Parmesan for complexity. Pre-shredded cheese contains anti-caking agents that prevent smooth melting, creating grainy textures that ruin the silky sauce Gordon Ramsay cauliflower cheese demands.

Whole milk creates the proper richness without overwhelming the cheese flavors. The roux technique – equal parts butter and flour cooked together – forms the sauce base that won’t break under heat. Room temperature milk integrates smoothly, preventing the lumpy disasters that plague many home cooks.

Dijon mustard adds the subtle tang that balances rich cheese, while fresh nutmeg provides the aromatic complexity that distinguishes restaurant-quality results. These aren’t optional seasonings – they’re essential components that create the signature flavor profile of authentic Gordon Ramsay cauliflower cheese.

Step-by-Step Instructions

Preparation Phase Preheat your oven to 400°F and bring a large pot of generously salted water to rolling boil. Cut the cauliflower into uniform florets – consistency ensures even cooking throughout your Gordon Ramsay cauliflower cheese.

Cauliflower Cooking Boil cauliflower florets for exactly 8-10 minutes until fork-tender but still firm. Drain immediately and thoroughly – excess water is the enemy of good Gordon Ramsay cauliflower cheese. Arrange in your greased baking dish while preparing the sauce.

Cheese Sauce Creation Melt butter in a heavy saucepan over medium heat. Whisk in flour and cook for 2 minutes, stirring constantly to create a smooth roux without browning. This foundation determines your sauce quality.

Gradually add room temperature milk while whisking continuously. This prevents lumps that ruin the smooth texture Gordon Ramsay cauliflower cheese requires. Cook until the sauce coats the back of a spoon – about 5-7 minutes of patient stirring.

Remove from heat and stir in three-quarters of the cheddar cheese, Dijon mustard, nutmeg, salt, and pepper. The residual heat melts the cheese perfectly without causing separation.

Assembly and Baking Pour the cheese sauce over cauliflower, ensuring complete coverage. Top with remaining cheddar and all Parmesan cheese for that golden, bubbling finish that makes Gordon Ramsay cauliflower cheese so visually appealing.

Bake for 25-30 minutes until golden brown and bubbling vigorously. The surface should be beautifully caramelized but not burned.

Pro Tips

Sauce Consistency Control If your sauce seems too thick, add warm milk one tablespoon at a time. Too thin? Cook longer while stirring constantly. Perfect Gordon Ramsay cauliflower cheese sauce should coat vegetables completely without being gluey.

Cheese Selection Strategy Mix aged cheddar with younger cheese for optimal melting. Aged provides flavor complexity while younger cheese melts smoothly. This combination creates the perfect texture Gordon Ramsay cauliflower cheese demands.

Temperature Management Never add cold milk to hot roux – temperature shock causes lumping. Keep milk at room temperature or warm it slightly before incorporation for foolproof results.

Timing Precision Don’t skip the 5-minute rest after baking. This allows the sauce to thicken properly and makes serving cleaner. Gordon Ramsay cauliflower cheese should hold together on the plate, not run everywhere.

How to Make Cauliflower More Interesting?

Beyond traditional Gordon Ramsay cauliflower cheese, consider flavor variations that maintain the classic technique while adding personal touches. Smoked paprika creates depth without overwhelming the cheese flavors. Fresh thyme or rosemary, added sparingly, provides aromatic complexity.

Texture variations work beautifully with this base recipe. Try adding crispy bacon bits or caramelized onions between sauce layers. Toasted breadcrumbs mixed with Parmesan create an extra-crispy top that contrasts beautifully with the creamy interior.

For heat lovers, a pinch of cayenne or finely minced jalapeños adds warmth without masking the sophisticated cheese flavors. The key is restraint – Gordon Ramsay cauliflower cheese should showcase technique and quality ingredients, not bold spices.

Consider serving variations that transform this side dish into main course material. Pair with Gordon Ramsay’s signature steak preparations for an elegant dinner, or serve alongside Gordon Ramsay’s roasted vegetables for a satisfying vegetarian meal.

Storage and Leftovers

Properly stored Gordon Ramsay cauliflower cheese keeps refrigerated for up to three days in airtight containers. Reheat gently in a 350°F oven, covered with foil to prevent drying. Add a splash of milk if the sauce seems too thick after refrigeration.

Freezing works but changes the texture slightly. The sauce may separate during thawing, requiring gentle reheating and stirring to reconstitute. For best results, consume fresh or within 24 hours of preparation.

Leftover Gordon Ramsay cauliflower cheese makes excellent soup base. Thin with milk or cream, add fresh herbs, and you’ve got an elegant starter that impresses dinner guests. According to nutritional guidelines from the Mayo Clinic, cauliflower provides excellent vitamin C content while the cheese adds essential calcium for bone health.

Frequently Asked Questions

Why does my cauliflower cheese always go watery?

Excess moisture from undercooked cauliflower or rushed sauce preparation causes watery results. Ensure cauliflower is properly drained and your roux cooks long enough to eliminate raw flour taste before adding liquid.

How to get a crispy top on cauliflower cheese?

Use freshly grated cheese on top rather than sauce-mixed cheese. The direct oven heat caramelizes surface proteins, creating that golden crust. Broil for 2-3 minutes at the end if needed, watching carefully to prevent burning.

Perfect Gordon Ramsay cauliflower cheese requires patience, quality ingredients, and attention to technique details that separate good from exceptional. Master these fundamentals, and you’ll create restaurant-quality results that rival any professional kitchen. The FDA’s food safety guidelines emphasize proper temperature control during preparation and storage.

The difference between attempting and achieving Gordon Ramsay cauliflower cheese lies in respecting the process. Every step serves a purpose, from proper cauliflower preparation through careful sauce construction to final presentation.

For more advanced cheese sauce techniques, explore Gordon Ramsay’s béchamel sauce methods that form the foundation of countless classic dishes.

Stay safe, Jack Sullivan

Golden Gordon Ramsay cauliflower cheese in cast iron skillet with crispy bubbling top
Jack Sullivan

Gordon Ramsay Cauliflower Cheese

Restaurant-quality cauliflower cheese with Gordon Ramsay’s signature techniques for the perfect creamy sauce and golden crispy top.
Prep Time 20 minutes
Cook Time 35 minutes
Total Time 55 minutes
Servings: 6 servings
Course: Side Dish
Cuisine: british
Calories: 285

Ingredients
  

  • 1 large head cauliflower cut into even florets
  • 3 tablespoons unsalted butter
  • 3 tablespoons all-purpose flour
  • 2 cups whole milk room temperature
  • 8 oz sharp cheddar cheese freshly grated
  • 2 oz Parmesan cheese freshly grated
  • 1/2 teaspoon Dijon mustard
  • 1/4 teaspoon nutmeg freshly grated
  • 1 teaspoon salt or to taste
  • 1/4 teaspoon black pepper freshly cracked

Equipment

  • 1 Large saucepan Heavy-bottomed for even heating
  • 1 Baking dish 9×13 inch or similar size
  • 1 Fine mesh strainer For smooth sauce consistency

Method
 

  1. 1️⃣ Preheat oven to 400°F (200°C). Bring large pot of salted water to boil and cook cauliflower florets for 8-10 minutes until just tender. Drain thoroughly and arrange in greased baking dish.
  2. 2️⃣ In heavy saucepan, melt butter over medium heat. Whisk in flour and cook for 2 minutes, stirring constantly to create a smooth roux without browning.
  3. 3️⃣ Gradually add milk, whisking continuously to prevent lumps. Cook until sauce thickens enough to coat the back of a spoon, about 5-7 minutes.
  4. 4️⃣ Remove from heat and stir in 3/4 of the cheddar cheese, Dijon mustard, nutmeg, salt, and pepper. Taste and adjust seasoning as needed.
  5. 5️⃣ Pour cheese sauce over cauliflower, ensuring all florets are well coated. Top with remaining cheddar and all Parmesan cheese.
  6. 6️⃣ Bake for 25-30 minutes until golden brown and bubbling. Let rest for 5 minutes before serving to allow sauce to set properly.

Nutrition

Serving: 1gCalories: 285kcalCarbohydrates: 12gProtein: 16gFat: 20gSaturated Fat: 12gPolyunsaturated Fat: 1gMonounsaturated Fat: 5gCholesterol: 58mgSodium: 680mgPotassium: 425mgFiber: 3gSugar: 8gVitamin A: 15IUVitamin C: 85mgCalcium: 35mgIron: 8mg

Notes

Use room temperature milk to prevent the sauce from seizing when added to the roux.
Pre-grated cheese contains anti-caking agents that can make your sauce grainy – always grate fresh.
Don’t skip the resting time after baking – it allows the sauce to thicken properly.

Tried this recipe?

Let us know how it was!

My crew laughed when I said I’d make Gordon Ramsay banana pancakes — until they tasted them. Picture this: Sunday morning at the firehouse, and I’m standing there with a mixing bowl, claiming I could recreate the chef’s famous three-ingredient masterpiece. The guys were rolling their eyes, making jokes about “fancy pancakes” and asking if I needed a British accent to cook them properly.

Twenty minutes later? Dead silence around the table, followed by requests for seconds, thirds, and the recipe. That’s the power of getting Gordon Ramsay banana pancakes right — they transform skeptics into believers with the first bite.

After perfecting this recipe through countless weekend breakfast experiments, I’ve learned that success lies in understanding the science behind these deceptively simple pancakes. You might think combining bananas, eggs, and a touch of flour is foolproof, but there’s technique involved that makes all the difference between restaurant-quality results and mushy disasters.

Ingredients That Actually Matter for Gordon Ramsay Banana Pancakes

Ingredients for Gordon Ramsay banana pancakes recipe arranged on kitchen counter

The beauty of Gordon Ramsay banana pancakes lies in their simplicity, but each ingredient plays a crucial role. Start with two large, perfectly ripe bananas — and I mean perfectly ripe. You want bananas with brown spots that give slightly when pressed. Under-ripe bananas lack sweetness and won’t mash properly, while overripe ones turn your batter into liquid.

Two large eggs provide structure and binding power. Room temperature eggs incorporate more easily and create better texture. The optional two tablespoons of flour add just enough structure without making these pancakes heavy or cake-like. A pinch of salt enhances the banana flavor — never skip this step.

For cooking, use real butter. It prevents sticking while adding richness that complements the bananas perfectly. I always recommend having extra butter on hand for serving because these pancakes deserve proper treatment.

Why Are My Banana Pancakes Mushy Inside?

This question haunts home cooks more than any other Gordon Ramsay banana pancakes challenge. Mushiness comes from three main culprits: over-mashed bananas, too much liquid, and improper heat control.

When mashing bananas, aim for smooth consistency with small chunks remaining. Over-mashing creates a liquid base that never sets properly during cooking. Your bananas should look like chunky applesauce, not baby food.

Heat control is equally critical. Too high heat creates a situation where the outside browns while the inside stays raw and mushy. Medium-low heat allows even cooking throughout, giving the egg proteins time to set properly and create that perfect tender-but-structured texture Gordon Ramsay demonstrates.

Overmixing the batter also contributes to mushiness. Once you add flour, whisk just until incorporated. Lumps are actually beneficial — they prevent gluten development that would make pancakes tough and help maintain the light texture these pancakes are famous for.

The thickness of your pancakes matters too. Pour 1/4 cup batter per pancake to ensure even cooking. Thicker pancakes need lower heat and longer cooking time to set the center properly.

Step-by-Step Instructions

Start by mashing your ripe bananas in a large bowl. I use a fork and work until smooth with small chunks remaining — this takes about two minutes of steady mashing. Don’t rush this step; proper banana preparation is foundation work.

Crack eggs directly into the banana mixture and whisk vigorously for thirty seconds. You want the mixture slightly frothy, which incorporates air for lighter pancakes. This vigorous whisking also ensures complete integration of eggs and bananas.

Add flour and salt, then whisk just until incorporated. The batter should look slightly lumpy — resist the urge to keep whisking. Professional chefs know that overmixing develops gluten, creating tough pancakes instead of the tender results we’re after.

Heat your non-stick skillet over medium-low heat. Add butter and let it foam without browning. This indicates perfect temperature for cooking. Brown butter means too hot; no foaming means too cool.

Pour 1/4 cup batter per pancake, leaving space between each one. Cook for 2-3 minutes until edges look set and small bubbles form on the surface. This is your visual cue that the bottom is properly browned and ready to flip.

Flip carefully using a thin spatula — these pancakes are more delicate than traditional ones. Cook for 1-2 minutes until golden brown. Serve immediately while hot for best texture and flavor.

Pro Tips for Perfect Results

Temperature consistency is everything with Gordon Ramsay banana pancakes. Keep your skillet at steady medium-low heat throughout cooking. If pancakes brown too quickly, reduce heat immediately. If they’re not browning after three minutes, increase heat slightly.

Use fresh ingredients for best results. Old eggs won’t whisk properly, and stale flour affects texture. Since there are so few ingredients, each one needs to perform perfectly.

For breakfast meal prep, mix dry ingredients ahead but don’t combine with bananas and eggs until ready to cook. The natural enzymes in bananas begin breaking down immediately upon mixing.

Consider pairing these pancakes with complementary dishes from your recipe collection. Gordon Ramsay scrambled eggs make an excellent protein-rich side, or try them alongside Gordon Ramsay’s signature bacon preparation for a complete breakfast spread.

Storage and Leftovers

Fresh Gordon Ramsay banana pancakes taste best served immediately, but leftovers can be stored in the refrigerator for up to two days. Layer them between parchment paper to prevent sticking and reheat in a dry skillet over low heat for best results.

For longer storage, these pancakes freeze beautifully for up to one month. Wrap individually in plastic wrap, then store in freezer bags. Proper food storage techniques ensure they maintain quality and safety.

To reheat frozen pancakes, thaw overnight in the refrigerator, then warm in a dry skillet or toaster. Avoid microwaving, which creates soggy texture that defeats the purpose of achieving perfect Gordon Ramsay banana pancakes.

Frequently Asked Questions

What are the 3 ingredients in banana pancakes?

The core three ingredients are ripe bananas, eggs, and optionally a small amount of flour. Some versions use only bananas and eggs, but adding flour improves structure and texture.

How many bananas for banana pancakes?

Two large ripe bananas provide the perfect amount for four servings. This ratio gives you enough banana flavor without making the batter too wet or dense.

What texture should banana pancakes be?

Perfect Gordon Ramsay banana pancakes should be golden brown outside with a tender, set interior — never mushy or raw. They’re more delicate than traditional pancakes but should hold together well when cut.

That Sunday morning skepticism from my crew taught me something valuable about Gordon Ramsay banana pancakes: they’re only as good as your technique. Master the basics — proper banana ripeness, gentle mixing, and controlled heat — and you’ll create breakfast magic that converts even the toughest critics.

Whether you’re cooking for family weekend breakfast or trying to impress guests, these pancakes deliver restaurant-quality results with minimal ingredients and maximum flavor. The simplicity is deceptive, but the results speak for themselves.

Stay safe, Jack Sullivan

Gordon Ramsay style banana pancakes stacked with fresh bananas and syrup
Jack Sullivan

Gordon Ramsay Banana Pancakes

Master Gordon Ramsay’s technique for perfect banana pancakes that are fluffy inside with just the right texture. No mushy disasters here.
Prep Time 10 minutes
Cook Time 15 minutes
Total Time 25 minutes
Servings: 4 servings
Course: Breakfast
Cuisine: American, british
Calories: 145

Ingredients
  

  • 2 large ripe bananas perfectly ripe with brown spots
  • 2 large eggs room temperature preferred
  • 2 tablespoons all-purpose flour optional for structure
  • 1 pinch salt enhances banana flavor
  • 1 tablespoon butter for cooking, plus extra for serving

Equipment

  • 1 – Large mixing bowl For combining ingredients smoothly
  • 1 Wire whisk Essential for proper batter texture
  • 1 Non-stick skillet Medium heat, well-seasoned preferred

Method
 

  1. 1️⃣ Mash ripe bananas in large bowl until smooth but with small chunks remaining. Don’t over-mash into liquid.
  2. 2️⃣ Crack eggs into banana mixture and whisk vigorously for 30 seconds until well combined and slightly frothy.
  3. 3️⃣ Add flour and salt, whisk just until incorporated. Don’t overmix – lumps are okay and prevent toughness.
  4. 4️⃣ Heat non-stick skillet over medium-low heat. Add butter and let it foam but not brown.
  5. 5️⃣ Pour 1/4 cup batter per pancake. Cook 2-3 minutes until edges set and bubbles form on surface.
  6. 6️⃣ Flip carefully with thin spatula and cook 1-2 minutes until golden. Serve immediately while hot.

Nutrition

Serving: 1gCalories: 145kcalCarbohydrates: 22gProtein: 6gFat: 4gSaturated Fat: 2gPolyunsaturated Fat: 1gMonounsaturated Fat: 1gCholesterol: 95mgSodium: 95mgPotassium: 285mgFiber: 2gSugar: 12gVitamin A: 76IUVitamin C: 5mgCalcium: 24mgIron: 1mg

Notes

Use bananas that are perfectly ripe with brown spots for maximum sweetness and flavor.
Don’t overmix the batter – lumps are actually good and prevent tough pancakes.
Cook on medium-low heat to ensure even cooking without burning the outside before the inside sets.

Tried this recipe?

Let us know how it was!

I’ve rescued people from fires, but Gordon Ramsay steak sandwich nearly defeated me. After twenty-three years of pulling folks out of burning buildings, you’d think a sandwich wouldn’t intimidate me. But there I stood in my kitchen, staring at four beautiful ribeye steaks, realizing I had no clue what made a Gordon Ramsay steak sandwich different from throwing meat between bread.

The first time I attempted this Gordon Ramsay steak sandwich, I learned something crucial about cooking that mirrors my firefighting experience – technique matters more than bravery. You can charge into a blazing kitchen with the best ingredients money can buy, but without proper method, you’ll end up with expensive disappointment.

What Makes a Good Steak Sandwich?

A proper Gordon Ramsay steak sandwich isn’t just about throwing premium beef on bread. It’s an orchestration of textures and flavors that requires the same systematic approach I use when coordinating emergency responses.

The foundation starts with quality ingredients. According to the USDA guidelines for beef quality, the marbling in ribeye provides both flavor and tenderness that cheaper cuts simply cannot match. This Gordon Ramsay steak sandwich demands ribeye for good reason – the fat content ensures the meat stays juicy even when sliced thin for sandwich assembly.

What separates a good steak sandwich from a great one is the supporting cast. Caramelized onions add sweetness that balances the meat’s richness, while fresh arugula provides a peppery contrast. The brioche bun isn’t just a vessel – its buttery texture complements rather than competes with the steak.

Temperature control makes or breaks this dish. Like managing ventilation in a structure fire, timing is everything. The Gordon Ramsay steak sandwich requires precise heat management to achieve that perfect sear while maintaining the interior temperature you want.

What Is Gordon Ramsay’s Signature Steak Dish?

While Gordon Ramsay is famous for multiple steak preparations, his approach to the Gordon Ramsay steak sandwich incorporates elements from his signature beef Wellington technique – specifically the compound butter and herb integration. This isn’t just seasoning; it’s flavor architecture.

Ramsay’s method involves building layers of taste throughout the cooking process. The Gordon Ramsay steak sandwich benefits from his restaurant-quality approach: proper seasoning timing, controlled heat application, and understanding how each component contributes to the final result. When I studied his technique for making this Gordon Ramsay steak sandwich, I noticed he treats even simple dishes with the same precision he’d use for his most complex creations.

The secret lies in his compound butter technique, borrowed from classical French cooking but adapted for accessibility. This Gordon Ramsay steak sandwich gets its restaurant-quality finish from that final butter baste – a technique that requires confidence and timing.

Ingredients That Actually Matter for Gordon Ramsay Steak Sandwich

Fresh ingredients for Gordon Ramsay steak sandwich including ribeye steaks, brioche buns, and seasonings

Not all ingredients are created equal when making a Gordon Ramsay steak sandwich. After testing multiple variations, I’ve learned which components you can substitute and which are non-negotiable.

The ribeye is essential. I’ve tried making this Gordon Ramsay steak sandwich with sirloin and even filet mignon, but ribeye’s marbling creates the perfect balance of flavor and texture. For those interested in understanding different cuts, our guide on Gordon Ramsay’s favorite steak preparations explains why certain cuts work better for specific applications.

Fresh thyme matters more than you’d expect. Dried herbs won’t give you the same aromatic impact in the compound butter. The Gordon Ramsay steak sandwich relies on that fresh herb flavor to cut through the richness of the meat and butter.

Quality brioche makes a difference you can taste. Standard hamburger buns will make this feel like a regular steak sandwich instead of the elevated Gordon Ramsay steak sandwich experience you’re after.

Step-by-Step Instructions

Preparation Phase: Remove your ribeye steaks from the refrigerator 30 minutes before cooking. This Gordon Ramsay steak sandwich depends on even cooking, and cold steaks won’t sear properly. Season generously with coarse sea salt and freshly cracked black pepper.

While steaks reach room temperature, prepare your compound butter. Mix softened butter with minced garlic and fresh thyme leaves. This flavored butter will finish your Gordon Ramsay steak sandwich with restaurant-quality richness.

Cooking Process: Heat your cast iron skillet over medium-high heat. A properly heated pan is crucial for the Gordon Ramsay steak sandwich – you want that immediate sizzle when the steak hits the surface.

Start caramelizing your onions in a separate pan with olive oil over medium heat. This process takes 15-20 minutes and cannot be rushed. Properly caramelized onions transform the Gordon Ramsay steak sandwich from good to exceptional.

The Critical Sear: Add a tablespoon of olive oil to your hot skillet. Place steaks in the pan and resist the urge to move them. Let them sear undisturbed for 3-4 minutes per side for medium-rare. During the final minute, add your compound butter and baste the steaks.

For the Gordon Ramsay steak sandwich, internal temperature matters. Use a meat thermometer – 135°F gives you perfect medium-rare that will slice beautifully for sandwich assembly.

Assembly: Rest your steaks for 5 minutes before slicing. This step is non-negotiable for a proper steak sandwich – cutting immediately will result in all the juices running out.

Slice steaks against the grain into thick strips. Toast your brioche buns lightly. Layer with fresh arugula, sliced steak, and caramelized onions.

Pro Tips from the Firehouse Kitchen

After making this Gordon Ramsay steak sandwich countless times for my crew, I’ve learned a few tricks that make the difference between good and great.

Room temperature steaks are crucial. Cold meat won’t sear properly, and your Gordon Ramsay steak sandwich will suffer. Plan ahead.

Don’t overcrowd your pan if making multiple portions. Better to cook steaks in batches than compromise the sear quality for your Gordon Ramsay steak sandwich.

The compound butter isn’t just for flavor – it helps create that glossy, restaurant-quality finish that elevates this Gordon Ramsay steak sandwich above homemade attempts.

Save some caramelized onions. They keep well refrigerated and transform any leftover steak into another Gordon Ramsay steak sandwich the next day.

Storage and Leftovers

Properly stored, cooked steak will keep in the refrigerator for 3-4 days. However, the Gordon Ramsay steak sandwich is best enjoyed fresh. Reheating steak rarely produces the same quality as the original preparation.

If you must store components separately, keep the compound butter refrigerated for up to a week. The caramelized onions actually improve after a day in the refrigerator – the flavors meld and concentrate.

For food safety information on storing cooked beef, the FDA provides clear guidelines that ensure your leftover Gordon Ramsay steak sandwich components remain safe to consume.

Frequently Asked Questions

What does Gordon Ramsay say about well done steak? Ramsay is famously opposed to well-done steak, often calling it a waste of good meat. For the Gordon Ramsay steak sandwich, medium-rare to medium provides the best texture and flavor.

What is Gordon Ramsay’s favorite cut of steak? While Ramsay appreciates various cuts, he frequently uses ribeye for its marbling and flavor. The Gordon Ramsay steak sandwich showcases why ribeye works so well in sandwich applications.

This Gordon Ramsay steak sandwich taught me that great cooking, like effective firefighting, comes down to preparation, technique, and respect for the process. Master these elements, and you’ll create something that rivals any restaurant version.

If you enjoyed this technique-focused approach, you might appreciate our guide to Gordon Ramsay’s signature cooking methods for more professional-level home cooking strategies.

Stay safe, Jack Sullivan

Gordon Ramsay steak sandwich with perfectly seared ribeye on brioche bun with caramelized onions and arugula
Jack Sullivan

Gordon Ramsay Steak Sandwich

Professional-level steak sandwich with perfectly seared ribeye, caramelized onions, and compound butter on toasted brioche
Prep Time 15 minutes
Cook Time 20 minutes
Total Time 35 minutes
Servings: 4 servings
Course: Main Course
Cuisine: british
Calories: 650

Ingredients
  

  • 4 ribeye steaks 8 oz each, room temperature
  • 4 brioche buns thick-cut, fresh
  • 2 large red onions thinly sliced
  • 4 cups fresh arugula washed and dried
  • 4 tbsp unsalted butter plus extra for compound butter
  • 3 cloves garlic minced fine
  • 2 tbsp fresh thyme leaves only
  • 2 tsp coarse sea salt for seasoning steaks
  • 1 tsp cracked black pepper freshly ground
  • 2 tbsp olive oil high smoke point

Equipment

  • Cast iron skillet Heavy-bottomed pan for perfect sear
  • Meat thermometer For precise temperature control

Method
 

  1. 1️⃣ Remove steaks from refrigerator 30 minutes before cooking to reach room temperature. Season generously with sea salt and black pepper.
  2. 2️⃣ Make compound butter by mixing softened butter with minced garlic and thyme. Set aside.
  3. 3️⃣ Heat cast iron skillet over medium-high heat. Add 1 tablespoon olive oil when pan is hot.
  4. 4️⃣ Caramelize onions in remaining oil over medium heat for 15-20 minutes until golden brown. Season lightly.
  5. 5️⃣ Sear steaks 3-4 minutes per side for medium-rare (internal temp 135°F). Add compound butter in final minute.
  6. 6️⃣ Rest steaks 5 minutes, then slice against grain into thick strips.
  7. 7️⃣ Toast brioche buns lightly. Layer with arugula, sliced steak, and caramelized onions. Serve immediately.

Nutrition

Serving: 1gCalories: 650kcalCarbohydrates: 32gProtein: 48gFat: 38gSaturated Fat: 16gPolyunsaturated Fat: 3gMonounsaturated Fat: 17gCholesterol: 145mgSodium: 850mgPotassium: 580mgFiber: 3gSugar: 8gVitamin A: 15IUVitamin C: 12mgCalcium: 85mgIron: 4mg

Notes

Use a meat thermometer for perfect doneness – 125°F for rare, 135°F for medium-rare.
Let steaks rest before slicing to retain juices and prevent drying out.
Quality of bread matters – brioche provides richness that complements the beef.

Tried this recipe?

Let us know how it was!

The smoke alarm went off three times during my first try at Gordon Ramsay white chicken chili. Three times. My neighbors probably thought I was running a cooking disaster drill at the firehouse. But here’s what twenty years of emergency response taught me: when something goes wrong, you analyze what happened, learn from it, and try again. That’s exactly what I did with this Gordon Ramsay white chicken chili recipe, and now it’s become one of my go-to comfort meals.

After studying Gordon’s techniques and adapting them for home cooks like us, I’ve cracked the code on making restaurant-quality Gordon Ramsay white chicken chili that won’t set off your smoke detector. The secret isn’t just in the ingredients—it’s in understanding why this dish works and how to execute it properly.

What All Goes in White Chicken Chili?

Gordon Ramsay white chicken chili is built on a foundation of carefully balanced ingredients that create depth and richness. The base starts with tender chicken breast, white beans (typically cannellini or Great Northern), and a creamy sauce that gets its signature color from sour cream rather than tomatoes.

The aromatics matter tremendously in Gordon Ramsay white chicken chili. Yellow onions provide sweetness, while garlic adds depth. Green chiles bring mild heat and that distinctive Southwestern flavor that makes this dish special. According to the USDA guidelines on safe food preparation, proper cooking temperatures ensure both safety and optimal flavor development in chicken-based dishes.

The spice blend for Gordon Ramsay white chicken chili focuses on cumin as the star, supported by oregano, salt, and freshly ground black pepper. This combination creates the warm, earthy base that distinguishes great white chicken chili from mediocre versions.

Ingredients That Actually Matter for Gordon Ramsay White Chicken Chili

All ingredients needed for Gordon Ramsay white chicken chili recipe laid out on marble surface

Not all ingredients are created equal when making Gordon Ramsay white chicken chili. Here’s what you need to get right:

Chicken Selection: Use boneless, skinless chicken breasts cut into bite-sized pieces. The key is uniform sizing—about 1-inch chunks cook evenly and stay tender. Don’t use chicken thighs here; they’ll make your Gordon Ramsay white chicken chili greasy.

Bean Choice: Cannellini beans work best because they hold their shape and have a creamy texture that complements the sauce. Great Northern beans are an acceptable substitute. Never use kidney beans in Gordon Ramsay white chicken chili—they’re too firm and the color clashes.

Quality Broth: Low-sodium chicken broth gives you control over the salt content. I prefer buying quality broth because it forms the liquid foundation of your Gordon Ramsay white chicken chili. This pairs beautifully with other chicken-based recipes like Gordon Ramsay’s chicken fricassee for a complete comfort food experience.

What Are the Four Ingredients in White Chicken Chili?

While Gordon Ramsay white chicken chili contains more than four ingredients for optimal flavor, the four core components that define this dish are chicken, white beans, green chiles, and chicken broth. These four elements create the foundation that makes it recognizably white chicken chili rather than just chicken soup.

However, don’t limit yourself to just these four. The magic of Gordon Ramsay white chicken chili happens when you layer flavors properly. The onions, garlic, and spices transform those basic four ingredients into something extraordinary.

Step-by-Step Instructions

Start by heating olive oil in a large Dutch oven over medium-high heat. Season your chicken pieces generously with salt and pepper, then sear them until golden brown on all sides. This browning step is crucial for Gordon Ramsay white chicken chili—it develops the fond that adds depth to your final dish.

Add the diced onion to the pot with the chicken and cook until softened, about 4-5 minutes. The onions should become translucent but not brown. Add minced garlic and cook for just 30 seconds until fragrant—any longer and it’ll burn.

Stir in the cumin and oregano, cooking for 30 seconds to bloom the spices. This technique, borrowed from Gordon’s methodology, ensures maximum flavor extraction. Add the green chiles and cook for 2 minutes to integrate their flavor into the base.

Pour in the chicken broth and bring to a boil. Reduce heat to medium-low and simmer for 15 minutes. This allows the flavors to meld while the chicken finishes cooking completely.

Add the drained white beans and simmer for another 10 minutes until everything is heated through. The beans should be tender but still hold their shape in your Gordon Ramsay white chicken chili.

What Will Thicken Up White Chicken Chili?

The sour cream serves as both flavor enhancer and thickening agent in Gordon Ramsay white chicken chili. Remove the pot from heat before stirring in room-temperature sour cream—this prevents curdling that ruined my first three attempts.

If you need additional thickening, mash about half a cup of the white beans against the side of the pot and stir them back in. This creates a naturally thick consistency without adding flour or cornstarch that can make Gordon Ramsay white chicken chili gummy.

For more advanced thickening techniques that work with various dishes, check out the professional methods used in Gordon Ramsay’s green peppercorn sauce.

Why Is It Called White Chicken Chili?

Gordon Ramsay white chicken chili gets its name from the absence of tomatoes and the use of white beans, chicken broth, and sour cream as the base. Unlike traditional red chili that relies on tomatoes for color and acidity, white chicken chili develops its character through dairy richness and green chile heat.

The “white” designation also refers to the cooking technique—it’s more like a cross between soup and stew, with a creamy consistency that’s distinctly different from tomato-based chilis.

Pro Tips

Never add cold sour cream directly to hot Gordon Ramsay white chicken chili. Let it come to room temperature first, then temper it by stirring in a ladle of the hot liquid before adding it all back to the pot.

Taste and adjust seasoning at the end. Gordon Ramsay white chicken chili should have balanced heat, creaminess, and savory depth. If it tastes flat, add more salt. If it needs brightness, a squeeze of fresh lime juice works wonders.

For those interested in mastering more Gordon Ramsay techniques, learning proper scrambled egg technique will improve your overall cooking confidence.

Storage and Leftovers

Gordon Ramsay white chicken chili stores well in the refrigerator for up to 4 days. The flavors actually improve overnight as everything melds together. Reheat gently on the stovetop, adding a splash of chicken broth if it’s too thick.

For freezing, store without the sour cream and add it fresh when reheating. This prevents texture issues that can occur with dairy-based frozen foods.

FAQ

How long does Gordon Ramsay white chicken chili take to cook?

Total cooking time is about 45 minutes—15 minutes prep and 30 minutes cooking.

Can you use rotisserie chicken in white chicken chili?

Yes, add it during the last 10 minutes to prevent it from becoming overcooked and stringy.

What makes Gordon Ramsay white chicken chili creamy?

he combination of sour cream and properly cooked white beans creates the signature creamy texture.

Is Gordon Ramsay white chicken chili healthy?

At 385 calories per serving with 38 grams of protein, it’s a nutritious, balanced meal.

After those three smoke alarm incidents, I learned that Gordon Ramsay white chicken chili isn’t about rushing—it’s about building layers of flavor methodically. Take your time with each step, respect the ingredients, and you’ll create something that would make Gordon proud.

Stay safe, Jack Sullivan

Creamy Gordon Ramsay white chicken chili served in ceramic bowl with cilantro garnish
Jack Sullivan

Gordon Ramsay White Chicken Chili

A creamy, flavorful white chicken chili inspired by Gordon Ramsay’s techniques with tender chicken, white beans, and aromatic spices.
Prep Time 15 minutes
Cook Time 30 minutes
Total Time 45 minutes
Servings: 6 servings
Course: Main Course
Cuisine: American
Calories: 385

Ingredients
  

  • 2 pounds boneless chicken breasts cut into bite-sized pieces
  • 2 cans white beans cannellini or Great Northern, drained and rinsed
  • 1 large yellow onion diced
  • 4 cloves garlic minced
  • 2 cans diced green chiles mild or medium heat
  • 4 cups low-sodium chicken broth
  • 1 cup sour cream room temperature
  • 2 teaspoons ground cumin
  • 1 teaspoon oregano dried
  • 2 tablespoons olive oil
  • 1 teaspoon salt or to taste
  • 1/2 teaspoon black pepper freshly ground

Equipment

  • Large Dutch Oven Heavy-bottomed pot for even heat distribution
  • Wooden spoon For stirring without scratching the pot
  • – Sharp knife For dicing vegetables and chicken

Method
 

  1. 1️⃣ Heat olive oil in a large Dutch oven over medium-high heat. Season chicken pieces with salt and pepper, then sear until golden brown on all sides, about 6-8 minutes total.
  2. 2️⃣ Add diced onion to the pot with the chicken and cook until softened and translucent, about 4-5 minutes. Add minced garlic and cook for another 30 seconds until fragrant.
  3. 3️⃣ Stir in cumin and oregano, cooking for 30 seconds to bloom the spices. Add diced green chiles and cook for 2 minutes.
  4. 4️⃣ Pour in chicken broth and bring to a boil. Reduce heat to medium-low and simmer for 15 minutes, allowing flavors to meld.
  5. 5️⃣ Add drained white beans to the pot and simmer for an additional 10 minutes until beans are heated through and chicken is fully cooked.
  6. 6️⃣ Remove from heat and slowly stir in room temperature sour cream until well combined. Taste and adjust seasoning with salt and pepper as needed.
  7. 7️⃣ Serve immediately while hot, garnished with fresh cilantro, diced avocado, shredded cheese, or a dollop of additional sour cream.

Nutrition

Serving: 1gCalories: 385kcalCarbohydrates: 28gProtein: 38gFat: 14gSaturated Fat: 6gPolyunsaturated Fat: 2gMonounsaturated Fat: 5gCholesterol: 98mgSodium: 742mgPotassium: 896mgFiber: 8gSugar: 6gVitamin A: 185IUVitamin C: 12mgCalcium: 142mgIron: 4mg

Notes

For extra flavor, try roasting the chicken pieces in a 400°F oven for 20 minutes before adding to the chili.
To prevent curdling, make sure the sour cream is at room temperature before stirring it into the hot chili.
This chili tastes even better the next day after flavors have had time to meld together.

Tried this recipe?

Let us know how it was!

After 20 years of cooking, I thought Gordon Ramsay breakfast casserole was easy. I was wrong.

Let me set the scene: Sunday morning, my wife’s expecting guests for brunch, and I’m standing in the kitchen with eggs, bacon, and what I assumed was foolproof confidence. Twenty years of firefighter station cooking should’ve prepared me for anything, right? Wrong. That first attempt at a Gordon Ramsay breakfast casserole taught me the difference between throwing ingredients together and actually understanding the science behind a perfect make-ahead breakfast.

The smoke alarm didn’t go off this time, but my pride took a hit when I served what can only be described as breakfast soup with cheese floating on top. My crew would’ve roasted me for weeks if they’d seen that disaster.

Here’s what I learned from my mistakes and how to make a Gordon Ramsay breakfast casserole that actually works.

What Does Gordon Ramsay Have for Breakfast?

Gordon Ramsay’s breakfast philosophy centers on fresh, high-quality ingredients prepared with precision. While he’s famous for his perfect scrambled eggs technique, his breakfast casserole approach combines his love for layered flavors with the practical need to feed multiple people efficiently. According to USDA nutritional guidelines, breakfast should provide 20-25% of daily nutritional needs, and Ramsay’s casserole delivers exactly that balance of protein, carbohydrates, and essential fats.

The key difference between Ramsay’s approach and standard breakfast casseroles lies in the timing and technique. He understands that eggs need gentle cooking even in casserole form, which is why temperature control becomes critical.

Should Breakfast Casserole Be Cooked Covered or Uncovered?

This question stumped me during my first attempt. I covered it thinking I was being smart, then wondered why the top stayed pale and soggy. Here’s the science: breakfast casseroles should be cooked uncovered for the final 30-40 minutes to achieve that golden-brown cheese crust Ramsay’s known for.

The uncovered method allows moisture to evaporate from the surface while maintaining the creamy interior texture. If you’re worried about over-browning, you can tent with foil for the first 20 minutes, then remove it to finish. But trust me, that golden top is what separates amateur breakfast casseroles from restaurant-quality results.

Ingredients That Actually Matter for Gordon Ramsay Breakfast Casserole

Ingredients for Gordon Ramsay breakfast casserole laid out on marble counter

Quality ingredients make the difference between good and exceptional. Here’s what you need:

  • Day-old bread: Fresh bread turns to mush. Day-old brioche or challah provides the perfect texture
  • Room temperature eggs: Cold eggs don’t incorporate properly with milk
  • Thick-cut bacon: Thin bacon disappears in the casserole; thick-cut maintains its presence
  • Whole milk: Don’t skimp here – skim milk produces a watery result
  • Sharp cheddar: Mild cheese gets lost among the other flavors

The bread choice particularly matters. I learned this from studying Ramsay’s bread-making techniques – enriched breads like brioche contain eggs and butter, which complement the casserole’s custard base perfectly.

Step-by-Step Instructions

Prep: 15 minutes | Cook: 45 minutes | Serves: 8

  1. Temperature control first: Preheat to 350°F. This isn’t negotiable – too hot and the eggs scramble, too cool and it never sets properly.
  2. Bacon preparation: Cook 8 slices thick-cut bacon until crispy, about 8 minutes. Drain and chop. Reserve 2 tablespoons of bacon fat for extra flavor.
  3. Bread layer: Cube 8 cups of day-old bread and arrange in a buttered 9×13 dish. The cubes should fit snugly but not be compressed.
  4. Egg mixture mastery: Whisk 12 eggs until completely smooth. Add 2 cups whole milk, 1 teaspoon salt, and ½ teaspoon freshly ground pepper. The mixture should be completely homogeneous.
  5. Assembly technique: Pour egg mixture over bread, ensuring even distribution. Press bread down gently to help absorption. Top with bacon and 2 cups shredded sharp cheddar.
  6. The critical bake: Uncovered for 40-45 minutes until golden brown and the center reaches 160°F internal temperature.
  7. Rest period: Let stand 10 minutes before serving. This allows the custard to firm up properly.

Pro Tips From Hard-Earned Experience

Make-ahead strategy: Assemble everything except the cheese the night before. Cover and refrigerate. Add cheese and bake in the morning, adding 10 extra minutes to cooking time.

Texture control: If your casserole seems too wet after baking, it needed more time. If it’s dry and rubbery, your oven was too hot or you overbaked it.

Flavor enhancement: A pinch of nutmeg in the egg mixture adds depth without being detectable. This technique comes from French custard-making traditions that Ramsay incorporates.

For comparison with other Gordon Ramsay breakfast techniques, check out his chicken fricassee method – the same attention to layering flavors applies.

Storage and Leftovers

Refrigerate leftovers within 2 hours of cooking. Properly stored Gordon Ramsay breakfast casserole keeps for 3-4 days. Reheat individual portions in the microwave for 1-2 minutes or cover and reheat in a 300°F oven for 10-15 minutes.

According to FDA food safety guidelines, egg-based dishes should not be left at room temperature for more than 2 hours, so don’t let that beautiful casserole sit out during long brunches.

Frequently Asked Questions

What does Gordon Ramsay add to his scrambled eggs?

Crème fraîche and butter, added off the heat to create silky texture. This same principle of fat incorporation applies to his breakfast casserole approach.

What is Gordon Ramsay’s most known dish?

While Beef Wellington tops most lists, his breakfast techniques have taught millions of home cooks fundamental skills that translate across all cooking.

That first disaster taught me respect for the basics. A Gordon Ramsay breakfast casserole isn’t just thrown-together ingredients – it’s a carefully constructed dish that rewards attention to detail. Master this recipe, and you’ll understand why Ramsay’s techniques have stood the test of time.

Perfect for holiday mornings, meal prep, or impressing house guests who don’t know about your first failed attempt.

Stay safe,
Jack Sullivan

Gordon Ramsay breakfast casserole recipe with golden cheese topping in white baking dish
Jack Sullivan

Gordon Ramsay Breakfast Casserole

A rich, savory breakfast casserole combining eggs, bacon, cheese, and bread into the perfect make-ahead morning meal that feeds a crowd.
Prep Time 15 minutes
Cook Time 45 minutes
Total Time 1 hour
Servings: 8 servings
Course: Breakfast
Cuisine: American, british
Calories: 385

Ingredients
  

  • 12 large eggs room temperature
  • 8 slices thick-cut bacon chopped
  • 8 cups day-old bread cubed (brioche or challah preferred)
  • 2 cups whole milk
  • 2 cups sharp cheddar cheese shredded
  • 1 tsp salt
  • 1/2 tsp black pepper freshly ground
  • 2 tbsp fresh chives chopped, for garnish
  • 2 tbsp butter for greasing dish

Equipment

  • 1 9×13 inch baking dish glass or ceramic preferred
  • 1 – Large mixing bowl for egg mixture
  • 1 Large Skillet for cooking bacon

Method
 

  1. 1️⃣ Preheat your oven to 350°F and grease a 9×13 inch baking dish with butter.
  2. 2️⃣ Cook bacon in a large skillet over medium heat until crispy, about 8 minutes. Drain on paper towels and chop into pieces.
  3. 3️⃣ Arrange cubed bread evenly in the prepared baking dish. Sprinkle bacon pieces over the bread.
  4. 4️⃣ In a large bowl, whisk eggs until well combined. Add milk, salt, and pepper, whisking until smooth.
  5. 5️⃣ Pour egg mixture evenly over bread and bacon. Press down gently to ensure bread absorbs the liquid.
  6. 6️⃣ Top with shredded cheddar cheese, distributing evenly across the surface.
  7. 7️⃣ Bake uncovered for 40-45 minutes until golden brown on top and set in the center.
  8. 8️⃣ Let cool for 10 minutes before serving. Garnish with fresh chives and serve immediately.

Nutrition

Serving: 1gCalories: 385kcalCarbohydrates: 28gProtein: 24gFat: 22gSaturated Fat: 10gPolyunsaturated Fat: 2gMonounsaturated Fat: 8gCholesterol: 325mgSodium: 680mgPotassium: 320mgFiber: 2gSugar: 6gVitamin A: 15IUVitamin C: 2mgCalcium: 25mgIron: 12mg

Notes

For best results, use day-old bread as it absorbs the egg mixture better than fresh bread.
This casserole can be assembled the night before and baked in the morning – perfect for holidays.
Internal temperature should reach 160°F when fully cooked.

Tried this recipe?

Let us know how it was!

Gordon Ramsay Red Velvet Brownies Recipe – Rich, Fudgy & Restaurant-Quality

My wife still brings up the time I butchered Gordon Ramsay red velvet brownies. It was our fifth anniversary, and I’d promised her something special. Instead of making reservations like a smart man, I decided to recreate those decadent red velvet brownies we’d shared at one of Ramsay’s restaurants. The result? A kitchen that looked like a crime scene and brownies harder than the pavement I’d walked on for twenty years as a firefighter.

That disaster taught me everything I needed to know about making Gordon Ramsay red velvet brownies properly. After months of practice and studying his techniques, I finally nailed the recipe that delivers the same rich, fudgy texture and vibrant color that made those restaurant brownies unforgettable. These aren’t just brownies with food coloring thrown in – they’re a perfect balance of cocoa depth and tangy cream cheese that creates something truly special.

What’s the Difference Between Red Velvet Brownies and Regular Brownies?

Red velvet brownies aren’t simply chocolate brownies with red food coloring added. The fundamental difference lies in the cocoa content and acidity balance. While regular brownies rely heavily on chocolate or cocoa powder for their flavor profile, Gordon Ramsay red velvet brownies use a smaller amount of cocoa powder combined with buttermilk and vinegar to create the signature tangy flavor that red velvet is known for.

The texture also differs significantly. Regular brownies can range from fudgy to cakey, but red velvet brownies aim for a specific tender, moist crumb that’s neither too dense nor too light. The addition of cream cheese swirl creates pockets of tangy richness that complement the subtle chocolate notes. According to the FDA’s guidance on food coloring, the vibrant red color comes from food-grade coloring agents that don’t affect taste but create that unmistakable visual appeal.

The chemistry behind red velvet involves the reaction between acidic ingredients and cocoa powder, which enhances the red color naturally. This reaction also contributes to the unique flavor profile that sets these brownies apart from their traditional chocolate counterparts.

What Are the Three Types of Brownies?

Understanding brownie types helps you achieve the perfect Gordon Ramsay red velvet brownies texture. Professional bakers recognize three distinct brownie categories based on texture and ingredient ratios.

Fudgy brownies contain higher fat content and less flour, creating a dense, moist texture similar to chocolate fudge. These brownies have a higher ratio of butter and chocolate to flour, resulting in that rich, almost underbaked center that melts in your mouth. Gordon Ramsay red velvet brownies fall into this category, with their tender, moist crumb and intense flavor concentration.

Chewy brownies strike a balance between fat and flour, often incorporating additional eggs for structure. These have a firmer bite than fudgy brownies but maintain moisture throughout. They hold their shape well when cut but still provide satisfying texture contrast.

Cakey brownies use more flour and leavening agents, creating a lighter texture that resembles chocolate cake more than traditional brownies. These are less dense and often preferred by those who find fudgy brownies too rich. However, for authentic Gordon Ramsay red velvet brownies, the fudgy approach delivers the restaurant-quality results you’re seeking.

Ingredients That Actually Matter for Gordon Ramsay Red Velvet Brownies

Red velvet brownie ingredients laid out for Gordon Ramsay recipe preparation

The quality of your ingredients directly impacts your final result. After perfecting this Gordon Ramsay red velvet brownies recipe, I’ve learned that certain ingredients can make or break your success.

Use high-quality Dutch-processed cocoa powder for deeper flavor and better color development. The alkaline process neutralizes the cocoa’s natural acidity, creating a smoother taste that works better with the tangy elements in red velvet. Regular cocoa powder can work, but Dutch-processed delivers superior results that match restaurant standards.

Room temperature eggs blend more easily and create better texture. Cold eggs can cause the butter to seize up, leading to lumpy batter that won’t bake evenly. The same principle applies to cream cheese – softened cream cheese incorporates smoothly, while cold cream cheese creates lumps that won’t distribute properly throughout your Gordon Ramsay red velvet brownies.

Food coloring choice matters more than you’d expect. Gel food coloring provides more vibrant color without thinning your batter, while liquid coloring can affect the moisture balance. For authentic Gordon Ramsay red velvet brownies color, you need enough coloring to achieve that signature deep red without compromising texture.

Quality vanilla extract enhances the overall flavor profile. Pure vanilla extract contains complex flavor compounds that complement both the cocoa and cream cheese elements. Imitation vanilla works in a pinch, but pure vanilla elevates these brownies from good to exceptional.

Step-by-Step Instructions

Proper technique transforms good ingredients into outstanding Gordon Ramsay red velvet brownies. Each step builds on the previous one, so attention to detail matters throughout the process.

Start by preheating your oven to 350°F and preparing your 9×13 inch pan with parchment paper. Leave overhang on the sides – this makes removal much easier and prevents sticking that can ruin your presentation.

Melt your butter completely and let it cool slightly before mixing. Hot butter can cook the eggs when combined, creating an undesirable texture in your Gordon Ramsay red velvet brownies. Whisk the cooled melted butter with granulated sugar until well combined, then add eggs one at a time, beating well after each addition.

The red food coloring goes in with the wet ingredients, ensuring even distribution throughout the batter. Add vanilla extract at this stage as well. The mixture should be smooth and vibrant red before you add any dry ingredients.

Combine your flour, cocoa powder, and salt in a separate bowl, whisking to eliminate any lumps. Gradually fold these dry ingredients into your wet mixture, stirring just until combined. Overmixing develops gluten, creating tough Gordon Ramsay red velvet brownies instead of the tender texture you want.

For the cream cheese layer, beat softened cream cheese with powdered sugar and one egg until completely smooth. This mixture should be lump-free and easy to spread or dollop onto your brownie batter.

Pro Tips for Perfect Results

Temperature control makes the difference between amateur and professional results. Your oven temperature should be accurate – invest in an oven thermometer if you haven’t already. Many home ovens run hot or cold, which can ruin your Gordon Ramsay red velvet brownies timing and texture.

Don’t overbake these brownies. They continue cooking from residual heat even after removal from the oven. The center should spring back lightly when touched, but shouldn’t be completely firm. Overbaked Gordon Ramsay red velvet brownies become dry and lose that fudgy texture that makes them special.

The cream cheese swirl technique requires a light touch. Drop spoonfuls of the cream cheese mixture over your brownie batter, then use a knife to create swirls. Don’t overmix – you want distinct cream cheese ribbons throughout, not a uniform color that muddles the visual appeal.

Cool completely before cutting. This is crucial for clean cuts and proper texture development. Warm brownies fall apart and don’t showcase the beautiful layers you’ve created. For the cleanest cuts, refrigerate your cooled Gordon Ramsay red velvet brownies for an hour before slicing.

Use a sharp knife wiped clean between cuts for professional-looking squares. Dull knives drag and tear, creating messy edges that don’t do justice to your hard work.

Storage and Serving

Proper storage maintains the quality that makes Gordon Ramsay red velvet brownies special. Store cooled brownies in an airtight container at room temperature for up to four days. The cream cheese component means they need protection from air exposure to prevent drying out.

For longer storage, wrap individual portions in plastic wrap and freeze for up to three months. Frozen Gordon Ramsay red velvet brownies thaw beautifully – just leave them at room temperature for about an hour before serving.

These brownies pair excellently with vanilla ice cream or a glass of cold milk. The richness benefits from something cool and creamy to balance the intense flavors. For special occasions, a light dusting of powdered sugar adds elegant presentation that matches the restaurant quality of your homemade Gordon Ramsay red velvet brownies.

Consider serving them with fresh berries for color contrast and a touch of acidity that complements the cream cheese swirl. Strawberries work particularly well, as their tartness balances the rich sweetness perfectly.

Frequently Asked Questions

What are the 5 ingredient brownies?

Five-ingredient brownies typically use butter, sugar, eggs, flour, and cocoa powder. However, Gordon Ramsay red velvet brownies require additional ingredients like cream cheese, food coloring, and vanilla extract to achieve the authentic flavor and appearance.

How to store red velvet brownies?

Store Gordon Ramsay red velvet brownies in an airtight container at room temperature for up to 4 days. Due to the cream cheese component, avoid leaving them out uncovered for extended periods. For longer storage, wrap individually and freeze for up to 3 months.

Making Gordon Ramsay red velvet brownies properly takes patience and attention to detail, but the results justify every step. These aren’t the disaster I created on my anniversary – they’re the restaurant-quality dessert that finally earned my wife’s forgiveness and became a regular request in our household. Master this recipe, and you’ll have a showstopper dessert that impresses every time. For more dessert mastery, try my Gordon Ramsay sticky toffee pudding for another restaurant-quality treat.

Stay safe,
Jack Sullivan

Gordon Ramsay style red velvet brownies with cream cheese swirl on marble cutting board
Jack Sullivan

Gordon Ramsay Red Velvet Brownies

Rich, fudgy red velvet brownies with cream cheese swirl inspired by Gordon Ramsay’s professional techniques
Prep Time 20 minutes
Cook Time 35 minutes
Total Time 55 minutes
Servings: 16 servings
Course: Dessert
Cuisine: American, Italian
Calories: 285

Ingredients
  

  • 1 cup unsalted butter melted
  • 2 cups granulated sugar
  • 4 large eggs room temperature
  • 2 teaspoons vanilla extract pure vanilla
  • 1 1/2 cups all-purpose flour
  • 1/4 cup unsweetened cocoa powder Dutch-processed preferred
  • 1 teaspoon salt
  • 2 tablespoons red food coloring gel or liquid
  • 8 oz cream cheese softened
  • 1/2 cup powdered sugar for cream cheese layer
  • 1 large egg for cream cheese layer

Equipment

  • 9×13 inch baking pan lined with parchment paper
  • – Large mixing bowl for brownie batter
  • Electric mixer hand or stand mixer

Method
 

  1. 1️⃣ Preheat oven to 350°F (175°C). Line a 9×13 inch baking pan with parchment paper, leaving overhang for easy removal.
  2. 2️⃣ In a large bowl, whisk melted butter and granulated sugar until combined. Add eggs one at a time, then vanilla extract and red food coloring.
  3. 3️⃣ In separate bowl, whisk flour, cocoa powder, and salt. Gradually fold dry ingredients into wet ingredients until just combined.
  4. 4️⃣ For cream cheese layer: Beat softened cream cheese, powdered sugar, and egg until smooth and creamy.
  5. 5️⃣ Pour brownie batter into prepared pan, spreading evenly. Drop spoonfuls of cream cheese mixture over batter and swirl with knife.
  6. 6️⃣ Bake for 32-35 minutes until edges are set and center springs back lightly when touched. Cool completely before cutting.

Nutrition

Serving: 1gCalories: 285kcalCarbohydrates: 42gProtein: 5gFat: 12gSaturated Fat: 7gPolyunsaturated Fat: 1gMonounsaturated Fat: 3gCholesterol: 75mgSodium: 185mgPotassium: 125mgFiber: 2gSugar: 36gVitamin A: 450IUCalcium: 65mgIron: 2mg

Notes

For best results, use room temperature eggs and softened cream cheese for smooth mixing.
Dutch-processed cocoa powder creates deeper flavor than natural cocoa powder.
Don’t overmix the batter – fold just until ingredients are combined to prevent tough brownies.

Tried this recipe?

Let us know how it was!

There’s a reason people avoid making Gordon Ramsay tomato relish at home — I found out why the hard way. After twenty years of emergency response cooking, where precision can mean the difference between a decent meal and disaster, I thought a simple tomato condiment would be child’s play. Three burned batches and one kitchen smoke alarm incident later, I realized this Gordon Ramsay tomato relish demanded the same methodical approach I use for everything else in my life.

The problem isn’t complexity — it’s patience. Most home cooks rush the process, cranking the heat and ending up with either watery disappointment or a charred mess. This Gordon Ramsay tomato relish requires the discipline of controlled heat and timing, much like managing a controlled burn during wildfire season. You can’t force it, and you definitely can’t rush it.

How to Make a Nice Tomato Relish

Creating an exceptional Gordon Ramsay tomato relish starts with understanding what separates amateur attempts from restaurant-quality results. The secret lies in proper tomato preparation and controlled reduction. Professional chefs know that fresh tomato selection directly impacts final flavor and texture.

Quality tomatoes form the foundation of any successful Gordon Ramsay tomato relish. Choose firm, ripe varieties like Roma or San Marzano — their lower moisture content and concentrated flavor create the perfect base. I learned this lesson after my first attempt using standard grocery store tomatoes resulted in a watery mess that barely resembled relish.

The key technique involves proper blanching and peeling. Score an X on each tomato bottom, blanch for exactly 60 seconds in boiling water, then shock in ice water. This process removes the tough skin while maintaining the flesh integrity needed for proper Gordon Ramsay tomato relish consistency.

Temperature control separates successful batches from failures. Start with medium heat to soften aromatics, then reduce to low for the long simmer. This Gordon Ramsay tomato relish needs gentle, consistent heat to concentrate flavors without burning. Think of it like maintaining steady pressure on a fire hose — consistent, controlled, effective.

What Consistency Should Tomato Relish Be?

The perfect Gordon Ramsay tomato relish consistency resembles chunky jam rather than smooth sauce. You want visible tomato pieces suspended in a glossy, thickened base that coats a spoon but isn’t paste-thick. This texture balance allows the relish to cling to food while maintaining distinct ingredient identity.

Professional consistency indicators include the wooden spoon test — when you draw a spoon through the Gordon Ramsay tomato relish, it should hold its shape briefly before slowly flowing back together. The mixture should reduce by roughly two-thirds from its starting volume during the cooking process.

Achieving proper thickness requires patience during the reduction phase. The Gordon Ramsay tomato relish continues thickening as it cools, so slightly undercook rather than overcook. I’ve learned that what seems thin in the hot pan becomes perfect spreading consistency at room temperature.

Ingredients That Actually Matter for Gordon Ramsay Tomato Relish

Gordon Ramsay style tomato relish with perfect chunky consistency in ceramic bowl

Not all ingredients carry equal weight in this Gordon Ramsay tomato relish recipe. The tomatoes obviously anchor everything, but the supporting cast makes or breaks the final product. Shallots provide sweetness without the harsh bite of regular onions, while fresh garlic adds depth that powder simply cannot match.

Red wine vinegar brings acidity that brightens the entire Gordon Ramsay tomato relish while balancing the natural tomato sweetness. Brown sugar adds complexity beyond simple sweetness — its molasses notes complement the tomato’s earthiness perfectly. Don’t substitute white sugar; the flavor difference is significant.

Fresh basil transforms this Gordon Ramsay tomato relish from ordinary to exceptional. Add it during the final cooking minutes to preserve its bright flavor and prevent it from becoming bitter. The herb’s aromatic oils need gentle heat integration, not aggressive cooking.

Quality olive oil matters more than you’d expect in Gordon Ramsay tomato relish. Extra virgin provides fruity notes that enhance rather than compete with the tomatoes. Cheap oil contributes nothing positive and can actually muddy the clean flavors you’re working to develop.

Step-by-Step Instructions

Begin your Gordon Ramsay tomato relish by preparing the tomatoes properly. Score, blanch, shock, peel, and dice into uniform half-inch pieces. This size maintains texture while ensuring even cooking throughout the reduction process.

Heat olive oil in a heavy-bottom saucepan over medium heat. Add diced shallots and cook until softened, about 3-4 minutes. The shallots should become translucent without browning — excessive color indicates too much heat.

Add minced garlic to the Gordon Ramsay tomato relish base and cook for one minute while stirring constantly. Garlic burns quickly and becomes bitter, so watch carefully during this step. You want fragrant, not colored.

Combine tomatoes, brown sugar, and red wine vinegar in the pan. Season with salt and pepper, then bring to a gentle simmer. This initial heating activates the tomato enzymes that will concentrate during the long cooking process.

Reduce heat to low and simmer the Gordon Ramsay tomato relish for 35-40 minutes, stirring occasionally. The mixture should bubble gently but never boil vigorously. Aggressive heat breaks down tomatoes too quickly and creates poor texture.

Add fresh basil during the final five minutes of cooking. Taste and adjust seasoning — you might need additional salt, pepper, or vinegar depending on your tomato’s natural acidity. The Gordon Ramsay tomato relish should balance sweet, sour, and savory elements perfectly.

How to Make Tomato Relish Thicker

If your Gordon Ramsay tomato relish seems too thin after proper cooking time, resist the urge to increase heat dramatically. Instead, continue gentle simmering while stirring more frequently to prevent sticking. The moisture will eventually evaporate, leaving proper consistency.

For emergency thickening, try our homemade tomato sauce techniques which apply similar reduction principles. Remember that the Gordon Ramsay tomato relish will thicken significantly as it cools, so err on the slightly thin side while hot.

Some cooks add tomato paste for quick thickening, but this changes the fresh flavor profile that makes Gordon Ramsay tomato relish special. Patience during reduction produces superior results compared to shortcuts.

Pro Tips

Choose your cooking vessel carefully for Gordon Ramsay tomato relish success. Wide, heavy-bottom pans promote even heat distribution and faster moisture evaporation. Narrow pots create hot spots and uneven cooking.

Make large batches of Gordon Ramsay tomato relish since the active cooking time is the same regardless of quantity. Properly processed jars store for months, and this condiment complements everything from grilled meats to cheese boards.

Taste frequently during the final cooking phase. The Gordon Ramsay tomato relish flavor concentrates rapidly during the last ten minutes, and over-reduction creates overly intense results that overpower rather than complement food.

Storage and Leftovers

Fresh Gordon Ramsay tomato relish keeps refrigerated for up to two weeks in clean containers. The flavors actually improve after 24 hours as ingredients marry and mellow. For longer storage, process in sterilized jars using proper water bath canning techniques.

This relish transforms leftover meals into something special. Try it with scrambled eggs, grilled cheese sandwiches, or as a sophisticated accompaniment to simple roasted meats.

Frequently Asked Questions

What does tomato relish have in it?

Gordon Ramsay tomato relish contains fresh tomatoes, shallots, garlic, red wine vinegar, brown sugar, olive oil, salt, pepper, and fresh basil. Quality ingredients and proper technique create the signature flavor profile.

How long does homemade tomato relish last?

Properly stored Gordon Ramsay tomato relish lasts two weeks refrigerated or up to one year when properly canned using water bath processing methods.

Making perfect Gordon Ramsay tomato relish taught me that even simple recipes demand respect for process and ingredients. The difference between amateur attempts and professional results often comes down to patience, quality ingredients, and refusing to rush critical steps. This relish proves that sometimes the most rewarding cooking happens at the lowest temperatures over the longest time.

Stay safe, Jack Sullivan

Gordon Ramsay style tomato relish with perfect chunky consistency in ceramic bowl
Jack Sullivan

Gordon Ramsay Tomato Relish

A vibrant, chunky tomato relish that perfectly balances sweet and tangy flavors with the ideal texture for any dish.
Prep Time 20 minutes
Cook Time 45 minutes
Total Time 1 hour 5 minutes
Servings: 8 servings
Course: sauce
Cuisine: british
Calories: 45

Ingredients
  

  • 2 lbs ripe tomatoes preferably Roma or San Marzano
  • 2 large shallots finely diced
  • 4 cloves garlic minced
  • 1/2 cup red wine vinegar
  • 1/4 cup brown sugar packed
  • 2 tbsp olive oil extra virgin
  • 1 tsp salt sea salt preferred
  • 1/2 tsp black pepper freshly ground
  • 2 tbsp fresh basil chopped

Equipment

  • 1 Large Heavy-Bottom Saucepan Essential for even heat distribution
  • 1 Sharp chef’s knife For precise dicing
  • 1 Wooden spoon Won’t scratch pan surface

Method
 

  1. 1️⃣ Score an X on the bottom of each tomato and blanch in boiling water for 60 seconds, then transfer to ice water. Peel and dice into 1/2-inch pieces.
  2. 2️⃣ Heat olive oil in a large heavy-bottom saucepan over medium heat. Add diced shallots and cook for 3-4 minutes until softened.
  3. 3️⃣ Add minced garlic and cook for another minute until fragrant, stirring constantly to prevent burning.
  4. 4️⃣ Add diced tomatoes, brown sugar, and red wine vinegar. Season with salt and pepper. Bring to a gentle simmer.
  5. 5️⃣ Reduce heat to low and simmer for 35-40 minutes, stirring occasionally, until mixture thickens to a chunky jam-like consistency.
  6. 6️⃣ Stir in fresh basil during the last 5 minutes of cooking. Taste and adjust seasoning as needed.
  7. 7️⃣ Let cool completely before transferring to sterilized jars. The relish will thicken further as it cools.

Nutrition

Serving: 1gCalories: 45kcalCarbohydrates: 8gProtein: 1gFat: 2gMonounsaturated Fat: 1gSodium: 295mgPotassium: 185mgFiber: 1gSugar: 7gVitamin A: 12IUVitamin C: 15mgCalcium: 2mgIron: 3mg

Notes

For best results, use ripe but firm tomatoes. The relish should coat a spoon but still have visible chunks.
Store in refrigerator for up to 2 weeks. Can be processed in water bath for longer storage.
This relish pairs beautifully with grilled meats, cheese boards, and sandwiches.

Tried this recipe?

Let us know how it was!

Every firefighter thinks they can cook — gordon ramsay full english breakfast taught me otherwise.

There I was, twenty-three years into the job, convinced that if I could coordinate a five-truck response to a structure fire, I could certainly handle cooking eight components for a proper English breakfast. My wife had been dropping hints about wanting a “proper fry-up” like the ones her grandmother made, and I figured gordon ramsay full english breakfast would be the perfect weekend surprise.

That first attempt was a disaster. Cold sausages, rubbery eggs, burnt hash browns, and beans that somehow managed to be both scalding and flavorless. The bacon was either raw or cremated, and the mushrooms turned into sad, gray lumps. My wife took one look at the plate and diplomatically suggested we grab breakfast at the diner instead.

What Is Included in a Full English Breakfast?

A traditional gordon ramsay full english breakfast consists of eight essential components that must work in perfect harmony. The foundation includes back bacon, Cumberland sausages, and black pudding for the meat elements. Fresh eggs, preferably sunny-side up, provide richness, while grilled tomatoes and sautéed mushrooms add vegetable components. Baked beans and hash browns complete the ensemble, creating a balanced plate that satisfies every craving.

Gordon Ramsay emphasizes that quality ingredients make the difference between an ordinary breakfast and an extraordinary one. According to the USDA guidelines for safe food handling, proper temperature control is crucial when preparing multiple protein components simultaneously.

The key insight I learned from studying gordon ramsay full english breakfast techniques is that timing matters more than technique. Each component requires specific cooking times and temperatures, and the secret lies in coordination rather than speed.

Ingredients That Actually Matter for Gordon Ramsay Full English Breakfast

Raw ingredients for Gordon Ramsay full English breakfast arranged on marble surface including bacon, sausages, eggs, tomatoes and mushrooms

After countless attempts perfecting this gordon ramsay full english breakfast, I’ve learned that ingredient quality directly impacts your final result. Skip the thin-cut bacon and cheap sausages — they’ll only lead to disappointment.

Essential Components:

  • Back bacon (thick-cut provides better texture)
  • Cumberland sausages (higher fat content creates superior flavor)
  • Black pudding (adds traditional authenticity)
  • Fresh eggs (room temperature prevents cracking)
  • Ripe tomatoes (firm enough to hold their shape when grilled)
  • Button mushrooms (absorb flavors while maintaining structure)
  • Quality baked beans (Heinz remains the gold standard)
  • Hash browns (frozen work perfectly for consistent results)

The revelation came when I started treating each component like a separate operation at the firehouse. Just as we assign specific roles during emergency responses, gordon ramsay full english breakfast requires systematic preparation and precise execution.

Step-by-Step Instructions

Preparation Phase: Begin by preheating your oven to 200°F and placing serving plates inside. This seemingly minor detail revolutionized my gordon ramsay full english breakfast game. Cold plates kill the experience faster than an overcooked egg.

The Cooking Sequence: Start with sausages since they require the longest cooking time. Place them in a cold, dry cast-iron skillet and turn the heat to medium. This technique, borrowed from Gordon Ramsay’s approach, allows even cooking without splitting the casings. Cook for 12-15 minutes, turning every three minutes.

Next, add black pudding slices to the same pan with a tablespoon of oil. The residual sausage fat creates incredible flavor depth. Cook 2-3 minutes per side until crispy edges form, then transfer to your warming plates.

Cook the bacon in the same pan, utilizing the accumulated flavors. Three to four minutes per side achieves that perfect balance between crispy edges and tender centers that defines gordon ramsay full english breakfast quality.

Hash browns follow the bacon, requiring fresh oil for proper crisping. The key is patience — four to five minutes per side without moving them creates that golden-brown crust Gordon Ramsay demands.

While hash browns cook, start your beans in a separate saucepan over low heat. Add butter and season to taste. This step often gets overlooked, but seasoned beans elevate the entire gordon ramsay full english breakfast experience.

Add mushrooms to the hash brown pan once they’ve finished. Three to four minutes of cooking develops their earthy flavors without turning them mushy. Season immediately and transfer to the warming oven.

Grilled tomatoes require careful attention. Place them cut-side down first, cooking for two minutes before flipping, seasoning, and cooking an additional two minutes. Properly cooked tomatoes should be heated through but maintain their structure.

Finally, crack the eggs into the pan for the finale. Gordon Ramsay’s technique emphasizes gentle cooking — two to three minutes creates set whites with perfectly runny yolks that bind the entire gordon ramsay full english breakfast together.

For those perfecting their egg technique, check out our comprehensive guide on Gordon Ramsay’s scrambled eggs method for alternative preparation styles.

Pro Tips From the Firehouse Kitchen

Temperature control remains paramount when executing gordon ramsay full english breakfast. Use a cast-iron skillet for even heat distribution and superior heat retention. The thermal mass helps maintain consistent temperatures as you add different components.

Timing coordination separates amateur attempts from professional results. Start components based on cooking time, not convenience. This systematic approach ensures everything finishes simultaneously.

Never crowd the pan. Overcrowding creates steam, preventing proper browning and resulting in soggy components that undermine your gordon ramsay full english breakfast quality.

Keep components warm in a low oven while preparing remaining items. Cold food kills breakfast enjoyment faster than burnt offerings.

The American Version of a Full English Breakfast

American breakfast plates typically substitute pancakes or French toast for black pudding and include hash browns as standard rather than optional. While Americans embrace bacon, they often prefer crispy strips over the softer back bacon traditional in gordon ramsay full english breakfast preparations.

American versions also frequently include country-style sausage patties instead of Cumberland links, and grits sometimes replace beans depending on regional preferences. The fundamental difference lies in sweetness — American breakfasts often incorporate syrup, sweet breads, and fruit elements that contrast with the savory focus of gordon ramsay full english breakfast tradition.

Storage and Leftovers

Leftover gordon ramsay full english breakfast components store differently. Cooked sausages and bacon refrigerate well for up to three days and reheat successfully in a skillet over medium heat. Avoid microwaving, which creates rubbery textures.

Leftover beans can be refrigerated and reheated gently on the stovetop with additional butter. Hash browns lose crispness when stored but work well incorporated into breakfast burritos or hash recipes.

According to Harvard Health guidelines, breakfast nutrition impacts energy levels throughout the day, making quality preparation worthwhile.

Never store cooked eggs or tomatoes — they don’t reheat successfully and compromise food safety standards we maintain at the firehouse.

For complementary recipes that pair well with this breakfast, explore our Gordon Ramsay baked beans recipe for homemade alternatives.

Frequently Asked Questions

What is Gordon Ramsay’s most famous dish?

Gordon Ramsay’s Beef Wellington remains his signature dish, though his breakfast techniques have gained enormous popularity through television appearances and cookbook publications.

What does Gordon Ramsey eat for breakfast?

Gordon Ramsay typically eats lighter breakfasts during busy periods, often opting for protein-rich options like scrambled eggs with smoked salmon, though he’s demonstrated full English breakfast preparation numerous times on television.

Final Thoughts

Mastering gordon ramsay full english breakfast requires patience, timing, and respect for each component. Like coordinating emergency responses, success depends on systematic preparation and precise execution rather than speed or shortcuts.

The satisfaction of presenting perfectly coordinated plates makes every learning mistake worthwhile. My wife now requests my gordon ramsay full english breakfast every weekend, and even the crew at Station 19 asks for the recipe.

Remember, cooking safety parallels fire safety — stay alert, maintain control, and never leave anything unattended. With practice and patience, you’ll create gordon ramsay full english breakfast results that rival any professional kitchen.

Stay safe,
Jack Sullivan

Jack Sullivan

Gordon Ramsay Full English Breakfast

Master Gordon Ramsay’s technique for the perfect full English breakfast with this comprehensive recipe featuring all traditional components cooked to perfection.
Prep Time 20 minutes
Cook Time 35 minutes
Total Time 55 minutes
Servings: 2 servings
Course: Breakfast
Cuisine: british
Calories: 892

Ingredients
  

  • 4 slices back bacon thick cut preferred
  • 4 Cumberland sausages high quality pork
  • 4 slices black pudding 1/2 inch thick
  • 4 large eggs room temperature
  • 2 large tomatoes halved
  • 8 oz button mushrooms quartered
  • 1 can baked beans 14 oz can
  • 2 cups hash browns frozen or fresh grated potato
  • 3 tbsp vegetable oil for cooking
  • 2 tbsp butter unsalted

Equipment

  • 1 Large Cast Iron Skillet 12-inch preferred for even heating
  • 1 Medium saucepan For beans and hash browns
  • 2 Warm Plates Keep in low oven for serving

Method
 

  1. 1️⃣ Preheat oven to 200°F (95°C). Place serving plates inside to warm. Heat large cast iron skillet over medium heat.
  2. 2️⃣ Add sausages to dry pan. Cook 12-15 minutes, turning every 3 minutes for even browning. Transfer to warm plate in oven.
  3. 3️⃣ Add 1 tablespoon oil to pan. Cook black pudding slices 2-3 minutes per side until crispy. Transfer to oven.
  4. 4️⃣ Cook bacon in same pan 3-4 minutes per side until golden but not crispy. Transfer to oven plate.
  5. 5️⃣ Add hash browns to pan with remaining oil. Cook 4-5 minutes per side until golden brown and crispy. Season with salt.
  6. 6️⃣ Meanwhile, heat beans in saucepan over low heat. Add butter and seasoning to taste.
  7. 7️⃣ Add mushrooms to hash brown pan. Cook 3-4 minutes until golden. Season and transfer to oven.
  8. 8️⃣ Add tomato halves cut-side down. Cook 2 minutes, flip, season, and cook 2 more minutes. Transfer to oven.
  9. 9️⃣ Finally, crack eggs into pan. Cook sunny-side up for 2-3 minutes until whites set but yolks remain runny.
  10. 🔟 Arrange all components on warm plates. Serve immediately with toast and HP sauce on the side.

Nutrition

Serving: 1gCalories: 892kcalCarbohydrates: 34gProtein: 42gFat: 67gSaturated Fat: 23gPolyunsaturated Fat: 8gMonounsaturated Fat: 28gCholesterol: 486mgSodium: 2156mgPotassium: 1243mgFiber: 6gSugar: 12gVitamin A: 892IUVitamin C: 23mgCalcium: 178mgIron: 8mg

Notes

Use high-quality ingredients for the best results – back bacon, proper Cumberland sausages, and fresh eggs make all the difference.
Keep components warm in a low oven while cooking each element to ensure everything stays hot for serving.
The key to Gordon Ramsay’s technique is proper timing and temperature control – never rush the cooking process.

Tried this recipe?

Let us know how it was!