Author

Jack Sullivan

Browsing

Gordon Ramsay Pan-Seared Scallops Recipe – Restaurant Quality at Home

Sunday night, long shift, and I choose to tackle Gordon Ramsay pan-seared scallops. After 16 hours of emergency calls and two structure fires, most people would order takeout. But something about those pristine scallops at the grocery store called to me. Maybe it was the challenge, or maybe I was still running on adrenaline from the day. Either way, I was about to learn that Gordon Ramsay pan-seared scallops demand the same precision and timing as a coordinated rescue operation.

The first time I attempted this dish, I treated it like any other protein – toss it in a hot pan and hope for the best. Big mistake. Scallops are unforgiving, and Ramsay’s technique requires military precision. But once you master the fundamentals, you’ll understand why this dish appears on every high-end menu from New York to London.

How to Make Gordon Ramsay’s Pan-Seared Scallops

Gordon Ramsay’s approach to pan-seared scallops centers on three non-negotiable principles: proper preparation, temperature control, and timing. In Hell’s Kitchen, contestants fail this dish more than any other because they rush the process. According to the USDA’s seafood safety guidelines, scallops must reach an internal temperature of 145°F, but Ramsay takes them off at 120°F for that perfect tender texture.

The secret lies in the searing technique. Ramsay uses what he calls the “hands-off” method – once those scallops hit the pan, you don’t touch them for 2-3 minutes. This allows the Maillard reaction to develop that golden caramelized crust that separates restaurant-quality scallops from home-cooked disasters.

Start with dry-packed scallops, never frozen. The side muscle – that tough strip attached to the side – must be removed. Pat them bone dry with paper towels, then let them sit at room temperature for 15 minutes. This step alone prevents 90% of scallop failures. Cold, wet scallops steam instead of sear, creating that rubbery texture that makes people swear off seafood forever.

How Does Hell’s Kitchen Cook Scallops

Hell’s Kitchen’s scallop service follows a strict protocol that I’ve adapted for home kitchens. The brigade system means every step is timed to perfection, and the same principles apply whether you’re cooking for Gordon Ramsay or your family dinner.

The pan selection matters more than most realize. Heavy-bottom stainless steel distributes heat evenly and prevents hot spots that char one side while leaving the other raw. Cast iron works but retains too much heat, making temperature control difficult for beginners.

Heat management separates professional kitchens from home disasters. The pan needs to reach smoking point – around 400°F – before the scallops make contact. You’ll hear that satisfying sizzle immediately, confirming proper temperature. If there’s no sizzle, the pan isn’t hot enough, and you’ll end up with gray, steamed scallops.

The butter basting technique comes from French cuisine but Ramsay perfected it for his kitchens. After flipping, add cold butter to the hot pan. As it melts and foams, tilt the pan and baste each scallop continuously. This creates that rich, nutty flavor while ensuring even cooking throughout. Professional chefs call this “arroser,” and it’s the difference between good and exceptional scallops.

What Makes Gordon Ramsay’s Scallops Special

Gordon Ramsay pan-seared scallops achieve perfection through attention to details that most home cooks overlook. The seasoning for Gordon Ramsay pan-seared scallops happens in stages – first, a generous coating of coarse sea salt and cracked black pepper applied 5 minutes before cooking. This draws out excess moisture while allowing the seasoning to penetrate the protein.

The cooking oil choice impacts both flavor and performance of Gordon Ramsay pan-seared scallops. Ramsay uses light olive oil or grapeseed oil for the initial sear because of their high smoke points. Butter comes later for flavor, not as the primary cooking fat for Gordon Ramsay pan-seared scallops. This prevents burned butter taste while maintaining that rich finish Hell’s Kitchen is known for.

Temperature precision defines professional cooking of Gordon Ramsay pan-seared scallops. Home cooks often overcook scallops, creating that bouncy texture reminiscent of pencil erasers. Gordon Ramsay’s method produces scallops with a golden exterior and a barely opaque center – what the industry calls “medium-rare.” The internal temperature should reach 120°F for perfect Gordon Ramsay pan-seared scallops, then carry-over cooking finishes the process off the heat.

For those interested in perfecting their shrimp scampi technique, many of these same principles apply to other seafood preparations.

Ingredients That Actually Matter for Gordon Ramsay Pan-Seared Scallops

Fresh ingredients for Gordon Ramsay pan-seared scallops recipe including sea scallops and seasonings

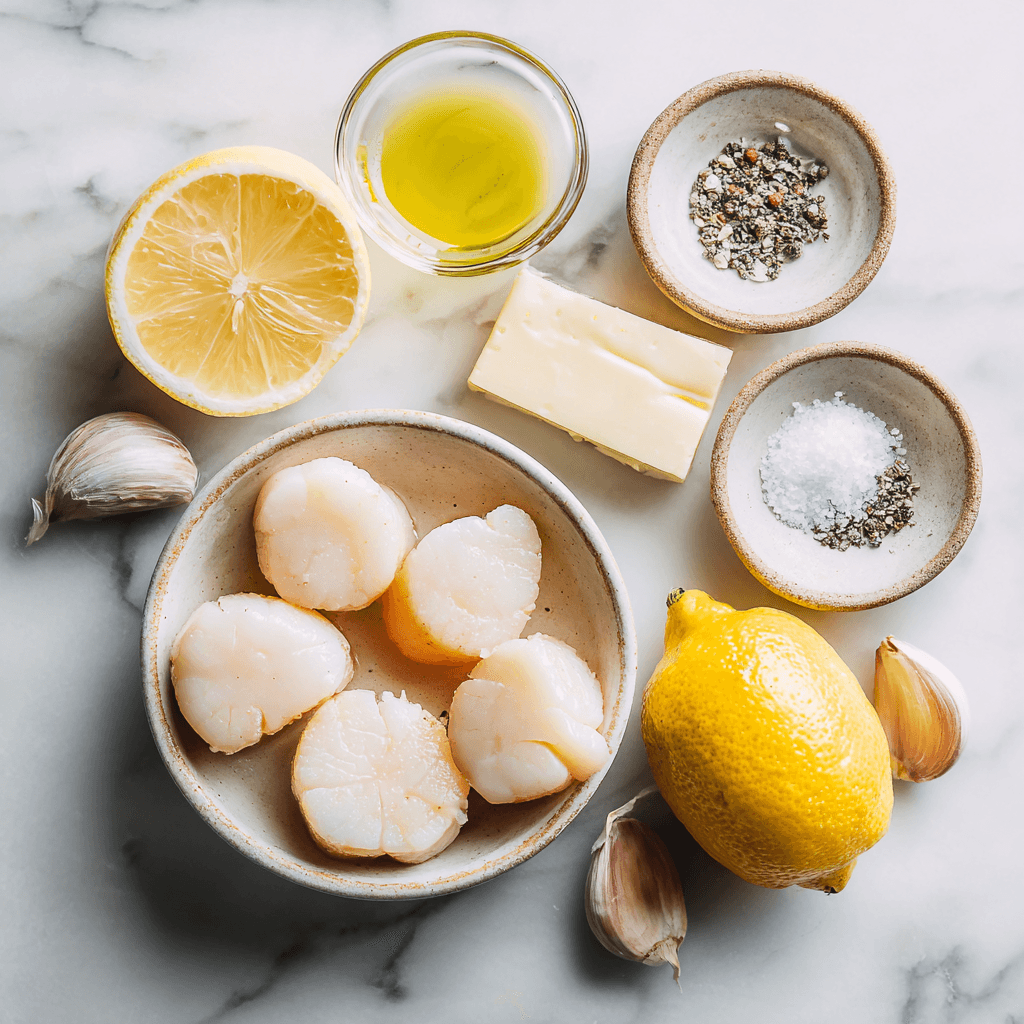
Quality ingredients make the difference between restaurant success and home disappointment. U-10 scallops – meaning 10 or fewer per pound – provide the size needed for proper searing. Smaller scallops cook too quickly, making temperature control nearly impossible.

Dry-packed versus wet-packed scallops isn’t a preference – it’s a requirement. Wet-packed scallops contain sodium tripolyphosphate, which retains water and prevents proper browning. They’ll release moisture in the pan, creating steam that ruins the sear. Dry-packed scallops cost more but deliver exponentially better results.

European-style butter contains higher fat content than regular butter, creating superior basting results. If unavailable, regular unsalted butter works, but watch for faster browning due to higher water content.

Sea salt provides better texture and flavor than table salt. The larger crystals dissolve slowly, creating micro-pockets of seasoning rather than uniform saltiness. Ramsay prefers Maldon sea salt, but any flaky sea salt achieves similar results.

Step-by-Step Instructions

Preparation Phase: Remove scallops from refrigeration 15 minutes before cooking. Pat completely dry with paper towels, checking for any remaining side muscles. Season generously with sea salt and cracked black pepper, allowing 5 minutes for penetration.

Cooking Phase: Heat your heaviest pan over medium-high heat until smoking. Add olive oil and swirl to coat evenly. Gently place scallops in the pan, ensuring adequate space between each one. Resist the urge to move them – patience creates the crust.

After 2-3 minutes, check the bottom edge for golden-brown color. Flip using tongs, immediately adding cold butter to the pan. Tilt the pan at a 45-degree angle and continuously baste the scallops with the foaming butter for 1-2 minutes.

Remove from heat and finish with fresh lemon juice. The residual heat will continue cooking the scallops to perfect doneness.

Pro Tips

Temperature control makes or breaks this dish. If your pan isn’t smoking when you add the oil, wait longer. Proper searing requires aggressive heat that many home cooks fear but professionals embrace.

Never crowd the pan. Overlapping scallops create steam, preventing proper browning. Cook in batches if necessary – better to serve perfect scallops in waves than mediocre ones all at once.

The flip test: gently lift one edge of a scallop after 2 minutes. If it releases easily and shows golden color, it’s ready to flip. If it sticks, give it another 30 seconds.

Trust the process. New cooks often flip too early, move the scallops around, or reduce heat when the pan smokes. These adjustments lead to failure. Follow the technique exactly as written, especially the first few times.

Storage and Leftovers

Scallops don’t reheat well, so plan portions accordingly. The delicate texture becomes rubber when reheated, and the carefully developed crust disappears. Cook only what you’ll serve immediately.

If you must store cooked scallops, refrigerate for no more than 24 hours. Reheat gently in a low oven (200°F) for just enough time to remove the chill. Never use a microwave, which creates steam and destroys texture.

Fresh scallops can be stored in the refrigerator for 1-2 days maximum. Keep them on ice in a perforated container, allowing drainage to prevent moisture accumulation.

For those planning a complete seafood menu, consider pairing these scallops with Gordon Ramsay’s grilled salmon for an impressive dinner presentation.

Frequently Asked Questions

What oil does Gordon Ramsey use for scallops?

Gordon Ramsay uses light olive oil or grapeseed oil for searing scallops because of their high smoke points. He adds butter later for flavor, not as the primary cooking fat.

Conclusion

Mastering Gordon Ramsay pan-seared scallops requires the same discipline as any emergency response – preparation, precision, and confidence in your training. The technique isn’t complicated, but it demands respect for the process and quality ingredients.

The investment in proper scallops and technique pays dividends in results. Once you experience that perfect golden crust giving way to tender, sweet scallop meat, you’ll understand why this dish commands premium prices in restaurants worldwide.

For your next culinary challenge, try pairing these scallops with Gordon Ramsay’s green peppercorn sauce for a restaurant-worthy presentation that rivals any high-end establishment.

Stay safe,
Jack Sullivan

Jack Sullivan

Gordon Ramsay Pan-Seared Scallops

Restaurant-quality pan-seared scallops with perfect golden crust using Gordon Ramsay’s technique from Hell’s Kitchen
Prep Time 15 minutes
Cook Time 6 minutes
Total Time 21 minutes
Servings: 4 servings
Course: Appetizer
Cuisine: british
Calories: 185

Ingredients
  

  • 12 large sea scallops U-10 size, side muscles removed
  • 2 tablespoons olive oil high heat cooking oil
  • 3 tablespoons unsalted butter European style preferred
  • 1 teaspoon sea salt coarse ground
  • 1/2 teaspoon black pepper freshly cracked
  • 1 large lemon for juice and zest

Equipment

  • 1 Heavy-bottom stainless steel pan Essential for even heat distribution
  • 1 Paper towels For patting scallops dry
  • 1 Tongs For safe flipping

Method
 

  1. 1️⃣ Remove scallops from refrigerator 15 minutes before cooking. Pat completely dry with paper towels and remove side muscles if still attached.
  2. 2️⃣ Season both sides of scallops generously with sea salt and cracked black pepper. Let sit for 5 minutes to develop flavors.
  3. 3️⃣ Heat heavy-bottom pan over medium-high heat until smoking. Add olive oil and swirl to coat evenly.
  4. 4️⃣ Gently place scallops in pan, ensuring they don’t touch each other. Do not move them for 2-3 minutes until golden crust forms.
  5. 5️⃣ Flip scallops using tongs and immediately add butter to pan. Tilt pan and baste scallops with foaming butter for 1-2 minutes.
  6. 6️⃣ Remove from heat, squeeze fresh lemon juice over scallops, and serve immediately while hot.

Nutrition

Serving: 1gCalories: 185kcalCarbohydrates: 4gProtein: 18gFat: 11gSaturated Fat: 5gPolyunsaturated Fat: 1gMonounsaturated Fat: 4gCholesterol: 45mgSodium: 590mgPotassium: 310mgSugar: 2gVitamin A: 85IUVitamin C: 8mgCalcium: 35mgIron: 1.2mg

Notes

Temperature is crucial – scallops should reach 120°F internal temperature for perfect doneness.
Never overcrowd the pan as this creates steam and prevents proper searing.
Quality matters – choose dry-packed scallops over wet-packed for better browning.

Tried this recipe?

Let us know how it was!

Three years ago, I was convinced Gordon Ramsay Mushroom And Leek Pasta was impossible to recreate at home. I mean, come on — how could a regular guy like me, armed with nothing but basic kitchen skills and a healthy dose of skepticism, possibly match what Gordon Ramsay creates in his professional kitchen? I figured it was one of those dishes that looked deceptively simple but required years of culinary school to pull off properly.

Boy, was I wrong.

After countless failed attempts at various “restaurant-quality” recipes, I stumbled across the specific techniques that make Gordon Ramsay Mushroom And Leek Pasta work at home. The secret isn’t in exotic ingredients or professional equipment — it’s in understanding why each step matters. Today, I’m sharing exactly what I learned, because if this skeptical ex-firefighter can master Gordon Ramsay Mushroom And Leek Pasta, anyone can.

What is Gordon Ramsay’s Favorite Pasta Dish?

While Gordon Ramsay has created hundreds of pasta dishes throughout his career, his mushroom and leek pasta represents his philosophy perfectly: simple ingredients elevated through proper technique. This Gordon Ramsay Mushroom And Leek Pasta showcases his ability to transform humble vegetables into something extraordinary.

The dish reflects Ramsay’s British roots — leeks are a staple in British cooking — while incorporating Italian pasta techniques he’s mastered over decades. What makes this particular Gordon Ramsay Mushroom And Leek Pasta special is how it balances earthy mushrooms with the mild onion flavor of leeks, all brought together with a silky wine and cream sauce. Check out Gordon Ramsay’s signature dishes to understand his broader cooking philosophy.

How Does Gordon Ramsay Cook Leeks?

The key to perfect leeks in Gordon Ramsay Mushroom And Leek Pasta lies in proper preparation and cooking technique. Gordon always emphasizes cleaning leeks thoroughly — they trap sand and grit between their layers, which can ruin the entire dish.

First, trim the dark green tops and root end, keeping only the white and light green portions. Slice them lengthwise, then cut into thin half-moons. The crucial step is soaking these sliced leeks in cold water for several minutes, agitating them to release any hidden dirt.

For cooking, Gordon adds leeks after the mushrooms have developed their golden color. This timing prevents the leeks from becoming mushy while ensuring they cook through properly. The leeks should be tender but still have slight bite when the Gordon Ramsay Mushroom And Leek Pasta is finished. Understanding professional cooking techniques helps achieve these restaurant-quality results at home.

Ingredients That Actually Matter for Gordon Ramsay Mushroom And Leek Pasta

Fresh ingredients for Gordon Ramsay mushroom and leek pasta recipe arranged on marble surface

Not all ingredients are created equal, and Gordon Ramsay Mushroom And Leek Pasta proves this point. The quality of your mushrooms makes or breaks this dish. I learned this lesson the hard way after using pre-sliced, watery mushrooms from a package.

Fresh mushrooms with good moisture content will release their liquid properly during cooking, concentrating their flavor. Button mushrooms work fine, but mixing in cremini or shiitake adds depth that elevates the entire Gordon Ramsay Mushroom And Leek Pasta experience.

The cream matters too. Heavy cream with at least 35% fat content creates the silky texture Gordon achieves. Lower-fat alternatives will break or curdle when combined with the wine reduction. According to USDA guidelines, heavy cream provides the proper fat content for stable sauce emulsification.

For pasta, fresh fettuccine works beautifully, but quality dried pasta produces excellent results. The pasta water you reserve becomes crucial for achieving the right consistency in your Gordon Ramsay Mushroom And Leek Pasta.

Step-by-Step Instructions

Creating perfect Gordon Ramsay Mushroom And Leek Pasta requires timing and technique. Start by getting your pasta water boiling — this ensures everything comes together at the right moment.

While the pasta cooks, prepare your vegetables. Clean and slice the leeks as described earlier, and cut mushrooms into uniform pieces. Consistency in size means even cooking throughout your Gordon Ramsay Mushroom And Leek Pasta.

The magic happens in the pan technique. Heat olive oil and butter together, then add mushrooms in a single layer. Don’t overcrowd — cook in batches if necessary. This allows proper browning instead of steaming. Once the mushrooms develop golden color, add the leeks.

The wine addition serves multiple purposes in Gordon Ramsay Mushroom And Leek Pasta. It deglazes the pan, picking up all those beautiful browned bits, while adding acidity that balances the rich cream. Let the wine reduce by half before adding cream — this concentrates the flavors and prevents the sauce from being too thin.

Pro Tips for Restaurant-Quality Results

Temperature control separates amateur cooking from professional results in Gordon Ramsay Mushroom And Leek Pasta. Keep your heat at medium-high for the initial mushroom cooking, then reduce to medium when adding cream. High heat will cause the cream to break, leaving you with an unappetizing, curdled mess.

Pasta water is your secret weapon. Save at least a cup before draining, and add it gradually when combining everything. The starch in pasta water helps bind the sauce to the pasta, creating that glossy, restaurant-quality finish Gordon achieves in his Gordon Ramsay Mushroom And Leek Pasta.

Timing the Parmesan addition matters enormously. Add it off the heat while tossing — the residual heat melts the cheese without making it stringy or clumpy. Fresh grated Parmesan behaves completely differently than pre-grated varieties, so invest in a good piece of aged Parmigiano-Reggiano.

Consider serving this with Gordon Ramsay’s garlic bread for a complete restaurant-style meal that complements the creamy pasta perfectly.

Storage and Leftovers

Gordon Ramsay Mushroom And Leek Pasta keeps well for up to three days in the refrigerator, though the texture changes slightly. The cream sauce will thicken considerably when cold, so add a splash of milk or cream when reheating.

Reheat gently in a skillet over low heat rather than the microwave. This allows you to adjust the consistency and prevents the sauce from breaking. Add a tablespoon of pasta water or cream if needed to restore the silky texture that makes Gordon Ramsay Mushroom And Leek Pasta special.

For best results, store the pasta and sauce together rather than separately. This prevents the pasta from drying out and helps maintain the integrated flavors you worked to develop.

Frequently Asked Questions

How to make mushroom pasta dish?

Start with properly sautéed mushrooms, develop good color before adding liquids, and finish with cream and cheese for richness.

Looking to expand your pasta repertoire? Try Gordon Ramsay’s meatballs and spaghetti or his ground turkey pasta for different flavor profiles using similar techniques.

This Gordon Ramsay Mushroom And Leek Pasta transformed my skepticism into genuine appreciation for how proper technique elevates simple ingredients. The dish proves that restaurant-quality cooking isn’t about expensive ingredients or fancy equipment — it’s about understanding why each step matters and executing with care.

Stay safe,
Jack Sullivan

Gordon Ramsay mushroom and leek pasta recipe served in white bowl with creamy sauce and fresh herbs
Jack Sullivan

Gordon Ramsay Mushroom And Leek Pasta

A creamy, restaurant-quality pasta dish featuring sautéed mushrooms and leeks in a rich white wine cream sauce, inspired by Gordon Ramsay’s cooking techniques.
Prep Time 15 minutes
Cook Time 20 minutes
Total Time 35 minutes
Servings: 4 servings
Course: Main Course
Cuisine: Italian
Calories: 485

Ingredients
  

  • 1 pound fresh fettuccine pasta or dried pasta
  • 1 pound mixed mushrooms button, cremini, or shiitake
  • 2 large leeks white and light green parts only
  • 1 cup heavy cream
  • 1/2 cup dry white wine Sauvignon Blanc or Pinot Grigio
  • 3 cloves garlic minced
  • 1/2 cup fresh Parmesan cheese grated
  • 3 tablespoons unsalted butter
  • 2 tablespoons olive oil
  • salt and black pepper to taste
  • 2 tablespoons fresh parsley chopped, for garnish

Equipment

  • Large Skillet 12-inch non-stick or stainless steel
  • Large Pot For boiling pasta
  • Colander For draining pasta

Method
 

  1. 1️⃣ Bring a large pot of salted water to boil. Cook pasta according to package directions until al dente. Reserve 1 cup pasta water before draining.
  2. 2️⃣ Clean leeks thoroughly and slice into thin half-moons. Slice mushrooms into even pieces, about 1/4-inch thick.
  3. 3️⃣ Heat olive oil and 1 tablespoon butter in large skillet over medium-high heat. Add mushrooms, season with salt and pepper. Cook 5-6 minutes until golden brown.
  4. 4️⃣ Add leeks to pan with mushrooms. Cook 3-4 minutes until softened. Add garlic and cook 30 seconds until fragrant.
  5. 5️⃣ Pour in white wine, scraping up any browned bits. Let wine reduce by half, about 2 minutes.
  6. 6️⃣ Add heavy cream and bring to gentle simmer. Cook 2-3 minutes until slightly thickened.
  7. 7️⃣ Add cooked pasta to skillet with remaining 2 tablespoons butter. Toss gently, adding pasta water as needed for silky consistency.
  8. 8️⃣ Remove from heat. Add Parmesan cheese and half the parsley. Toss until cheese melts. Season with salt and pepper to taste.
  9. 9️⃣ Serve immediately, garnished with remaining parsley and extra Parmesan cheese.

Nutrition

Serving: 1gCalories: 485kcalCarbohydrates: 58gProtein: 18gFat: 22gSaturated Fat: 12gPolyunsaturated Fat: 2gMonounsaturated Fat: 6gCholesterol: 65mgSodium: 420mgPotassium: 580mgFiber: 4gSugar: 6gVitamin A: 1250IUVitamin C: 18mgCalcium: 280mgIron: 3mg

Notes

Don’t skip reserving pasta water – it’s crucial for achieving the perfect creamy consistency.
Clean leeks thoroughly by slicing and soaking in cold water to remove all sand and grit.
Use a mix of mushroom varieties for complex flavor – button, cremini, and shiitake work beautifully together.

Tried this recipe?

Let us know how it was!

My biggest kitchen disaster? It involved Gordon Ramsay Cordon Bleu… Let me tell you, there’s something about attempting a chef’s signature dish that brings out either the best or worst in home cooks. For me, it was definitely the latter—at first. Picture this: chicken breasts flying across the kitchen, cheese oozing everywhere but where it should be, and a smoke detector screaming louder than Ramsay himself during Hell’s Kitchen. But like any good firefighter, I don’t give up easily, especially when it comes to mastering a classic like Gordon Ramsay Cordon Bleu.

After that initial disaster, I studied the technique, practiced the roll, and finally conquered this elegant yet approachable dish. Now I’m sharing what I learned so you can skip straight to the success part of the journey.

What Are Some Common Mistakes When Making Cordon Bleu?

When it comes to Gordon Ramsay Cordon Bleu, the devil is truly in the details. The most frequent mistakes I’ve seen (and made myself) start with the chicken itself. Many home cooks don’t pound the chicken breast thin enough, resulting in undercooked centers or overcooked exteriors. According to the USDA Food Safety guidelines, chicken must reach an internal temperature of 165°F to be safe—something that’s much easier to achieve with evenly pounded meat.

Another critical error is overstuffing the chicken. While it’s tempting to pile on extra cheese and ham, this inevitably leads to a blowout during cooking. As Gordon Ramsay demonstrates in many of his recipes, restraint with fillings creates a more balanced and manageable final product.

The breading process trips up many cooks too. The classic flour-egg-breadcrumb sequence isn’t just tradition—it’s food science. The flour helps the egg adhere, and the egg helps the breadcrumbs stick. Skip a step, and you’ll end up with a sad, naked chicken roll instead of that gorgeous golden crust that makes Gordon Ramsay’s chicken dishes so appealing.

Ingredients That Actually Matter for Gordon Ramsay Cordon Bleu

Fresh ingredients for Gordon Ramsay cordon bleu recipe laid out on kitchen counter

Not all ingredients are created equal when making Cordon Bleu. The quality of your cheese makes a tremendous difference—opt for genuine Swiss or Gruyère rather than processed alternatives. The meltability and flavor complexity elevate the entire dish.

The breadcrumb choice is equally important. While traditional recipes call for fine breadcrumbs, Gordon Ramsay often uses panko for extra crispiness. This Japanese-style breadcrumb creates that restaurant-quality crunch that’s hard to achieve at home.

Don’t overlook the mustard either. A small amount of Dijon whisked into your egg mixture adds a subtle tang that balances the richness of the cheese and ham. It’s a small detail that makes a big difference, similar to how Gordon approaches his signature sauces.

Step-by-Step Instructions

The key to perfect Gordon Ramsay Cordon Bleu lies in preparation and technique. Start by properly pounding your chicken to an even thickness. Place it between plastic wrap and use gentle, even strokes with a meat mallet—think precision, not power.

When rolling the chicken, keep it tight but not strangled. Too loose and it falls apart; too tight and the filling erupts during cooking. Secure with toothpicks if needed, but remember to remove them before serving!

The searing stage is critical—you want that beautiful golden crust before the chicken goes into the oven. Use a combination of oil and butter for the best flavor and color, and make sure your pan is properly heated before adding the chicken.

Finishing in the oven ensures even cooking without burning the exterior. An instant-read thermometer is invaluable here—it’s the difference between perfectly juicy chicken and a dry disappointment.

Pro Tips

For extra flavor, try brining your chicken breasts for 30 minutes before starting. A simple solution of salt water improves moisture retention and seasons the meat from within.

If you’re struggling with keeping the roll intact, try chilling the assembled but unbreaded rolls for 30 minutes. This firms up the cheese slightly and makes the breading process easier.

For an extra-crispy coating, double-dip in the egg and breadcrumbs. This creates a thicker shell that stands up to the moisture from the filling, much like the technique used in Gordon Ramsay’s crispy chicken dishes.

Storage/Leftovers

Properly stored in an airtight container, Gordon Ramsay Cordon Bleu will keep in your refrigerator for up to 3 days. To reheat, avoid the microwave (more on that below) and instead use a 300°F oven for about 15 minutes. This gentle reheating preserves the crispy exterior while warming the filling without causing it to explode.

For make-ahead convenience, you can prepare the rolls through the breading stage and freeze them uncooked. Place them on a baking sheet until frozen solid, then transfer to freezer bags. When ready to cook, thaw overnight in the refrigerator before searing and baking as directed, adding a few extra minutes to the cooking time.

Serving Suggestions

Gordon Ramsay typically serves his Cordon Bleu with sophisticated yet simple sides. A light arugula salad dressed with lemon vinaigrette provides a refreshing contrast to the rich chicken. For starch, consider Gordon Ramsay’s fondant potatoes or a classic mashed potato.

A small drizzle of Dijon cream sauce elevates the presentation and adds another layer of flavor. Simply reduce heavy cream with a teaspoon of Dijon mustard, seasoning to taste.

Frequently Asked Questions

What is a fun fact about cordon bleu?

The term “Cordon Bleu” translates to “blue ribbon” in French, symbolizing excellence. It originated from L’Ordre des Chevaliers du Saint-Esprit, a 16th-century French order of knights who wore blue ribbons and were known for their exceptional culinary standards. Today, the prestigious cooking school Le Cordon Bleu continues this tradition of culinary excellence worldwide.

How long can I keep cordon bleu?

Cooked Cordon Bleu can be refrigerated for up to 3 days in an airtight container. For longer storage, freeze the cooked dish for up to 2 months. Uncooked, breaded Cordon Bleu can be frozen for up to 3 months if properly wrapped to prevent freezer burn. Always thaw frozen Cordon Bleu in the refrigerator overnight before reheating or cooking.

Why can’t you microwave chicken cordon bleu?

Microwaving chicken cordon bleu is a recipe for disaster for several reasons. First, the intense, uneven heat causes the cheese to melt too quickly and explode out of the chicken. Second, the breaded coating loses all crispiness and becomes soggy or rubbery. Finally, the chicken itself often cooks unevenly, resulting in dry edges and potentially undercooked centers. For best results, always reheat in a conventional oven at a moderate temperature.

Conclusion

Mastering Gordon Ramsay’s Cordon Bleu might seem intimidating at first, but with attention to detail and proper technique, it’s an achievable classic that’s sure to impress. My journey from kitchen disaster to confident execution proves that persistence pays off. The combination of crispy exterior, tender chicken, and melty cheese-ham filling creates a perfect balance of textures and flavors that’s well worth the effort.

Remember, even professional chefs make mistakes—what matters is learning from them. So don’t be discouraged if your first attempt isn’t perfect. Each time you make this dish, you’ll refine your technique until you’re creating restaurant-quality Cordon Bleu that would make Gordon Ramsay himself proud.

Whether you’re cooking for a special occasion or simply wanting to elevate your weeknight dinner, this Gordon Ramsay Cordon Bleu recipe delivers a gourmet experience that’s sure to become a favorite in your culinary repertoire.
Stay safe,
Jack Sullivan

Gordon Ramsay style chicken cordon bleu sliced to show melted cheese and ham filling
Jack Sullivan

Gordon Ramsay Cordon Bleu

Restaurant-quality chicken cordon bleu with melted Swiss cheese and ham, perfectly breaded and golden brown using Gordon Ramsay’s techniques.
Prep Time 25 minutes
Cook Time 20 minutes
Total Time 45 minutes
Servings: 4 servings
Course: Main Course
Cuisine: british, French
Calories: 485

Ingredients
  

  • 4 boneless skinless chicken breasts 6-8 oz each, pounded to 1/4 inch thickness
  • 8 slices Swiss cheese thinly sliced
  • 8 slices deli ham thinly sliced
  • 1 cup all-purpose flour
  • 3 large eggs beaten
  • 2 cups panko breadcrumbs
  • 1 tsp salt
  • 1/2 tsp black pepper freshly ground
  • 3 tbsp vegetable oil for frying

Equipment

  • 1 Meat Mallet For pounding chicken breasts thin
  • 3 Shallow bowls For breading station setup
  • 1 Large oven-safe skillet Cast iron preferred for even cooking

Method
 

  1. 1️⃣ Preheat oven to 375°F (190°C). Place chicken breasts between plastic wrap and pound to 1/4 inch thickness using meat mallet.
  2. 2️⃣ Season chicken with salt and pepper. Place 2 slices cheese and 2 slices ham on each breast, leaving 1-inch border.
  3. 3️⃣ Roll chicken tightly from one end, tucking in sides. Secure with toothpicks if needed.
  4. 4️⃣ Set up breading station: flour in one bowl, beaten eggs in second, panko breadcrumbs in third.
  5. 5️⃣ Dredge each chicken roll in flour, then egg, then breadcrumbs, pressing gently to adhere.
  6. 6️⃣ Heat oil in large oven-safe skillet over medium-high heat. Brown chicken rolls on all sides, about 6-8 minutes total.
  7. 7️⃣ Transfer skillet to preheated oven and bake for 15-18 minutes until internal temperature reaches 165°F (74°C).
  8. 8️⃣ Rest for 5 minutes before slicing. Remove toothpicks and slice into 1-inch thick rounds to serve.

Nutrition

Serving: 1gCalories: 485kcalCarbohydrates: 28gProtein: 45gFat: 22gSaturated Fat: 8gPolyunsaturated Fat: 3gMonounsaturated Fat: 7gCholesterol: 185mgSodium: 925mgPotassium: 485mgFiber: 2gSugar: 2gVitamin A: 320IUVitamin C: 2mgCalcium: 285mgIron: 3mg

Notes

Use a meat thermometer to ensure internal temperature reaches 165°F for food safety.
Don’t skip the resting period – it allows juices to redistribute for better texture.
For extra crispy coating, double-bread by repeating the egg and breadcrumb steps.

Tried this recipe?

Let us know how it was!

My biggest kitchen disaster? It involved Gordon Ramsay barbecue steak and nearly cost me my marriage. Picture this: anniversary dinner, trying to impress my wife with restaurant-quality Gordon Ramsay barbecue steak, and I managed to turn premium ribeye into charcoal while simultaneously setting off three smoke alarms. Twenty years of firefighting experience, and I couldn’t handle a simple steak. That embarrassing failure taught me everything I know about mastering Gordon Ramsay’s barbecue steak technique.

After studying Gordon’s methods and practicing until my neighbors complained about the smoke, I’ve perfected this Gordon Ramsay barbecue steak recipe. The secret isn’t just in the cooking—it’s in understanding why each step matters for achieving that restaurant-quality result at home.

What is Gordon Ramsay’s Signature Steak Dish?

Gordon Ramsay’s signature approach to barbecue steak combines his classical French training with bold flavors and precise technique. His method focuses on three core principles: proper seasoning, high-heat searing, and strategic basting with aromatics. Unlike many chefs who overcomplicate steak preparation, Gordon’s Gordon Ramsay barbecue steak philosophy emphasizes simplicity executed perfectly.

The signature elements include generous seasoning with coarse salt and cracked black pepper, cooking over intense heat for proper caramelization, and finishing with butter, garlic, and fresh herbs for depth. According to the USDA guidelines on safe meat preparation, proper technique ensures both safety and flavor development. This approach transforms simple ingredients into an exceptional Gordon Ramsay barbecue steak that rivals any steakhouse.

What Kind of Steak Does Gordon Ramsay Use?

Gordon Ramsay consistently chooses ribeye for his barbecue steak preparations, and there’s solid reasoning behind this selection. Ribeye offers the perfect balance of marbling, tenderness, and flavor intensity that responds beautifully to his high-heat grilling technique. The intramuscular fat in ribeye bastes the meat naturally during cooking, creating the rich, juicy texture that defines exceptional Gordon Ramsay barbecue steak.

When selecting ribeye for Gordon Ramsay barbecue steak, look for steaks with good marbling throughout, consistent thickness of about one inch, and bright red color without excessive moisture. The marbling should appear as thin white streaks distributed evenly through the meat. This fat content is crucial for achieving the tender, flavorful results that make Gordon Ramsay barbecue steak special. You’ll want to check out our guide on Gordon Ramsay’s signature dishes to understand how he approaches different cuts of meat.

How to Cook a Perfect Barbecue Steak?

Cooking perfect Gordon Ramsay barbecue steak requires understanding heat control, timing, and the science behind proper searing. The key is creating two distinct cooking phases: the high-heat sear for flavor development and the controlled finish for perfect doneness. Gordon’s technique maximizes the Maillard reaction—the chemical process that creates those complex, savory flavors we associate with perfectly cooked steak.

Temperature control is absolutely critical for Gordon Ramsay barbecue steak success. Your grill needs to reach 450-500°F for proper searing, hot enough to create immediate caramelization without burning. The steak should hit the grates and produce an immediate sizzle—this sound indicates proper heat for achieving restaurant-quality results. Research from Harvard Health Publishing shows that proper high-heat searing actually helps preserve moisture within the meat while developing flavor complexity.

The seasoning timing matters tremendously for Gordon Ramsay barbecue steak. Salt the steaks generously 30 minutes before cooking, allowing the salt to penetrate and begin breaking down proteins for maximum tenderness. This pre-seasoning step is what separates amateur grilling from professional results.

Ingredients That Actually Matter for Gordon Ramsay Barbecue Steak

Raw ribeye steaks and seasonings for Gordon Ramsay barbecue steak recipe

Quality ingredients make the difference between good steak and exceptional Gordon Ramsay barbecue steak. Start with premium ribeye steaks, preferably USDA Prime or Choice grade, cut to consistent one-inch thickness. The marbling should be evident but not excessive—you want flavor enhancement, not grease.

Coarse sea salt provides better texture and flavor distribution than table salt for Gordon Ramsay barbecue steak. The larger crystals adhere better to the meat surface and dissolve slowly, creating proper seasoning penetration. Freshly cracked black pepper adds aromatic intensity that pre-ground pepper simply cannot match.

Extra virgin olive oil serves multiple purposes in Gordon Ramsay barbecue steak preparation: it helps seasonings adhere, promotes even browning, and adds subtle flavor complexity. Fresh thyme and crushed garlic provide aromatic compounds that infuse the meat during cooking, while unsalted butter enables the basting technique that creates Gordon’s signature finish.

Step-by-Step Instructions

Preparation Phase: Remove your ribeye steaks from refrigeration exactly 30 minutes before cooking—this ensures even cooking throughout. Pat each steak completely dry with paper towels, removing all surface moisture that could interfere with proper searing. Preheat your grill to high heat, aiming for 450-500°F.

Seasoning: Drizzle steaks with olive oil and season generously with coarse salt and freshly cracked black pepper on both sides. The seasoning should be visible and substantial—don’t be timid here, as this creates the flavorful crust that defines Gordon Ramsay barbecue steak.

Initial Searing: Place steaks on the hottest part of your grill and resist the urge to move them. Cook for 3-4 minutes, allowing proper sear marks to develop. The steak should release easily when properly seared—if it sticks, it needs more time.

The Flip and Aromatics: Flip each steak once and immediately add crushed garlic cloves and thyme sprigs beside the steaks on the grill. These aromatics will char slightly, releasing compounds that enhance the overall flavor profile of your Gordon Ramsay barbecue steak.

Finishing: Cook another 3-4 minutes for medium-rare doneness, checking internal temperature with a meat thermometer (130°F for medium-rare). In the final minute, add butter and spoon it over the steaks repeatedly—this basting technique adds richness and helps achieve Gordon’s signature finish.

Pro Tips from a Former Firefighter

After years of perfecting Gordon Ramsay barbecue steak, I’ve learned several crucial details that make the difference between good and exceptional results. First, never press down on your steaks with a spatula—this squeezes out valuable juices that contribute to flavor and tenderness. Trust the process and let heat do the work.

Temperature monitoring is essential for consistent Gordon Ramsay barbecue steak results. Invest in a reliable meat thermometer and learn the target temperatures: 125°F for rare, 130°F for medium-rare, 140°F for medium. These numbers are your guarantee of perfect doneness every time.

The resting period is non-negotiable for Gordon Ramsay barbecue steak. Allow steaks to rest for 5 minutes after cooking, which redistributes juices throughout the meat for maximum tenderness. Cover loosely with foil to maintain temperature while resting.

Storage and Leftovers

Properly cooked Gordon Ramsay barbecue steak should be consumed immediately for best quality, but leftovers can be stored safely in refrigeration for up to three days. Wrap cooled steaks tightly in plastic wrap or store in airtight containers to prevent moisture loss and flavor transfer.

For reheating leftover Gordon Ramsay barbecue steak, avoid the microwave which creates tough, rubbery texture. Instead, bring steaks to room temperature and warm gently in a 250°F oven for 5-7 minutes, just until heated through. This method preserves the original texture and flavor profile. Consider our Gordon Ramsay pepper sauce recipe as an excellent complement to reheated steak.

Cold leftover steak works beautifully sliced thin for salads or sandwiches. The intense flavors developed during proper Gordon Ramsay barbecue steak preparation actually improve when the meat has time to rest overnight, making leftovers a valuable bonus rather than a compromise.

Frequently Asked Questions

How long does it take to cook steak on a barbecue?

For 1-inch thick ribeye steaks using Gordon Ramsay’s method, total cooking time is 6-8 minutes (3-4 minutes per side) for medium-rare doneness at high heat (450-500°F). Thicker steaks require proportionally longer cooking times.

What internal temperature should I target?

For Gordon Ramsay barbecue steak, aim for 130°F internal temperature for perfect medium-rare doneness. Use a digital meat thermometer inserted into the thickest part of the steak for accurate readings.

Can I use different cuts of steak?

While Gordon prefers ribeye, his barbecue technique works well with other premium cuts like New York strip or filet mignon. Adjust cooking times based on thickness and desired doneness levels.

Should I marinate the steaks beforehand?

Gordon’s approach relies on high-quality meat and proper seasoning rather than marinades. The salt, pepper, and aromatics provide sufficient flavor enhancement for excellent Gordon Ramsay barbecue steak results.

This Gordon Ramsay barbecue steak technique transformed my grilling from embarrassing disasters to restaurant-quality results. The combination of proper preparation, high-heat cooking, and strategic finishing creates steaks that rival any steakhouse. With practice and attention to detail, you’ll master this method and impress everyone at your table. For your next dinner party, consider pairing this with our Gordon Ramsay fondant potatoes for a complete restaurant-quality experience.

Stay safe,
Jack Sullivan

Gordon Ramsay style barbecue steak with perfect grill marks and herb butter
Jack Sullivan

Gordon Ramsay Barbecue Steak

Master Gordon Ramsay’s signature barbecue steak technique with perfectly seasoned ribeye, proper grilling methods, and his famous finishing touches for restaurant-quality results at home.
Prep Time 15 minutes
Cook Time 12 minutes
Total Time 27 minutes
Servings: 4 servings
Course: Main Course
Cuisine: American, british
Calories: 485

Ingredients
  

  • 4 pieces ribeye steaks 1-inch thick, room temperature
  • 2 tablespoons coarse sea salt
  • 1 tablespoon freshly cracked black pepper
  • 3 tablespoons extra virgin olive oil
  • 4 sprigs fresh thyme
  • 4 cloves garlic crushed
  • 4 tablespoons unsalted butter

Equipment

  • 1 Gas or charcoal grill Preheat to high heat
  • 1 Meat thermometer For checking doneness
  • 1 Tongs For flipping steaks

Method
 

  1. 1️⃣ Remove steaks from refrigerator 30 minutes before cooking to bring to room temperature. Preheat grill to high heat (450-500°F).
  2. 2️⃣ Pat steaks completely dry with paper towels. Drizzle with olive oil and season generously with salt and pepper on both sides.
  3. 3️⃣ Place steaks on the hottest part of the grill. Cook for 3-4 minutes without moving for perfect sear marks.
  4. 4️⃣ Flip steaks and add crushed garlic and thyme sprigs to the grill beside the steaks for aromatics.
  5. 5️⃣ Cook another 3-4 minutes for medium-rare (internal temp 130°F). Add butter in final minute, spooning over steaks.
  6. 6️⃣ Remove steaks and rest for 5 minutes before serving. Top with grilled garlic and thyme.

Nutrition

Serving: 1gCalories: 485kcalCarbohydrates: 2gProtein: 42gFat: 34gSaturated Fat: 15gPolyunsaturated Fat: 2gMonounsaturated Fat: 16gCholesterol: 125mgSodium: 890mgPotassium: 485mgFiber: 1gVitamin A: 12IUVitamin C: 3mgCalcium: 28mgIron: 18mg

Notes

For best results, choose ribeye steaks with good marbling and bring to room temperature before grilling.
Gordon Ramsay always emphasizes not moving the steak too early – let it develop proper sear marks first.
Use a meat thermometer for perfect doneness: 125°F for rare, 130°F for medium-rare, 140°F for medium.

Tried this recipe?

Let us know how it was!

The first time I attempted Gordon Ramsay White Onion Soup, I thought I had it all figured out. Twenty years of firefighting taught me to follow protocols, and how hard could soup be, right? Four burnt batches later, standing in my smoke-filled kitchen with my wife shaking her head, I realized this Gordon Ramsay White Onion Soup demanded the same precision I used in emergency situations.

That humbling experience taught me everything about what separates amateur soup-making from professional results. Today, I’m sharing the exact techniques that transformed my disaster into a soup worthy of Ramsay’s kitchen.

What Are Some Common Mistakes When Making French Onion Soup?

The biggest mistake home cooks make with Gordon Ramsay White Onion Soup is rushing the caramelization process. I learned this the hard way during my first attempt. According to the USDA, proper caramelization requires the Maillard reaction, which only occurs at specific temperatures over extended time periods.

Most people crank up the heat thinking they’ll save time, but this burns the onions’ exterior while leaving the interior raw. The result? Bitter, uneven flavors that no amount of cream can fix. Gordon Ramsay White Onion Soup requires patience – true caramelization takes 25-30 minutes on medium-low heat.

Another critical error involves the roux technique. Many skip the flour step entirely or add it incorrectly, resulting in lumpy, thin soup. The flour must cook with the caramelized onions for exactly two minutes to eliminate the raw flour taste while creating proper thickening power.

How to Make White Onion Soup?

Creating authentic Gordon Ramsay White Onion Soup starts with ingredient selection. Sweet white onions work best because they contain higher natural sugar content, which caramelizes beautifully. I prefer Vidalia or Walla Walla varieties when available.

The technique follows Gordon’s methodical approach: start with European-style butter in a heavy-bottomed pot. This isn’t just preference – the milk fat content affects flavor development significantly. Heat on medium-low and add your thinly sliced onions. Here’s where discipline matters: resist the urge to increase heat.

During those crucial 25-30 minutes, stir occasionally but don’t over-mix. The onions need contact time with the pot’s surface to develop proper color and flavor. You’ll know they’re ready when they’re deep golden brown and smell intensely sweet.

Next comes the roux formation. Sprinkle flour directly over your caramelized onions and cook for two minutes, stirring constantly. This creates a light roux that will thicken your Gordon Ramsay White Onion Soup without affecting the color.

Gradually add warmed vegetable stock while whisking continuously. Cold stock will cause the roux to seize and create lumps – a mistake that’s nearly impossible to fix. Add bay leaves and fresh thyme, then simmer for 15 minutes.

For restaurant-quality smoothness, use an immersion blender to puree the soup completely. Professional kitchens often strain through a fine-mesh sieve, but this step is optional for home cooking.

Finally, stir in room-temperature heavy cream and season with salt and white pepper. White pepper maintains the soup’s clean appearance while providing the necessary heat.

Ingredients That Actually Matter for Gordon Ramsay White Onion Soup

Ingredients for Gordon Ramsay white onion soup recipe laid out on marble counter

Quality ingredients make the difference between good and exceptional Gordon Ramsay White Onion Soup. Here’s what you need:

Sweet white onions form the foundation. Avoid yellow or red onions – they lack the sweetness necessary for proper caramelization. Six large onions yield approximately four generous servings.

European-style unsalted butter contains higher milk fat content than standard American butter, creating richer flavor development during the caramelization process.

Low-sodium vegetable stock allows you to control seasoning while providing clean vegetable flavors that complement the onions without overpowering them.

Heavy cream must be room temperature to prevent curdling when added to the hot soup. This technique is supported by culinary science regarding temperature control in dairy integration.

Fresh herbs – bay leaves and thyme – provide aromatic complexity. Dried herbs work in a pinch, but fresh herbs deliver superior flavor profiles.

Professional Tips for Perfect Results

After mastering Gordon Ramsay White Onion Soup, these tips ensure consistent success:

Temperature control is everything. Use a heavy-bottomed pot to prevent hot spots that cause uneven caramelization. I learned this from analyzing our successful batch versus the disasters – consistent heat distribution made all the difference.

Mise en place saves the day. Prep all ingredients before starting because once caramelization begins, you can’t leave the stove. This includes warming your stock and bringing cream to room temperature.

Taste throughout the process. Properly caramelized onions should taste intensely sweet with no bitterness. If you detect any harsh flavors, start over – no amount of cream will mask burnt onions.

For enhanced flavor complexity, consider this professional technique guide that explains Gordon’s layering methods for soups.

Storage and Leftovers

Gordon Ramsay White Onion Soup keeps beautifully in the refrigerator for up to four days. Store without the cream addition, then stir in fresh cream when reheating. This prevents the dairy from breaking during storage.

For freezing, prepare the soup base through the simmering stage, omitting the cream entirely. Frozen portions last up to three months. Thaw overnight in the refrigerator, then reheat gently while stirring in fresh cream.

When reheating, use low heat and stir frequently to prevent scorching. The cream can separate if overheated, so patience pays off here too.

This soup pairs exceptionally well with crusty bread or Gordon’s garlic bread recipe for a complete meal experience.

FAQ

What is an interesting fact about French onion soup?

French onion soup originated as a peasant dish in 18th century France, made from onions, water, and stale bread – today’s elegant versions evolved from this humble beginning.

What is the etiquette for eating French onion soup?

Use your spoon to break through any cheese crust (though Gordon Ramsay White Onion Soup typically doesn’t include cheese), then eat normally with the spoon, avoiding slurping.

Mastering Gordon Ramsay White Onion Soup taught me that professional cooking isn’t about shortcuts – it’s about understanding each technique’s purpose and executing with precision. The patience required reminds me of emergency response work: rushing leads to mistakes, while methodical execution saves the day.

Try this recipe and discover how proper technique transforms simple ingredients into something extraordinary. For more professional soup techniques, explore Gordon’s roasted tomato soup method.

Stay safe, Jack Sullivan

Gordon Ramsay style white onion soup in ceramic bowl with herbs and cream garnish
Jack Sullivan

Gordon Ramsay White Onion Soup

Professional-style white onion soup with Gordon Ramsay’s signature techniques for perfectly caramelized onions and silky smooth texture.
Prep Time 15 minutes
Cook Time 45 minutes
Total Time 1 hour
Servings: 4 servings
Course: Soup
Cuisine: French
Calories: 285

Ingredients
  

  • 6 large white onions sweet variety preferred, thinly sliced
  • 4 tablespoons unsalted butter European style for richer flavor
  • 2 tablespoons all-purpose flour for thickening
  • 6 cups vegetable stock low-sodium, warmed
  • 1/2 cup heavy cream room temperature
  • 2 bay leaves fresh preferred
  • 1 teaspoon fresh thyme leaves only
  • salt and white pepper to taste

Equipment

  • 1 Heavy-bottomed pot 6-quart capacity preferred for even heat distribution
  • 1 Wooden spoon For stirring without scratching the pot
  • 1 Fine mesh strainer Optional, for ultra-smooth texture

Method
 

  1. 1️⃣ Heat butter in heavy-bottomed pot over medium-low heat. Add sliced onions and cook slowly for 25-30 minutes, stirring occasionally until deeply caramelized and golden brown.
  2. 2️⃣ Sprinkle flour over caramelized onions and cook for 2 minutes, stirring constantly to create a light roux.
  3. 3️⃣ Gradually add warm vegetable stock, whisking continuously to prevent lumps. Add bay leaves and thyme.
  4. 4️⃣ Bring to gentle simmer and cook for 15 minutes. Remove bay leaves and blend until smooth using immersion blender.
  5. 5️⃣ Stir in heavy cream and season with salt and white pepper. Serve immediately while hot.

Nutrition

Serving: 1gCalories: 285kcalCarbohydrates: 18gProtein: 6gFat: 22gSaturated Fat: 14gPolyunsaturated Fat: 1gMonounsaturated Fat: 6gCholesterol: 65mgSodium: 720mgPotassium: 420mgFiber: 3gSugar: 12gVitamin A: 85IUVitamin C: 12mgCalcium: 95mgIron: 2mg

Notes

Patience is key for proper caramelization – don’t rush this step.
Use white pepper to maintain the soup’s clean appearance.
Strain through fine-mesh for restaurant-quality smoothness.

Tried this recipe?

Let us know how it was!

Gordon Ramsay Leek and Potato Soup Recipe – Restaurant Quality at Home
I saw Gordon Ramsay Leek and Potato Soup on a menu and said, “I could make that.” Famous last words.
After twenty years of firefighting and thinking I knew my way around a kitchen, I figured soup was soup. How hard could it be? Throw some vegetables in a pot, add water, season it up. That overconfidence cost me an embarrassing dinner party where my guests politely sipped what could only be described as potato-flavored water with sad leek pieces floating around.
That failure sent me straight to studying how Gordon Ramsay approaches comfort food recipes, and I discovered the techniques that separate restaurant-quality Gordon Ramsay’s leek and potato soup from home kitchen disasters.

How to Make Gordon Ramsay Leek and Potato Soup That Actually Tastes Good

The secret to Gordon Ramsay Leek and Potato Soup lies in understanding that each ingredient serves a specific purpose. You can’t just dump everything together and hope for the best. This recipe follows Ramsay’s methodical approach, building layers of flavor through proper technique.
Start with quality ingredients. Ramsay always emphasizes that great dishes begin with great products. For Gordon Ramsay’s leek and potato soup, that means fresh leeks properly cleaned, starchy russet potatoes that break down beautifully, and rich chicken stock that forms the flavor foundation.
The cooking method matters as much as the ingredients. Ramsay’s technique involves caramelizing the aromatics first, which develops the deep, complex flavors that make restaurant soups memorable. When you taste Gordon Ramsay’s leek and potato soup made this way, you understand why his version stands apart from basic home recipes.

Why Most People’s Leek and Potato Soup Tastes Bland

Here’s what I learned about why Gordon Ramsay Leek and Potato Soup succeeds where others fail. Most home cooks make three critical mistakes that guarantee bland results.
First, they don’t properly clean their leeks. Leeks trap dirt and sand between their layers, and if you don’t clean them thoroughly, that grit ruins the entire dish. Ramsay’s method involves splitting the leeks lengthwise and rinsing under cold running water while separating each layer.
Second, they skip the caramelization step. When you see Gordon Ramsay Leek and Potato Soup being made professionally, notice how the aromatics get proper browning time. This develops the Maillard reactions that create depth of flavor. Rush this step, and you get flat, one-dimensional soup.
Third, they use the wrong stock. Water won’t cut it for Gordon Ramsay Leek and Potato Soup. Quality chicken stock provides the savory backbone that makes every spoonful satisfying. I keep homemade stock in my freezer specifically for soups like this, though high-quality commercial stocks work well too.

Ingredients That Actually Matter for Gordon Ramsay Leek and Potato Soup

Fresh leeks, potatoes, and ingredients for Gordon Ramsay leek and potato soup recipe

When making Gordon Ramsay Leek and Potato Soup, ingredient selection determines your success. Use four large leeks, focusing on the white and light green parts only. The dark green tops are too tough and bitter for this refined soup.
Choose russet potatoes for their high starch content. They break down during cooking, naturally thickening the Gordon Ramsay leek and potato soup without requiring flour or other thickeners. Two pounds provides the perfect balance with the leeks.
Quality chicken stock cannot be compromised. Six cups of rich, gelatinous stock creates the luxurious mouthfeel that defines restaurant-quality Gordon Ramsay’s leek and potato soup. If your stock doesn’t gel slightly when cold, it lacks the collagen needed for proper body.
Heavy cream adds richness, but timing matters. Add it at the end to prevent curdling. The cream should be room temperature to integrate smoothly into the hot Gordon Ramsay Leek and Potato Soup.

Professional Techniques for Perfect Results

Making Gordon Ramsay Leek and Potato Soup requires understanding heat control and timing. Start with medium heat when sautéing the aromatics. High heat burns the delicate leeks before they can caramelize properly.
Listen to your pan. When cooking the leeks and onions for Gordon Ramsay Leek and Potato Soup, you should hear gentle sizzling, not aggressive bubbling. Adjust the heat accordingly.
The blending technique determines texture. An immersion blender gives you control over consistency. For traditional Gordon Ramsay Leek and Potato Soup, blend until smooth but leave slight texture for visual interest.
Straining elevates the final product. Professional kitchens strain their Gordon Ramsay Leek and Potato Soup through fine mesh to achieve silky smoothness. This extra step separates good from great.
Temperature control when adding cream prevents breaking. The Gordon Ramsay Leek and Potato Soup should be hot but not boiling when you incorporate the cream. Stir constantly during this step.

Storage and Serving Your Gordon Ramsay Leek and Potato Soup

Gordon Ramsay Leek and Potato Soup keeps well in the refrigerator for up to four days. Cool completely before storing to maintain food safety. When reheating, do so gently over medium-low heat, stirring occasionally.
For best results, make the base of Gordon Ramsay Leek and Potato Soup ahead of time and add the cream just before serving. This prevents the dairy from breaking during storage and reheating.
Freeze portions without the cream for up to three months. The Gordon Ramsay Leek and Potato Soup base freezes beautifully, making it perfect for meal prep. Thaw overnight in the refrigerator before reheating.
Serve Gordon Ramsay Leek and Potato Soup as a starter with crusty bread like Gordon Ramsay’s garlic bread or as a light meal paired with a simple salad. The soup’s rich, creamy texture makes it naturally satisfying.
Consider this Gordon Ramsay Leek and Potato Soup as the foundation for other recipes too. Use it as a base for more complex preparations or serve alongside Gordon Ramsay’s fondant potatoes for an elegant potato-focused menu.

Frequently Asked Questions

How long does Gordon Ramsay Leek and Potato Soup take to make?

Total time is about 55 minutes – 20 minutes prep and 35 minutes cooking time.

What stock is best for leek and potato soup?

High-quality chicken stock provides the best flavor foundation, though vegetable stock works for vegetarian versions.

How do I make my leek and potato soup tastier?

Proper caramelization of aromatics, quality stock, and finishing with cream are the key flavor boosters.

That dinner party disaster taught me respect for proper technique. Now when I make Gordon Ramsay Leek and Potato Soup, my guests ask for the recipe instead of politely changing the subject. The difference between amateur and professional results comes down to understanding the fundamentals and executing them consistently.

Stay safe, Jack Sullivan

Gordon Ramsay style leek and potato soup served in white bowls with chive garnish
Jack Sullivan

Gordon Ramsay Leek and Potato Soup

Restaurant-quality leek and potato soup using Gordon Ramsay’s techniques for maximum flavor and creamy texture.
Prep Time 20 minutes
Cook Time 35 minutes
Total Time 55 minutes
Servings: 6 servings
Course: Appetizer
Cuisine: british
Calories: 245

Ingredients
  

  • 4 large leeks white and light green parts only, cleaned thoroughly
  • 2 lbs russet potatoes peeled and cubed
  • 1 large yellow onion diced
  • 4 cloves garlic minced
  • 6 cups chicken stock high-quality or homemade preferred
  • ½ cup heavy cream room temperature
  • 3 tbsp unsalted butter
  • 1 tsp sea salt or to taste
  • ½ tsp white pepper freshly ground
  • 2 tbsp fresh chives chopped, for garnish

Equipment

  • 1 Large Heavy-Bottom Pot Essential for even heat distribution
  • 1 Immersion blender For smooth texture control
  • 1 Fine mesh strainer For silky finish

Method
 

  1. 1️⃣ Heat butter in large heavy-bottom pot over medium heat. Add diced onion and cook until translucent, about 5 minutes.
  2. 2️⃣ Add minced garlic and sliced leeks. Cook for 8-10 minutes until leeks soften and begin to caramelize slightly.
  3. 3️⃣ Add cubed potatoes and chicken stock. Bring to boil, then reduce heat and simmer covered for 20-25 minutes until potatoes are fork-tender.
  4. 4️⃣ Using immersion blender, blend soup to desired consistency (leave slightly chunky for texture or blend smooth).
  5. 5️⃣ Strain through fine mesh strainer for silky texture. Return to pot and stir in cream. Season with salt and white pepper.
  6. 6️⃣ Serve immediately, garnished with fresh chives and a drizzle of cream if desired.

Nutrition

Serving: 1gCalories: 245kcalCarbohydrates: 28gProtein: 6gFat: 12gSaturated Fat: 8gPolyunsaturated Fat: 1gMonounsaturated Fat: 3gCholesterol: 35mgSodium: 720mgPotassium: 480mgFiber: 4gSugar: 8gVitamin A: 15IUVitamin C: 12mgCalcium: 8mgIron: 6mg

Notes

Use high-quality chicken stock for best flavor – homemade is ideal.
Don’t skip the straining step – it’s what gives restaurant-quality smoothness.
Soup can be made ahead and reheated gently, adding cream just before serving.

Tried this recipe?

Let us know how it was!

My crew laughed when I said I’d make Gordon Ramsay mayonnaise — until they tasted it. There I was, standing in the firehouse kitchen after a particularly grueling 24-hour shift, claiming I could recreate the legendary chef’s signature condiment from scratch. “Sullivan’s lost it,” they said, watching me gather egg yolks and oil like I was preparing for some kind of culinary battle.

But here’s the thing about making Gordon Ramsay mayonnaise — it’s not about fancy equipment or expensive ingredients. It’s about understanding the science of emulsion and respecting the process. After twenty years of following protocols in life-or-death situations, I approached this professional cooking technique with the same methodical precision that served me well in emergency response.

The first attempt? Complete disaster. The mixture broke faster than a rookie’s resolve on their first fire call. But failure teaches you more than success ever will, and Gordon Ramsay mayonnaise demands nothing less than perfection in technique.

How Do You Make Gordon Ramsay Mayonnaise?

Creating authentic Gordon Ramsay mayonnaise requires understanding that this isn’t just any condiment — it’s a testament to culinary precision. The master chef’s approach focuses on temperature control, timing, and the gradual building of emulsion that transforms simple ingredients into something extraordinary.

The foundation starts with room-temperature egg yolks, a critical detail many home cooks overlook. Cold ingredients fight against proper emulsion formation, much like how cold equipment can fail during critical operations. When making Gordon Ramsay mayonnaise, temperature consistency isn’t optional — it’s essential.

Professional kitchens understand that the oil addition rate determines success or failure. Start with drops, literally counting them out for the first quarter cup. This patience pays dividends when your Gordon Ramsay mayonnaise achieves that perfect glossy thickness that rivals any restaurant preparation.

The whisking technique matters enormously. Maintain consistent circular motions, keeping the whisk in constant contact with the bowl’s bottom. This continuous agitation creates the mechanical action necessary for proper emulsion, transforming your Gordon Ramsay mayonnaise from a mixture into a unified, creamy masterpiece.

Ingredients That Actually Matter for Gordon Ramsay Mayonnaise

Essential ingredients for Gordon Ramsay mayonnaise recipe including egg yolks, olive oil, and seasonings

Quality ingredients separate good Gordon Ramsay mayonnaise from exceptional results. Free-range egg yolks provide superior color and richness, while their room-temperature state ensures optimal emulsion formation. The difference is immediately noticeable in both texture and flavor depth.

Dijon mustard serves dual purposes in Gordon Ramsay mayonnaise — it acts as an emulsifier while contributing complex flavor notes that distinguish this recipe from basic versions. French Dijon varieties offer the authentic taste profile that Gordon Ramsay himself prefers in professional kitchens.

Oil selection critically impacts the final product. While extra virgin olive oil might seem like the premium choice, its strong flavor can overpower the delicate balance of Gordon Ramsay mayonnaise. Grapeseed oil or light olive oil varieties provide the neutral base that allows other ingredients to shine while maintaining proper consistency.

Fresh lemon juice brings essential acidity that balances richness while contributing to the emulsion’s stability. Pre-bottled lemon juice lacks the bright, clean flavor that makes Gordon Ramsay mayonnaise restaurant-quality. Always use freshly squeezed and strained juice for optimal results.

Step-by-Step Instructions

Begin by combining three large egg yolks, one tablespoon of Dijon mustard, and two tablespoons of fresh lemon juice in your mixing bowl. Whisk vigorously for thirty seconds until the mixture becomes pale and slightly thickened — this initial preparation sets the foundation for successful Gordon Ramsay mayonnaise.

Add oil drop by drop while whisking continuously. This cannot be rushed. Each drop must fully incorporate before adding the next. For the first quarter cup, count each drop to maintain proper pacing. This methodical approach ensures your Gordon Ramsay mayonnaise forms a stable emulsion from the start.

Once the mixture begins thickening noticeably, increase the oil flow to a thin stream while maintaining constant whisking. The transformation happens gradually — your Gordon Ramsay mayonnaise will become glossy and substantially thicker with proper technique.

Continue adding the remaining oil in a steady stream, never stopping the whisking motion. The consistency should become rich and luxurious, coating the whisk heavily. Season with half a teaspoon of sea salt and a quarter teaspoon of white pepper, adjusting to taste.

How to Fix Failed Mayonnaise

When Gordon Ramsay mayonnaise breaks — and it happens to everyone — don’t panic. Professional kitchens deal with this regularly, and the fix is straightforward once you understand the science. A broken emulsion means the oil and water phases have separated, but this doesn’t mean your ingredients are wasted.

Start fresh with a new egg yolk in a clean bowl. Whisk it briefly, then begin adding your broken Gordon Ramsay mayonnaise drop by drop, just as you would with oil. The fresh yolk provides new emulsifying agents that can rescue the mixture and restore proper consistency.

Temperature problems often cause emulsion failure. If your ingredients were too cold, let them reach room temperature before attempting the repair. Patience during this recovery process often determines whether your Gordon Ramsay mayonnaise achieves its intended quality or remains a learning experience.

Sometimes adding a teaspoon of warm water to the fresh egg yolk before incorporating the broken mixture helps re-establish the emulsion more effectively. This technique works particularly well when the original Gordon Ramsay mayonnaise was over-mixed or prepared too quickly.

Pro Tips for Perfect Results

Professional Gordon Ramsay mayonnaise benefits from ingredient preparation timing. Remove eggs from refrigeration thirty minutes before cooking to ensure optimal temperature. This simple step prevents many common emulsion problems that frustrate home cooks.

Consider the bowl material when making Gordon Ramsay mayonnaise. Glass or stainless steel bowls provide better temperature control than plastic alternatives. The smooth surface also facilitates more effective whisking action, contributing to superior texture development.

Humidity affects emulsion stability more than most people realize. On particularly humid days, your Gordon Ramsay mayonnaise may require slight adjustments in acid content to maintain proper consistency. A few extra drops of lemon juice can compensate for atmospheric moisture.

Storage technique impacts longevity and flavor retention. Transfer your finished Gordon Ramsay mayonnaise to an airtight container immediately after preparation. Refrigerate promptly and consume within one week for optimal quality and food safety.

Storage and Serving Suggestions

Proper storage ensures your Gordon Ramsay mayonnaise maintains quality throughout its refrigerator life. Glass containers with tight-fitting lids prevent flavor absorption while protecting the delicate emulsion from temperature fluctuations that can cause separation.

This Gordon Ramsay mayonnaise pairs exceptionally well with grilled salmon dishes or enhances egg salad preparations with its rich, complex flavor profile. The versatility makes it worthwhile to keep fresh batches available for various culinary applications.

Frequently Asked Questions

What is the best oil to use for making mayonnaise?

Neutral oils like grapeseed or light olive oil work best, providing clean flavor without overwhelming the other ingredients.

What mayonnaise did Julia Child use?

Julia Child typically made her own mayonnaise using similar techniques to Gordon Ramsay’s method, emphasizing fresh ingredients and proper emulsion technique.

That day in the firehouse kitchen, watching my crew’s expressions change from skepticism to amazement as they tasted my Gordon Ramsay mayonnaise, I realized something important. Mastering fundamental techniques — whether in emergency response or cooking — requires the same dedication to precision and respect for process. The laughter stopped, replaced by requests for the recipe and genuine appreciation for craftsmanship.

The next shift brought new challenges, but also brought colleagues asking when I’d make another batch. Sometimes the most rewarding victories come from the smallest battles, fought in the most unexpected places.

Stay safe,
Jack Sullivan

Step-by-step Gordon Ramsay mayonnaise preparation showing whisking technique and ingredients
Jack Sullivan

Gordon Ramsay Mayonnaise

Master Chef Gordon Ramsay’s professional mayonnaise recipe with foolproof techniques for perfect emulsion every time.
Prep Time 15 minutes
Total Time 15 minutes
Servings: 8 servings
Course: sauce
Cuisine: French
Calories: 186

Ingredients
  

  • 3 large egg yolks room temperature, from free-range eggs
  • 1 tablespoon Dijon mustard quality French mustard preferred
  • 2 tablespoons fresh lemon juice freshly squeezed, strained
  • 1 cup neutral oil grapeseed or light olive oil
  • 1/2 teaspoon sea salt fine sea salt
  • 1/4 teaspoon white pepper freshly ground preferred

Equipment

  • – Large mixing bowl Glass or stainless steel preferred
  • Wire whisk Medium-sized balloon whisk
  • Measuring cups For accurate oil measurement

Method
 

  1. 1️⃣ Combine egg yolks, Dijon mustard, and lemon juice in a large mixing bowl. Whisk vigorously for 30 seconds until mixture becomes pale and slightly thickened.
  2. 2️⃣ Begin adding oil drop by drop while whisking continuously. This initial slow addition is crucial for proper emulsion formation. Continue for first 1/4 cup of oil.
  3. 3️⃣ Once emulsion begins to form (mixture thickens noticeably), increase oil flow to a thin stream while maintaining constant whisking motion.
  4. 4️⃣ Continue adding remaining oil in steady stream, whisking constantly. The mayonnaise should become thick and glossy with each addition.
  5. 5️⃣ Season with sea salt and white pepper, whisking to incorporate. Taste and adjust seasoning as needed. Add extra lemon juice if desired for brightness.
  6. 6️⃣ Transfer to airtight container and refrigerate immediately. Let flavors meld for at least 30 minutes before serving for best taste.

Nutrition

Serving: 1gCalories: 186kcalCarbohydrates: 0.5gProtein: 1.2gFat: 20.4gSaturated Fat: 2.8gPolyunsaturated Fat: 5.6gMonounsaturated Fat: 11.2gCholesterol: 69mgSodium: 148mgPotassium: 18mgSugar: 0.3gVitamin A: 98IUVitamin C: 3.2mgCalcium: 12mgIron: 0.4mg

Notes

For best results, ensure all ingredients are at room temperature before beginning.
If mayonnaise breaks during preparation, start fresh with new egg yolk and slowly whisk in the broken mixture.
Store in refrigerator for up to 1 week in airtight container.

Tried this recipe?

Let us know how it was!

My crew laughed when I said I’d make Gordon Ramsay Marie Rose Sauce — until they tasted it. Twenty-three years of fighting fires, and these guys thought I couldn’t handle a simple sauce recipe. Boy, were they wrong.

After watching Ramsay demonstrate this classic British condiment on one of his shows, I knew I had to master it. The Gordon Ramsay Marie Rose Sauce isn’t just another cocktail sauce – it’s the difference between amateur hour and restaurant-quality seafood presentations.

What is the Gordon Ramsay Marie Rose Sauce?

Gordon Ramsay’s version of Marie Rose sauce elevates the traditional British condiment with precise technique and premium ingredients. Unlike basic cocktail sauces, Gordon Ramsay Marie Rose Sauce incorporates Worcestershire sauce complexity and carefully balanced acidity to create a sophisticated accompaniment for seafood dishes.

This premium sauce originated in the 1960s as a luxury condiment for prawn cocktails and has become synonymous with upscale British dining. Ramsay’s interpretation maintains the classic foundation while adding professional refinements that transform ordinary ingredients into something extraordinary.

The key distinction lies in the proportion ratios and the addition of brandy, which adds depth without overpowering the delicate balance between creamy richness and tangy brightness.

Ingredients That Actually Matter for Gordon Ramsay Marie Rose Sauce

Homemade Gordon Ramsay Marie Rose sauce in glass bowl with fresh garnish

Quality ingredients make the difference between mediocre and magnificent. Here’s what you need for authentic Gordon Ramsay Marie Rose Sauce:

  • Premium mayonnaise (½ cup) – full-fat only, no light versions
  • High-quality ketchup (2 tablespoons) – avoid high-fructose corn syrup brands
  • Authentic Worcestershire sauce (1 teaspoon) – British brands preferred
  • Fresh lemon juice (1 tablespoon) – never bottled
  • Tabasco sauce (3-4 drops) – adjust for heat tolerance
  • Quality brandy (1 teaspoon, optional) – adds sophistication
  • White pepper (¼ teaspoon) – freshly ground

The mayonnaise forms the creamy foundation, while ketchup provides sweetness and color. Worcestershire sauce adds umami complexity, and lemon juice provides the essential acidic balance that prevents the sauce from being too heavy.

Step-by-Step Instructions

Step 1: Combine mayonnaise and ketchup in a medium mixing bowl. Whisk vigorously until completely smooth and evenly blended. No streaks should remain – this foundation determines your final texture.

Step 2: Add Worcestershire sauce, fresh lemon juice, and white pepper. Mix thoroughly using figure-eight motions to incorporate all flavors evenly throughout the base.

Step 3: Add Tabasco sauce carefully, drop by drop. Start with three drops, taste, then adjust. The heat should complement, not dominate the other flavors in your Gordon Ramsay Marie Rose Sauce.

Step 4: If using brandy, stir it in gently with the final mixing. This optional ingredient adds restaurant-level sophistication and depth that separates professional from amateur versions.

Step 5: Taste and adjust seasoning as needed. Cover and refrigerate for 15 minutes minimum before serving. This resting period allows all flavors to meld into the perfect Gordon Ramsay Marie Rose Sauce.

Professional Tips for Perfect Results

Temperature control matters more than most people realize. Keep all ingredients at room temperature before mixing – cold mayonnaise doesn’t blend properly and creates lumpy texture.

The lemon juice ratio is critical. Too little, and your Gordon Ramsay Marie Rose Sauce becomes heavy and cloying. Too much creates an unpleasant tartness that overpowers the delicate seafood it’s meant to complement.

Fresh ingredients trump convenience every time. Pre-squeezed lemon juice lacks the bright acidity that makes this sauce sing, and low-quality mayonnaise produces inferior results regardless of technique.

Consider making Gordon Ramsay’s other signature sauces to create a complete condiment collection that elevates any meal.

What to do with Marie Rose Sauce?

This versatile condiment transforms ordinary dishes into restaurant-quality presentations. Classic applications include prawn cocktails, crab salads, and lobster rolls, but Gordon Ramsay Marie Rose Sauce excels in unexpected uses too.

Try it as a dipping sauce for perfectly prepared seafood or as a sophisticated sandwich spread that elevates simple ingredients. The sauce pairs beautifully with grilled fish, steamed vegetables, and even Gordon Ramsay’s scotch eggs.

Advanced applications include using it as a base for more complex sauces, incorporating it into salad dressings, or serving alongside premium appetizers for entertaining guests.

The sauce’s balanced acidity makes it an excellent palate cleanser between courses, while its creamy texture provides richness without heaviness.

Storage and Shelf Life

Properly stored Gordon Ramsay Marie Rose Sauce keeps refrigerated for up to five days in an airtight container. The flavors actually improve after the first day as ingredients continue melding together.

Never leave the sauce at room temperature for more than two hours due to the mayonnaise base. For entertaining, keep it chilled in a serving bowl nested in ice.

The sauce doesn’t freeze well – freezing separates the emulsion and creates an unpleasant texture when thawed.

Frequently Asked Questions

What’s in a Marie Rose sauce?

Traditional Marie Rose sauce contains mayonnaise, ketchup, Worcestershire sauce, lemon juice, and seasonings. Gordon Ramsay’s version adds brandy and precise seasoning ratios for enhanced flavor.

How do you make Marie Rose sauce Jamie Oliver?

While Jamie Oliver’s version uses similar base ingredients, Gordon Ramsay Marie Rose Sauce includes brandy and different proportions, creating a more sophisticated flavor profile with better balance.

Final Thoughts

That firehouse dinner where I served my Gordon Ramsay Marie Rose Sauce became legendary. The same guys who laughed at my sauce-making ambitions now request it for every seafood night. Sometimes the simplest recipes require the most precision.

Master this foundation, and you’ll understand why professional chefs guard their sauce recipes so carefully. Quality ingredients, proper technique, and attention to detail transform basic condiments into culinary excellence.

Stay safe, Jack Sullivan

Homemade Gordon Ramsay Marie Rose sauce in glass bowl with fresh garnish
Jack Sullivan

Gordon Ramsay Marie Rose Sauce

A premium seafood sauce that transforms ordinary dishes into restaurant-quality masterpieces with the perfect balance of creamy richness and tangy brightness.
Prep Time 5 minutes
Total Time 5 minutes
Servings: 8 servings
Course: sauce
Cuisine: british
Calories: 95

Ingredients
  

  • 1/2 cup mayonnaise high-quality, full-fat
  • 2 tablespoons tomato ketchup premium brand preferred
  • 1 teaspoon Worcestershire sauce authentic British brand
  • 1 tablespoon fresh lemon juice freshly squeezed
  • 3-4 drops Tabasco sauce adjust to taste
  • 1 teaspoon brandy optional, for sophistication
  • 1/4 teaspoon white pepper freshly ground

Equipment

  • 1 Mixing Bowl Medium-sized glass or stainless steel
  • 1 Whisk Small wire whisk or fork
  • 1 Measuring spoons For precise measurements

Method
 

  1. 1️⃣ In a medium mixing bowl, combine mayonnaise and ketchup. Whisk until completely smooth and evenly blended.
  2. 2️⃣ Add Worcestershire sauce, fresh lemon juice, and white pepper. Mix thoroughly to incorporate all flavors.
  3. 3️⃣ Carefully add Tabasco sauce drop by drop, tasting as you go. Start with 3 drops and adjust for heat preference.
  4. 4️⃣ If using brandy, stir it in gently to add depth and sophistication to the sauce.
  5. 5️⃣ Taste and adjust seasoning. Chill for 15 minutes before serving to allow flavors to meld perfectly.

Nutrition

Serving: 1gCalories: 95kcalCarbohydrates: 2gFat: 10gSaturated Fat: 2gPolyunsaturated Fat: 5gMonounsaturated Fat: 3gCholesterol: 8mgSodium: 180mgPotassium: 25mgSugar: 2gVitamin A: 2IUVitamin C: 3mgCalcium: 1mgIron: 1mg

Notes

The secret to perfect Gordon Ramsay Marie Rose Sauce is using high-quality mayonnaise and balancing the acidity with fresh lemon juice.
For best results, chill the sauce for at least 15 minutes before serving to allow all flavors to meld together.
Store covered in refrigerator for up to 5 days. The sauce actually improves in flavor after the first day.

Tried this recipe?

Let us know how it was!

I’ve rescued people from fires, but Gordon Ramsay Shrimp Cocktail nearly defeated me. There I was, standing in my kitchen after a 24-hour shift, thinking I’d whip up something elegant for my wife’s birthday dinner. How hard could shrimp cocktail be, right? Two hours and three batches of rubbery shrimp later, I realized that even the simplest dishes require proper technique.

That humbling experience taught me something crucial about Gordon Ramsay Shrimp Cocktail – it’s not just about boiling shrimp and opening a bottle of cocktail sauce. The devil’s in the details, and after studying Ramsay’s methods and practicing relentlessly, I’ve finally cracked the code to restaurant-quality shrimp cocktail at home.

What Do You Know About Shrimp Cocktails?

The Gordon Ramsay Shrimp Cocktail represents the pinnacle of elegant simplicity. Unlike many appetizers that rely on complex preparations, this dish demands perfection in execution rather than elaborate techniques. According to the USDA guidelines for seafood safety, proper cooking temperature and timing are critical for both safety and texture.

Ramsay’s approach to Gordon Ramsay Shrimp Cocktail focuses on three fundamental elements: premium ingredients, precise cooking times, and balanced cocktail sauce. The chef emphasizes that overcooked shrimp ruins the entire dish, transforming what should be tender, sweet meat into chewy disappointment. His method involves careful temperature control and immediate ice shocking to halt the cooking process.

The traditional Gordon Ramsay Shrimp Cocktail dates back to the 1960s but has evolved significantly under modern culinary masters. Today’s version emphasizes fresh, sustainable shrimp paired with homemade cocktail sauce that balances acidity, heat, and umami flavors.

How to Eat Shrimp Cocktail Etiquette

Proper Gordon Ramsay Shrimp Cocktail etiquette can make or break your dining experience. The traditional method involves using the small cocktail fork provided, though many restaurants now serve it with the shrimp already arranged for easy eating. Never bite directly into a whole shrimp – instead, eat it in one or two neat bites maximum.

When dining formally, hold the shrimp by its tail with your fingers, dip it into the cocktail sauce, and eat it cleanly. If no cocktail fork is provided, using your fingers is perfectly acceptable for Gordon Ramsay Shrimp Cocktail. Place used tails on the side plate, never back in the serving dish.

The sauce plays a crucial role in Gordon Ramsay Shrimp Cocktail etiquette. Don’t overload each shrimp with sauce – a light coating enhances the seafood’s natural flavor without overwhelming it. Professional chefs recommend one dip per shrimp to maintain the balance Ramsay intended.

Ingredients That Actually Matter for Gordon Ramsay Shrimp Cocktail

Gordon Ramsay shrimp cocktail recipe with perfectly cooked jumbo shrimp and homemade cocktail sauce

Quality starts with the shrimp selection. For authentic Gordon Ramsay Shrimp Cocktail, choose jumbo shrimp (16-20 count per pound) that are firm, smell like the ocean, and have no black spots. Fresh shrimp should have translucent shells and spring back when pressed.

The cocktail sauce deserves equal attention. While store-bought versions exist, Gordon Ramsay Shrimp Cocktail shines with homemade sauce combining high-quality ketchup, fresh horseradish, real lemon juice, and authentic Worcestershire sauce. Each ingredient contributes specific flavors that create the complex taste profile Ramsay demands.

Seasoning the poaching liquid elevates Gordon Ramsay Shrimp Cocktail beyond basic boiled shrimp. Bay leaves, salt, and proper water temperature create an aromatic bath that infuses subtle flavors into the shrimp during the brief cooking process.

Step-by-Step Instructions

Creating perfect Gordon Ramsay Shrimp Cocktail requires methodical preparation and precise timing. Start by setting up your ice bath before heating any water – this prevents overcooking when you need to shock the shrimp immediately.

Bring a large pot of salted water to a rolling boil with one bay leaf. The water should taste like mild seawater – this seasons the Gordon Ramsay Shrimp Cocktail from within. While waiting for the boil, prepare your cocktail sauce by whisking together ketchup, horseradish, lemon juice, Worcestershire sauce, and hot sauce until smooth.

Add the shrimp to the boiling water and cook for exactly 2-3 minutes until they turn pink and curl into a C-shape. Overcooking is the biggest mistake in Gordon Ramsay Shrimp Cocktail preparation. The moment they’re done, transfer immediately to the ice bath using a slotted spoon.

Let the shrimp cool completely in the ice bath, about 5 minutes. This stops the cooking process and ensures the Gordon Ramsay Shrimp Cocktail maintains its tender texture. Pat dry before arranging on serving plates.

Pro Tips From a Former Firefighter

After years of perfecting Gordon Ramsay Shrimp Cocktail, I’ve learned that preparation prevents poor performance. Set up all your equipment before starting – ice bath, cocktail sauce ingredients, and serving glasses should be ready before you turn on the heat.

Temperature control matters more than timing for Gordon Ramsay Shrimp Cocktail. If your shrimp are particularly large, they might need an extra 30 seconds. If they’re smaller, reduce cooking time accordingly. The visual cue – pink color and C-curve shape – tells you more than any timer.

Make the cocktail sauce at least an hour ahead if possible. This allows flavors to meld properly, creating the complex taste that makes Gordon Ramsay Shrimp Cocktail restaurant-worthy. You can also try my Gordon Ramsay Shrimp Scampi for another elegant shrimp preparation.

Storage and Leftovers

Properly stored Gordon Ramsay Shrimp Cocktail keeps for up to two days in the refrigerator. Store the shrimp and cocktail sauce separately to maintain optimal texture and prevent the shrimp from absorbing too much sauce flavor.

Wrap the cooked shrimp tightly in plastic wrap or store in an airtight container. The cocktail sauce can be stored in a covered container for up to one week. According to Mayo Clinic food safety guidelines, properly refrigerated cooked shrimp maintains both safety and quality when stored correctly.

Never freeze leftover Gordon Ramsay Shrimp Cocktail as this destroys the texture completely. Instead, repurpose leftover shrimp in salads or pasta dishes like my Gordon Ramsay Favorite Pasta Dishes for creative meal solutions.

Frequently Asked Questions

What is Gordon Ramsay’s favorite cocktail?

While Ramsay enjoys various beverages, his culinary focus remains on food rather than drinks. His shrimp cocktail recipe emphasizes the appetizer’s elegance rather than beverage pairings.

What are 5 interesting facts about Gordon Ramsay?

Gordon Ramsay trained under Marco Pierre White, holds 16 Michelin stars total, played soccer semi-professionally before cooking, owns restaurants worldwide, and emphasizes technique over complexity in dishes like his famous shrimp cocktail.

Final Thoughts

Gordon Ramsay Shrimp Cocktail taught me that respect for ingredients and proper technique matter more than fancy equipment or complex recipes. This elegant appetizer proves that sometimes the simplest dishes require the most skill to execute perfectly.

The key to mastering Gordon Ramsay Shrimp Cocktail lies in understanding that each element – from shrimp selection to sauce balance – contributes to the final result. Take your time, follow the temperature guidelines, and don’t rush the process.

Whether you’re hosting a dinner party or simply wanting to elevate your weeknight meal, Gordon Ramsay Shrimp Cocktail delivers restaurant-quality results at home. For more Gordon Ramsay techniques, check out my Gordon Ramsay Signature Dishes guide.

Stay safe,
Jack Sullivan

Gordon Ramsay shrimp cocktail recipe with perfectly cooked jumbo shrimp and homemade cocktail sauce
Jack Sullivan

Gordon Ramsay Shrimp Cocktail

Master Chef Gordon Ramsay’s elegant shrimp cocktail with perfectly cooked jumbo shrimp and homemade cocktail sauce. A restaurant-quality appetizer that’s surprisingly simple to make at home.
Prep Time 20 minutes
Cook Time 8 minutes
Total Time 28 minutes
Servings: 4 servings
Course: Appetizer
Cuisine: british
Calories: 185

Ingredients
  

  • 2 lbs jumbo shrimp 16-20 count, peeled and deveined
  • 1 cup ketchup for cocktail sauce
  • 2 tbsp prepared horseradish adjust to taste
  • 1 tbsp Worcestershire sauce
  • 2 tbsp fresh lemon juice
  • 1 tsp hot sauce Tabasco preferred
  • 1 tsp kosher salt

Equipment

  • Large pot for boiling For cooking shrimp
  • Large bowl with ice For ice bath
  • Cocktail glasses For serving

Method
 

  1. 1️⃣ Bring a large pot of salted water to boil with bay leaf. Prepare ice bath in large bowl.
  2. 2️⃣ Add shrimp to boiling water. Cook for 2-3 minutes until pink and just cooked through.
  3. 3️⃣ Immediately transfer shrimp to ice bath to stop cooking. Let cool completely.
  4. 4️⃣ Mix ketchup, horseradish, Worcestershire sauce, lemon juice, and hot sauce for cocktail sauce.
  5. 5️⃣ Arrange chilled shrimp around rim of cocktail glasses. Serve with cocktail sauce in center.

Nutrition

Serving: 1gCalories: 185kcalCarbohydrates: 8gProtein: 35gFat: 2gSaturated Fat: 0.5gPolyunsaturated Fat: 0.8gMonounsaturated Fat: 0.3gCholesterol: 285mgSodium: 890mgPotassium: 385mgFiber: 0.5gSugar: 6gVitamin A: 8IUVitamin C: 15mgCalcium: 12mgIron: 18mg

Notes

For best results, buy fresh shrimp the day you plan to cook. Frozen shrimp works but thaw completely first.
Don’t overcook the shrimp – they should be pink and just opaque. Overcooked shrimp become rubbery.
Make cocktail sauce ahead of time to let flavors meld. Store covered in refrigerator for up to 1 week.

Tried this recipe?

Let us know how it was!

The smoke alarm went off three times during my first try at Gordon Ramsay Meatball Soup — and that was just the beginning of what I now call “The Great Meatball Disaster of 2019.” As a firefighter, I thought I knew how to handle heat and smoke, but Gordon Ramsay Meatball Soup had other plans. Between burnt meatballs, watery broth, and enough kitchen chaos to warrant an actual fire department response, I learned that mastering this recipe requires more than just throwing ingredients together.

After years of perfecting this Gordon Ramsay Meatball Soup, I can tell you it’s become one of our station’s most requested meals. The key lies in understanding Ramsay’s technique for creating perfectly seasoned meatballs that hold their shape while delivering maximum flavor in every spoonful.

How Does Gordon Ramsay Cook Meatballs?

Gordon Ramsay’s approach to meatballs in his signature soup focuses on three critical elements: proper binding, strategic seasoning, and controlled cooking temperature. Unlike traditional methods that often result in dense, heavy meatballs, Ramsay’s technique creates light yet flavorful spheres that enhance rather than overwhelm the broth.

The secret starts with fresh breadcrumbs rather than dried ones. Fresh breadcrumbs absorb moisture differently, creating a tender texture that prevents the meatballs from becoming rubber balls. Ramsay also emphasizes minimal mixing – just enough to combine ingredients without developing the meat proteins that create toughness.

Temperature control is crucial when browning the meatballs. According to USDA guidelines, ground beef should reach 160°F internally, but Ramsay’s method involves initial searing at high heat followed by gentle braising. This two-step process ensures food safety while maintaining moisture and preventing overcooking.

What Is the Origin of Meatball Soup?

Meatball soup traces its roots back to ancient Rome, where similar preparations were documented in early cookbooks. The concept spread throughout Europe during the medieval period, with each region developing unique variations. Italian wedding soup, Swedish köttbullar, and German sauerbraten all share common ancestry with modern meatball soups.

The British interpretation, which influences Gordon Ramsay’s version, emerged during the 18th century when hearty, warming soups became staples of working-class cuisine. These soups provided complete nutrition in a single bowl – protein from meat, carbohydrates from added vegetables or grains, and essential minerals from rich bone broths.

Modern Gordon Ramsay Meatball Soup incorporates elements from this historical foundation while applying contemporary culinary techniques. The result bridges traditional comfort food with professional kitchen precision, creating a dish that satisfies both nostalgia and sophisticated palates.

Ingredients That Actually Matter for Gordon Ramsay Meatball Soup

Fresh ingredients for Gordon Ramsay meatball soup recipe laid out on marble counter

Quality ingredients make the difference between restaurant-worthy Gordon Ramsay Meatball Soup and cafeteria disappointment. Start with 80/20 ground beef – the fat content ensures juicy meatballs while providing enough protein structure for proper binding. Leaner ground beef creates dry, crumbly results that fall apart during cooking.

Fresh breadcrumbs are non-negotiable. Day-old bread processed in a food processor creates the ideal texture for moisture retention. Avoid store-bought dried breadcrumbs, which absorb liquid differently and can create gummy textures.

Your broth foundation determines the soup’s success. Low-sodium beef stock allows better seasoning control, while homemade stock elevates the entire dish. If using store-bought, choose brands with minimal additives and high gelatin content – look for stock that gels when refrigerated.

For those interested in mastering other Ramsay techniques, check out our Gordon Ramsay Bolognese Sauce guide for complementary pasta skills.

Step-by-Step Instructions

Preparation (25 minutes): Begin by combining ground beef, fresh breadcrumbs, eggs, half the diced onion, minced garlic, salt, and pepper in a large mixing bowl. Mix gently with clean hands until ingredients just come together – overmixing develops gluten in the bread and creates tough meatballs.

Form mixture into uniform 1.5-inch spheres using a cookie scoop or hands. Consistency in size ensures even cooking throughout. Place formed meatballs on a plate and refrigerate for 15 minutes. This chilling step helps maintain shape during the browning process.

Cooking Process (35 minutes): Heat olive oil in a large Dutch oven over medium-high heat. Brown meatballs in batches, avoiding overcrowding which drops temperature and prevents proper searing. Turn carefully with tongs to develop color on all sides, then remove and set aside.

In the same pot, sauté remaining onions until translucent, approximately 5 minutes. Scrape up browned bits from the bottom – these fond particles add crucial flavor to the finished soup. The Mayo Clinic recommends monitoring sodium intake, so taste your stock before adding additional salt.

Pour beef stock into the pot and bring to a gentle boil. Return browned meatballs to the liquid, reduce heat to low, and cover. Simmer for 20 minutes, allowing meatballs to finish cooking while infusing the broth with their flavors.

Pro Tips

Temperature management separates amateur attempts from professional results. Use a digital thermometer to monitor both oil temperature for browning (350°F optimal) and final meatball internal temperature (160°F for safety).

Don’t skip the refrigeration step before cooking. Cold meatballs hold their shape better during the initial searing process, preventing the flat-bottomed disasters that plagued my early attempts.

Consider adding a splash of Worcestershire sauce to the meatball mixture for umami depth. This technique, borrowed from British pub cooking, enhances the savory profile without overpowering the beef flavor.

For variation inspiration, explore our Gordon Ramsay Chicken Cacciatore for another hearty comfort dish using similar braising techniques.

Storage and Leftovers

Gordon Ramsay Meatball Soup improves overnight as flavors meld and develop complexity. Store leftovers in the refrigerator for up to three days in airtight containers. The soup can be frozen for up to three months, though the texture of reheated meatballs may be slightly softer.

When reheating, use low heat and stir gently to prevent meatball breakage. Add a splash of additional stock if the soup has thickened during storage. Fresh herbs added during reheating brighten flavors that may have diminished.

For meal prep enthusiasts, consider our Gordon Ramsay Fondant Potatoes as an excellent side dish that reheats beautifully alongside this soup.

Frequently Asked Questions

What is Gordon Ramsay’s most famous recipe?

While Beef Wellington is often considered Ramsay’s signature dish, his scrambled eggs technique and various pasta preparations have gained equal recognition. Gordon Ramsay Meatball Soup represents his approach to elevating comfort food through professional techniques.

What are some fun facts about Gordon Ramsay?

Ramsay originally trained as a footballer before pursuing culinary arts. He holds multiple Michelin stars and has opened restaurants worldwide. Despite his television persona, he’s known for patient teaching in professional kitchens and emphasis on fundamental techniques like those used in Gordon Ramsay Meatball Soup

From that first smoke-alarm-triggering disaster to today’s refined technique, Gordon Ramsay Meatball Soup has taught me that great cooking combines respect for ingredients with understanding of fundamental processes. Whether you’re feeding a hungry fire crew or your own family, this recipe delivers the comfort and satisfaction that makes all the effort worthwhile.Stay safe,
Jack Sullivan

Gordon Ramsay style meatball soup in rustic bowl with perfectly cooked meatballs in rich broth
Jack Sullivan

Gordon Ramsay Meatball Soup

A rich, comforting soup featuring perfectly seasoned meatballs in a flavorful broth, inspired by Gordon Ramsay’s professional techniques.
Prep Time 25 minutes
Cook Time 35 minutes
Total Time 1 hour
Servings: 6 servings
Course: Soup
Cuisine: british
Calories: 285

Ingredients
  

  • 1.5 pounds ground beef 80/20 blend for best flavor
  • 1 cup fresh breadcrumbs preferably day-old bread
  • 2 large eggs room temperature
  • 1 medium yellow onion finely diced
  • 4 cloves garlic minced
  • 8 cups beef stock low sodium preferred
  • 2 tablespoons olive oil extra virgin
  • 1 teaspoon salt kosher salt
  • 1/2 teaspoon black pepper freshly ground
  • 2 tablespoons fresh parsley chopped for garnish

Equipment

  • Large Dutch Oven 6-8 quart capacity for proper heat distribution
  • – Large mixing bowl For meatball preparation
  • Cookie Scoop For uniform meatball sizing

Method
 

  1. 1️⃣ Combine ground beef, breadcrumbs, eggs, half the diced onion, minced garlic, salt, and pepper in a large mixing bowl. Mix gently with hands until just combined.
  2. 2️⃣ Using a cookie scoop or hands, form mixture into 1.5-inch meatballs. Place on a plate and refrigerate for 15 minutes to firm up.
  3. 3️⃣ Heat olive oil in a large Dutch oven over medium-high heat. Brown meatballs in batches, turning carefully to seal all sides. Remove and set aside.
  4. 4️⃣ In the same pot, sauté remaining onions until translucent, about 5 minutes. Scrape up any browned bits from the bottom.
  5. 5️⃣ Pour in beef stock and bring to a gentle boil. Return meatballs to pot, reduce heat to low, and simmer covered for 20 minutes.
  6. 6️⃣ Taste and adjust seasoning. Ladle into bowls and garnish with fresh parsley. Serve immediately while hot.

Nutrition

Serving: 1gCalories: 285kcalCarbohydrates: 12gProtein: 28gFat: 15gSaturated Fat: 5gPolyunsaturated Fat: 1gMonounsaturated Fat: 7gCholesterol: 98mgSodium: 650mgPotassium: 485mgFiber: 2gSugar: 4gVitamin A: 8IUVitamin C: 12mgCalcium: 6mgIron: 18mg

Notes

For extra flavor, add a splash of Worcestershire sauce to the meatball mixture.
Don’t overmix the meatball mixture – this keeps them tender.
Refrigerating meatballs before cooking helps them hold their shape.

Tried this recipe?

Let us know how it was!