Author

Jack Sullivan

Browsing

Three years ago, I was convinced Gordon Ramsay Tuna Steak was impossible to master at home. As a firefighter who thought he could handle anything in the kitchen, I figured searing fish was just like any other protein. Boy, was I wrong. After watching Ramsay’s technique videos and ruining about $60 worth of beautiful tuna, I finally cracked the code. Now I can nail that perfect sesame crust and pink center every single time—and you can too.

The secret isn’t just in the technique, it’s understanding why each step exists. When I finally stopped rushing and started treating this Gordon Ramsay Tuna Steak recipe like the precision cooking it demands, everything clicked.

How Does Gordon Ramsay Cook Tuna Steak?

Ramsay’s approach to Gordon Ramsay Tuna Steak is all about controlled aggression—high heat, quick searing, and absolute confidence. His technique relies on three non-negotiables: room temperature fish, a screaming hot pan, and never moving the steak during searing.

The foundation starts with proper preparation. Ramsay insists on bringing the tuna to room temperature because cold fish hitting hot oil creates uneven cooking. His marinade technique serves dual purposes—the sesame oil and soy sauce combination penetrates the fish while aromatics build complementary flavor layers.

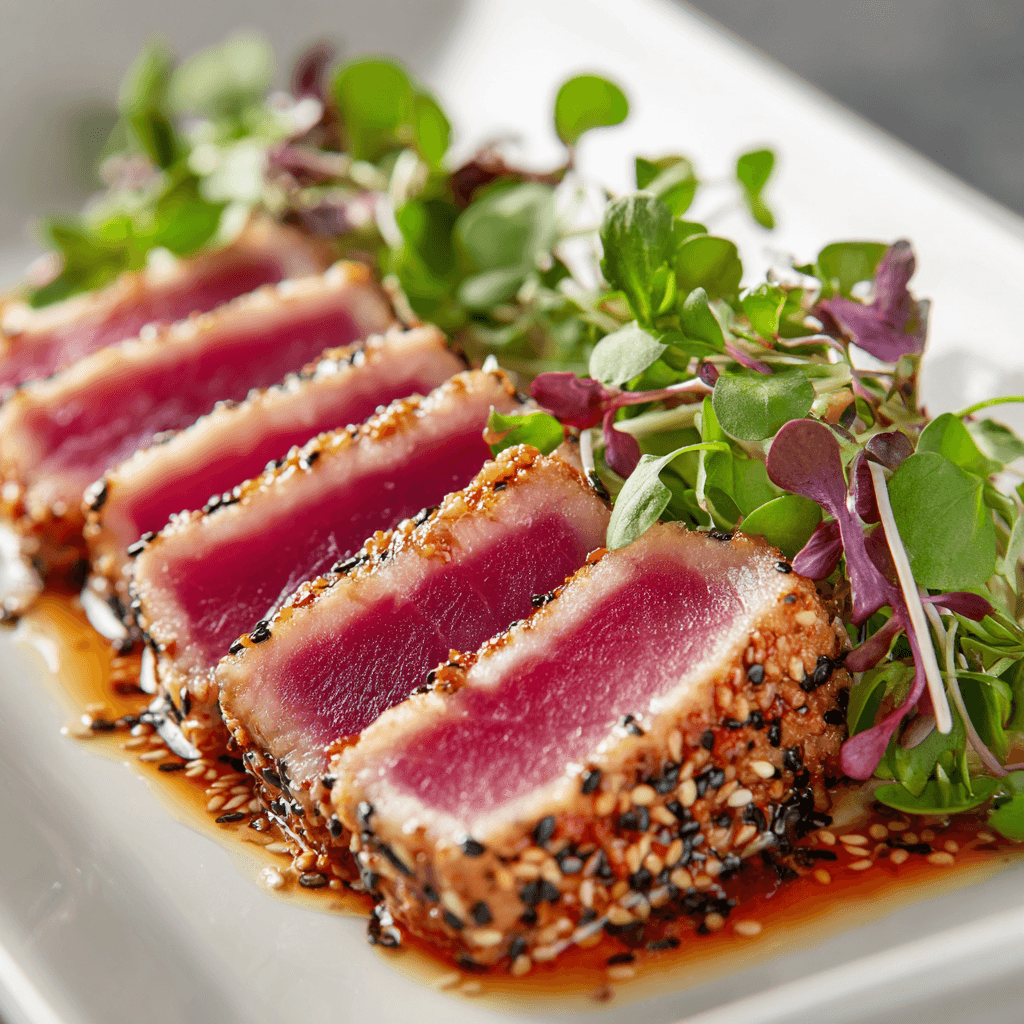
The sesame seed crust is Ramsay’s signature touch on this Gordon Ramsay Tuna Steak. He presses seeds firmly into the surface, creating texture contrast and adding nutty flavors that pair beautifully with the fish’s natural richness. According to USDA guidelines, marinating seafood for 15-30 minutes is optimal for both flavor and food safety.

How to Make Tuna Steak More Interesting?

The beauty of Gordon Ramsay Tuna Steak lies in building flavor layers without masking the fish’s natural taste. His sesame seed crust provides textural interest—the contrast between crunchy exterior and silky interior creates an almost restaurant-quality experience.

The marinade components work synergistically. Sesame oil brings richness, soy sauce adds umami depth, garlic provides aromatic complexity, and ginger contributes subtle heat. This Gordon Ramsay Tuna Steak combination creates layers that unfold as you eat.

For serving variations, consider pairing this Gordon Ramsay Tuna Steak with complementary sides like Gordon Ramsay Fondant Potatoes or Gordon Ramsay Beet Salad. Advanced flavor techniques include finishing with quality sesame oil or togarashi, but the Gordon Ramsay Tuna Steak should remain the star.

How to Cook Tuna Steaks So They Don’t Dry Out?

Moisture retention is the make-or-break factor with Gordon Ramsay Tuna Steak. Overcooking transforms this premium fish into expensive cat food, so understanding temperature control is crucial.

One-inch thickness provides enough mass to create temperature gradient—seared exterior with perfectly pink center. Room temperature preparation cannot be skipped; cold fish hitting extreme heat creates thermal shock, causing proteins to seize and moisture to escape rapidly.

The marinade serves as moisture insurance. Oil-based marinades create a protective barrier that slows moisture loss during high-heat cooking. Timing precision matters enormously: ninety seconds per side for rare, two minutes for medium-rare. The FDA recommends 145°F for fish, but sushi-grade tuna can safely be served at 125°F (rare) to 130°F (medium-rare).

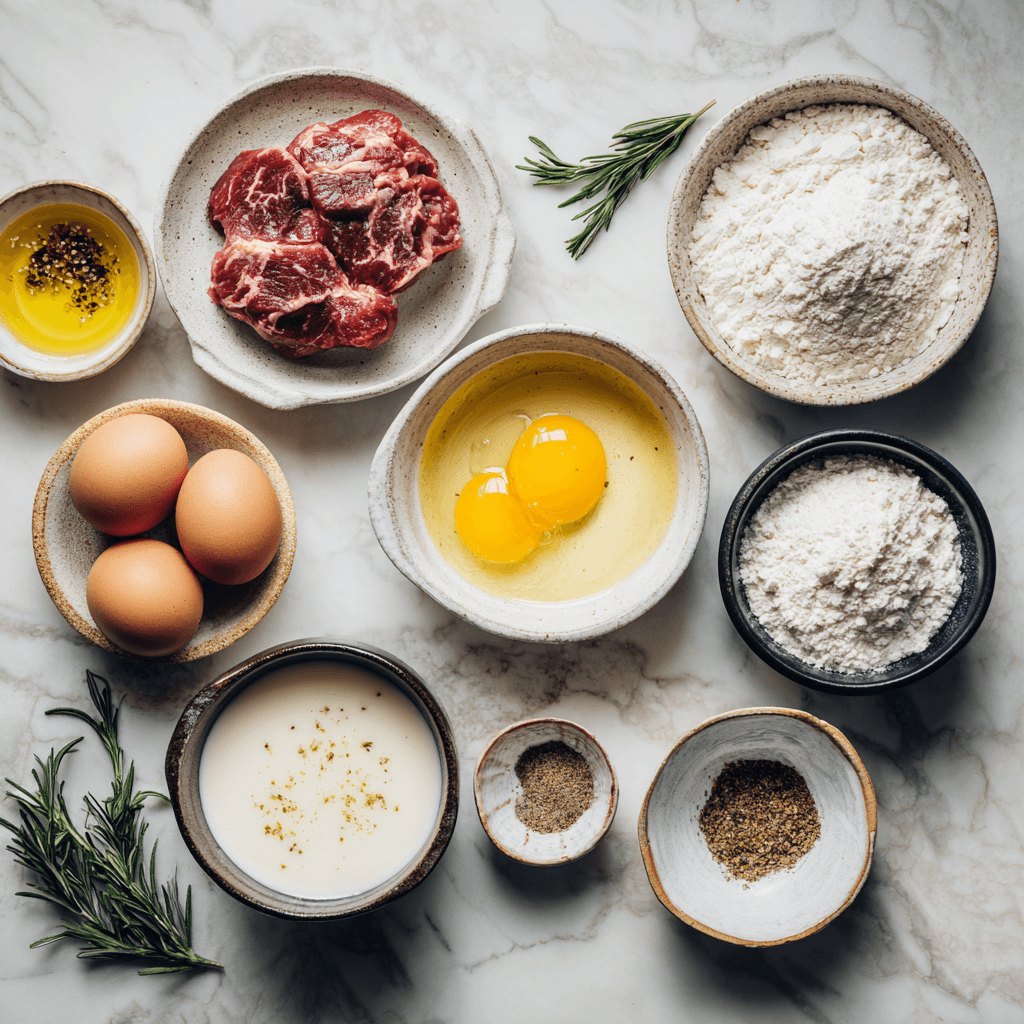
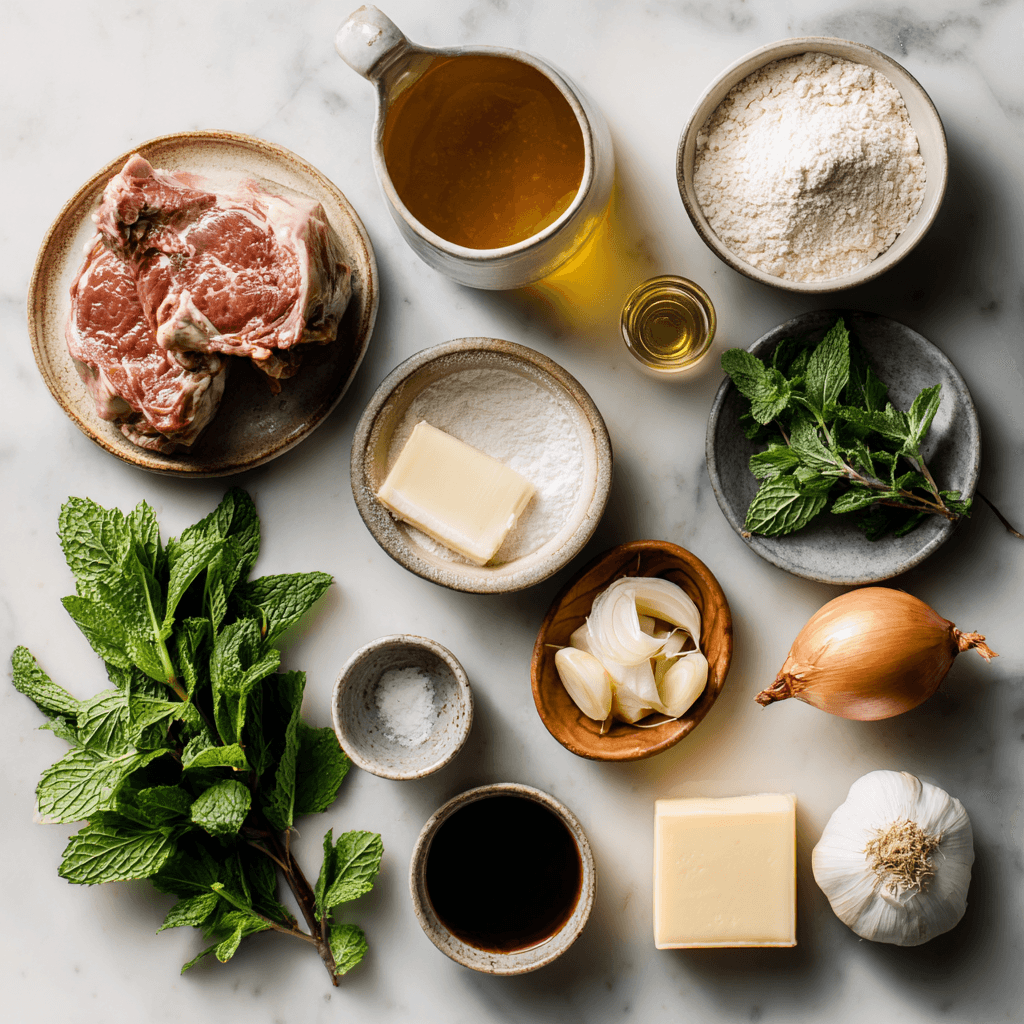
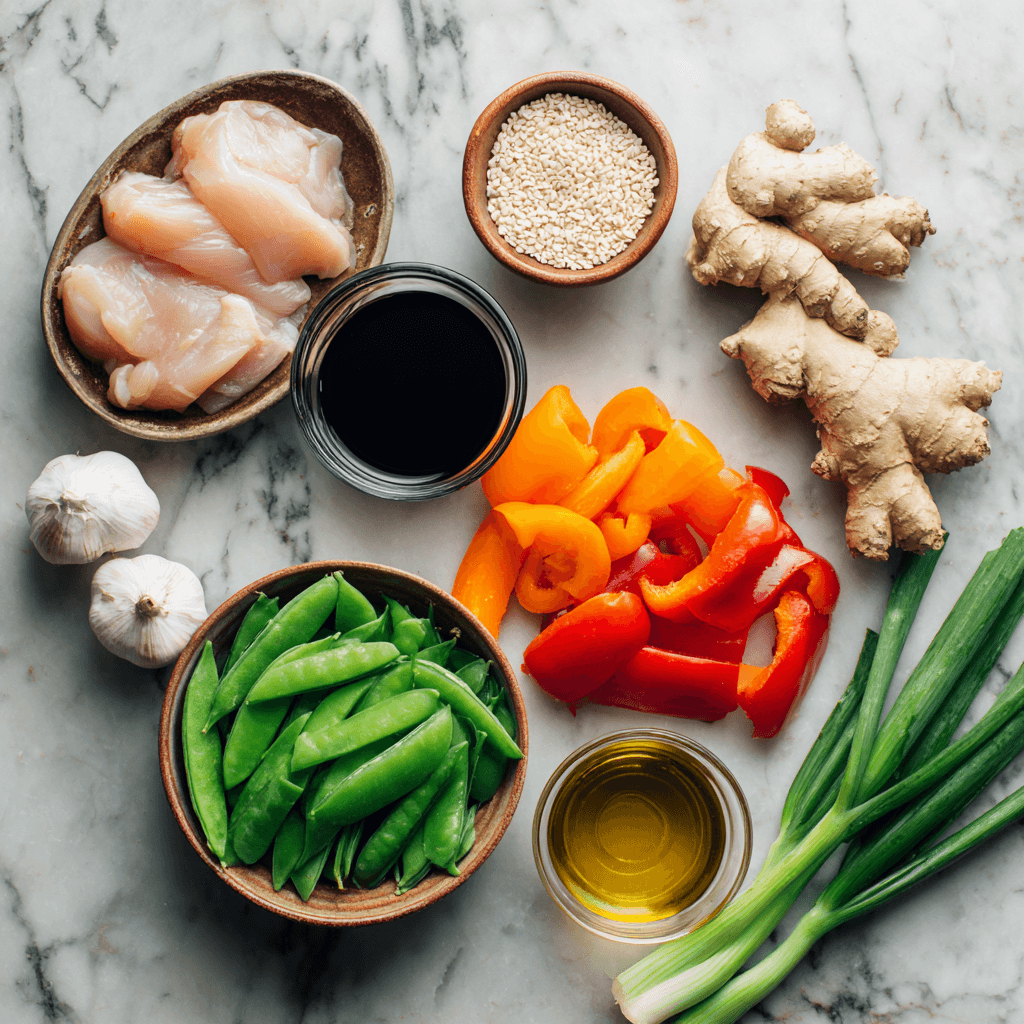
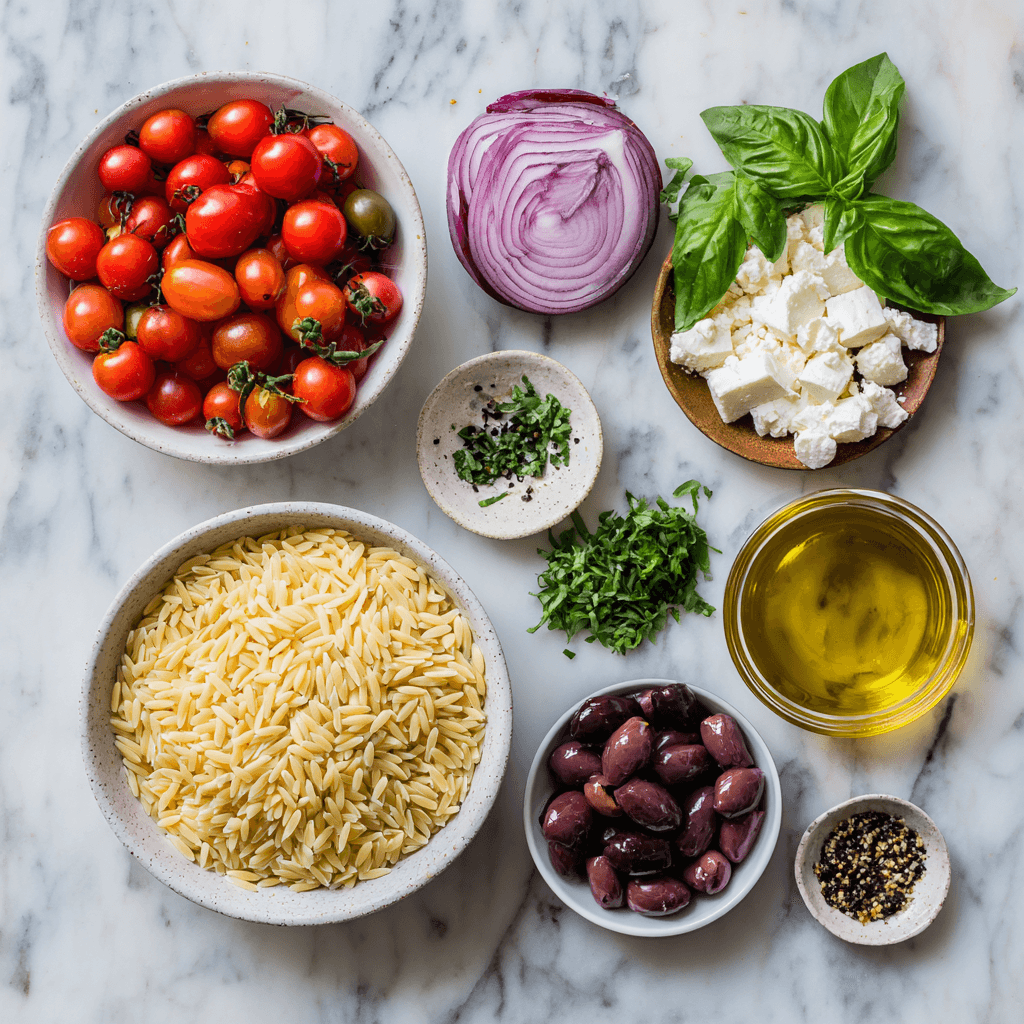
Ingredients That Actually Matter for Gordon Ramsay Tuna Steak

Fresh tuna steak and Asian-inspired seasonings for Gordon Ramsay recipe

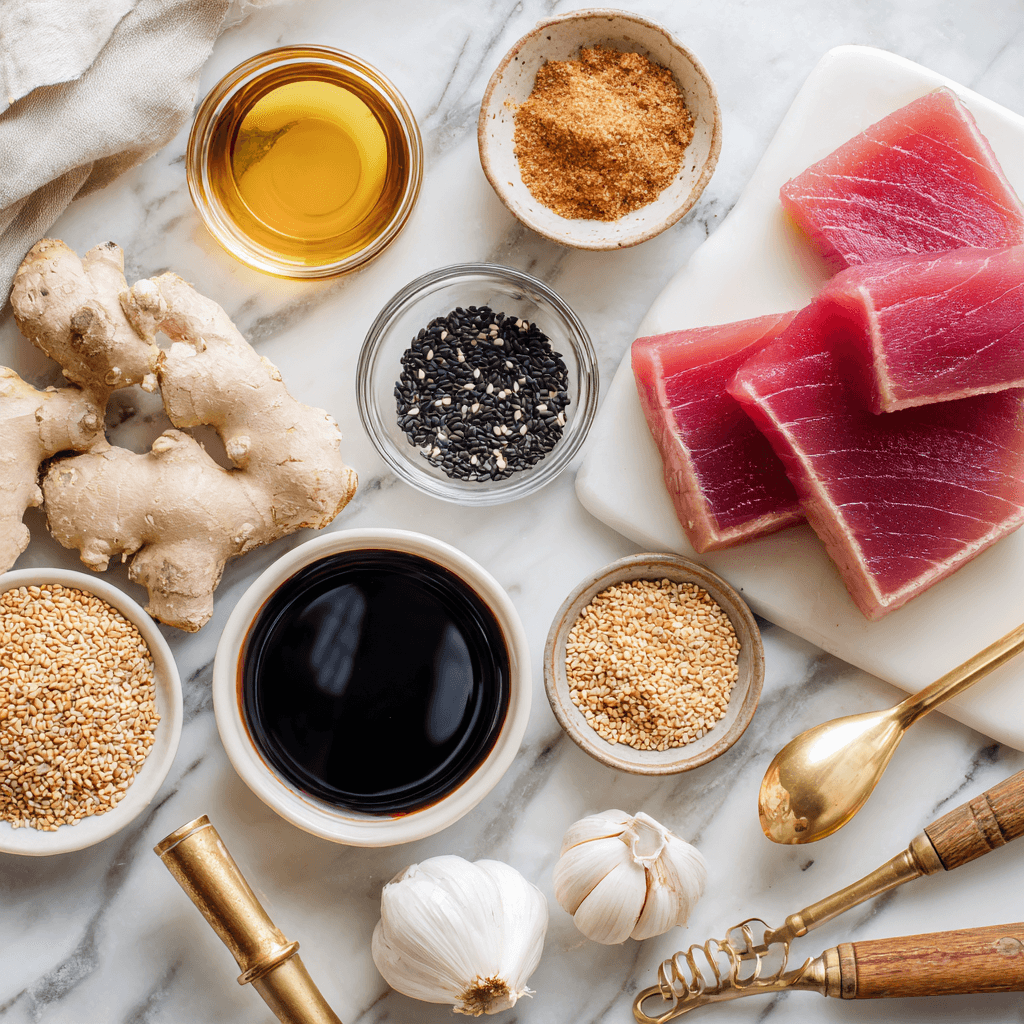
Quality starts with sushi-grade tuna—non-negotiable for this Gordon Ramsay Tuna Steak since we’re serving it rare. Look for deep red color, firm texture, and no fishy smell. Toasted sesame oil provides deeper, nuttier flavors compared to regular sesame oil.

The black and white sesame seed combination creates visual and flavor complexity. Fresh aromatics make noticeable differences—pre-minced garlic and ginger from jars lack the brightness needed for this Gordon Ramsay Tuna Steak. Coarse sea salt provides better texture and cleaner flavor than table salt.

Step-by-Step Instructions

Remove tuna steaks from refrigeration 30 minutes before cooking and pat completely dry. Combine sesame oil, soy sauce, minced garlic, and grated ginger in a shallow dish. Marinate tuna for 15 minutes, turning once.

Mix sesame seeds on a large plate. Remove tuna from marinade and press both sides firmly into the seed mixture. Season with sea salt and black pepper.

Heat cast iron skillet over high heat until smoking. Add vegetable oil and swirl to coat. Place tuna steaks in the hot pan—don’t move them. Sear for 90 seconds per side for rare, or 2 minutes for medium-rare.

Remove from heat immediately and let rest for 2 minutes. Slice against the grain with a sharp knife and serve your perfectly executed Gordon Ramsay Tuna Steak immediately.

Pro Tips for Perfect Results

Use an instant-read thermometer for accuracy—125°F for rare, 130°F for medium-rare. Cast iron provides superior heat retention for this Gordon Ramsay Tuna Steak. Choose high smoke point oils like vegetable or grapeseed for searing.

Slice with your sharpest knife in one smooth motion—sawing ruins the delicate texture. Serve immediately while the contrast between hot crust and cool interior is most pronounced. This Gordon Ramsay Tuna Steak doesn’t hold well and is designed to be eaten fresh.

Consider exploring Gordon Ramsay Grilled Salmon techniques to expand your seafood repertoire, or try Gordon Ramsay Tuna Cakes for a different approach to this versatile fish.

Storage and Leftovers

Refrigerate leftover Gordon Ramsay Tuna Steak within two hours in an airtight container for no more than 24 hours. Reheating isn’t recommended—the delicate texture doesn’t survive well. Instead, use leftovers cold in salads or sushi-style preparations.

For meal prep, prepare marinade and sesame seed mixture up to 24 hours ahead, but cook the Gordon Ramsay Tuna Steak fresh for optimal results. According to Harvard Health, tuna provides excellent lean protein and omega-3 fatty acids.

Frequently Asked Questions

What to look for in a tuna steak?

Choose sushi-grade tuna with deep red color, firm texture, and no fishy odor. Avoid steaks with brown spots or excessive moisture—these compromise your Gordon Ramsay Tuna Steak.

Can I use frozen tuna?

Properly frozen sushi-grade tuna works for Gordon Ramsay Tuna Steak. Thaw completely in the refrigerator overnight and pat dry thoroughly before proceeding.

How do I know when the pan is hot enough?

The pan should be smoking lightly when you add oil. A drop of water should sizzle and evaporate immediately—this extreme heat is essential for proper searing.

Mastering this Gordon Ramsay Tuna Steak takes practice, but the results are worth every minute. The combination of technique, timing, and quality ingredients creates restaurant-worthy results that’ll impress even the toughest critics. Remember, confidence comes from understanding the “why” behind each step.

Stay safe,
Jack Sullivan

Gordon Ramsay style seared tuna steak sliced showing perfect pink interior
Jack Sullivan

Gordon Ramsay Tuna Steak

Master Gordon Ramsay’s technique for perfectly seared tuna steak with a crispy exterior and tender pink interior. Restaurant-quality results at home.
Prep Time 15 minutes
Cook Time 6 minutes
Total Time 21 minutes
Servings: 4 servings
Course: Main Course
Cuisine: Japanese
Calories: 285

Ingredients
  

  • 4 pieces fresh tuna steaks 1-inch thick, sushi-grade
  • 2 tbsp sesame oil toasted variety preferred
  • 3 tbsp soy sauce low sodium recommended
  • 2 cloves fresh garlic minced fine
  • 1 tbsp fresh ginger grated or minced
  • 1/4 cup black sesame seeds for crusting
  • 1/4 cup white sesame seeds for crusting
  • 1 tsp sea salt coarse variety
  • 1/2 tsp black pepper freshly cracked
  • 2 tbsp vegetable oil for searing

Equipment

  • 1 Cast iron skillet Heavy-bottomed pan essential for even heat distribution
  • 1 Meat thermometer For checking internal temperature accuracy

Method
 

  1. 1️⃣ Remove tuna steaks from refrigeration 30 minutes before cooking to bring to room temperature. Pat completely dry with paper towels.
  2. 2️⃣ Combine sesame oil, soy sauce, minced garlic, and grated ginger in a shallow dish. Marinate tuna steaks for 15 minutes, turning once.
  3. 3️⃣ Mix black and white sesame seeds on a large plate. Remove tuna from marinade and press both sides firmly into sesame seed mixture.
  4. 4️⃣ Season sesame-crusted tuna with sea salt and freshly cracked black pepper on both sides.
  5. 5️⃣ Heat cast iron skillet over high heat until smoking. Add vegetable oil and swirl to coat pan evenly.
  6. 6️⃣ Sear tuna steaks for 90 seconds per side for rare center, or 2 minutes per side for medium-rare. Do not move during searing.
  7. 7️⃣ Remove from heat immediately and let rest for 2 minutes. Slice against the grain with sharp knife and serve immediately.

Nutrition

Serving: 1gCalories: 285kcalCarbohydrates: 8gProtein: 42gFat: 12gSaturated Fat: 2gPolyunsaturated Fat: 4gMonounsaturated Fat: 5gCholesterol: 65mgSodium: 680mgPotassium: 545mgFiber: 2gSugar: 2gVitamin A: 185IUCalcium: 85mgIron: 2mg

Notes

Always use sushi-grade tuna for this recipe to ensure food safety when serving rare to medium-rare.
The key to perfect searing is a screaming hot pan and not moving the fish during cooking.
Internal temperature should reach 125°F for rare or 130°F for medium-rare when measured with an instant-read thermometer.

Tried this recipe?

Let us know how it was!

The smoke alarm went off three times during my first try at Gordon Ramsay Roasted Tomato Soup. Three times. My neighbors probably thought I was trying to burn down the whole apartment complex. But here’s the thing about firefighting — we learn from disasters, and sometimes the best lessons come from complete failures.

That first attempt at Gordon Ramsay Roasted Tomato Soup taught me more about cooking than any cookbook ever could. Now, after perfecting this recipe through trial and plenty of error, I can confidently say this is the most satisfying soup you’ll ever make at home. Whether you’re looking to impress dinner guests or just want comfort food that actually tastes like it came from a high-end restaurant, this Gordon Ramsay Roasted Tomato Soup delivers every single time.

The secret isn’t just following Gordon’s technique — it’s understanding why each step matters. You might be wondering if making restaurant-quality Gordon Ramsay Roasted Tomato Soup at home is worth the effort. After serving this to my crew at the station and watching grown firefighters practically lick their bowls clean, I can tell you it absolutely is. This recipe pairs perfectly with Gordon Ramsay’s garlic bread for the ultimate comfort meal.

What Are the Best Tomatoes to Use for Roasted Tomato Soup?

Choosing the right tomatoes for Gordon Ramsay Roasted Tomato Soup makes the difference between a watery disappointment and restaurant-quality perfection. After testing everything from beefsteak to cherry tomatoes, I’ve learned that Roma tomatoes are your best bet for this recipe.

Roma tomatoes have less water content and more flesh than other varieties, which means your Gordon Ramsay Roasted Tomato Soup won’t end up thin and lacking flavor. According to the USDA’s nutritional database, Roma tomatoes contain higher concentrations of lycopene and natural sugars, which intensify during the roasting process. The lower seed count also prevents that bitter aftertaste you sometimes get with tomato-heavy dishes.

San Marzano tomatoes are the gold standard if you can find them fresh, but they’re not always available and can be expensive. Roma tomatoes give you 90% of the flavor at a fraction of the cost. The key is making sure they’re ripe but still firm — you want them to hold their shape during the roasting process while developing those caramelized edges that give Gordon Ramsay Roasted Tomato Soup its signature depth.

Ingredients That Actually Matter for Gordon Ramsay Roasted Tomato Soup

Ingredients for Gordon Ramsay roasted tomato soup including fresh tomatoes and herbs

Every ingredient in Gordon Ramsay Roasted Tomato Soup serves a specific purpose, and I learned this the hard way during my smoke alarm disasters. Fresh garlic is non-negotiable. Pre-minced garlic from a jar will give you a sharp, artificial flavor that competes with the tomatoes instead of complementing them.

The quality of your olive oil matters more than you might think. Extra virgin olive oil not only helps the vegetables caramelize properly but also adds fruity notes that enhance the overall flavor profile. Research from Harvard’s nutrition department shows that high-quality olive oil retains more antioxidants during cooking.

Yellow onions work better than white or red onions for this recipe. They have the right balance of sweetness and sharpness, and they caramelize beautifully alongside the tomatoes. Don’t skimp on the heavy cream — this is what transforms good tomato soup into Gordon Ramsay Roasted Tomato Soup. The fat content balances the acidity of the tomatoes and creates that silky texture that makes this soup restaurant-quality.

Step-by-Step Instructions

Prep Your Oven and Vegetables
Preheat your oven to 425°F and line a large roasting pan with parchment paper. Cut 3 pounds of Roma tomatoes in half and remove the cores. Quarter one large yellow onion and peel 6 garlic cloves. This prep work is crucial for even cooking in your Gordon Ramsay Roasted Tomato Soup.

Season and Roast
Arrange the tomatoes cut-side up on your prepared pan along with the onion and garlic. Drizzle everything with 1/4 cup extra virgin olive oil and season generously with sea salt and freshly ground black pepper. The tomatoes should be cut-side up to prevent them from steaming in their own juices.

Watch for Caramelization
Roast for 35-40 minutes until the tomato edges are caramelized and slightly charred. This is where Gordon Ramsay Roasted Tomato Soup gets its depth — those dark edges aren’t burnt, they’re concentrated flavor. The Maillard reaction that occurs during this process creates complex flavors that can’t be achieved through other cooking methods.

Build the Base and Finish
Transfer all roasted vegetables to a large, heavy-bottomed pot. Add 1 tablespoon of tomato paste and cook for 2 minutes, stirring constantly. Pour in 4 cups of low-sodium vegetable stock and bring to a boil. Reduce heat and simmer for 15 minutes. Use an immersion blender to puree until smooth, then strain through a fine-mesh sieve for restaurant-quality texture. Return to pot and stir in 1/2 cup heavy cream and 1/4 cup fresh chopped basil.

How to Make Tomato Soup More Interesting

Gordon Ramsay Roasted Tomato Soup is already packed with flavor, but there are several ways to elevate it even further. Herb variations can completely change the character of your soup. Fresh thyme adds an earthy note that pairs beautifully with the roasted vegetables. Oregano brings a Mediterranean flair, while fresh sage creates a more sophisticated, restaurant-style soup.

Spice additions should be subtle but impactful. A pinch of smoked paprika echoes the roasted flavors and adds depth. Red pepper flakes give a gentle heat that doesn’t compete with the tomatoes. Texture contrasts make each bowl more interesting — homemade croutons, a dollop of pesto, or toasted pine nuts provide elements that complement the smooth soup base.

This Gordon Ramsay Roasted Tomato Soup pairs beautifully with Gordon Ramsay’s signature dishes for a complete restaurant-style meal experience.

Pro Tips and Storage

Temperature control is everything when making Gordon Ramsay Roasted Tomato Soup. Keep your oven at exactly 425°F — too low and the vegetables won’t caramelize properly. Don’t overcrowd your roasting pan. The vegetables need space for proper browning to occur.

The straining step isn’t optional if you want restaurant-quality results. Yes, it’s an extra dish to wash, but it removes any remaining tomato skins and seeds that can make the soup gritty. Cream temperature matters — add it when the soup is hot but not boiling to prevent curdling.

For storage, let Gordon Ramsay Roasted Tomato Soup cool completely before refrigerating. Store in airtight containers for up to 4 days in the refrigerator. For freezing, prepare the recipe up to the point before adding cream — the base freezes beautifully for up to 3 months. When ready to serve, thaw overnight, reheat gently, then stir in fresh cream and herbs.

For more advanced cooking techniques that complement this soup, check out our guide on professional bread making secrets to create the perfect accompaniment.

Frequently Asked Questions

What is Gordon Ramsay’s most famous recipe?

While Gordon Ramsay is known for many dishes, his Beef Wellington is probably his most famous signature recipe. However, his approach to simple dishes like roasted tomato soup showcases his ability to elevate everyday ingredients.

What is in Jamie Oliver’s 5 ingredient tomato soup?

Jamie Oliver’s version typically uses canned tomatoes, onion, garlic, vegetable stock, and fresh basil. While simpler than Gordon Ramsay Roasted Tomato Soup, it lacks the depth of flavor that comes from roasting the vegetables first.

Stay safe,
Jack Sullivan

Gordon Ramsay roasted tomato soup in a white bowl with fresh basil garnish
Jack Sullivan

Gordon Ramsay Roasted Tomato Soup

Restaurant-quality roasted tomato soup inspired by Gordon Ramsay’s techniques, featuring perfectly roasted tomatoes with fresh herbs and cream for the ultimate comfort food experience.
Prep Time 15 minutes
Cook Time 45 minutes
Total Time 1 hour
Servings: 4 servings
Course: Soup
Cuisine: british
Calories: 285

Ingredients
  

  • 3 lbs Roma tomatoes halved and cored
  • 1 large yellow onion quartered
  • 6 cloves garlic peeled
  • 1/4 cup extra virgin olive oil
  • 2 tsp sea salt
  • 1 tsp black pepper freshly ground
  • 4 cups vegetable stock low sodium
  • 1/2 cup heavy cream
  • 1/4 cup fresh basil chopped
  • 1 tbsp tomato paste

Equipment

  • Large roasting pan For roasting tomatoes evenly
  • Immersion blender For smooth texture
  • Large heavy-bottomed pot For simmering soup

Method
 

  1. 1️⃣ Preheat oven to 425°F. Line a large roasting pan with parchment paper.
  2. 2️⃣ Arrange halved tomatoes cut-side up, quartered onion, and garlic cloves on the roasting pan. Drizzle with olive oil and season with salt and pepper.
  3. 3️⃣ Roast for 35-40 minutes until tomato edges are caramelized and slightly charred.
  4. 4️⃣ Transfer roasted vegetables to a large pot. Add tomato paste and cook for 2 minutes, stirring constantly.
  5. 5️⃣ Pour in vegetable stock and bring to a boil. Reduce heat and simmer for 15 minutes.
  6. 6️⃣ Use an immersion blender to puree until smooth. Strain through fine-mesh sieve for silky texture.
  7. 7️⃣ Return to pot, stir in heavy cream and fresh basil. Season to taste and serve immediately.

Nutrition

Serving: 1gCalories: 285kcalCarbohydrates: 18gProtein: 6gFat: 22gSaturated Fat: 8gPolyunsaturated Fat: 2gMonounsaturated Fat: 10gCholesterol: 41mgSodium: 890mgPotassium: 875mgFiber: 4gSugar: 12gVitamin A: 45IUVitamin C: 28mgCalcium: 8mgIron: 12mg

Notes

For best results, use Roma tomatoes as they have fewer seeds and more flesh than other varieties.
Don’t skip the straining step – it creates the silky restaurant-quality texture that makes this soup special.
The soup can be made up to 3 days ahead and reheated gently before serving.

Tried this recipe?

Let us know how it was!

My biggest kitchen disaster? It involved Gordon Ramsay Tuna Nicoise Salad. Picture this: twenty years of emergency response training, and I’m standing in my kitchen at 3 AM, staring at what looked like a crime scene. Overcooked tuna that resembled gray shoe leather. Eggs that exploded in the pot. Green beans so overcooked they’d lost their will to live. That disaster taught me everything I needed to know about respecting this classic French dish.

The Gordon Ramsay Tuna Nicoise Salad isn’t just another salad—it’s a masterclass in technique, timing, and precision. After rebuilding my approach from scratch and studying Ramsay’s methods, I’ve learned that this dish demands the same level of preparation and execution as any five-alarm call. When done right, this Gordon Ramsay Tuna Nicoise Salad delivers restaurant-quality results that’ll make your guests think you’ve been secretly attending culinary school.

How Does Gordon Ramsay Make Tuna Salad?

Gordon Ramsay’s approach to Gordon Ramsay Tuna Nicoise Salad centers on three non-negotiable principles: premium ingredients, precise timing, and proper technique. Unlike conventional tuna salads that rely on canned fish and mayonnaise, Ramsay’s method elevates this classic French composition with fresh, sushi-grade yellowfin tuna that’s seared to perfection.

The foundation of Ramsay’s Gordon Ramsay Tuna Nicoise Salad starts with ingredient selection. He insists on sushi-grade tuna steaks, preferably yellowfin, because inferior fish will never achieve the buttery texture that defines this dish. The tuna gets seasoned generously with sea salt and freshly cracked black pepper, then seared in a smoking-hot cast iron skillet for exactly 60-90 seconds per side.

What sets Ramsay’s technique apart is his attention to temperature control and resting periods. After searing, the tuna must rest for precisely 2 minutes before slicing—this allows the juices to redistribute and prevents the beautiful rare center from bleeding out onto your cutting board. According to the USDA guidelines for seafood safety, when working with high-quality sushi-grade fish like what Ramsay recommends, brief searing followed by immediate serving ensures both safety and optimal flavor development.

The supporting vegetables in Ramsay’s Gordon Ramsay Tuna Nicoise Salad receive equal attention. Green beans get blanched for exactly 2-3 minutes until they’re bright green and crisp-tender, then shocked in ice water to stop the cooking process. Eggs are boiled for exactly 7 minutes to achieve that perfect jammy yolk consistency that Ramsay is famous for.

How to Make the Perfect Nicoise Salad?

Creating the perfect Gordon Ramsay Tuna Nicoise Salad requires understanding that this isn’t just a thrown-together salad—it’s an artfully composed dish where every element serves a specific purpose. The secret lies in treating each component individually before bringing them together in the final presentation.

Temperature contrast plays a crucial role in the perfect Gordon Ramsay Tuna Nicoise Salad. While most components are served at room temperature, the seared tuna should still be warm when the salad is plated. This creates a dynamic eating experience where different temperatures and textures interact with each bite.

Proper plating transforms a good Gordon Ramsay Tuna Nicoise Salad into a perfect one. Ramsay never tosses the components together—instead, each element gets artfully arranged on the platter in distinct sections. The mixed greens form the base, with each vegetable component clustered in its own area. For optimal results, prepare a Classic French Vinaigrette using the same precision techniques that Ramsay applies to all his sauces.

Ingredients That Actually Matter for Gordon Ramsay Tuna Nicoise Salad

Fresh ingredients for Gordon Ramsay Tuna Nicoise Salad arranged on marble surface

The difference between a restaurant-quality Gordon Ramsay Tuna Nicoise Salad and a disappointing home attempt often comes down to ingredient selection. Fresh yellowfin tuna forms the heart of any Gordon Ramsay Tuna Nicoise Salad. The tuna should have a deep red color, firm texture, and absolutely no fishy smell.

Authentic Nicoise olives make an enormous difference in the final flavor profile. These small, dark purple olives from the French Riviera have a distinct fruity flavor that kalamata or other substitutes simply cannot replicate. European-style anchovies packed in olive oil contribute essential umami depth to Gordon Ramsay Tuna Nicoise Salad.

Farm-fresh eggs with bright orange yolks create the visual and textural contrast that elevates Gordon Ramsay Tuna Nicoise Salad from ordinary to extraordinary. The 7-minute cooking time works perfectly with fresh, room-temperature eggs. Consider pairing your salad with complementary sides from our Gordon Ramsay Signature Dishes collection.

Step-by-Step Instructions

Preparation Phase (25 minutes)

Begin your Gordon Ramsay Tuna Nicoise Salad by filling a large pot with salted water and bringing it to a rolling boil. Add the scrubbed new potatoes first, cooking for 15-18 minutes until fork-tender. Remove and quarter when cool.

Using the same boiling water, cook eggs for exactly 7 minutes for jammy yolks. Transfer immediately to ice bath, then peel and halve. Blanch green beans for 2-3 minutes until bright green and crisp-tender. Shock in ice bath to preserve color and texture.

Vinaigrette and Tuna

Whisk together minced garlic, Dijon mustard, and red wine vinegar. Slowly drizzle in olive oil while whisking to create proper emulsion. Season with salt and pepper.

Remove tuna from refrigeration 15 minutes before cooking. Season generously with salt and pepper. Heat cast iron skillet over high heat until smoking. Sear tuna 60-90 seconds per side for perfect Gordon Ramsay Tuna Nicoise Salad. Rest 2 minutes, then slice against the grain.

For additional protein techniques, explore our guide on Gordon Ramsay Grilled Salmon which uses similar high-heat searing methods.

Final Assembly

Arrange mixed greens on large platter. Working in sections, artfully arrange sliced tuna, halved eggs, quartered potatoes, blanched green beans, halved tomatoes, and olives. Distribute anchovy fillets and scatter capers. Drizzle vinaigrette over entire Gordon Ramsay Tuna Nicoise Salad and serve immediately.

Pro Tips

Temperature Management: The magic of Gordon Ramsay Tuna Nicoise Salad lies in serving it while the tuna remains warm against cool vegetables. Time your tuna searing so the salad can be served within 5 minutes.

Make-Ahead Strategy: All vegetables can be prepared up to 4 hours in advance. The vinaigrette can be made a day ahead but bring to room temperature before serving your Gordon Ramsay Tuna Nicoise Salad.

Research from the Harvard School of Public Health indicates that omega-3 fatty acids in high-quality tuna provide significant cardiovascular benefits when consumed as part of a Mediterranean-style diet.

Storage and Leftovers

Gordon Ramsay Tuna Nicoise Salad is designed for immediate consumption. Prepared vegetables can be refrigerated for up to 2 days in separate containers. Seared tuna should never be stored and reheated—the delicate texture will be destroyed.

According to Mayo Clinic food safety guidelines, seafood dishes like Gordon Ramsay Tuna Nicoise Salad should not be left at room temperature for more than 2 hours to prevent bacterial growth.

Frequently Asked Questions

What goes in a tuna nicoise salad?

A traditional Gordon Ramsay Tuna Nicoise Salad contains seared yellowfin tuna, hard-boiled eggs, green beans, new potatoes, cherry tomatoes, Nicoise olives, anchovy fillets, capers, and mixed salad greens, all dressed with classic Dijon vinaigrette.

What are the characteristics of Nicoise salad?

Gordon Ramsay Tuna Nicoise Salad is characterized by its composed presentation where ingredients are arranged separately rather than mixed, the use of traditional Mediterranean ingredients from Nice, France, and emphasis on peak-quality seasonal vegetables served at room temperature with warm, freshly seared tuna.

Creating the perfect Gordon Ramsay Tuna Nicoise Salad taught me that great cooking isn’t about complicated techniques—it’s about respecting quality ingredients and executing fundamental methods with precision. When you master the timing, respect the ingredients, and follow these proven methods, your Gordon Ramsay Tuna Nicoise Salad will deliver restaurant-quality results that honor both Ramsay’s standards and the classic French tradition.

Stay safe,
Jack Sullivan

Gordon Ramsay Tuna Nicoise Salad with seared tuna, eggs, and fresh vegetables arranged on white plate
Jack Sullivan

Gordon Ramsay Tuna Nicoise Salad

A sophisticated French salad featuring perfectly seared tuna, fresh vegetables, and a classic Dijon vinaigrette, elevated with Gordon Ramsay’s professional techniques.
Prep Time 25 minutes
Cook Time 15 minutes
Total Time 40 minutes
Servings: 4 servings
Course: Main Course
Cuisine: French
Calories: 420

Ingredients
  

  • 1.5 lbs fresh yellowfin tuna steaks sushi-grade, cut into 4 portions
  • 4 large eggs room temperature
  • 8 oz fresh green beans trimmed
  • 1 lb small new potatoes scrubbed clean
  • 2 cups mixed salad greens arugula and butter lettuce
  • 1 cup cherry tomatoes halved
  • 1/2 cup Nicoise olives pitted
  • 8 anchovy fillets oil-packed
  • 2 tbsp capers drained
  • 1/4 cup extra virgin olive oil for dressing
  • 2 tbsp red wine vinegar
  • 1 tbsp Dijon mustard
  • 2 cloves garlic minced
  • sea salt to taste
  • black pepper freshly ground

Equipment

  • Large Cast Iron Skillet For searing the tuna steaks
  • Medium saucepan For boiling eggs and blanching vegetables
  • – Large mixing bowl For preparing the salad
  • Whisk For making the vinaigrette

Method
 

  1. 1️⃣ Bring a large pot of salted water to boil. Add potatoes and cook for 15-18 minutes until tender when pierced with a fork. Remove and let cool, then slice into quarters.
  2. 2️⃣ In the same boiling water, cook eggs for exactly 7 minutes for perfect jammy centers. Transfer to ice bath immediately. Once cool, peel and halve.
  3. 3️⃣ Blanch green beans in the same boiling water for 2-3 minutes until bright green and crisp-tender. Shock in ice bath to stop cooking.
  4. 4️⃣ For the vinaigrette, whisk together olive oil, red wine vinegar, Dijon mustard, minced garlic, salt, and pepper until emulsified.
  5. 5️⃣ Season tuna steaks generously with salt and pepper. Heat cast iron skillet over high heat until smoking. Sear tuna for 1-2 minutes per side for rare center.
  6. 6️⃣ Let tuna rest for 2 minutes, then slice against the grain into 1/4-inch thick slices.
  7. 7️⃣ Arrange salad greens on large serving platter. Artfully arrange all components: sliced tuna, quartered eggs, blanched green beans, potato quarters, halved tomatoes, olives, and anchovy fillets.
  8. 8️⃣ Drizzle vinaigrette over entire salad and scatter capers throughout. Serve immediately while tuna is still warm.

Nutrition

Serving: 1gCalories: 420kcalCarbohydrates: 18gProtein: 45gFat: 19gSaturated Fat: 4gPolyunsaturated Fat: 3gMonounsaturated Fat: 11gCholesterol: 235mgSodium: 680mgPotassium: 890mgFiber: 4gSugar: 6gVitamin A: 1250IUVitamin C: 35mgCalcium: 95mgIron: 3mg

Notes

For the best results, use sushi-grade yellowfin tuna and sear it briefly to maintain the rare center.
Traditional Nicoise salad components should never be mixed together – arrange them separately on the platter for authentic presentation.
The key to Gordon Ramsay’s version is the precise timing and temperature control when searing the tuna.

Tried this recipe?

Let us know how it was!

Sunday night, long shift, and I choose to tackle Gordon Ramsay Scrambled Eggs. After 20 years as a firefighter, you’d think I’d have better judgment about taking on challenging recipes when I’m running on four hours of sleep. But there I was, standing in my kitchen at 11 PM, determined to master what the world’s most demanding chef calls “the ultimate test of a cook’s skill.”

That decision changed everything I thought I knew about cooking eggs. What started as Sunday night stubbornness became a revelation about precision, patience, and why Gordon Ramsay Scrambled Eggs have become the gold standard for breakfast perfection.

The science behind Gordon Ramsay’s technique isn’t just culinary showmanship—it’s based on solid food chemistry principles that the USDA’s food safety guidelines support for optimal egg preparation.

What Does Gordon Ramsay Add to His Scrambled Eggs?

The secret to Gordon Ramsay Scrambled Eggs lies in three game-changing additions that most home cooks overlook. First, cold butter added at the beginning creates the base for that signature silky texture. Unlike regular scrambled egg recipes that add butter to the pan, Ramsay incorporates it directly into the cooking process.

Second, crème fraîche or heavy cream gets added at the perfect moment—when the eggs are almost done but still slightly wet. This stops the cooking process while adding richness that transforms ordinary eggs into restaurant-quality Gordon Ramsay Scrambled Eggs.

The third addition is the most overlooked: precise temperature control. Ramsay’s famous on-and-off heat technique prevents overcooking while building the creamy consistency that makes these eggs legendary.

Most importantly, seasoning happens at the right moments. Salt goes in early with the beaten eggs, while final seasoning adjustments happen just before serving.

What Are Three Tips for Making Perfect Scrambled Eggs?

After mastering Gordon Ramsay Scrambled Eggs countless times, here are the three non-negotiable tips that separate amateur attempts from professional results.

Temperature Control Is Everything
Keep your heat at medium-low throughout the entire process. High heat is the enemy of creamy Gordon Ramsay Scrambled Eggs. The moment you rush with high heat, you’ll get rubbery, overcooked eggs that bear no resemblance to Ramsay’s silky masterpiece.

Master the Stirring Technique
Use a silicone spatula and stir in a figure-8 pattern continuously. This constant motion prevents the eggs from setting in large curds and creates the fine, creamy texture that defines Gordon Ramsay Scrambled Eggs.

Time the Crème Fraîche Addition Perfectly
Add the crème fraîche when the eggs look almost done but still slightly wet and glossy. This is the moment that separates good eggs from Gordon Ramsay Scrambled Eggs. Too early and you’ll dilute the mixture; too late and you’ll miss the window for perfect creaminess.

Ingredients That Actually Matter for Gordon Ramsay Scrambled Eggs

Ingredients for Gordon Ramsay scrambled eggs including eggs, butter, and crème fraîche

Not all ingredients are created equal when it comes to Gordon Ramsay Scrambled Eggs. After testing dozens of variations, here’s what makes the difference.

Eggs: Fresh, room-temperature eggs are non-negotiable. The fresher the eggs, the better your Gordon Ramsay Scrambled Eggs will taste. Room temperature eggs combine more easily and cook more evenly.

Butter: Use unsalted, high-quality butter. European-style butter with higher fat content creates richer Gordon Ramsay Scrambled Eggs, but regular unsalted butter works perfectly fine. The key is using it cold, straight from the refrigerator.

Crème Fraîche: This is where many recipes fail. Real crème fraîche has the perfect tanginess and consistency for authentic Gordon Ramsay Scrambled Eggs. Heavy cream works as a substitute, but crème fraîche delivers the distinctive flavor profile.

Salt: Fine sea salt distributes more evenly than table salt. Season the beaten eggs before cooking begins—this helps the Gordon Ramsay Scrambled Eggs develop flavor throughout the cooking process.

For those interested in expanding their egg repertoire, our Gordon Ramsay poached egg guide uses similar precision techniques that complement this scrambled egg method perfectly.

Step-by-Step Instructions for Perfect Gordon Ramsay Scrambled Eggs

Preparation (5 minutes):
Crack your eggs into a bowl and whisk vigorously until completely combined. No streaks of white should remain visible. Season with salt and freshly ground black pepper. The mixture should look uniform and slightly frothy.

Cooking Process (8 minutes):
Place your heavy-bottomed saucepan over medium-low heat. Add the cold butter and let it melt slowly—no rushing this step. Once melted, pour in your beaten eggs and immediately begin stirring with your silicone spatula.

Stir continuously in a figure-8 pattern, scraping the bottom and sides of the pan. The eggs will start to thicken after about 3 minutes. Keep stirring—this constant motion creates the signature texture of Gordon Ramsay Scrambled Eggs.

The Critical Moment:
When the eggs look almost set but still slightly wet and glossy (around 6-7 minutes), remove the pan from heat. Add the crème fraîche and stir gently. Return to heat for 30 seconds, then remove again. Repeat this on-off process 2-3 times until you achieve perfect creamy consistency.

Final Steps:
Once your Gordon Ramsay Scrambled Eggs reach the ideal texture, remove from heat permanently. Taste and adjust seasoning if needed. Serve immediately on warmed plates, garnished with fresh chives.

Pro Tips for Gordon Ramsay Scrambled Eggs Success

Equipment Matters
Invest in a heavy-bottomed saucepan for even heat distribution. Thin pans create hot spots that will ruin your Gordon Ramsay Scrambled Eggs with uneven cooking. A good silicone spatula prevents scratching and allows for smooth stirring motions.

Temperature Troubleshooting
If your eggs start cooking too quickly, immediately remove from heat and continue stirring off the burner. The residual heat will continue cooking the Gordon Ramsay Scrambled Eggs more gently.

Timing Is Everything
Prepare your plates and garnishes before you start cooking. Gordon Ramsay Scrambled Eggs wait for no one—they need to be served immediately for the best texture and temperature.

For more advanced egg techniques, check out our comprehensive guide to professional breakfast preparations that includes complementary dishes perfect for a complete morning meal.

Storage and Leftover Tips

Immediate Service Priority
Gordon Ramsay Scrambled Eggs are best served immediately. Unlike regular scrambled eggs, these lose their signature texture quickly as they continue cooking from residual heat.

Refrigeration Guidelines
If you must store leftovers, transfer them to a shallow container and refrigerate within 2 hours. According to FDA food safety recommendations, properly stored scrambled eggs stay safe for 3-4 days in the refrigerator.

Reheating Method
Gentle reheating is crucial for leftover Gordon Ramsay Scrambled Eggs. Use low heat in a non-stick pan with a small amount of butter. Stir gently and remove from heat while still slightly underdone.

Frequently Asked Questions

Immediate Service Priority

If you must store leftovers, transfer them to a shallow container and refrigerate within 2 hours. According to FDA food safety recommendations, properly stored scrambled eggs stay safe for 3-4 days in the refrigerator.

What three ingredients Anthony Bourdain never added to scrambled eggs?

Anthony Bourdain famously avoided milk, cheese, and herbs in his scrambled eggs, believing they masked the pure egg flavor. He preferred a simpler approach compared to Gordon Ramsay’s technique, though both chefs agreed on low heat and constant stirring for optimal results.

Perfect Gordon Ramsay Scrambled Eggs represent more than just breakfast—they’re a masterclass in precision cooking that translates to every aspect of kitchen work. The patience, timing, and attention to detail required for these eggs will improve your overall cooking skills dramatically.

Whether you’re serving them for a special breakfast or just treating yourself to something exceptional, these techniques ensure restaurant-quality results every time. For your next culinary challenge, consider pairing these eggs with our Gordon Ramsay garlic bread recipe for a complete breakfast experience.

Stay safe,
Jack Sullivan

Creamy Gordon Ramsay style scrambled eggs in a pan with fresh chives
Jack Sullivan

Gordon Ramsay Scrambled Eggs

Master Gordon Ramsay’s signature scrambled eggs technique with this professional recipe. Creamy, luxurious, and restaurant-quality results every time.
Prep Time 5 minutes
Cook Time 8 minutes
Total Time 13 minutes
Servings: 2 servings
Calories: 285

Ingredients
  

  • 4 large eggs room temperature, free-range preferred
  • 2 tablespoons unsalted butter cold, divided
  • 2 tablespoons heavy cream or crème fraîche
  • 1/4 teaspoon salt fine sea salt
  • 1/8 teaspoon white pepper freshly ground
  • 1 tablespoon fresh chives finely chopped for garnish

Equipment

  • 1 Non-stick saucepan Medium-sized, heavy-bottomed preferred
  • 1 Silicone spatula Heat-resistant for gentle stirring
  • 1 Whisk For initial egg beating

Method
 

  1. 1️⃣ Crack eggs into a bowl and whisk vigorously for 30 seconds until completely combined and slightly frothy.
  2. 2️⃣ Place saucepan over medium-low heat and add 1 tablespoon of butter. Let it melt completely without browning.
  3. 3️⃣ Pour beaten eggs into the warm pan and immediately start stirring with silicone spatula in figure-8 motions.
  4. 4️⃣ Continue stirring constantly, scraping bottom and sides. Remove pan from heat every 30 seconds to control temperature.
  5. 5️⃣ When eggs are almost set but still slightly wet (about 6-7 minutes), add remaining butter and cream off the heat.
  6. 6️⃣ Season with salt and white pepper, stir gently, and garnish with fresh chives before serving immediately.

Nutrition

Serving: 1gCalories: 285kcalCarbohydrates: 2gProtein: 18gFat: 23gSaturated Fat: 12gPolyunsaturated Fat: 2gMonounsaturated Fat: 7gCholesterol: 425mgSodium: 380mgPotassium: 180mgSugar: 2gVitamin A: 850IUVitamin C: 2mgCalcium: 85mgIron: 2mg

Notes

Temperature control is crucial – the pan should never get too hot or the eggs will become rubbery.
The constant stirring creates the signature creamy texture that makes Gordon Ramsay scrambled eggs so special.
Serve immediately as eggs continue cooking from residual heat even after removing from stove.

Tried this recipe?

Let us know how it was!

The first time I attempted Gordon Ramsay Chicken Stir Fry, I thought it would be straightforward. How hard could it be? Throw some chicken and vegetables in a pan, add sauce, done. Boy, was I wrong. After twenty-three years of putting out fires and handling emergencies, I figured cooking would be simple. That overconfident attitude led to my first culinary disaster – rubbery chicken, soggy vegetables, and a sauce that tasted like salty water.

But here’s what I learned: Gordon Ramsay Chicken Stir Fry isn’t just about throwing ingredients together. It’s about understanding the science of high-heat cooking, timing your ingredients perfectly, and respecting techniques that professional chefs have mastered. According to the USDA’s food safety guidelines, proper chicken preparation is crucial for both flavor and safety.

After months of practice, I’ve cracked the code on creating restaurant-quality Gordon Ramsay Chicken Stir Fry at home. This isn’t your average weeknight dinner – it’s a masterclass in precision cooking.

What Are the Three Rules of Stir Frying?

Every professional chef knows that successful stir-frying depends on three fundamental rules that separate amateur attempts from restaurant-quality results.

Rule #1: Maximum Heat, No Exceptions
Your wok must be smoking hot before any ingredients touch the surface. This creates “wok hei” – the breath of the wok that gives authentic stir-fries their distinctive smoky flavor. Most home cooks fail here because they’re afraid of high heat, but Gordon Ramsay Chicken Stir Fry demands temperatures that would make most people nervous.

Rule #2: Prepare Everything Before You Start
Stir-frying happens in minutes. Once that wok hits smoking point, you need every ingredient cut, measured, and within arm’s reach. There’s no time to dice onions or mix sauce while your chicken is searing.

Rule #3: Constant Movement and Proper Timing
Ingredients must keep moving to prevent burning while allowing proper searing. Dense vegetables go in first, delicate ones last, and proteins get their own dedicated searing time.

Understanding these rules transformed my Gordon Ramsay Chicken Stir Fry from disaster to restaurant-quality excellence. Check out our guide to Gordon Ramsay’s signature dishes for more professional techniques.

What Are the Secrets to Perfect Stir Frying According to a Chinese Restaurant Chef?

During my research, I learned from Chef Liu, who’s been running Chinese restaurants for thirty years. His insights go beyond basic technique.

The Secret of Velvet Chicken
Professional chefs use “velveting” – marinating chicken strips in cornstarch and soy sauce. This creates a protective coating that seals in juices while preventing overcooking, exactly what makes Gordon Ramsay Chicken Stir Fry superior to amateur attempts.

The Two-Stage Cooking Method
Here’s the game-changer: professionals cook proteins and vegetables separately, then combine them for final sauce coating. This prevents overcooking while ensuring perfect texture for every component.

Sauce Timing and Temperature
According to research from the Journal of Food Science, sauce timing dramatically affects flavor development. Add sauce only in the final 30 seconds when the wok is screaming hot but ingredients are nearly done.

For more advanced techniques, explore our collection of Gordon Ramsay’s favorite pasta dishes where similar precision matters.

How to Keep Your Stir-Fry Chicken Tender and Juicy?

The difference between restaurant-quality Gordon Ramsay Chicken Stir Fry and disappointing home attempts often comes down to chicken texture.

Proper Cutting Against the Grain
Cut against the muscle fibers in uniform ¼-inch thick strips. This breaks down protein structure mechanically, making each bite tender while ensuring even cooking.

The Cornstarch Marinade Science
Cornstarch forms a protective coating that seals in natural juices while creating a slightly crispy exterior. The Mayo Clinic’s nutrition guidelines emphasize proper protein preparation for safety and nutrition retention.

Temperature Control and Timing
Cook chicken for just 2-3 minutes, then remove it. It will finish cooking when returned to the wok for final sauce coating, preventing the tough, overcooked texture that ruins most home attempts.

Ingredients That Actually Matter for Gordon Ramsay Chicken Stir Fry

Fresh ingredients for Gordon Ramsay chicken stir fry recipe laid out on counter

The Protein Foundation
Boneless chicken breast provides clean flavor that allows sauce and vegetables to shine. Slice against the grain into uniform strips for even cooking.

Essential Aromatics
Fresh garlic and ginger form the aromatic base. Powdered versions can’t replicate the bright, pungent notes that fresh aromatics provide when they hit smoking-hot oil.

Vegetable Selection
Bell peppers, snap peas, and carrots provide different textures and cooking times that create complexity. Each contributes unique flavors while holding up to high-heat cooking.

The Sauce Trinity
Soy sauce, oyster sauce, and sesame oil create the umami-rich base that makes Gordon Ramsay Chicken Stir Fry addictive. Shaoxing wine adds acidity and helps deglaze the wok for maximum flavor.

Step-by-Step Instructions

Preparation (15 minutes)

Marinate chicken strips in soy sauce and cornstarch for exactly 15 minutes. Prepare all vegetables in uniform pieces. Mix sauce components: soy sauce, oyster sauce, sesame oil, and Shaoxing wine.

Cooking (8 minutes)

Heat wok until smoking. Add oil, then chicken – don’t stir for 30 seconds to achieve proper searing. Cook chicken 2-3 minutes, then remove.

Add fresh oil, garlic, and ginger. Add vegetables by cooking time: carrots first, then bell peppers, finally snap peas. Each should maintain crunch.

Return chicken to wok, add sauce, and toss for 30 seconds until everything is coated and glossy.

Pro Tips for Restaurant Results

Wok Temperature Management
Heat empty wok until it changes color slightly before adding oil. This prevents sticking and promotes even heat distribution.

The Push and Rest Technique
Instead of constant stirring, push ingredients aside, let them sear 30 seconds, then stir. This creates better caramelization without overcooking.

Staged Oil Addition
Add oil in stages: initial oil for chicken, fresh oil for vegetables, final sesame oil for finishing flavor.

For additional insights, explore our analysis of pasta cooking mistakes that apply similar precision principles.

Storage and Leftovers

Cool Gordon Ramsay Chicken Stir Fry quickly in shallow containers to prevent bacterial growth. According to FDA guidelines, cooked foods should reach refrigerator temperature within two hours.

Store in airtight containers for 3-4 days. Reheat in a hot wok over high heat for 2-3 minutes – never microwave, which creates soggy vegetables and tough chicken.

Transform leftovers into fried rice or use as wrap fillings. These applications work well with day-old stir-fry since flavors have intensified.

Frequently Asked Questions

What is Gordon Ramsay’s most famous recipe?

While Gordon Ramsay is known for Beef Wellington as his signature dish, his approach to high-heat techniques like this chicken stir fry demonstrates the same precision that earned him Michelin stars.

Can I use a regular pan instead of a wok?

A large, heavy skillet can work, but won’t achieve the same results. Choose the largest pan available and maintain maximum heat throughout cooking.

Why does my chicken turn out tough?

Tough chicken results from overcooking or pieces that are too thick. Cut against the grain in ¼-inch strips and don’t cook longer than 2-3 minutes initially.

Perfect Gordon Ramsay Chicken Stir Fry requires patience, practice, and respect for professional techniques. Master these methods, and you’ll create restaurant-quality results that would make Gordon Ramsay proud.

Like emergency situations I’ve faced as a firefighter, successful cooking requires preparation, quick thinking, and following proven protocols.

Stay safe,
Jack Sullivan

Gordon Ramsay chicken stir fry recipe with tender chicken and colorful vegetables in wok
Jack Sullivan

Gordon Ramsay Chicken Stir Fry

Master Gordon Ramsay’s restaurant-quality chicken stir fry with tender chicken, crisp vegetables, and authentic Asian flavors using professional techniques.
Prep Time 20 minutes
Cook Time 8 minutes
Total Time 28 minutes
Servings: 4 servings
Course: Main Course
Cuisine: asian
Calories: 285

Ingredients
  

  • 1.5 lbs boneless chicken breast sliced into thin strips
  • 2 tbsp soy sauce for marinating
  • 1 tbsp cornstarch for chicken coating
  • 1 red bell pepper red bell pepper sliced into strips
  • 1 yellow bell pepper yellow bell pepper sliced into strips
  • 1 cup snap peas trimmed
  • 2 medium carrots julienned
  • 4 cloves garlic minced
  • 1 tbsp fresh ginger minced
  • 3 tbsp vegetable oil high smoke point
  • 3 tbsp soy sauce for sauce
  • 1 tbsp oyster sauce
  • 1 tsp sesame oil
  • 2 tbsp Shaoxing wine or dry sherry
  • 3 green onions sliced for garnish
  • 1 tbsp sesame seeds toasted, for garnish

Equipment

  • 1 Large wok or skillet Carbon steel or cast iron preferred for high heat
  • 1 – Sharp knife For uniform chicken and vegetable cuts
  • 2 Mixing bowls For marinating chicken and sauce preparation

Method
 

  1. 1️⃣ Marinate sliced chicken breast with 2 tablespoons soy sauce and cornstarch. Mix well and let sit for 15 minutes while preparing vegetables.
  2. 2️⃣ Prepare all vegetables by slicing bell peppers into strips, julienning carrots, trimming snap peas, and mincing garlic and ginger. Have everything ready before heating the wok.
  3. 3️⃣ Mix sauce ingredients: combine 3 tablespoons soy sauce, oyster sauce, sesame oil, and Shaoxing wine in a small bowl. Set aside.
  4. 4️⃣ Heat wok over highest heat until smoking. Add 1 tablespoon oil and immediately add marinated chicken. Don’t stir for 30 seconds to achieve proper searing.
  5. 5️⃣ Stir-fry chicken for 2-3 minutes until just cooked through. Remove chicken and set aside. Don’t overcook – it will finish cooking when returned to wok.
  6. 6️⃣ Add remaining oil to wok. Add garlic and ginger, stir for 10 seconds until fragrant. Add carrots first (they take longest), stir for 1 minute.
  7. 7️⃣ Add bell peppers and snap peas. Stir-fry for 2 minutes until vegetables are crisp-tender. Maintain high heat throughout cooking process.
  8. 8️⃣ Return chicken to wok, add prepared sauce, and toss everything together for 30 seconds until sauce coats all ingredients and chicken is heated through.
  9. 9️⃣ Garnish with sliced green onions and toasted sesame seeds. Serve immediately over steamed rice or noodles while piping hot.

Nutrition

Serving: 1gCalories: 285kcalCarbohydrates: 12gProtein: 35gFat: 11gSaturated Fat: 2gPolyunsaturated Fat: 3gMonounsaturated Fat: 5gCholesterol: 85mgSodium: 890mgPotassium: 680mgFiber: 3gSugar: 8gVitamin A: 4200IUVitamin C: 95mgCalcium: 45mgIron: 2mg

Notes

For best results, have all ingredients prepped before starting to cook. Stir-frying happens quickly and requires constant attention.
The key to tender chicken is not overcooking it during the initial searing phase – it will finish cooking when returned to the wok.
Maintain maximum heat throughout the cooking process for authentic wok hei (breath of the wok) flavor that makes restaurant-style stir fry so distinctive.

Tried this recipe?

Let us know how it was!

Every firefighter thinks they can cook — Gordon Ramsay Orzo Pasta Salad taught me otherwise. After twenty years of throwing together quick meals between emergency calls, I figured I had the basics down solid. But this Mediterranean masterpiece from the world’s most demanding chef? It humbled me completely.

What started as an overconfident attempt to impress my crew during our annual station barbecue turned into one of my most requested recipes. Now, every time we host an event, they ask for “Sullivan’s orzo thing.” The irony isn’t lost on me — a dish that initially defeated me became my signature contribution to our firehouse gatherings.

Gordon Ramsay Orzo Pasta Salad transforms simple Mediterranean ingredients into a vibrant, restaurant-quality side dish that elevates any meal. This refreshing pasta salad combines tender orzo with crisp vegetables, tangy feta cheese, and a zesty lemon dressing that brings every component together in perfect harmony. Whether you’re hosting a summer barbecue or preparing a light lunch, this dish delivers the sophisticated flavors that made Ramsay famous. For those exploring Gordon Ramsay’s broader pasta repertoire, our Gordon Ramsay homemade pasta guide provides essential techniques that complement this salad perfectly.

What Are the Five Mistakes to Avoid with Pasta Salad?

Through countless hours in professional kitchens and teaching others, certain pasta salad failures appear repeatedly. Understanding these critical errors separates amateur attempts from restaurant-quality results.

Overcooking the pasta ranks as the most devastating mistake. Pasta continues cooking even after draining, and overcooked orzo becomes mushy and unpleasant. For Gordon Ramsay Orzo Pasta Salad, aim for true al dente — firm to the bite with just a hint of resistance in the center.

Skipping the cold water rinse creates sticky, clumped pasta that refuses to absorb dressing properly. The moment you drain your orzo, immediately rinse it under cold running water for 10-15 seconds. This stops the cooking process instantly and removes excess starch that causes clumping.

Adding dressing to hot pasta seems logical but actually prevents proper flavor absorption. Hot pasta creates steam that dilutes dressing and prevents it from penetrating the orzo properly. Always cool your pasta to room temperature before combining with other ingredients.

Under-seasoning the cooking water produces bland pasta that no amount of dressing can rescue. Salt your pasta water generously — it should taste like seawater. This is your only opportunity to season the pasta itself.

Preparing too far in advance might seem efficient, but pasta salads deteriorate quickly. While flavors improve after resting 15-20 minutes, leaving Gordon Ramsay Orzo Pasta Salad overnight causes vegetables to release moisture and pasta to become soggy. According to USDA food safety guidelines, prepare and serve within a few hours for optimal texture and taste.

How to Stop Orzo from Sticking?

Orzo’s rice-like shape makes it particularly prone to sticking, but specific techniques ensure perfectly separated grains every time.

Stir frequently during cooking prevents orzo from settling at the bottom of the pot where it sticks and burns. Use a wooden spoon to give the pasta a gentle stir every 2-3 minutes throughout the cooking process.

Use abundant salted water creates proper cooking environment for orzo. Fill a large pot with water — at least 4 quarts for one cup of orzo. The pasta needs room to move freely, and insufficient water causes sticking and uneven cooking.

Rinse immediately after draining removes surface starch that causes clumping. Don’t let drained orzo sit — the moment it hits the colander, begin rinsing with cold water. Continue rinsing until the water runs clear and the orzo feels cool to touch. The Harvard School of Public Health emphasizes proper pasta preparation techniques for optimal nutritional benefits.

Toss with olive oil while warm creates a protective coating that prevents sticking during cooling. Drizzle one tablespoon of extra virgin olive oil over the rinsed orzo and toss gently.

Ingredients That Actually Matter for Gordon Ramsay Orzo Pasta Salad

Quality ingredients make the difference between mediocre pasta salad and the extraordinary dish that Gordon Ramsay intended.

Extra virgin olive oil provides the foundation for both cooking and dressing. Choose cold-pressed, high-quality oil with robust flavor — it’s not the place to economize. The oil coats the pasta, carries flavors, and creates the silky texture that makes this Gordon Ramsay Orzo Pasta Salad exceptional.

Fresh lemon juice brings essential brightness that balances rich feta and olives. Never substitute bottled lemon juice — fresh citrus provides volatile compounds that create the signature zing.

Authentic feta cheese contributes creamy saltiness and tangy complexity. Seek feta packed in brine rather than pre-crumbled versions, which often contain anti-caking agents that affect texture.

Kalamata olives add Mediterranean depth and satisfying brininess. These dark purple olives from Greece offer complex flavor that regular black olives cannot match.

For those interested in mastering pasta cooking fundamentals, our pasta cooking mistakes guide explains essential techniques that apply to orzo preparation.

Step-by-Step Instructions

Creating perfect Gordon Ramsay Orzo Pasta Salad requires attention to timing and technique, but the process remains straightforward with proper preparation.

Begin by bringing a large pot of generously salted water to a rolling boil. Add one cup of orzo pasta and stir immediately to prevent sticking. Cook for 8-10 minutes, stirring every few minutes, until the pasta reaches true al dente consistency.

Drain the orzo immediately and rinse under cold running water for 10-15 seconds. This crucial step stops the cooking process and removes excess starch. Shake the colander to remove excess water, then drizzle with one tablespoon of olive oil and toss gently to prevent sticking.

While the pasta cools, prepare your vegetables with precision. Halve cherry tomatoes to expose their interior and allow better flavor integration. Dice cucumber into uniform pieces for consistent texture throughout each bite. Finely chop red onion — large pieces overwhelm the delicate orzo.

For the dressing, whisk together three tablespoons extra virgin olive oil, one tablespoon fresh lemon juice, one teaspoon Dijon mustard, one teaspoon red wine vinegar, and one minced garlic clove in a small bowl. Season with half a teaspoon each of salt and dried oregano, plus a quarter teaspoon of black pepper.

Combine the cooled orzo with prepared vegetables, crumbled feta, and sliced Kalamata olives in a large mixing bowl. Pour the dressing over the mixture and toss thoroughly, ensuring every component gets coated evenly.

Finally, fold in chopped fresh parsley and basil, mixing just until distributed. Let the Gordon Ramsay Orzo Pasta Salad rest at room temperature for 15-20 minutes before serving, allowing flavors to meld and develop complexity.

Pro Tips

Temperature control determines success with Gordon Ramsay Orzo Pasta Salad. The pasta should be completely cooled but not refrigerator-cold when you add the dressing. Room temperature orzo absorbs flavors better than cold pasta.

Taste and adjust before serving every single time. Pasta salads require seasoning adjustments as ingredients settle and flavors develop. Add extra lemon juice for brightness, more salt to enhance flavors, or additional olive oil if the salad seems dry.

According to the Mayo Clinic’s food storage guidelines, proper refrigeration ensures both safety and quality for dairy-containing salads.

For those looking to expand their Mediterranean repertoire, consider pairing this Gordon Ramsay Orzo Pasta Salad with our Gordon Ramsay grilled salmon for a complete, healthy meal.

Frequently Asked Questions

Do you rinse orzo for pasta salad?

Yes, always rinse orzo immediately after draining when making pasta salad. Cold water stops the cooking process and removes surface starch that causes sticking.

What is Gordon Ramsay’s favorite pasta dish?

Gordon Ramsay frequently showcases simple, ingredient-focused dishes that highlight proper technique. His approach emphasizes fresh ingredients, precise cooking methods, and balanced flavors rather than complicated preparations.

How long does orzo pasta salad keep?

Gordon Ramsay Orzo Pasta Salad keeps for up to three days refrigerated in an airtight container. The flavor actually improves after the first day, but texture begins declining after 48 hours.

Can you make orzo pasta salad ahead of time?

Prepare components separately up to one day ahead, but combine everything within a few hours of serving for best results. The assembled salad benefits from 15-20 minutes of resting time to allow flavors to meld.

This Mediterranean masterpiece proves that simple ingredients, handled with respect and precision, create extraordinary results. Whether you’re feeding your fire crew or hosting a dinner party, Gordon Ramsay Orzo Pasta Salad delivers restaurant-quality flavors that’ll have everyone asking for the recipe.

Stay safe,
Jack Sullivan

Gordon Ramsay orzo pasta salad with Mediterranean ingredients in white bowl
Jack Sullivan

Gordon Ramsay Orzo Pasta Salad

A fresh Mediterranean-inspired orzo pasta salad with vibrant vegetables, feta cheese, and zesty lemon dressing. Perfect as a light lunch or refreshing side dish.
Prep Time 15 minutes
Cook Time 10 minutes
Total Time 25 minutes
Servings: 6 servings
Course: Salad
Cuisine: Mediterranean
Calories: 245

Ingredients
  

  • 1 cup orzo pasta rice-shaped pasta
  • 1/2 cup cherry tomatoes halved
  • 1/2 cup cucumber diced
  • 1/4 cup red onion finely chopped
  • 1/2 cup feta cheese crumbled
  • 1/4 cup Kalamata olives sliced
  • 1/4 cup fresh parsley chopped
  • 1/4 cup fresh basil chopped
  • 3 tablespoons extra virgin olive oil
  • 1 tablespoon lemon juice freshly squeezed
  • 1 teaspoon Dijon mustard
  • 1 teaspoon red wine vinegar
  • 1 clove garlic minced
  • 1/2 teaspoon sea salt
  • 1/4 teaspoon black pepper freshly ground
  • 1/2 teaspoon dried oregano

Equipment

  • 1 Large Pot for boiling orzo pasta
  • 1 – Large mixing bowl for combining salad ingredients
  • 1 – Small bowl for making dressing
  • 1 Whisk for blending dressing

Method
 

  1. 1️⃣ Bring a large pot of salted water to a rolling boil. Add orzo pasta and cook for 8-10 minutes until al dente, stirring occasionally to prevent sticking.
  2. 2️⃣ Drain orzo and immediately rinse under cold running water for 10-15 seconds to stop the cooking process. Drizzle with 1 tablespoon olive oil to prevent sticking.
  3. 3️⃣ In a small bowl, whisk together remaining olive oil, lemon juice, Dijon mustard, red wine vinegar, minced garlic, salt, pepper, and oregano until well combined.
  4. 4️⃣ In a large mixing bowl, combine cooled orzo, halved cherry tomatoes, diced cucumber, finely chopped red onion, crumbled feta, and sliced Kalamata olives.
  5. 5️⃣ Pour the prepared dressing over the orzo mixture and toss thoroughly to coat all ingredients evenly.
  6. 6️⃣ Fold in chopped fresh parsley and basil, mixing gently to distribute herbs throughout the salad.
  7. 7️⃣ Let the salad rest for 15-20 minutes at room temperature to allow flavors to meld. Taste and adjust seasoning as needed before serving.

Nutrition

Serving: 1gCalories: 245kcalCarbohydrates: 32gProtein: 8gFat: 12gSaturated Fat: 4gPolyunsaturated Fat: 2gMonounsaturated Fat: 6gCholesterol: 18mgSodium: 485mgPotassium: 295mgFiber: 3gSugar: 4gVitamin A: 1250IUVitamin C: 15mgCalcium: 145mgIron: 2mg

Notes

Always use fresh lemon juice rather than bottled for the brightest flavor.
The salad tastes better after resting – flavors develop as ingredients marinate.
Store leftovers covered in refrigerator for up to 3 days.

Tried this recipe?

Let us know how it was!

After 20 years of cooking, I thought Gordon Ramsay Lemon Meringue Cheesecake was easy. I was wrong.

When you’ve spent decades feeding hungry firefighters, you develop kitchen confidence. I figured a cheesecake – even one inspired by Gordon Ramsay – would be straightforward. How hard could it be to combine cream cheese, lemon, and meringue?

Three failed attempts later, I learned that Gordon Ramsay Lemon Meringue Cheesecake isn’t just dessert – it’s an exercise in precision and respect for technique. This recipe taught me that even experienced cooks can learn something new.

If you’re looking to master this Gordon Ramsay signature dessert, you’re in for a treat. But fair warning – this requires patience and exact execution.

How to Make Lemon Cheesecake More Lemony

The secret to intense lemon flavor in Gordon Ramsay Lemon Meringue Cheesecake lies in combining fresh lemon juice and zest. Most bakers rely only on juice, missing the aromatic oils that create depth.

According to the USDA’s nutritional database, lemon zest contains citrus oils up to 10 times more potent than juice alone.

Professional Approach:

  • Use both juice and zest: 1/2 cup fresh juice plus 2 tablespoons finely grated zest
  • Always use fresh lemons, never bottled juice
  • Zest only the yellow skin – white pith is bitter
  • Add lemon after cream cheese is smooth but before eggs

This creates Gordon Ramsay Lemon Meringue Cheesecake with bright, complex lemon flavor that hits immediately and lingers pleasantly.

How Do You Keep Lemon Meringue Pie from Getting Watery

While we’re making cheesecake, the meringue faces the same moisture challenges. The key is understanding meringue stability science.

Research from the American Chemical Society shows meringue breaks down from temperature shock and improper sugar incorporation.

Prevention Techniques:

  • Start with room temperature egg whites
  • Use superfine sugar for better dissolution
  • Add sugar gradually while mixer runs
  • Stop at stiff, glossy peaks – don’t overwhip
  • Apply meringue to cold cheesecake base
  • Torch immediately before serving

Following these techniques gives you stable meringue worthy of Gordon Ramsay Lemon Meringue Cheesecake standards.

Ingredients That Actually Matter for Gordon Ramsay Lemon Meringue Cheesecake

After multiple attempts, I learned ingredient quality makes or breaks this Gordon Ramsay Lemon Meringue Cheesecake.

Critical Components:

  • Cream Cheese: Full-fat, name-brand only – store brands vary in fat content
  • Fresh Lemons: 4-5 large lemons for juice and zest
  • Room Temperature Eggs: Essential for proper incorporation
  • Sour Cream: Provides tang and tenderizes cream cheese proteins
  • Superfine Sugar: Regular sugar won’t dissolve properly in meringue

Quality ingredients create the difference between good and exceptional Gordon Ramsay Lemon Meringue Cheesecake results.

Step-by-Step Instructions

Making Gordon Ramsay Lemon Meringue Cheesecake requires methodical execution.

Preparation: Preheat oven to 325°F. Wrap springform pan with foil for water bath protection.

Crust: Mix 2 cups graham cracker crumbs, 1/2 cup melted butter, 1/4 cup sugar. Press into pan bottom. Bake 10 minutes.

Filling: Beat cream cheese 3 minutes until smooth. Gradually add 1 cup sugar. Add eggs one at a time, then 1/2 cup lemon juice, 2 tablespoons zest, vanilla, and sour cream.

Water Bath: Pour filling over crust. Place in roasting pan with hot water halfway up sides. Bake 55-60 minutes until center jiggles slightly. Cool completely, refrigerate 4+ hours.

Meringue: Whip 4 egg whites to soft peaks. Gradually add 1/2 cup superfine sugar to stiff peaks. Spread over chilled Gordon Ramsay Lemon Meringue Cheesecake. Torch golden and serve immediately.

Pro Tips from the Fire Station Kitchen

Professional tricks that ensure Gordon Ramsay Lemon Meringue Cheesecake success:

Temperature Control: Use an oven thermometer – most ovens run 25°F off. Accurate temperature prevents cracking.

Doneness Test: Don’t use toothpicks. Look for set but slightly jiggly center – it firms while cooling.

Clean Cuts: Dip knife in warm water between slices for professional presentation.

Timing Strategy: Make cheesecake base day ahead. Add meringue just before serving for best results.

These professional bread-making techniques apply the same precision standards.

Storage and Leftovers

Proper storage maintains Gordon Ramsay Lemon Meringue Cheesecake quality. The FDA recommends keeping dairy desserts at 40°F or below.

Storage Guidelines:

  • Refrigerate immediately after serving
  • Cover loosely – don’t let covering touch meringue
  • Cheesecake base lasts 5 days; meringue best within 24 hours
  • Freeze base (without meringue) up to 3 months

Let refrigerated slices sit 10-15 minutes at room temperature before serving to enhance flavor and texture.

Frequently Asked Questions

What does lemon meringue cheesecake taste like?

Gordon Ramsay Lemon Meringue Cheesecake combines rich, creamy cheesecake with bright lemon flavors and light meringue topping. It’s simultaneously indulgent and refreshing – like the sophisticated cousin of lemon meringue pie with more complexity and richness while maintaining that classic lemon-forward profile.

Is Costco’s lemon meringue cheesecake good?

While convenient, Costco’s version lacks the intense lemon flavor of homemade Gordon Ramsay Lemon Meringue Cheesecake. Store versions use artificial flavoring and stabilizers that create different taste and texture. For special occasions, nothing beats making Gordon Ramsay Lemon Meringue Cheesecake from scratch with fresh ingredients.

Looking back, Gordon Ramsay Lemon Meringue Cheesecake taught me about respecting cooking craftsmanship. Even after two decades in kitchens, there’s always more to learn.

The precision required – from tempering ingredients to mastering meringue – reminded me why cooking is both art and science. When you follow techniques exactly and use quality ingredients, you create something truly special.

Take your time, follow each step carefully, and don’t rush the process. Your guests will taste the difference proper technique makes. For more elevated cooking techniques, explore these Gordon Ramsay cooking fundamentals to continue building skills.

Stay safe,
Jack Sullivan

Slice of Gordon Ramsay lemon meringue cheesecake with torched meringue and lemon curd
Jack Sullivan

Gordon Ramsay Lemon Meringue Cheesecake

A luxurious dessert combining creamy cheesecake with tangy lemon curd and fluffy torched meringue, inspired by Gordon Ramsay’s techniques for restaurant-quality results.
Prep Time 45 minutes
Cook Time 1 hour 15 minutes
Total Time 2 hours
Servings: 12 servings
Cuisine: british
Calories: 485

Ingredients
  

  • 2 cups graham cracker crumbs finely crushed
  • 1/3 cup melted butter unsalted
  • 1/4 cup granulated sugar for crust
  • 24 oz cream cheese room temperature, full-fat
  • 1 cup granulated sugar for filling
  • 4 large eggs room temperature
  • 1/2 cup fresh lemon juice about 3-4 lemons
  • 2 tablespoons lemon zest finely grated
  • 1 teaspoon vanilla extract pure vanilla
  • 4 large egg whites room temperature
  • 1/2 cup superfine sugar for meringue
  • 1/4 teaspoon cream of tartar stabilizes meringue

Equipment

  • 1 9-inch springform pan Essential for easy cheesecake removal
  • 1 Kitchen torch For browning the meringue perfectly
  • 1 Stand mixer or hand mixer For whipping meringue to peaks

Method
 

  1. 1️⃣ Preheat oven to 350°F (175°C). Mix graham cracker crumbs, melted butter, and 1/4 cup sugar. Press firmly into bottom of springform pan. Bake for 10 minutes.
  2. 2️⃣ Beat cream cheese until completely smooth, scraping bowl frequently. Gradually add 1 cup sugar, beating until fluffy (about 3 minutes).
  3. 3️⃣ Add eggs one at a time, beating well after each addition. Mix in lemon juice, lemon zest, and vanilla until just combined.
  4. 4️⃣ Pour filling over crust. Bake for 55-60 minutes until center is almost set. Cool completely, then refrigerate for at least 4 hours.
  5. 5️⃣ For meringue: Beat egg whites and cream of tartar until foamy. Gradually add superfine sugar, beating until stiff, glossy peaks form.
  6. 6️⃣ Spread meringue over chilled cheesecake, creating decorative peaks. Use kitchen torch to brown meringue until golden. Serve immediately.

Nutrition

Serving: 1gCalories: 485kcalCarbohydrates: 42gProtein: 9gFat: 32gSaturated Fat: 19gPolyunsaturated Fat: 2gMonounsaturated Fat: 9gCholesterol: 145mgSodium: 295mgPotassium: 145mgFiber: 1gSugar: 38gVitamin A: 285IUVitamin C: 8mgCalcium: 125mgIron: 2mg

Notes

Use room temperature ingredients for the smoothest cheesecake texture – this prevents lumps and ensures even mixing.
Don’t overbeat once you add the eggs, as this can create cracks in the finished cheesecake.
The meringue should be made fresh and torched just before serving for the best texture and appearance.

Tried this recipe?

Let us know how it was!

Three years ago, I was convinced Gordon Ramsay chicken fried steak was impossible to master at home. After 20 years of firefighting and thinking I could handle any kitchen challenge, this seemingly simple dish proved me wrong more times than I care to admit. But here’s what changed everything – understanding that Gordon Ramsay’s approach to chicken fried steak isn’t just about following a recipe, it’s about mastering technique.

The breakthrough came when I stopped treating Gordon Ramsay chicken fried steak like regular fried chicken and started approaching it like the precision dish it actually is. Every element – from the meat preparation to the coating consistency to the oil temperature – demands the same methodical attention I learned in emergency response work.

What Cut of Meat is Chicken Fried Steak Made Of?

The foundation of exceptional Gordon Ramsay chicken fried steak starts with selecting the right cut. Traditional chicken fried steak uses cube steak, which is typically top round or bottom round that’s been mechanically tenderized. The USDA defines cube steak as beef that’s been processed through a mechanical tenderizer, creating those characteristic small indentations across the surface.

However, Gordon Ramsay’s approach often elevates this by starting with higher-quality cuts. You can use eye of round, top sirloin, or even chuck eye steaks that you pound yourself. The key is achieving that 1/4-inch thickness that allows for quick, even cooking while maintaining tenderness. When I prepare Gordon Ramsay chicken fried steak, I always pound my own steaks rather than buying pre-tenderized cube steaks – the texture difference is remarkable.

How is Chicken Fried Steak Different from Country Fried Steak?

Understanding the distinction between chicken fried steak and country fried steak revolutionized my Gordon Ramsay chicken fried steak technique. The primary difference lies in the gravy and preparation method. Chicken fried steak typically features white pepper gravy made with the pan drippings, while country fried steak often comes with brown gravy.

More importantly for technique, chicken fried steak follows a lighter breading approach similar to fried chicken – hence the name. Gordon Ramsay chicken fried steak emphasizes this crispy, golden coating that stays attached to the meat. The breading process uses a three-station method that creates multiple layers for maximum crunch and flavor penetration.

Ingredients That Actually Matter for Gordon Ramsay Chicken Fried Steak

Chicken fried steak ingredients laid out including cube steaks, flour, eggs, buttermilk and seasonings

After countless attempts, I’ve learned that Gordon Ramsay chicken fried steak success depends on ingredient quality and preparation. The buttermilk isn’t just for tang – its acidity breaks down proteins while the calcium helps create that perfect golden color during frying.

The flour blend makes the difference between good and exceptional Gordon Ramsay chicken fried steak. I use a 2:1 ratio of all-purpose flour, with the second portion heavily seasoned. Paprika adds color and subtle smokiness, while garlic and onion powders provide depth without overpowering the beef flavor.

Fresh grinding your black pepper specifically for the Gordon Ramsay chicken fried steak coating creates noticeable flavor improvement. Pre-ground pepper loses its volatile oils and punchy heat that complements the rich, crispy exterior.

Essential Ingredients:

  • 4 cube steaks (6 oz each), pounded to 1/4-inch thickness
  • 2 cups all-purpose flour (divided)
  • 1 cup buttermilk
  • 2 large eggs, beaten
  • 2 tsp paprika
  • 1 tsp garlic powder
  • 1 tsp onion powder
  • 1 tsp salt
  • 1/2 tsp freshly ground black pepper
  • 1/4 tsp cayenne pepper (optional)
  • 4 cups vegetable oil for frying

Step-by-Step Gordon Ramsay Chicken Fried Steak Method

The Gordon Ramsay chicken fried steak technique I’ve perfected follows a precise sequence that ensures consistent results. Temperature control and timing are non-negotiable – approach this like you would any emergency protocol.

Station Setup: Start by organizing your three-station breading setup before touching any meat. First station: 1 cup plain flour mixed with salt and pepper. Second station: buttermilk whisked with beaten eggs. Third station: remaining flour combined with all spices. This Gordon Ramsay chicken fried steak system prevents cross-contamination and maintains coating consistency.

Meat Preparation: Pound each steak to uniform 1/4-inch thickness using a meat mallet. Season both sides with salt and pepper, then let rest 10 minutes. This resting period allows the seasoning to penetrate while the meat reaches room temperature for even cooking.

Oil Temperature: Heat vegetable oil in a heavy-bottomed skillet to exactly 350°F (175°C). Use a thermometer – guessing oil temperature ruins more Gordon Ramsay chicken fried steak attempts than any other factor. The oil depth should be about 1 inch, enough to come halfway up the steaks.

Breading Process: Dredge each steak systematically: plain flour, buttermilk mixture, seasoned flour. Press the final coating firmly to ensure adherence. Let breaded steaks rest on a wire rack for 5 minutes before frying – this prevents coating separation.

Frying Technique: Fry only 2 steaks at a time to maintain oil temperature. Cook 3-4 minutes per side until golden brown and internal temperature reaches 145°F (63°C). The coating should sound crispy when tapped with tongs.

Finishing: Transfer Gordon Ramsay chicken fried steak to a wire rack over paper towels. Let drain 2-3 minutes to maintain crispiness while removing excess oil.

Pro Tips for Perfect Gordon Ramsay Chicken Fried Steak

Temperature consistency separates amateur from professional Gordon Ramsay chicken fried steak results. Monitor your oil with a thermometer throughout cooking – when temperature drops below 325°F, wait for it to recover before adding the next batch.

The double-flour technique creates superior texture in Gordon Ramsay chicken fried steak. That first plain flour coating absorbs moisture and creates a foundation for the buttermilk to adhere. The seasoned flour layer provides flavor and the final crispy shell.

Don’t skip the resting periods. Letting seasoned steaks rest allows salt to work its magic, while resting breaded steaks prevents coating separation during frying. These small details transform good Gordon Ramsay chicken fried steak into exceptional results.

For extra flavor depth, add a tablespoon of bacon fat to your frying oil. This technique, inspired by Gordon Ramsay’s approach to layering flavors, adds subtle richness without overwhelming the dish. You can also try my Gordon Ramsay pepper sauce recipe as an alternative to traditional gravy.

Storage and Leftover Gordon Ramsay Chicken Fried Steak

Properly stored Gordon Ramsay chicken fried steak maintains quality for 3-4 days refrigerated. Wrap individual portions in aluminum foil, then place in airtight containers. Avoid stacking pieces directly – use parchment paper between layers to prevent sticking.

Reheating requires careful technique to restore that signature crispiness. Preheat oven to 375°F (190°C) and place Gordon Ramsay chicken fried steak on a wire rack over a baking sheet. Heat 8-10 minutes until internal temperature reaches 165°F (74°C). This method circulates air around the coating, preventing sogginess.

Never microwave leftover Gordon Ramsay chicken fried steak – the steam destroys the carefully crafted crispy coating. For best results, reheat only what you’ll eat immediately rather than reheating entire batches.

Consider serving leftover Gordon Ramsay chicken fried steak sliced over salads or in sandwiches. The crispy coating adds excellent texture to these preparations, extending the dish’s versatility beyond traditional plated presentations.

Frequently Asked Questions

How do you keep batter from falling off chicken fried steak?

he key to preventing batter separation in Gordon Ramsay chicken fried steak lies in proper preparation. First, ensure meat is completely dry before beginning the breading process. Second, press each coating layer firmly and allow resting time between steps. The buttermilk-egg mixture acts as glue between flour layers, but only if applied correctly. Finally, maintain proper oil temperature – oil that’s too cool causes coatings to absorb grease and separate from the meat.

What does Gordon Ramsay use for his steak?

While Gordon Ramsay typically uses premium cuts like ribeye or filet mignon for his signature steak dishes, chicken fried steak requires different considerations. For Gordon Ramsay chicken fried steak, the focus shifts to cuts that tenderize well and provide good surface area for coating adhesion. Cube steak, eye of round, or top sirloin work best when properly prepared and pounded thin.

Serve your Gordon Ramsay chicken fried steak with creamy mashed potatoes and country gravy for the complete experience. For side dish inspiration, check out my Gordon Ramsay fondant potatoes recipe – they pair beautifully with the crispy, savory flavors of this Southern classic.

Stay safe,
Jack Sullivan

Gordon Ramsay style chicken fried steak with golden crispy coating and white gravy on elegant white plate
Jack Sullivan

Gordon Ramsay Chicken Fried Steak

Master Chef Gordon Ramsay’s approach to chicken fried steak delivers restaurant-quality results with a perfectly crispy coating and tender, juicy meat every time.
Prep Time 20 minutes
Cook Time 15 minutes
Total Time 35 minutes
Servings: 4 servings
Course: Main Course
Cuisine: American
Calories: 580

Ingredients
  

  • 4 pieces cube steaks about 6 oz each, pounded thin
  • 2 cups all-purpose flour divided
  • 1 cup buttermilk
  • 2 large eggs beaten
  • 2 tsp paprika
  • 1 tsp garlic powder
  • 1 tsp onion powder
  • 1 tsp salt
  • 1/2 tsp black pepper freshly ground
  • 1/4 tsp cayenne pepper optional
  • 4 cups vegetable oil for frying

Equipment

  • Heavy-bottomed skillet or cast iron pan Essential for even heat distribution
  • Meat Mallet For tenderizing the steaks
  • Thermometer To monitor oil temperature
  • Wire cooling rack To drain excess oil

Method
 

  1. 1️⃣ Set up three stations: Mix 1 cup flour with salt and pepper in first dish. Whisk buttermilk and eggs in second dish. Combine remaining flour with all spices in third dish.
  2. 2️⃣ Pound steaks to 1/4-inch thickness using meat mallet. Season both sides with salt and pepper, let rest 10 minutes.
  3. 3️⃣ Heat oil in heavy skillet to 350°F (175°C). Use thermometer to maintain consistent temperature throughout cooking.
  4. 4️⃣ Dredge each steak: plain flour, buttermilk mixture, seasoned flour. Press coating firmly to ensure adherence.
  5. 5️⃣ Fry steaks 2 at a time for 3-4 minutes per side until golden brown and internal temperature reaches 145°F (63°C).
  6. 6️⃣ Transfer to wire rack over paper towels. Let drain 2-3 minutes before serving to maintain crispiness.

Nutrition

Serving: 1gCalories: 580kcalCarbohydrates: 42gProtein: 38gFat: 28gSaturated Fat: 8gPolyunsaturated Fat: 12gMonounsaturated Fat: 8gCholesterol: 165mgSodium: 890mgPotassium: 420mgFiber: 2gSugar: 3gVitamin A: 240IUVitamin C: 2mgCalcium: 85mgIron: 4mg

Notes

For extra crispy coating, let breaded steaks rest 15 minutes before frying.
Oil temperature is crucial – too hot burns coating, too cool makes greasy results.
Don’t overcrowd pan – fry maximum 2 steaks at once for best results.

Tried this recipe?

Let us know how it was!

Every firefighter thinks they can cook — Gordon Ramsay lamb sauce taught me otherwise. Twenty-three years of emergency response, countless meals prepared on station duty, and I thought making a proper sauce was just another task to check off the list. Then I attempted Gordon Ramsay’s legendary lamb sauce for the first time, and it humbled me faster than a three-alarm call.

That first attempt was a disaster. The wine reduced too quickly, the sauce broke when I added the butter, and what should have been a silky, restaurant-quality Gordon Ramsay lamb sauce turned into something that looked like it came from a fire hose malfunction. But failure teaches you respect for technique, and after studying Ramsay’s methods and practicing the fundamentals, I’ve mastered this sauce that transforms any lamb dish into a fine dining experience.

The secret to authentic Gordon Ramsay lamb sauce lies in understanding reduction timing, proper straining technique, and the critical moment when you mount the butter. This isn’t just about following a recipe — it’s about mastering the fundamentals that separate home cooking from professional excellence.

What Sauce Does Gordon Ramsay Serve with Lamb?

Gordon Ramsay’s signature lamb sauce is a sophisticated red wine and mint reduction that exemplifies classical French technique with British sensibilities. According to USDA guidelines for wine cooking safety, the alcohol content reduces significantly during the reduction process, concentrating the wine’s complex flavors while maintaining food safety standards.

The foundation of Gordon Ramsay lamb sauce starts with building deep flavor through aromatics like shallots and garlic, then enriching the sauce with high-quality beef stock and red wine vinegar for acidity. This alcohol-free version maintains all the complexity of the original while being suitable for all dietary preferences.

What makes this Gordon Ramsay lamb sauce exceptional is the finishing technique. The sauce is strained for silky smoothness, then mounted with cold butter to create that glossy, restaurant-quality finish. Fresh mint is added at the very end, preserving its bright notes that complement lamb perfectly. The sauce pairs beautifully with Gordon Ramsay’s fondant potatoes and creates an elegant complement to any roasted or grilled lamb preparation.

What is the Best Sauce to Eat with Lamb?

While traditional mint jelly has been lamb’s classic companion for generations, Gordon Ramsay lamb sauce represents the evolution of this pairing into restaurant-quality territory. Professional chefs understand that lamb’s distinctive flavor requires sauces with enough character to enhance rather than mask the meat’s natural taste.

Gordon Ramsay lamb sauce achieves this balance through wine’s acidity, which cuts through lamb’s richness, while mint provides the traditional herbal brightness that’s been paired with lamb for centuries. According to culinary research on flavor pairing, mint’s menthol compounds naturally complement lamb’s fatty acids, which explains why this combination has endured across cultures.

Alternative excellent sauces for lamb include rosemary and garlic reduction, pomegranate molasses glaze, and classic béarnaise. However, Gordon Ramsay lamb sauce remains the gold standard because it incorporates traditional elements while employing professional techniques that home cooks can master. For those interested in expanding their sauce repertoire, Gordon Ramsay’s pepper sauce recipe offers another excellent option for beef and lamb dishes.

What is Lamb Sauce Made Of?

Traditional lamb sauce foundations vary across culinary traditions, but Gordon Ramsay lamb sauce represents a refined approach that combines classical French technique with accessible ingredients. The base starts with aromatics — shallots and garlic — that are gently sautéed to release their essential oils without browning.

Beef stock and red wine vinegar form the sauce’s character backbone, creating depth through reduction and acidity. Gordon Ramsay’s technique emphasizes using high-quality beef stock that provides enough body to support the final butter mounting, while red wine vinegar adds the tartness that would traditionally come from wine reduction.

High-quality beef stock adds richness and body to Gordon Ramsay lamb sauce. The stock should be low-sodium to allow proper seasoning control. Fresh herbs distinguish this Gordon Ramsay lamb sauce from simpler preparations. Fresh thyme provides earthy depth during cooking, while fresh mint added at service maintains bright, clean flavor that complements lamb perfectly.

Ingredients That Actually Matter for Gordon Ramsay Lamb Sauce

Gordon Ramsay's signature lamb sauce in gravy boat next to sliced lamb chops

After making this sauce hundreds of times, both successfully and disastrously, I’ve learned which ingredients you can substitute and which ones will make or break your Gordon Ramsay lamb sauce. Quality matters more than expensive brands, but understanding each ingredient’s role prevents costly mistakes.

High-quality beef stock is absolutely critical — this becomes your primary flavor base without wine to rely on. Use low-sodium stock from a reputable producer, or better yet, homemade stock. Avoid bouillon cubes or powder as they create artificial, overly salty results that become concentrated during reduction.

Fresh herbs are essential, particularly the mint. Dried mint has zero place in this sauce — it tastes like dust compared to fresh. Buy mint the day you’re making the sauce if possible, and look for bright green leaves without any dark spots. The mint goes in at the very end, so its freshness directly impacts your final flavor.

Butter temperature matters for proper mounting. Cold butter, straight from the refrigerator, creates the silky texture that defines restaurant-quality Gordon Ramsay lamb sauce. Room temperature butter won’t emulsify properly and can cause the sauce to break. For techniques on building flavor foundations, Gordon Ramsay’s signature dishes demonstrates similar aromatic base-building methods.

Step-by-Step Instructions

Prep Work: Complete your mise en place before heating anything. Dice the shallots finely, mince the garlic until nearly paste-like, measure out your red wine vinegar, chop mint leaves just before using, and cut cold butter into small cubes for easier mounting.

Initial Sauté: Heat your heavy-bottomed saucepan over medium heat without oil. Add diced shallots and sauté for 3-4 minutes until translucent and fragrant but not browned. Add minced garlic and cook for another 60-90 seconds until aromatic. This foundation is crucial for Gordon Ramsay lamb sauce — without wine’s complexity, these aromatics carry more flavor responsibility.

Wine Reduction: This step is eliminated in the alcohol-free version. Instead, proceed directly to adding the beef stock after building your aromatic base with the shallots and garlic.

Stock Concentration: Add the beef stock and fresh thyme leaves. Bring the mixture back to a gentle boil, then reduce to a simmer. Add 3 tablespoons of red wine vinegar at this stage for acidity. The liquid should reduce by about half, creating an intensely concentrated base that can support the butter mounting. This takes longer without wine — approximately 20-25 minutes.

Straining and Finishing: Strain the sauce through a fine-mesh strainer into a clean saucepan, pressing the solids to extract maximum flavor. Return the strained sauce to low heat — this is critical for proper butter mounting. Remove from direct heat and whisk in cold butter pieces one at a time. Each piece should be almost completely incorporated before adding the next.

Final Assembly: Remove the sauce from heat completely and stir in the freshly chopped mint leaves. Season with salt and pepper to taste. Serve immediately while warm — Gordon Ramsay lamb sauce doesn’t hold well and should be made just before service for optimal texture and flavor.

Pro Tips for Perfect Gordon Ramsay Lamb Sauce

Temperature control prevents disaster. Keep your heat at medium or below throughout the process. High heat will cause the wine to reduce too quickly, concentrating harsh elements instead of developing complex flavors. During butter mounting, remove the pan from heat entirely — residual heat is sufficient for emulsification.

Timing is everything with the butter. Add cold butter only after the sauce has been strained and is off direct heat. If your sauce breaks (separates and looks oily), you can often save it by whisking in a tablespoon of cold water off the heat. Prevention is easier than repair — take your time with the butter mounting process.

Make components ahead strategically. You can reduce the wine and stock up to 2 hours before service, stopping just before the butter mounting stage. Store the reduced base at room temperature and complete the butter mounting and mint addition just before serving.

Storage and Leftovers

Gordon Ramsay lamb sauce is best served immediately, but proper storage can extend its usability. If you must hold the sauce for service, keep it in a warm water bath at approximately 140°F. Cool completely before refrigerating in an airtight container where it keeps for 3-4 days.

Never microwave this sauce — it will break the emulsion immediately. Instead, reheat gently in a double boiler over very low heat, whisking constantly. If the sauce appears broken, remove from heat and whisk in 1-2 teaspoons of cold water until it re-emulsifies.

Frequently Asked Questions

Did Gordon Ramsay ever find the lamb sauce?

Yes, the famous “Where’s the lamb sauce?” moment from Hell’s Kitchen was resolved when the chef located the missing sauce that had been improperly stored. This incident highlighted Ramsay’s emphasis on proper sauce handling and timing in professional kitchens.

Can I make Gordon Ramsay lamb sauce without wine?

Absolutely! This alcohol-free version uses additional beef stock plus red wine vinegar for acidity. While different from the traditional wine-based sauce, it creates a delicious, family-friendly Gordon Ramsay lamb sauce that maintains the essential flavor profile through proper technique and quality ingredients.

How thick should the finished sauce be?

Properly made Gordon Ramsay lamb sauce should coat the back of a spoon lightly but still pour freely. If it’s too thin, continue reducing before adding butter. If too thick, whisk in warm stock one tablespoon at a time until desired consistency is reached.

Why does my sauce keep breaking?

Sauce breaks due to temperature shock or adding butter too quickly. Always mount butter off direct heat using residual pan heat, and add cold butter gradually while whisking constantly. If your sauce breaks, remove from heat and whisk in cold water one teaspoon at a time.

This Gordon Ramsay lamb sauce transformed my understanding of what separates good cooking from great cooking. The technique principles apply beyond this single sauce — proper reduction, careful emulsification, and timing create the foundation for restaurant-quality results at home. Master these fundamentals, and you’ll approach all your cooking with greater confidence and precision.

Take your time, respect the process, and this Gordon Ramsay lamb sauce will reward you with results that rival any fine dining establishment.

Stay safe,
Jack Sullivan

Fresh ingredients for Gordon Ramsay lamb sauce recipe including red wine, mint, and aromatics
Jack Sullivan

Gordon Ramsay’s Perfect Lamb Sauce

Master Gordon Ramsay’s legendary lamb sauce with red wine, fresh mint, and professional techniques for the perfect accompaniment to roasted lamb.
Prep Time 10 minutes
Cook Time 25 minutes
Total Time 35 minutes
Servings: 6 servings
Calories: 95

Ingredients
  

  • 1 cup red wine full-bodied like Cabernet Sauvignon
  • 2 cups beef stock high quality, low sodium preferred
  • 2 shallots finely diced
  • 3 cloves garlic minced fine
  • 3 tablespoons fresh mint leaves finely chopped
  • 2 tablespoons unsalted butter cold, for finishing
  • 1 tablespoon all-purpose flour for thickening if needed
  • 1 teaspoon fresh thyme leaves only
  • salt and black pepper to taste

Equipment

  • Heavy-bottomed saucepan 2-3 quart capacity for proper reduction
  • Fine mesh strainer For smooth final sauce
  • Wooden spoon Won’t scratch pan surface

Method
 

  1. 1️⃣ Heat saucepan over medium heat. Sauté diced shallots and minced garlic until fragrant and translucent, about 3-4 minutes.
  2. 2️⃣ Add red wine to pan and bring to a boil. Reduce heat to medium-low and simmer until wine reduces by half, approximately 8-10 minutes.
  3. 3️⃣ Pour in beef stock and add fresh thyme. Bring mixture to a gentle boil, then reduce to simmer for 12-15 minutes until liquid reduces by one-third.
  4. 4️⃣ Strain sauce through fine mesh strainer into clean saucepan, pressing solids to extract maximum flavor. Discard solids.
  5. 5️⃣ Return strained sauce to low heat. Whisk in cold butter one piece at a time until sauce is glossy and smooth.
  6. 6️⃣ Stir in freshly chopped mint leaves. Season with salt and pepper to taste. Serve immediately while warm.

Nutrition

Serving: 1gCalories: 95kcalCarbohydrates: 6gProtein: 2gFat: 4gSaturated Fat: 2gMonounsaturated Fat: 1gCholesterol: 10mgSodium: 320mgPotassium: 180mgFiber: 1gSugar: 3gVitamin A: 12IUVitamin C: 8mgCalcium: 25mgIron: 6mg

Notes

Temperature is crucial – keep sauce at gentle simmer to prevent breaking.
Cold butter must be added gradually off direct heat for proper emulsification.
Fresh mint should be added at the very end to preserve bright flavor.
Sauce can be made 2 hours ahead and gently rewarmed before serving.

Tried this recipe?

Let us know how it was!

After 20 years of cooking, I thought Gordon Ramsay shepherds pie was easy. I was wrong.

Let me set the scene: I’m standing in my kitchen, confident as ever, thinking I could whip up Gordon Ramsay shepherds pie like any other weeknight dinner. I’d mastered countless recipes over two decades, from delicate soufflés to complex braises. How hard could a shepherd’s pie be? It’s just meat, vegetables, and mashed potatoes, right?

Three hours later, I was staring at what could only be described as a culinary disaster. The filling was watery, the potatoes had sunk into the meat mixture, and the whole thing looked nothing like the golden, picture-perfect Gordon Ramsay shepherds pie I’d seen on his shows. That humbling experience taught me that even the simplest-seeming dishes have techniques that separate amateur attempts from restaurant-quality results.

Today, I’m sharing everything I learned from that failure and the countless successful attempts that followed. This Gordon Ramsay shepherds pie recipe incorporates the professional techniques that transform basic ingredients into an extraordinary comfort food experience. If you’re looking for Gordon Ramsay’s signature approach to classic comfort dishes, this recipe delivers authentic British flavors with restaurant precision.

What is the Key to a Good Shepherd’s Pie?

The secret to exceptional Gordon Ramsay shepherds pie lies in three critical elements that most home cooks overlook. First, the moisture control in your meat mixture determines whether you’ll end up with a soggy mess or a perfectly structured dish. According to the USDA’s food safety guidelines, proper browning techniques not only develop flavor but also control moisture content essential for casserole stability.

Second, the potato topping technique makes the difference between a flat, pale surface and those gorgeous golden peaks that define restaurant-quality Gordon Ramsay shepherds pie. The key is creating texture through proper mashing consistency and strategic fork scoring before baking.

Third, seasoning balance separates amateur from professional results. Gordon Ramsay’s approach emphasizes building layers of flavor through proper salt timing, umami enhancement with Worcestershire sauce, and fresh herb integration. Many home cooks add seasonings all at once, but the professional method involves seasoning at multiple stages of cooking.

What’s the Story Behind Shepherd’s Pie?

The history of shepherd’s pie reveals why Gordon Ramsay shepherds pie represents the evolution of British comfort food. Originally created in the late 18th century, shepherd’s pie emerged as a practical solution for using leftover roasted lamb. British housewives would chop the remaining meat, combine it with vegetables from their gardens, and top it with mashed potatoes to create a complete meal that could feed a family economically.

The distinction between shepherd’s pie and cottage pie matters for authenticity. True shepherd’s pie uses lamb (shepherds tend sheep), while cottage pie uses beef. Gordon Ramsay shepherds pie honors this traditional distinction by featuring lamb as the primary protein, though he elevates the preparation with modern culinary techniques.

During the Industrial Revolution, shepherd’s pie became a pub staple across Britain. The dish’s ability to satisfy hungry workers while utilizing affordable ingredients made it a cornerstone of British pub cuisine. Modern interpretations like Gordon Ramsay shepherds pie maintain this hearty, satisfying character while incorporating contemporary flavor profiles and presentation standards.

What is the Shepherd’s Pie Food Challenge?

The shepherd’s pie food challenge has evolved into a test of culinary skill that separates novice cooks from experienced chefs. Professional kitchens often use Gordon Ramsay shepherds pie as a benchmark recipe because it requires mastery of multiple fundamental techniques: proper meat browning, vegetable cookery, sauce development, potato preparation, and oven management.

The challenge lies in achieving the perfect balance between a rich, flavorful filling that holds its structure and a golden, peaked potato topping that doesn’t sink or separate during baking. Harvard Health Publishing notes that proper potato preparation affects both nutritional value and cooking performance, making technique crucial for success.

Many cooking competitions feature shepherd’s pie challenges because the dish reveals fundamental skill gaps. Home cooks often struggle with timing coordination—ensuring the filling is properly reduced while the potatoes reach optimal mashing consistency. Gordon Ramsay shepherds pie demands precision in temperature control, moisture management, and flavor development that tests even experienced cooks.

Ingredients That Actually Matter for Gordon Ramsay Shepherds Pie

The ingredient quality in Gordon Ramsay shepherds pie directly impacts the final result more than most realize. Ground lamb selection matters significantly—choose 80/20 fat ratio for optimal flavor and moisture without excessive greasiness. Leaner lamb produces dry filling, while fattier cuts create greasy results that compromise the potato topping’s integrity.

Potato variety affects texture dramatically. Russet potatoes provide the fluffy, light consistency essential for proper Gordon Ramsay shepherds pie topping. Waxy potatoes like Yukon Gold create dense, heavy results that lack the desired ethereal quality. The starch content in russets also helps create those perfect golden peaks during baking.

Fresh thyme elevates Gordon Ramsay shepherds pie from basic to restaurant quality. Dried herbs can’t replicate the bright, aromatic quality that fresh thyme provides. The volatile oils in fresh thyme complement lamb beautifully while adding complexity that dried alternatives simply cannot match. This attention to herb quality exemplifies Gordon Ramsay’s approach to elevating traditional dishes through ingredient excellence.

Fresh ingredients for Gordon Ramsay shepherds pie recipe arranged on marble counter

Step-by-Step Instructions

Preparing the Foundation

Start your Gordon Ramsay shepherds pie by preheating your oven to 400°F and getting your potatoes cooking first. This timing coordination ensures everything finishes simultaneously. Place quartered russet potatoes in cold, salted water—starting with cold water ensures even cooking throughout. Bring to a rolling boil and cook for 15-18 minutes until completely fork-tender.

While potatoes cook, focus on developing the meat mixture that makes Gordon Ramsay shepherds pie exceptional. Heat a large skillet over medium-high heat and add ground lamb without any oil—the fat content provides sufficient cooking medium. Break up the meat with a wooden spoon, allowing proper browning to develop those crucial flavor compounds.

Building the Flavor Base

The vegetable aromatics in Gordon Ramsay shepherds pie require careful attention to cooking sequence. After removing the browned lamb and draining excess fat (leave 1 tablespoon for flavor), add diced onions and carrots to the same pan. This technique captures the fond—those browned bits that add incredible depth to your Gordon Ramsay shepherds pie.

Cook the vegetables for 5-6 minutes until softened but not mushy. Add minced garlic during the final 30 seconds to prevent burning while ensuring aromatic release. This timing prevents the bitter flavors that develop when garlic cooks too long at high heat.

Creating the Sauce

Tomato paste integration separates amateur from professional Gordon Ramsay shepherds pie preparation. Stir the paste directly into the vegetable mixture and cook for a full minute. This technique, called “blooming,” concentrates the tomato flavors and eliminates the raw paste taste that ruins many homemade versions.

Add Worcestershire sauce, fresh thyme, salt, and pepper before returning the lamb to the pan. The umami richness from Worcestershire sauce provides the savory depth that makes Gordon Ramsay shepherds pie so satisfying. Mix thoroughly to distribute seasonings evenly throughout the filling.

Pour in beef stock and bring to a simmer. This is where patience becomes crucial—allow the mixture to reduce for 8-10 minutes until the liquid volume decreases by half. Proper reduction concentrates flavors while achieving the correct consistency for Gordon Ramsay shepherds pie. Add frozen peas during the final 2 minutes to maintain their bright color and texture.

Pro Tips for Perfect Gordon Ramsay Shepherds Pie

Temperature control makes the difference between soggy and spectacular Gordon Ramsay shepherds pie results. Your filling should be hot when you add the potato topping—this creates steam that helps the potatoes set properly during baking. Cold filling leads to uneven cooking and potential food safety issues.

The potato topping technique requires specific attention to moisture content. After draining the potatoes thoroughly, return them to the hot pot for 30 seconds to evaporate excess moisture. This step prevents watery mashed potatoes that sink into the filling. Mash with butter first, then gradually add warm milk until you achieve smooth, pipeable consistency.

Creating texture on your Gordon Ramsay shepherds pie topping ensures beautiful browning. Use a fork to create peaks and valleys across the potato surface—these raised areas catch heat and develop the golden color that makes restaurant-quality presentation. For more advanced potato preparation techniques, proper texture development is essential.

The final baking stage requires visual cues rather than strict timing. Your Gordon Ramsay shepherds pie is ready when the potato topping shows deep golden peaks and the filling bubbles actively around the edges. This typically takes 20-25 minutes, but oven variations make visual assessment more reliable than timer dependence.

Storage and Leftover Magic

Gordon Ramsay shepherds pie actually improves after resting, making it perfect for meal preparation. Allow the finished dish to cool for 5 minutes before serving—this resting period allows the filling to set properly while the potatoes maintain their structure. Cutting too early results in runny filling that compromises presentation.

For storage, Gordon Ramsay shepherds pie refrigerates beautifully for up to 4 days. Cover tightly with foil to prevent moisture loss and refrigerator odor absorption. The flavors meld during storage, often creating even more delicious results the next day.

Reheating requires gentle oven warming rather than microwave zapping. Preheat your oven to 350°F, cover the Gordon Ramsay shepherds pie with foil, and warm for 15-20 minutes until heated through. Remove foil during the final 5 minutes to restore the crispy potato topping texture. Learn more about proper leftover handling to maintain food safety and quality.

Individual portions freeze exceptionally well when wrapped properly. Cut cooled Gordon Ramsay shepherds pie into serving portions, wrap individually in plastic wrap, then store in freezer bags for up to 3 months. This preparation method provides convenient single servings while maintaining quality through proper freezer protection.

Frequently Asked Questions

What are 5 interesting facts about Gordon Ramsay?

Gordon Ramsay originally trained to become a professional soccer player before a knee injury redirected him to culinary arts. He earned his first Michelin star at age 27, making him one of the youngest chefs to achieve this recognition. Ramsay has completed multiple marathons and ironman competitions, demonstrating the same dedication to fitness as cooking. His television career spans over 20 countries with shows broadcast in more than 200 territories worldwide. Despite his fiery television persona, Ramsay is known for his charitable work, particularly with disadvantaged youth through cooking education programs.

The key to successful Gordon Ramsay shepherds pie lies in understanding that this seemingly simple dish requires respect for technique and ingredient quality. Every element—from proper lamb browning to potato topping texture—contributes to the final result. When you master these fundamentals, you’ll create restaurant-quality comfort food that honors the British tradition while satisfying modern palates.

Remember that cooking is about patience and attention to detail. Don’t rush the reduction process, take time to properly season at each stage, and trust the visual cues that indicate doneness. Your Gordon Ramsay shepherds pie should be a source of pride, not frustration.

The next time you’re craving ultimate comfort food, remember that Gordon Ramsay shepherds pie rewards careful preparation with extraordinary results. For complementary side dishes that pair beautifully, consider vegetables that balance the richness while maintaining the British comfort food theme.

This recipe transforms simple ingredients into restaurant-quality Gordon Ramsay shepherds pie through professional techniques and careful attention to detail. The result justifies every minute spent perfecting each component.

Stay safe,
Jack Sullivan

Gordon Ramsay style shepherds pie with golden mashed potato topping in cast iron skillet
Jack Sullivan

Gordon Ramsay Shepherds Pie

Restaurant-quality shepherd’s pie with perfectly seasoned lamb filling and golden mashed potato topping, following Gordon Ramsay’s professional techniques.
Prep Time 25 minutes
Cook Time 45 minutes
Total Time 1 hour 10 minutes
Servings: 6 servings
Course: Main Course
Cuisine: british
Calories: 542

Ingredients
  

  • 2 lbs ground lamb 80/20 fat ratio preferred
  • 3 lbs russet potatoes peeled and quartered
  • 1 large yellow onion diced
  • 2 large carrots diced small
  • 1 cup frozen peas
  • 3 cloves garlic minced
  • 2 tbsp tomato paste
  • 2 tbsp Worcestershire sauce
  • 1 cup beef stock low sodium
  • 4 tbsp butter for mashed potatoes
  • 1/2 cup whole milk warm
  • 2 tbsp fresh thyme leaves only
  • 1 tsp salt kosher salt
  • 1/2 tsp black pepper freshly ground

Equipment

  • 1 9×13 inch baking dish or cast iron skillet
  • 1 Large Skillet for browning lamb
  • 1 Large Pot for boiling potatoes

Method
 

  1. 1️⃣ Preheat oven to 400°F (200°C). Place quartered potatoes in large pot with cold salted water, bring to boil, and cook for 15-18 minutes until fork-tender.
  2. 2️⃣ Heat large skillet over medium-high heat. Add ground lamb and cook, breaking up with wooden spoon, until browned and cooked through (about 6-8 minutes). Remove lamb and drain fat, leaving 1 tablespoon in pan.
  3. 3️⃣ Add diced onions and carrots to the same skillet. Cook for 5-6 minutes until softened. Add minced garlic and cook for additional 30 seconds until fragrant.
  4. 4️⃣ Stir in tomato paste and cook for 1 minute. Add Worcestershire sauce, fresh thyme, salt, and pepper. Return lamb to pan and mix well.
  5. 5️⃣ Pour in beef stock and simmer for 8-10 minutes until liquid reduces by half. Stir in frozen peas during last 2 minutes. Taste and adjust seasoning.
  6. 6️⃣ Drain potatoes thoroughly and return to pot. Mash with butter and warm milk until smooth and creamy. Season with salt and pepper to taste.
  7. 7️⃣ Transfer lamb mixture to 9×13 inch baking dish. Spread mashed potatoes evenly over top, creating peaks with fork for extra browning.
  8. 8️⃣ Bake for 20-25 minutes until potato topping is golden brown and filling bubbles around edges. Rest for 5 minutes before serving.

Nutrition

Serving: 1gCalories: 542kcalCarbohydrates: 38gProtein: 28gFat: 32gSaturated Fat: 14gPolyunsaturated Fat: 2gMonounsaturated Fat: 13gCholesterol: 98mgSodium: 687mgPotassium: 1245mgFiber: 6gSugar: 8gVitamin A: 4520IUVitamin C: 28mgCalcium: 156mgIron: 4mg

Notes

For extra richness, add a beaten egg yolk to the mashed potatoes before spreading over filling.
Ground beef can be substituted for lamb, but lamb provides authentic British flavor.
Make ahead tip: Assemble completely and refrigerate up to 24 hours before baking. Add 10 minutes to cooking time if baking from cold.

Tried this recipe?

Let us know how it was!