There’s a reason people avoid making Gordon Ramsay Green Papaya Salad at home—I found out why. One wrong cut, one bad ingredient, and you’re not making salad. You’re making regret.
I learned this the hard way during a dinner party that should’ve been a triumph. I’d just watched Ramsay prepare this fiery Thai classic on TV—how hard could it be? Turns out, very. My version was either too sour, too bland, or so spicy it cleared the room. I even triggered a coughing fit in my neighbor’s dog.
But after studying Ramsay’s technique, consulting Thai chefs, and testing over a dozen variations, I cracked the code. This isn’t just shredded fruit with fish sauce. It’s a balance of sour, sweet, salty, spicy, and umami—a dish where every element must earn its place.
Now, when I serve Gordon Ramsay Green Papaya Salad, guests don’t just eat it. They pause. They ask, “How?”
Let me show you how to get it right.
Why This Gordon Ramsay Green Papaya Salad Works (And Where Most Go Wrong)
Most people treat Gordon Ramsay Green Papaya Salad like a simple slaw. That’s the first mistake. This is a textural and flavor symphony—one that demands precision.
The biggest failure points?
Using ripe papaya → mushy, sweet, wrong texture
Skipping the mortar and pestle → no flavor integration
Overdressing → drowns the crunch
Wrong chili level → overwhelms instead of enhances
Gordon Ramsay’s version works because he respects the fermented depth of fish sauce, the brightness of fresh lime, and the crunch of perfectly julienned papaya. He doesn’t mask flavors—he amplifies them.
According to the USDA Seafood Safety Guidelines , fish sauce is safe and stable when stored properly, but quality matters. Use a premium brand—your Gordon Ramsay Green Papaya Salad deserves it.
How to Choose Green Papaya for Salad
This is non-negotiable: use unripe, firm green papaya.
Look for:
Matte green skin (not shiny)
No soft spots or bruises
Heavy for its size (indicates moisture)
No orange blush (means ripening)
Avoid anything with yellow patches—they’re starting to sweeten, and you want crisp, neutral crunch, not tropical softness.
Pro tip: Wear gloves. Green papaya contains papain, a latex-like enzyme that can irritate sensitive skin.
Gordon Ramsay Green Papaya Salad is a flavor bomb:
Sour from fresh lime
Salty from fish sauce
Sweet from palm sugar
Spicy from dried chilies
Umami from fermented depth
It’s refreshing yet intense, crisp yet complex. Think of it as a Thai ceviche without the seafood—bright, acidic, and alive.
The herbs—mint and cilantro—add a cooling contrast, while crushed peanuts bring earthy richness.
If you’ve only had sweet fruit salads, this will shock your palate—in the best way.
Ingredients That Actually Matter for Gordon Ramsay Green Papaya Salad
The Green Papaya
Must be unripe. If it yields to pressure, it’s too soft. You want firm, crunchy texture that holds up to dressing.
Fish Sauce
Don’t cheap out. Use Thai or Vietnamese brands (Red Boat, Tiparos). This is the umami backbone of your Gordon Ramsay Green Papaya Salad.
Palm Sugar
Its caramel-like depth balances lime’s acidity. Substitute brown sugar if needed, but palm sugar is superior.
Fresh Lime Juice
Never bottled. Freshly squeezed lime delivers the bright sourness that defines the dish.
Dried Red Chilies
Provide slow-building heat. Start with 1–2, taste, then add more.
Fresh Herbs
Mint and cilantro aren’t garnish—they’re essential. Their freshness cuts through the spice.
Roasted Peanuts
Add crunch and nuttiness. Crush them just before serving.
This attention to ingredient quality mirrors what we use in Gordon Ramsay Beet Salad —every component must pull its weight.
Step-by-Step Instructions
1️⃣ Prepare the Papaya
Peel the green papaya, cut in half, scoop out seeds, and julienne into thin matchsticks. A mandoline or julienne peeler works best.
2️⃣ Pound the Dressing Base
In a mortar, pound garlic and chilies until fragrant. Add palm sugar and pound until dissolved.
3️⃣ Add Liquids
Stir in fish sauce and lime juice. Mix into a smooth, aromatic paste.
4️⃣ Bruise the Beans
Add green beans to the mortar and pound lightly—this helps them absorb flavor.
5️⃣ Combine and Toss
Transfer to a large bowl. Add papaya, tomatoes, mint, and cilantro. Toss vigorously to coat.
6️⃣ Adjust Seasoning
Taste. Need more sour? Add lime. More sweet? Add sugar. More salt? Fish sauce. This is yourGordon Ramsay Green Papaya Salad.
7️⃣ Serve Immediately
Plate and top with crushed peanuts. Do not let it sit—crunch fades fast.
This technique of building flavor layers is similar to what we use in Gordon Ramsay Asparagus Risotto —each step builds toward the final balance.
Pro-Tips That Change the Game
Use a mortar and pestle – It’s not optional. Pounding releases oils and integrates flavors.
Keep it cold – Chill ingredients before assembling for maximum crunch.
Adjust heat slowly – Start mild, then build. You can’t undo too much spice.
Make it ahead? – Prep ingredients separately, but assemble last minute.
Add protein? – Top with grilled shrimp or chicken for a full meal.
Storage & Leftovers Guidance
How long does green papaya salad keep in the fridge? Up to 24 hours, but it’s best immediately. The papaya softens, and the dressing breaks down the crunch.
If you must store it:
Keep in an airtight container
Do not add peanuts until serving
Expect texture loss upon reheating (it won’t be crisp)
For meal prep, store components separately and assemble fresh.
Comprehensive FAQ Section
Is green papaya salad healthy to eat every day?
Yes, in moderation. It’s low in calories, high in fiber, and packed with vitamins C and A. However, the fish sauce adds sodium, so balance it with low-sodium meals.
What’s the best way to julienne green papaya?
Use a julienne peeler or mandoline with julienne blade. Cut into thin, even matchsticks for consistent texture.
Can I make this vegetarian?
Yes—use vegetarian fish sauce (mushroom-based) or soy sauce + seaweed for umami.
What pairs well with Gordon Ramsay Green Papaya Salad?
Use gloves when handling green papaya to avoid skin irritation from latex.Adjust chili level to taste—start with 1 and build up.For extra umami, add 1 tsp shrimp paste (kapi).
The first time I attempted Gordon Ramsay Roasted Root Vegetables With Crushed Pepitas, I thought it would be simple. How hard could roasting vegetables be, right? Twenty years of firefighting had taught me to handle pressure, but nothing prepared me for the precision this dish demands. What I learned that evening changed everything I knew about vegetable cookery.
After multiple attempts and countless adjustments, I’ve mastered Gordon Ramsay’s technique for creating perfectly caramelized root vegetables with that signature pepita crunch. The secret isn’t just in the temperature—it’s in understanding how each vegetable behaves under heat and timing everything to perfection.
This Gordon Ramsay Roasted Root Vegetables With Crushed Pepitas recipe delivers restaurant-quality results at home. The combination of properly seasoned root vegetables with the nutty crunch of pepitas creates a side dish that elevates any meal. According to the USDA’s nutritional guidelines, root vegetables provide essential vitamins and minerals that support overall health.
How Do You Roast Carrots and Parsnips in Gordon Ramsay Style?
Gordon Ramsay’s approach to roasting carrots and parsnips focuses on uniform cutting and proper oil distribution. The key is cutting both vegetables into identical 2-inch pieces to ensure even cooking. Ramsay emphasizes that carrots and parsnips have different densities, so they require strategic placement on the baking sheet.
For optimal results with Gordon Ramsay Roasted Root Vegetables With Crushed Pepitas, place denser vegetables like carrots on the edges of the pan where heat is more intense. Parsnips, being slightly less dense, can occupy the center areas. This positioning ensures both vegetables achieve that golden caramelization Ramsay is famous for.
The temperature control is crucial—425°F provides enough heat to caramelize the natural sugars without burning the exterior. If you’re looking for more vegetable preparation techniques, check out our Gordon Ramsay buttered savoy cabbage guide for complementary side dishes.
What Root Vegetables Can You Roast Together?
The beauty of Gordon Ramsay Roasted Root Vegetables With Crushed Pepitas lies in the variety of compatible vegetables. Carrots, parsnips, potatoes, beets, turnips, and rutabagas all work excellently together when cut to uniform sizes.
However, not all root vegetables cook at the same rate. Potatoes and beets require slightly longer cooking times, while carrots and parsnips finish faster. The professional trick is starting denser vegetables like potatoes 10 minutes before adding others to the pan.
Color separation is another consideration—beets will bleed their vibrant color onto other vegetables. Keep them on a separate section of your baking sheet or use a dedicated pan. This prevents your Gordon Ramsay Roasted Root Vegetables With Crushed Pepitas from turning uniformly purple.
What Is the Single Ingredient You Need for the Crispiest Roasted Vegetables?
High-quality extra virgin olive oil is the game-changer for achieving maximum crispiness in Gordon Ramsay Roasted Root Vegetables With Crushed Pepitas. The oil creates a barrier that promotes browning while preventing moisture loss.
But here’s the professional secret: completely dry vegetables before oiling. Any surface moisture will create steam instead of the desired caramelization. Pat each piece dry with paper towels, then toss with oil immediately before roasting.
The oil-to-vegetable ratio matters tremendously. Too little oil results in dry, tough vegetables. Too much creates soggy results. For perfect Gordon Ramsay Roasted Root Vegetables With Crushed Pepitas, use approximately 1 tablespoon of oil per pound of vegetables.
How to Make Crispy Roast Potatoes Gordon Ramsay Style?
Gordon Ramsay’s crispy potato technique involves parboiling before roasting—a method that works perfectly alongside other root vegetables. For Gordon Ramsay Roasted Root Vegetables With Crushed Pepitas, cut potatoes into 2-inch chunks and parboil for 8-10 minutes until edges soften.
After parboiling, drain thoroughly and let potatoes steam-dry for 5 minutes. This creates the fluffy exterior that crisps beautifully in the oven. Toss with oil and seasonings while still warm—the heat helps the oil penetrate the roughened surface.
The secret to restaurant-quality results is aggressive seasoning. Salt the potatoes heavily after the initial oil toss, then again halfway through roasting. This double-salting technique ensures flavor penetrates throughout while promoting surface crisping. For more potato techniques, explore our Gordon Ramsay fondant potatoes recipe.
Ingredients That Actually Matter for Gordon Ramsay Roasted Root Vegetables With Crushed Pepitas
Not all ingredients are created equal when making Gordon Ramsay Roasted Root Vegetables With Crushed Pepitas. Quality makes a measurable difference in the final result.
Root Vegetables: Choose firm, unblemished vegetables. Avoid pre-cut packages—whole vegetables retain more moisture and flavor. Look for carrots with bright orange color and parsnips with cream-colored skin.
Crushed Pepitas: Toast raw pumpkin seeds yourself rather than buying pre-toasted varieties. Fresh pepitas provide superior crunch and nutty flavor that complements the caramelized vegetables perfectly.
Olive Oil: Extra virgin olive oil with a smoke point around 375°F works best. Lower quality oils can turn bitter at high roasting temperatures, affecting the overall taste of your Gordon Ramsay Roasted Root Vegetables With Crushed Pepitas.
Fresh Herbs: Thyme and rosemary are Ramsay’s go-to choices. Fresh herbs release essential oils that infuse the vegetables during roasting. Dried herbs work but lack the aromatic impact of fresh varieties.
Step-by-Step Instructions
Preparation: Begin by preheating your oven to 425°F and preparing two large rimmed baking sheets with parchment paper. This temperature provides optimal caramelization for Gordon Ramsay Roasted Root Vegetables With Crushed Pepitas.
Vegetable Prep: Cut all vegetables into uniform 2-inch pieces. Consistency is crucial—uneven pieces will cook at different rates, resulting in some vegetables being overcooked while others remain underdone.
Seasoning: Toss vegetables with olive oil, salt, pepper, and fresh herbs in a large bowl. Ensure every piece is well-coated. The oil should glisten on the surface without pooling at the bottom of the bowl.
Arrangement: Spread vegetables in a single layer across your prepared baking sheets. Overcrowding prevents proper browning and results in steamed rather than roasted vegetables.
Roasting: Cook for 35-45 minutes, turning once halfway through. The vegetables are ready when they’re golden brown and easily pierced with a fork.
Finishing: Remove from oven and immediately sprinkle with crushed pepitas while the vegetables are still hot. This ensures the pepitas adhere properly to your Gordon Ramsay Roasted Root Vegetables With Crushed Pepitas.
For nutritional information about roasted vegetables, the National Institutes of Health provides comprehensive data on vitamin and mineral content.
Pro Tips for Perfect Results
Temperature Control: An oven thermometer ensures accuracy. Many home ovens run 25-50 degrees off their displayed temperature, which significantly impacts cooking times for Gordon Ramsay Roasted Root Vegetables With Crushed Pepitas.
Pan Selection: Heavy-duty rimmed baking sheets prevent warping and ensure even heat distribution. Thin pans create hot spots that can burn vegetables before they’re properly cooked.
Timing Management: Start checking vegetables at the 30-minute mark. Oven variations and vegetable sizes affect cooking times. Well-roasted vegetables should have deep golden edges and tender centers.
Pepita Preparation: Toast pepitas in a dry skillet for 3-4 minutes before crushing. This extra step intensifies their nutty flavor and ensures they maintain crunch when added to hot vegetables.
Storage and Leftovers
Properly stored Gordon Ramsay Roasted Root Vegetables With Crushed Pepitas maintain quality for up to four days refrigerated. Store in airtight containers to prevent moisture loss and flavor absorption from other foods.
Reheating: Avoid microwaving, which creates soggy textures. Instead, reheat in a 375°F oven for 8-10 minutes until warmed through. Add fresh pepitas after reheating to restore crunch.
Meal Prep: These vegetables work excellently for weekly meal preparation. Cook a large batch and portion into containers with proteins for complete meals throughout the week.
Freezing: While possible, freezing changes the texture significantly. Root vegetables become softer after thawing. If freezing, use thawed vegetables in soups or purees rather than as a side dish.
Can you roast carrots and parsnips at the same time?
Yes, carrots and parsnips roast beautifully together when cut to the same size. Both vegetables have similar cooking times and complement each other’s flavors perfectly in Gordon Ramsay Roasted Root Vegetables With Crushed Pepitas.
This Gordon Ramsay Roasted Root Vegetables With Crushed Pepitas recipe transforms simple ingredients into an extraordinary side dish. The combination of proper technique, quality ingredients, and careful timing creates vegetables that rival any restaurant preparation. Whether you’re serving this alongside our Gordon Ramsay grilled salmon or as part of a vegetarian feast, these roasted vegetables deliver consistently impressive results.
The methodical approach I learned from years of emergency response translates perfectly to cooking. Following each step precisely ensures success every time you make Gordon Ramsay Roasted Root Vegetables With Crushed Pepitas.
Stay safe, Jack Sullivan
Jack Sullivan
Gordon Ramsay Roasted Root Vegetables With Crushed Pepitas
Learn Gordon Ramsay’s technique for perfectly roasted root vegetables with crushed pepitas. This professional method delivers crispy, caramelized vegetables every time.
For extra crispy vegetables, pat them completely dry before oiling and roasting.Don’t overcrowd the pan – use two baking sheets if needed for proper browning.Vegetables are done when they’re golden brown and easily pierced with a fork.
I saw gordon ramsay apple pie on a menu and said, “I could make that.” Famous last words.
Twenty years fighting fires, and I thought I understood heat control. Turns out, managing the delicate balance between caramelizing apples and achieving that perfect flaky crust requires a different kind of precision than wielding a fire hose. After three attempts that ranged from soggy disasters to burnt offerings, I finally cracked the code on Gordon Ramsay’s apple pie technique.
The secret isn’t just in following his recipe—it’s understanding why each step matters. When you master Gordon Ramsay’s approach to apple pie, you’re not just baking a dessert; you’re learning fundamental techniques that transform how you approach pastry forever. This gordon ramsay apple pie combines perfectly caramelized apples with a butter-rich crust that stays crisp from bottom to top.
How Do You Caramelize Apples Like Gordon Ramsay?
Gordon Ramsay’s apple caramelization technique separates amateur bakers from professionals. The key lies in pre-cooking your apples before they ever see the pie crust. Most home bakers dump raw apples into their crust and wonder why they end up with a watery mess.
Start by heating a large skillet over medium-high heat—not medium, not high, but that sweet spot where you maintain control. Add your sliced Granny Smith apples (Gordon always uses Granny Smith for their tartness and firm texture) along with brown sugar and spices. The magic happens in those crucial 8-10 minutes of cooking.
You’ll know you’ve achieved proper caramelization when the apples release their juices, the sugars turn golden, and the liquid reduces to a syrupy consistency. The apples should be tender but still hold their shape—no mushy apple sauce here. According to the USDA’s food safety guidelines, proper cooking also ensures food safety while developing complex flavors.
This pre-cooking method prevents the dreaded soggy bottom crust because you’re controlling moisture from the start. Add cornstarch at the end to bind everything together, creating a filling that won’t leak during baking.
What’s the Trick to a Great Apple Pie According to Gordon Ramsay?
Gordon Ramsay’s greatest apple pie trick is treating your pastry like it’s alive. Cold butter, cold hands, cold everything. The moment your butter starts melting during mixing, you’ve lost the battle for flaky layers.
Work your butter into the flour until it resembles coarse breadcrumbs with some larger butter pieces still visible—those chunks create steam pockets during baking, resulting in flaky layers. Add ice water gradually, just enough to bring the dough together. Overworking creates tough, chewy pastry instead of the tender, flaky crust that makes gordon ramsay apple pie special.
Temperature control extends beyond ingredients. Chill your assembled pie for 30 minutes before baking. This firms up the butter again and prevents shrinkage. Gordon also recommends using a glass pie dish so you can monitor the bottom crust’s progress—no guessing games.
The professional touch comes in the egg wash. That glossy, golden finish you see on restaurant desserts? It’s simply beaten egg brushed over the top crust before baking. This creates an appealing color and slight sheen that elevates your homemade gordon ramsay apple pie to restaurant quality.
How Do You Keep the Bottom Crust From Getting Soggy?
The soggy bottom curse has defeated more apple pie dreams than any other baking mishap. Gordon Ramsay’s solution involves multiple defensive strategies working together.
First, that pre-cooked apple filling I mentioned earlier removes excess moisture before it can attack your crust. But Gordon goes further. He recommends blind baking the bottom crust for 10 minutes at 425°F before adding the filling. This creates a moisture barrier that protects against soggy bottoms.
Cornstarch beats flour as a thickener because it creates a clearer, more stable gel that won’t break down during baking. Mix it directly with your cooked apples while they’re still warm—this activates the cornstarch immediately.
Position matters too. Bake your gordon ramsay apple pie on the lowest oven rack for the first 25 minutes. This direct heat from below sets the bottom crust quickly. If you’re making our Gordon Ramsay fondant potatoes, you’ll recognize this bottom-heat technique for achieving perfect texture.
The final defense is proper cooling. I know it’s tempting to cut into that beautiful pie immediately, but cooling for at least 3 hours allows the filling to set properly. Hot filling equals runny filling, and runny filling means soggy crust.
Ingredients That Actually Matter for Gordon Ramsay Apple Pie
Not all ingredients are created equal when you’re aiming for gordon ramsay apple pie perfection. Let me break down what actually makes a difference versus marketing hype.
Apples: Granny Smith isn’t just tradition—it’s science. Their high acid content prevents excessive browning, and their firm texture holds up during the double cooking process (pre-cooking plus baking). Honeycrisp might taste great fresh, but they’ll turn to mush in your pie.
Butter: European-style butter contains less water and more fat than standard American butter. That extra fat content translates directly to flakier pastry. If you can’t find European butter, stick with unsalted and add salt separately for better control.
Brown Sugar vs. White Sugar: Brown sugar adds molasses notes that complement the apple’s natural tartness. The moisture in brown sugar also helps with caramelization during the pre-cooking stage.
Spices: Fresh-grated nutmeg makes a noticeable difference over pre-ground. Cinnamon should be Ceylon, not Cassia, if you can source it—Ceylon offers more complex, sweeter notes that won’t overpower the apples.
According to Harvard Health’s nutritional database, apples provide essential fiber and antioxidants, making this gordon ramsay apple pie a more nutritious dessert choice when enjoyed in moderation.
Step-by-Step Instructions
For the Pastry:
Cut cold butter into flour and salt until mixture resembles coarse crumbs with some larger pieces remaining.
Add ice water gradually, mixing just until dough comes together.
Divide dough in half, form into discs, wrap in plastic, and refrigerate 1 hour minimum.
For the Filling: 4. Heat large skillet over medium-high heat. Add sliced apples, brown sugar, cinnamon, and nutmeg. 5. Cook 8-10 minutes, stirring occasionally, until apples caramelize and soften slightly. 6. Stir in cornstarch until mixture thickens. Remove from heat and cool completely.
Assembly and Baking: 7. Preheat oven to 425°F. Roll out bottom crust and place in 9-inch pie dish. 8. Add cooled apple filling and dot with butter pieces. 9. Roll out top crust, create lattice pattern or cover with vents, and brush with beaten egg. 10. Bake 45-55 minutes until crust is golden brown and filling bubbles through vents. 11. Cool completely on wire rack, at least 3 hours before serving.
Pro Tips from the Firehouse Kitchen
After perfecting this gordon ramsay apple pie through multiple attempts (and crew taste-testing sessions), here are the details that separate good from great:
Use a kitchen scale. Measuring flour by weight instead of volume eliminates the most common pastry failures. 2½ cups flour should weigh approximately 315 grams.
Test your apple doneness. Pierce with a fork during pre-cooking—they should offer slight resistance, not slide off the fork completely.
Create steam vents strategically. If using a full top crust instead of lattice, cut vents in a pattern that allows steam to escape from the center where heat builds most intensely.
Monitor your oven hot spots. Rotate the pie 180 degrees halfway through baking if your oven heats unevenly. Most home ovens do.
For more advanced pastry techniques, check out our guide to Gordon Ramsay’s signature dishes where he demonstrates professional pastry handling.
Storage and Leftovers
Proper storage keeps your gordon ramsay apple pie tasting fresh for days. Cover loosely with foil and refrigerate for up to 4 days. The key word is “loosely”—tight covering traps moisture and softens the crust.
For reheating individual slices, use a 350°F oven for 10-12 minutes rather than the microwave. This restores some crispness to the crust while warming the filling evenly.
Freezing works well for this recipe. Wrap the cooled pie tightly in plastic wrap, then aluminum foil. Freeze for up to 3 months. Thaw overnight in the refrigerator before reheating.
If you’re planning ahead, you can freeze the unbaked pie. Assemble completely, wrap well, and freeze. Bake directly from frozen, adding 15-20 minutes to the baking time and covering the edges with foil to prevent over-browning.
Frequently Asked Questions
What is Gordon Ramsay’s favorite dessert? While Gordon Ramsay has praised many desserts throughout his career, he’s particularly fond of classic British puddings and perfectly executed fruit tarts. His apple pie technique reflects his appreciation for traditional recipes elevated through proper technique.
Why won’t caramel stick to apples? Caramel fails to stick when apples contain too much surface moisture or when the caramel temperature is wrong. Pat apples dry before caramelizing, and ensure your sugar mixture reaches proper caramelization temperature (around 340°F) before adding apples.
What ingredients are needed for apple pie? The essential ingredients for gordon ramsay apple pie include Granny Smith apples, all-purpose flour, cold unsalted butter, brown sugar, cinnamon, nutmeg, cornstarch, salt, and ice water. Quality matters more than quantity—invest in European-style butter and fresh spices for best results.
Perfect Pairings and Serving Suggestions
This gordon ramsay apple pie pairs beautifully with vanilla ice cream or freshly whipped cream. For a more sophisticated presentation, try it alongside a glass of dessert wine or aged rum.
If you’re serving this as part of a larger meal, consider it after hearty dishes like our Gordon Ramsay chicken cacciatore. The pie’s richness provides a satisfying conclusion to substantial main courses.
For holiday entertaining, this recipe scales well. The pastry dough can be made days ahead and refrigerated, while the apple filling keeps for 2 days covered in the refrigerator. This advance preparation makes holiday meal planning much more manageable.
According to Mayo Clinic’s dietary guidelines, enjoying desserts like apple pie in moderation as part of a balanced diet contributes to overall meal satisfaction and dietary adherence.
FAQ
Crust shrinks during baking
Your dough was overworked or not chilled long enough. Always rest pastry dough for at least 1 hour, and avoid stretching it when placing in the pie dish.
Filling bubbles over
Either your thickener ratio was off or your oven temperature runs hot. Reduce oven temperature by 25°F and extend baking time if this happens consistently.
Apple filling too sweet or too tart
Adjust brown sugar in 2-tablespoon increments up or down based on your apple variety and personal preference. Taste your pre-cooked filling and adjust before assembling.
This gordon ramsay apple pie technique has saved me from countless dessert disasters since that first humbling attempt. The combination of proper apple preparation, temperature control, and patience creates results that would make any professional kitchen proud.
The key to mastering this recipe lies in understanding that each step serves a specific purpose. When you pre-cook those apples, you’re not just following instructions—you’re controlling moisture and developing flavor. When you keep that butter cold, you’re engineering flaky layers. When you resist cutting into the hot pie, you’re allowing physics to work in your favor.
Whether you’re impressing dinner guests or just satisfying your own dessert cravings, this gordon ramsay apple pie delivers the perfect balance of technique and tradition. The methodical approach might seem excessive at first, but once you taste the results, you’ll understand why Gordon Ramsay’s techniques have earned their reputation.
Stay safe, Jack Sullivan
Jack Sullivan
Gordon Ramsay Apple Pie
Master Gordon Ramsay’s professional apple pie technique with perfectly caramelized apples and a flaky, buttery crust that never gets soggy.
1️⃣ Make pastry by cutting cold butter into flour and salt until mixture resembles coarse crumbs. Add ice water gradually until dough forms.
2️⃣ Divide dough in half, wrap in plastic, and chill for 1 hour minimum.
3️⃣ Heat large skillet over medium-high heat. Add sliced apples, brown sugar, and spices. Cook 8-10 minutes until apples caramelize and soften slightly.
4️⃣ Stir cornstarch into apple mixture to thicken. Remove from heat and cool completely.
5️⃣ Preheat oven to 425°F. Roll out bottom crust and place in pie dish. Add cooled apple filling and dot with butter pieces.
6️⃣ Roll out top crust and create lattice pattern or cover completely with vents. Brush with beaten egg.
7️⃣ Bake 45-55 minutes until crust is golden brown and filling bubbles. Cover edges with foil if browning too quickly.
8️⃣ Cool completely on wire rack before serving, at least 3 hours for proper set.
Pre-cook apples to prevent soggy bottom crust and ensure proper texture.Use cornstarch instead of flour for clearer, more stable thickening.Blind bake bottom crust for 10 minutes if extra protection needed against sogginess.
My wife still brings up the time I butchered gordon ramsay bechamel sauce during our anniversary dinner. Picture this: a 20-year firefighter veteran, confident from years of feeding hungry crews, attempting to impress with a “simple” white sauce. Three hours later, our kitchen looked like a flour bomb had exploded, and we ordered pizza.
That disaster taught me respect for gordon ramsay bechamel sauce. This isn’t just mixing milk and flour—it’s a foundational technique that separates home cooks from professionals. After studying Gordon’s methods and countless practice runs (my wife was patient, thankfully), I’ve mastered the approach that delivers restaurant-quality results every time.
The secret isn’t complicated ingredients or fancy equipment. Gordon ramsay bechamel sauce succeeds through precise technique, proper timing, and understanding why each step matters. Whether you’re building lasagna layers or creating the perfect pasta sauce foundation, this mother sauce forms the backbone of countless dishes.
Let me walk you through the professional method that finally earned my wife’s forgiveness—and might save your next dinner party.
What Is the Basic Formula for Béchamel Sauce?
Gordon ramsay bechamel sauce follows the classic French mother sauce formula: equal parts butter and flour (called a roux) combined with milk. The ratio Gordon emphasizes is 4 tablespoons each of butter and flour to 2 cups of milk. This creates approximately 2 cups of finished sauce.
The USDA guidelines confirm that proper milk heating and handling prevents bacterial growth while maintaining nutritional integrity. Gordon’s technique addresses both safety and flavor development.
The magic happens in three distinct phases. First, you create the roux by cooking butter and flour together until fragrant but not browned. Second, you gradually incorporate warm milk while whisking constantly. Finally, you simmer the mixture until it reaches proper consistency—thick enough to coat a spoon but still pourable.
Understanding this formula means you can scale gordon ramsay bechamel sauce for any application. Double it for large lasagnas, halve it for smaller gratins, or adjust seasoning for specific dishes. The ratios remain constant; only quantities change.
How to Make White Sauce for Lasagna Gordon Ramsay Style?
Gordon ramsay bechamel sauce for lasagna requires slight modifications from the basic recipe. The consistency needs to be thicker to support pasta layers without making the final dish watery. Gordon achieves this by cooking the sauce 2-3 minutes longer than standard applications.
Start with the same base formula but add an extra tablespoon of flour. This creates a sauce that holds its structure when layered. The key difference is the final thickness—it should coat a spoon heavily and hold its shape when dropped from a whisk.
For lasagna applications, Gordon seasons the gordon ramsay bechamel sauce more aggressively. Add extra nutmeg (up to 1/2 teaspoon) and consider a pinch of garlic powder. These flavors complement the meat sauce and cheese layers without competing.
Temperature control becomes critical for lasagna béchamel. Cool the sauce slightly before layering—hot sauce can melt cheese prematurely and create uneven textures. Room temperature sauce spreads evenly and maintains proper structure during baking.
The final tip Gordon emphasizes: make extra. Lasagna béchamel disappears quickly during assembly, and running short means compromising layer thickness. Better to have surplus than thin, inadequate coverage between pasta sheets.
How to Make the Tastiest White Sauce Pasta?
Transforming gordon ramsay bechamel sauce into exceptional pasta sauce requires understanding how to build flavor layers. Gordon’s approach starts with infusing the milk with aromatics before incorporating it into the roux.
Heat your milk with bay leaves, whole garlic cloves, and onion quarters. This infusion step, often skipped in basic recipes, creates depth that elevates simple gordon ramsay bechamel sauce into restaurant-quality pasta sauce. Strain out the aromatics before adding milk to your roux.
Cheese integration separates good from great. Remove the sauce from heat before adding grated Parmesan or Gruyère. Residual heat melts the cheese without breaking the emulsion. Gordon recommends 1/2 cup grated cheese per cup of finished sauce.
Pasta water becomes your secret weapon. Reserve 1 cup of starchy pasta cooking water before draining. Add this gradually to your gordon ramsay bechamel sauce to adjust consistency and help the sauce cling to pasta surfaces. The starch creates natural binding.
Fresh herbs finish the dish. Gordon prefers chopped chives or parsley added just before serving. These bright flavors cut through the richness and add color contrast. Consider crispy pancetta or toasted pine nuts for texture variation.
For professional results, toss pasta directly in the pan with sauce rather than serving sauce over pasta. This technique, called mantecatura, ensures every strand gets properly coated with gordon ramsay bechamel sauce.
Ingredients That Actually Matter for Gordon Ramsay Béchamel Sauce
Quality ingredients transform basic gordon ramsay bechamel sauce from adequate to exceptional. Start with European-style unsalted butter—the higher fat content and lower water content create smoother textures and richer flavors than standard American butter.
Flour choice impacts both texture and flavor. All-purpose flour works perfectly, but Gordon sometimes uses a blend of all-purpose and cake flour for ultra-smooth results. Cake flour’s lower protein content reduces gluten development, creating more tender sauces.
Milk quality matters more than most realize. Whole milk provides necessary fat content for proper emulsification and mouthfeel. Low-fat alternatives create thin, watery gordon ramsay bechamel sauce that lacks richness. For special occasions, Gordon uses a blend of milk and heavy cream.
Fresh nutmeg makes a dramatic difference over pre-ground versions. Whole nutmegs stay potent for years when properly stored, while ground nutmeg loses flavor within months. A microplane grater creates the fine texture needed for smooth integration.
White pepper maintains the sauce’s pristine appearance while providing gentle heat. Black pepper creates visual specks that some find unappealing in white sauces. However, black pepper offers more complex flavor if appearance isn’t critical.
Salt choice affects both flavor and texture. Gordon prefers fine sea salt for its clean taste and easy dissolution. Table salt works fine but can taste slightly metallic in delicate sauces. Avoid coarse salts that won’t dissolve completely.
Consider these optional enhancements: bay leaves for subtle complexity, a splash of dry white wine for acidity, or a touch of Dijon mustard for depth. Each addition should complement, not overpower, the basic gordon ramsay bechamel sauce foundation.
Step-by-Step Professional Method
Equipment Setup: Arrange all ingredients within reach before starting. Gordon ramsay bechamel sauce moves quickly once you begin, and stepping away can result in burned roux or lumpy sauce. Use a heavy-bottom saucepan to prevent hot spots and ensure even heating.
Warm the milk in a separate saucepan over low heat. Add bay leaf if using. This step prevents temperature shock when adding milk to the roux, which causes lumps and uneven cooking. Keep the milk warm throughout the process.
Creating the Perfect Roux: Melt butter over medium heat without browning. The goal is completely melted butter with no foam or color development. Gordon emphasizes that brown butter, while delicious in other applications, overpowers delicate gordon ramsay bechamel sauce.
Add flour gradually while whisking constantly. Cook this mixture for 2-3 minutes, stirring continuously. The roux should smell nutty and fragrant without any raw flour odor. This cooking step eliminates the chalky taste that ruins many white sauces.
Milk Integration: Begin adding warm milk in small amounts while whisking vigorously. Start with just a few tablespoons, whisking until completely smooth before adding more. This gradual incorporation prevents lumps from forming.
As the mixture smooths, you can add larger amounts of milk more quickly. Continue whisking constantly and adjust heat as needed to prevent boiling. The sauce will gradually thicken as it cooks.
Final Seasoning and Finishing: Cook until the gordon ramsay bechamel sauce coats the back of a spoon consistently. This typically takes 8-10 minutes of gentle simmering with constant stirring. The sauce should be thick enough to hold its shape briefly when dripped from a whisk.
Season with salt, white pepper, and freshly grated nutmeg. Taste and adjust—seasoning should enhance the milk and butter flavors without overwhelming them. Remove any bay leaves used during milk heating.
For ultra-smooth results, strain the finished sauce through a fine-mesh sieve. This step removes any small lumps or undissolved seasonings for restaurant-quality presentation.
Professional Tips That Make the Difference
Temperature control separates amateur from professional gordon ramsay bechamel sauce. Never let the sauce boil vigorously—gentle simmering prevents breaking and ensures smooth texture. If the sauce gets too hot, remove it from heat temporarily while continuing to whisk.
Whisking technique matters more than whisk type. Use smooth, circular motions that reach all areas of the pan bottom. Figure-eight patterns work well for reaching corners where lumps often form. Constant motion prevents flour from settling and cooking unevenly.
Make gordon ramsay bechamel sauce ahead when possible. The sauce improves with resting time as flavors meld and any minor lumps dissolve completely. Cover with plastic wrap directly touching the surface to prevent skin formation.
For storage, press plastic wrap directly onto the sauce surface and refrigerate up to 3 days. Reheat gently while whisking, adding small amounts of milk if the sauce has thickened too much during storage.
Consider sauce consistency for intended use. Pasta sauces need thinner consistency than gratins or lasagnas. Adjust with additional warm milk or cooking time as needed for your specific application.
Common rescue techniques: If lumps form despite careful technique, strain the sauce immediately. For thin sauce, create a small slurry with equal parts butter and flour, then whisk into the simmering sauce. For broken sauce, remove from heat and whisk in cold butter one piece at a time.
Storage and Leftover Magic
Proper storage extends gordon ramsay bechamel sauce usability for days. Cool completely before refrigerating, and always cover with plastic wrap touching the surface. This prevents the tough skin that forms when sauce is exposed to air.
Leftover gordon ramsay bechamel sauce transforms ordinary ingredients into restaurant-quality dishes. Use it as a base for cheese sauces by whisking in grated cheese over low heat. Create cream soups by thinning with stock and adding vegetables.
The sauce freezes well for up to 3 months when properly packaged. Pour into ice cube trays for portion control, then transfer frozen cubes to freezer bags. This method provides perfect serving sizes for small applications.
Reheating requires gentle heat and patience. Thaw frozen sauce overnight in the refrigerator, then reheat slowly while whisking constantly. Add small amounts of milk if the sauce appears too thick after storage.
Transform leftover sauce into garlic bread spread by mixing with minced garlic and herbs. Use it as a pizza base for white sauce pizzas, or incorporate into mashed potatoes for extra richness and creaminess.
Frequently Asked Questions
Is alfredo sauce the same as a bechamel sauce?
No, alfredo sauce and gordon ramsay bechamel sauce differ significantly. Alfredo contains butter, heavy cream, and Parmesan cheese without any flour-based roux. Béchamel uses a flour-butter roux with milk and typically no cheese initially.
Should béchamel sauce be salted or unsalted butter?
Gordon ramsay bechamel sauce should always use unsalted butter for precise salt control. Salted butter varies in sodium content between brands, making consistent seasoning difficult. Unsalted butter allows you to add exactly the right amount of salt.
What is the difference between a white sauce and béchamel sauce?
White sauce is a general term for any pale-colored sauce, while béchamel specifically refers to the French mother sauce made with roux and milk. All béchamel is white sauce, but not all white sauces are béchamel—some use cream, cheese, or other bases.
Creating perfect gordon ramsay bechamel sauce requires patience, technique, and quality ingredients. The difference between mediocre and exceptional results lies in understanding why each step matters and executing them with precision.
This foundation sauce opens doors to countless culinary applications. Master it once, and you’ll find yourself reaching for this technique repeatedly. From simple pasta dishes to complex layered casseroles, gordon ramsay bechamel sauce provides the creamy, rich base that elevates home cooking to professional standards.
The investment in learning proper technique pays dividends for years. Your family will notice the difference immediately, and guests will wonder how you achieved such restaurant-quality results at home.
Stay safe, Jack Sullivan
Jack Sullivan
Gordon Ramsay Béchamel Sauce
Master Gordon Ramsay’s foolproof béchamel sauce recipe with this professional technique. Perfect for lasagna, pasta dishes, and classic French cooking.
Always use unsalted butter to control sodium content precisely.Warm milk prevents the sauce from seizing and creates smoother texture.The roux (butter-flour mixture) must cook completely to eliminate raw flour taste.Constant whisking is essential – lumps form quickly if you stop stirring.
There’s a reason people avoid making Gordon Ramsay Air Fryer Chicken at home — I found out why. After twenty years of emergency response work, I thought I’d seen every kind of disaster. Then I tried recreating Gordon Ramsay Air Fryer Chicken using one of Gordon’s signature techniques. Let me tell you, that first attempt at Gordon Ramsay Air Fryer Chicken was a masterclass in humility.
The problem wasn’t the Gordon Ramsay Air Fryer Chicken recipe itself. Gordon Ramsay’s approach to Gordon Ramsay Air Fryer Chicken is actually brilliant — it’s the precision that intimidates home cooks. Every temperature matters, every timing is calculated, and there’s zero room for the “close enough” mentality that works with other recipes. But once you understand his methodology, this Gordon Ramsay Air Fryer Chicken becomes one of the most reliable recipes in your arsenal.
What makes this Gordon Ramsay Air Fryer Chicken technique special is how Gordon maximizes the air fryer’s strengths while compensating for its limitations. The result? Restaurant-quality Gordon Ramsay Air Fryer Chicken with a golden, crispy exterior and perfectly juicy interior — all in just 25 minutes. According to the USDA guidelines for poultry safety, proper cooking technique is essential for both safety and flavor when preparing Gordon Ramsay Air Fryer Chicken.
Does Gordon Ramsay Use Air Fryers?
Absolutely. Gordon Ramsay has embraced air fryer technology, particularly for achieving consistent Gordon Ramsay Air Fryer Chicken results. In his restaurant kitchens and home cooking demonstrations, he frequently uses air fryers for their ability to create crispy textures without excess oil when making Gordon Ramsay Air Fryer Chicken.
What sets Gordon’s Gordon Ramsay Air Fryer Chicken approach apart is his understanding of air circulation principles. He treats the air fryer like a miniature convection oven, using specific positioning and timing techniques that most home cooks overlook when attempting Gordon Ramsay Air Fryer Chicken. His method focuses on maximizing surface contact while ensuring even heat distribution — something he learned from years of professional kitchen experience.
The key insight Gordon brings to Gordon Ramsay Air Fryer Chicken cooking is temperature control precision. While many recipes suggest general temperature ranges, Gordon’s Gordon Ramsay Air Fryer Chicken technique requires exact temperatures maintained throughout the cooking process. This precision transforms ordinary air fryer results into restaurant-quality Gordon Ramsay Air Fryer Chicken outcomes.
I learned this the hard way during my first attempt at Gordon Ramsay Air Fryer Chicken. Following a generic air fryer recipe, I ended up with unevenly cooked chicken — crispy in some spots, soggy in others. Gordon’s Gordon Ramsay Air Fryer Chicken method eliminates these inconsistencies through systematic temperature and timing protocols. Try our Gordon Ramsay stuffed chicken legs for another professional technique.
How Does Gordon Ramsay Cook His Chicken?
Gordon’s chicken cooking philosophy centers on three fundamental principles: moisture control, seasoning penetration, and precise temperature management. For air fryer applications, he adapts these principles to work with rapid air circulation technology.
First, moisture control begins before cooking starts. Gordon always pats chicken completely dry, then allows it to air-dry for additional time. This step removes surface moisture that would otherwise create steam, preventing the crispy skin formation that defines quality chicken preparation.
Second, his seasoning technique involves oil-based marinades that penetrate the meat while creating a protective barrier during cooking. The oil serves dual purposes: flavor carrier and heat conductor. This ensures even cooking while preventing the exterior from burning before the interior reaches safe temperature.
Third, Gordon’s temperature protocol for air fryer chicken involves specific heat stages. He starts at higher temperatures to establish the crust, then adjusts as needed to ensure thorough cooking without overcooking the exterior. This technique requires understanding your specific air fryer’s heat patterns — something that comes with practice.
The positioning aspect is equally critical. Gordon places chicken skin-side down initially, allowing the skin to render and crisp against the hot air fryer basket. This creates better texture than starting skin-side up, which many home cooks attempt incorrectly.
How to Perfectly Cook Chicken in the Air Fryer?
Perfect air fryer chicken requires systematic attention to four key variables: preparation, temperature, timing, and finishing technique. Gordon’s approach addresses each variable with professional precision.
Preparation starts with ingredient selection. Choose bone-in, skin-on chicken thighs for optimal results. Thighs contain more fat than breasts, which provides better flavor and prevents drying during the rapid cooking process. The bone conducts heat evenly, while the skin provides natural protection.
Temperature management involves preheating your air fryer to exactly 380°F. This temperature creates immediate searing without burning, establishing the crispy exterior that defines quality chicken. Lower temperatures won’t achieve proper crisping; higher temperatures risk burning before the interior cooks thoroughly.
Timing protocols require precision. Cook skin-side down for exactly 8 minutes, then flip and continue for 7 minutes. This timing assumes standard-sized thighs; adjust slightly for significantly larger or smaller pieces. Always verify doneness with a meat thermometer — internal temperature must reach 165°F for food safety compliance per FDA recommendations.
Finishing technique involves proper resting. Remove chicken from the air fryer and let it rest for 5 minutes before serving. This allows juices to redistribute throughout the meat, preventing dryness when you cut into it. Many home cooks skip this step, resulting in less flavorful, drier chicken.
Ingredients That Actually Matter for Gordon Ramsay Air Fryer Chicken
Success with this recipe depends entirely on ingredient quality and proper proportions. Each component serves a specific purpose in achieving Gordon’s signature results.
Chicken Selection: Use bone-in, skin-on thighs weighing approximately 4-6 ounces each. The bone provides even heat distribution, while the skin creates natural protection against overcooking. Avoid boneless pieces — they cook too quickly and dry out easily in air fryers.
Oil Choice: Extra virgin olive oil provides the best flavor profile and heat stability for this application. The oil creates a barrier that prevents moisture loss while promoting even browning. Don’t substitute with cooking sprays — they lack the coverage and heat transfer properties needed for optimal results.
Seasoning Blend: Coarse sea salt draws out surface moisture while penetrating the meat. Freshly ground black pepper provides heat and complexity. Garlic powder offers savory depth without the burning risk of fresh garlic. Smoked paprika adds color and subtle smoky flavor that complements the air frying process.
Herb Selection: Dried thyme withstands high-heat cooking better than fresh herbs, which tend to burn in air fryers. The earthy flavor complements chicken without overwhelming the natural taste. Optional cayenne pepper adds heat for those who prefer spicier food.
Quality matters significantly with these ingredients. Generic seasonings lack the potency of premium spices, resulting in bland chicken despite following the recipe exactly. Invest in quality ingredients — the difference is immediately noticeable in the final product. For side dish inspiration, try our Gordon Ramsay fondant potatoes recipe.
Step-by-Step Instructions
Preparation Phase: Begin by removing chicken from refrigeration 15 minutes before cooking to allow it to reach room temperature. This ensures even cooking throughout the pieces. Pat each thigh completely dry with paper towels, paying special attention to skin surfaces where moisture tends to accumulate.
Seasoning Application: In a large mixing bowl, combine olive oil with all dry seasonings. Mix thoroughly to create a uniform paste-like consistency. Add chicken thighs and massage the mixture into all surfaces, ensuring complete coverage. The oil should coat every area of the chicken for even cooking and flavor distribution.
Marination Period: Allow seasoned chicken to rest for minimum 10 minutes at room temperature. This brief marination period allows flavors to penetrate while the salt begins drawing out surface moisture. For deeper flavor, marinate covered in refrigerator for up to 4 hours, bringing to room temperature before cooking.
Air Fryer Setup: Preheat your air fryer to exactly 380°F for 3 minutes. Proper preheating ensures immediate searing when chicken touches the basket surface. Most air fryers require this preheating period to reach stable operating temperature.
Initial Cooking Phase: Place chicken thighs skin-side down in the air fryer basket, ensuring pieces don’t overlap or touch. Overcrowding prevents proper air circulation and results in uneven cooking. Cook for exactly 8 minutes without opening the air fryer door — this maintains consistent temperature and allows proper crisping.
Flipping and Finishing: After 8 minutes, carefully flip each piece using tongs. The skin should be golden brown and crispy at this stage. Continue cooking for 7 additional minutes, or until internal temperature reaches 165°F when measured with a meat thermometer inserted into the thickest part of the thigh.
Final Resting: Remove chicken from air fryer and place on a clean plate. Allow to rest for 5 minutes before serving. This resting period is crucial for juice redistribution and optimal texture. Resist the temptation to cut immediately — patience here makes the difference between good and exceptional results.
Pro Tips for Air Fryer Success
Moisture Management: For extra crispy skin, place seasoned chicken uncovered in refrigerator for 1-2 hours before cooking. This additional drying time removes more surface moisture, resulting in superior crisping during the air frying process.
Batch Cooking: Never overcrowd the air fryer basket. Cook in multiple batches if necessary, keeping finished pieces warm in a 200°F oven while completing remaining batches. Proper air circulation is essential for even cooking and crisping.
Temperature Verification: Invest in a quality instant-read thermometer for accurate temperature monitoring. Air fryer cooking times can vary based on model and piece size, making temperature verification the only reliable doneness indicator.
Equipment Maintenance: Clean your air fryer basket thoroughly between uses. Residual oils and food particles can create smoke and off-flavors that affect subsequent cooking. A clean basket also promotes better air circulation for optimal results.
Altitude Adjustments: If cooking at altitudes above 3,000 feet, reduce cooking temperature by 25°F and increase cooking time by 2-3 minutes. Higher altitudes affect air circulation and cooking efficiency, requiring these adjustments for consistent results.
Understanding your specific air fryer model is crucial. Different brands have varying heat distribution patterns and fan strengths. Keep notes on your results and adjust timing or temperature slightly based on your equipment’s performance characteristics.
Storage and Leftovers
Proper storage maintains the quality of your Gordon Ramsay Air Fryer Chicken for future meals. Refrigerate cooked chicken within 2 hours of cooking to prevent bacterial growth. Store in shallow, covered containers for even cooling and optimal food safety.
Refrigerated chicken maintains quality for 3-4 days when stored properly. For longer storage, freeze cooked chicken for up to 3 months. Wrap individual pieces in freezer paper or vacuum-seal for best quality retention during freezing.
Reheating Techniques: Reheat refrigerated chicken in a 350°F oven for 10-12 minutes, or until heated through. Avoid microwave reheating, which creates soggy skin and uneven heating. For frozen chicken, thaw completely in refrigerator before reheating using the oven method.
Meal Prep Applications: This recipe works excellently for meal preparation. Cook a large batch and portion into individual containers with vegetables and grains for complete meals. The robust flavors hold up well to refrigeration and reheating.
Leftover chicken can be repurposed into salads, sandwiches, or pasta dishes. The well-seasoned meat adds flavor to various applications without requiring additional seasoning. Consider our Gordon Ramsay chicken cacciatore for another way to use quality chicken in a complete meal.
FAQ Section
What is Gordon Ramsay’s most famous recipe?
While Gordon Ramsay is known for many signature dishes, his Beef Wellington is considered his most famous recipe. However, his air fryer chicken technique has gained significant popularity for home cooking due to its accessibility and consistent results.
Can I put raw chicken in an air fryer?
Yes, raw chicken can be cooked directly in an air fryer. In fact, this is the preferred method for achieving crispy skin and juicy meat. Always ensure internal temperature reaches 165°F for food safety.
What temperature should I cook chicken at in the air fryer?
For Gordon Ramsay’s technique, cook chicken at exactly 380°F. This temperature provides optimal balance between crisping the exterior and cooking the interior thoroughly without burning.
This Gordon Ramsay Air Fryer Chicken technique transforms ordinary home cooking into restaurant-quality results. The precision required might seem intimidating initially, but following these exact steps ensures consistent success every time. Master this foundation recipe, and you’ll understand why Gordon’s methods work so effectively with modern air fryer technology.
The key is respecting the process — every step serves a specific purpose in achieving the final result. From moisture management to temperature precision, each element contributes to the exceptional flavor and texture that defines professional-quality chicken preparation.
Stay safe, Jack Sullivan
Jack Sullivan
Gordon Ramsay Air Fryer Chicken
Master Gordon Ramsay’s signature air fryer chicken technique for perfectly crispy, juicy chicken every time. This restaurant-quality recipe delivers golden-brown perfection in just 25 minutes.
For extra crispy skin, place chicken in refrigerator uncovered for 1 hour before cooking.Don’t overcrowd the air fryer basket – cook in batches if necessary.Internal temperature is key for food safety – always use a meat thermometer.
I saw Gordon Ramsay Pea And Ham soup on a menu and said, “I could make that.” Famous last words.
Three weeks into my retirement from the fire department, I was dining at an upscale gastropub with my wife. The menu featured “Chef’s Traditional Pea & Ham Soup” for $18 a bowl. Eighteen dollars! I scoffed and told Sarah, “I could make that for a fraction of the cost.” She just smiled knowingly – the same smile she gives me when I insist I can fix the garbage disposal myself.
What followed was a humbling lesson in why Gordon Ramsay’s signature dishes command respect in professional kitchens worldwide. My first attempt produced what I can only describe as green wallpaper paste with ham chunks floating like debris. The second try? Watery disappointment that tasted like someone had whispered “pea” over a pot of ham water.
It took me five attempts and serious research into professional techniques before I cracked the code. The secret isn’t just throwing split peas and ham into water – it’s understanding the science behind flavor development, proper thickening techniques, and the methodical approach that separates amateur cooking from professional results.
How To Add More Flavour To Pea And Ham Soup
The foundation of exceptional Gordon Ramsay Pea And Ham soup lies in building layers of flavor from the very beginning. According to food science research from the USDA, the Maillard reaction – the browning process that occurs when proteins and sugars heat up – is crucial for developing complex flavors in soup bases.
Start by properly sautéing your mirepoix (onions, carrots, celery) until they develop a light golden color. This caramelization process creates hundreds of flavor compounds that simple boiling cannot achieve. The key is patience – rushing this step by using high heat will result in bitter, unevenly cooked vegetables that muddy your soup’s final taste.
Next, brown your ham hock or ham bone directly in the pot after removing the vegetables. This step, often skipped in home kitchens, adds a smoky depth that transforms ordinary soup into restaurant-quality Gordon Ramsay Pea And Ham. The rendered fat from the ham also provides richness that enhances the overall mouthfeel.
Professional chefs understand that seasoning isn’t just about salt and pepper at the end. Build your seasoning throughout the cooking process. Add bay leaves and fresh thyme early so their essential oils have time to infuse the liquid. This technique, similar to the layered approach used in Gordon Ramsay’s homemade pasta dishes, ensures every spoonful carries maximum flavor impact.
What Is A Thickening Agent For Pea And Ham Soup
The split peas themselves serve as the primary thickening agent in authentic Gordon Ramsay Pea And Ham soup, but understanding how to manipulate them properly separates amateur results from professional excellence. Split peas contain high levels of starch and protein that, when properly cooked, break down to create a naturally creamy texture without requiring flour or cream.
The critical factor is cooking time and temperature control. Split peas need consistent, gentle simmering for 90 minutes to 2 hours to fully break down. Aggressive boiling will cause them to become mushy on the outside while remaining hard in the center, creating an unpleasant, gritty texture that won’t thicken properly.
For restaurant-quality consistency, use an immersion blender to partially puree the soup after the peas have fully cooked. This technique allows you to control the final texture precisely – blend more for a smoother soup, less for a more rustic appearance. Professional kitchens often pass their soup through a fine mesh strainer after blending to achieve the silky smoothness characteristic of high-end establishments.
If your Gordon Ramsay Pea And Ham soup isn’t thickening adequately after proper cooking time, you can employ the reduction method. Remove the lid and increase heat slightly to encourage evaporation, concentrating the flavors while thickening the consistency. According to Harvard Medical School’s nutrition guidelines, this method preserves more nutrients than adding starch-based thickeners.
Ingredients That Actually Matter for Gordon Ramsay Pea And Ham
Quality ingredients make the difference between mediocre soup and the exceptional Gordon Ramsay Pea And Ham that rivals professional kitchens. Your choice of ham determines the soup’s entire flavor profile – this isn’t the place to economize with lunch meat scraps.
Ham hocks provide the most authentic flavor and natural gelatin that creates body in your soup. The bone and connective tissue break down during the long simmer, releasing collagen that gives the soup its characteristic rich mouthfeel. If ham hocks aren’t available, a leftover ham bone from a holiday meal works perfectly.
Split peas come in yellow and green varieties, both suitable for Gordon Ramsay Pea And Ham soup. Green split peas provide a more vibrant color and slightly earthier flavor, while yellow split peas offer a milder taste and lighter appearance. Avoid split peas that have been sitting in your pantry for more than a year – old legumes require longer cooking times and may never fully break down.
Fresh herbs make a significant impact in professional-quality soup. Fresh thyme releases more aromatic compounds than dried, while fresh bay leaves provide a more complex flavor than their dried counterparts. If you’re committed to mastering techniques like those found in professional bread making secrets, investing in fresh herbs is essential.
Step-by-Step Instructions
Heat 2 tablespoons of olive oil in your heaviest pot over medium heat. Add the diced onion, carrots, and celery, cooking for 5-7 minutes until they begin to soften and develop light golden edges. This foundational step cannot be rushed – proper vegetable preparation sets the stage for the complex flavors that make Gordon Ramsay Pea And Ham soup exceptional.
Add the ham hock to the pot and brown it lightly on all sides, approximately 3-4 minutes total. You’ll hear the satisfying sizzle as the meat contacts the hot surface – this is the Maillard reaction creating the deep, savory notes that distinguish professional soup from home cooking attempts.
Pour in the split peas, followed by 8 cups of filtered water. Add the bay leaves and fresh thyme, then bring the mixture to a rolling boil. Once boiling, immediately reduce the heat to maintain a gentle simmer. This temperature control is crucial – vigorous boiling will make the peas mushy and cloud your broth.
Partially cover the pot and simmer for 1.5 to 2 hours, stirring occasionally to prevent sticking. The split peas should completely break down, and the ham should be falling off the bone. During the final 30 minutes, taste and adjust seasoning, remembering that the flavors will concentrate as the liquid reduces.
Remove the ham hock and bay leaves from the pot. Carefully shred the ham meat, discarding the bone, skin, and excess fat. Return the shredded ham to the pot – this technique ensures every bite contains perfectly distributed meat without overwhelming chunks.
Use an immersion blender to partially puree the soup, leaving some texture for visual appeal and mouthfeel. The goal is a creamy consistency with visible ham pieces and some intact split pea texture. Season with salt and freshly ground black pepper, tasting and adjusting until the flavors balance perfectly.
Pro Tips for Perfect Gordon Ramsay Pea And Ham
Professional kitchens employ specific techniques that home cooks often overlook when preparing Gordon Ramsay Pea And Ham soup. Temperature control throughout the cooking process makes the difference between exceptional and ordinary results. Maintain your simmer at the lowest possible heat that still produces gentle bubbling – this prevents the split peas from breaking down too quickly and creating a gluey texture.
Soaking split peas overnight reduces cooking time and ensures more even breakdown, though it’s not strictly necessary. If you choose to soak, drain and rinse the peas before adding them to your pot. This step removes some of the compounds that can cause digestive discomfort while improving the final texture.
For restaurant-level presentation, strain your finished soup through a fine mesh strainer, then stir the strained soup back into the ham pieces. This technique, commonly used in establishments that serve Gordon Ramsay’s favorite pasta dishes, creates the smooth, refined appearance that distinguishes professional cooking.
Salt timing matters significantly in Gordon Ramsay Pea And Ham soup. Add salt gradually throughout the cooking process rather than all at once at the end. The ham provides natural saltiness that intensifies as the liquid reduces, so taste frequently during the final hour of cooking to avoid over-seasoning.
Storage and Leftovers
Gordon Ramsay Pea And Ham soup improves dramatically overnight as the flavors continue to meld and develop complexity. Store cooled soup in the refrigerator for up to 4 days, or freeze portions for up to 3 months. The soup will thicken considerably when cold – this is normal and expected.
When reheating, add water gradually while stirring to restore the proper consistency. Heat gently over medium-low heat, stirring frequently to prevent scorching. The natural starches in split peas can stick to the bottom of the pot if heated too aggressively.
For meal prep efficiency, consider making double batches and freezing individual portions. The soup freezes exceptionally well, though you may need to adjust the consistency slightly after thawing. This approach aligns with the systematic meal planning strategies used in professional kitchens that consistently deliver quality results.
Frequently Asked Questions
What seasoning to put in pea soup?
The classic seasoning combination includes bay leaves, fresh thyme, black pepper, and salt. Start with these basics, then adjust according to your preference. Some cooks add a pinch of smoked paprika for extra depth.
How to make pea soup less bland?
Build flavor layers by properly browning your vegetables and ham hock before adding liquid. Use quality ingredients and season throughout the cooking process rather than only at the end. The ham provides natural saltiness, so taste frequently.
How to enhance the flavor of peas?
Fresh herbs make the biggest impact on pea flavor. Thyme and bay leaves are traditional, but a small amount of fresh rosemary or sage can add interesting complexity. Avoid overwhelming the natural pea taste with too many competing flavors.
What seasoning pairs well with peas?
Peas pair beautifully with herbs like thyme, bay leaves, and fresh parsley. Garlic and onion provide aromatic base notes, while a touch of black pepper adds warmth without overwhelming the delicate pea flavor.
That $18 bowl of soup taught me respect for professional technique and the importance of understanding ingredients rather than just following recipes. My crew still requests my Gordon Ramsay Pea And Ham soup for station dinners, and Sarah finally admits it rivals any restaurant version we’ve tried.
The key isn’t complicated equipment or exotic ingredients – it’s methodical technique, quality components, and the patience to let time and temperature work their magic. Whether you’re feeding a firehouse crew or a family dinner, this approach delivers consistent, restaurant-quality results that justify the effort invested.
Remember, cooking is like firefighting – preparation and proper technique prevent disasters. Take your time with each step, taste frequently, and trust the process. The reward is a bowl of Gordon Ramsay Pea And Ham soup that proves you absolutely can make restaurant-quality food at home.
Stay safe, Jack Sullivan
Jack Sullivan
Gordon Ramsay Pea And Ham Soup
Master Gordon Ramsay’s legendary pea and ham soup with professional techniques for rich, flavorful results that rival any restaurant.
1 Large Heavy-Bottom Pot Essential for even heat distribution
1 Immersion blender For perfect texture control
1 Fine mesh strainer Professional finishing technique
Method
1️⃣ Heat olive oil in large heavy-bottom pot over medium heat. Add diced onion, carrots, and celery. Sauté for 5-7 minutes until vegetables begin to soften.
2️⃣ Add ham hock to pot and brown lightly on all sides, about 3-4 minutes. This develops crucial flavor base.
3️⃣ Add split peas, water, bay leaves, and thyme. Bring to rolling boil, then reduce to gentle simmer.
4️⃣ Simmer partially covered for 1.5-2 hours, stirring occasionally. Peas should break down and ham should be falling off bone.
5️⃣ Remove ham hock and bay leaves. Shred ham meat and discard bone and excess fat. Return shredded ham to pot.
6️⃣ Use immersion blender to partially blend soup, leaving some texture. Season with salt and pepper to taste.
7️⃣ Adjust consistency with additional water if needed. Soup should coat spoon but still flow easily.
For richer flavor, soak split peas overnight and drain before using.Ham hock provides the most authentic flavor, but leftover ham bone works perfectly.Soup improves overnight – reheat gently and add water as needed to adjust consistency.
The first time I attempted Gordon Ramsay Ground Turkey Pasta, I figured it would be simple enough. After all, how hard could it be to brown some turkey and toss it with pasta? Twenty years of emergency response work had taught me to approach every situation with confidence – but apparently, that confidence didn’t automatically transfer to mastering Gordon Ramsay Ground Turkey Pasta.
I was dead wrong about the simplicity part.
What started as a “quick weeknight dinner” turned into a three-hour education in why professional chefs deserve their reputation. The turkey came out dry as sawdust, the pasta was overcooked mush, and the whole dish lacked any discernible flavor beyond salt. My family politely pushed food around their plates while I sat there wondering where I’d gone wrong with this Gordon Ramsay Ground Turkey Pasta attempt.
That failure sent me down a rabbit hole of research, and eventually, I cracked the code on Gordon Ramsay Ground Turkey Pasta. The secret isn’t just following a recipe – it’s understanding the fundamental techniques that separate amateur cooking from professional results.
How to Enhance the Flavor of Ground Turkey
Ground turkey gets a bad reputation for being bland, but that’s usually because people don’t understand how to work with it properly when making Gordon Ramsay Ground Turkey Pasta. Unlike beef, turkey doesn’t have the same fat content to carry flavors, which means you need to be strategic about seasoning and cooking techniques.
The key starts before the turkey ever hits the pan. I season the raw meat with salt, pepper, and oregano, then let it rest for 10-15 minutes. This gives the salt time to penetrate the protein and start breaking down the muscle fibers, which creates better texture and allows other seasonings to penetrate deeper.
When cooking, resist the urge to press down on the turkey with your spatula. This is a rookie mistake that squeezes out moisture and results in dry, flavorless meat. Instead, let the turkey brown naturally, breaking it up gently with a wooden spoon. The browning process – known as the Maillard reaction – creates hundreds of flavor compounds that give the meat depth and complexity.
According to research from the USDA’s Food Safety and Inspection Service, proper cooking techniques not only improve flavor but ensure food safety when preparing ground turkey dishes.
What to Season Ground Turkey with for Pasta
Seasoning ground turkey for Gordon Ramsay Ground Turkey Pasta requires a layered approach. I use what I call the “three-stage seasoning method” that builds flavor throughout the cooking process.
Stage 1: Initial Seasoning Before cooking, I season the raw turkey with kosher salt (1 teaspoon per pound), freshly ground black pepper, and dried oregano. The salt is crucial here – it needs time to work its magic on the protein structure.
Stage 2: Aromatics Once the turkey is browned, I add the holy trinity of Italian cooking: onions, garlic, and red pepper flakes. The onions provide sweetness and body, the garlic adds pungency, and the red pepper flakes bring heat that complements rather than overwhelms the mild turkey.
Stage 3: Fresh Finishing At the end, fresh basil and quality Parmesan cheese provide brightness and richness that you simply can’t achieve with dried herbs alone. The basil should be added off the heat to preserve its delicate flavor, while the Parmesan melts slightly from the residual heat, creating a silky finish.
This technique draws inspiration from Gordon Ramsay’s Bolognese sauce approach, where building layers of flavor creates complexity that makes simple ingredients sing.
Why Does Gordon Ramsay Add Oil to Pasta
This question comes up constantly when people research Gordon Ramsay Ground Turkey Pasta, and there’s a lot of misinformation out there. Gordon Ramsay doesn’t add oil to the pasta water – that’s actually counterproductive because it prevents sauce from adhering to the pasta. Instead, he adds oil at specific points for specific reasons.
First, oil is used to sauté the aromatics and brown the protein. Extra virgin olive oil not only prevents sticking but contributes its own flavor profile to the dish. The key is using enough oil to properly cook the ingredients without making the dish greasy.
Second, Ramsay often finishes pasta dishes with a drizzle of high-quality olive oil just before serving. This technique, called “mantecatura” in Italian cooking, creates a glossy finish and adds richness without overwhelming the other flavors.
The real secret that most home cooks miss is pasta water. That starchy, salty liquid is liquid gold for creating restaurant-quality Gordon Ramsay Ground Turkey Pasta. I always reserve at least half a cup before draining, then use it to adjust the sauce consistency and help everything bind together properly.
Professional chefs understand that pasta water is the bridge between pasta and sauce – without it, you’re just serving pasta with sauce on top rather than a cohesive dish where every component works together.
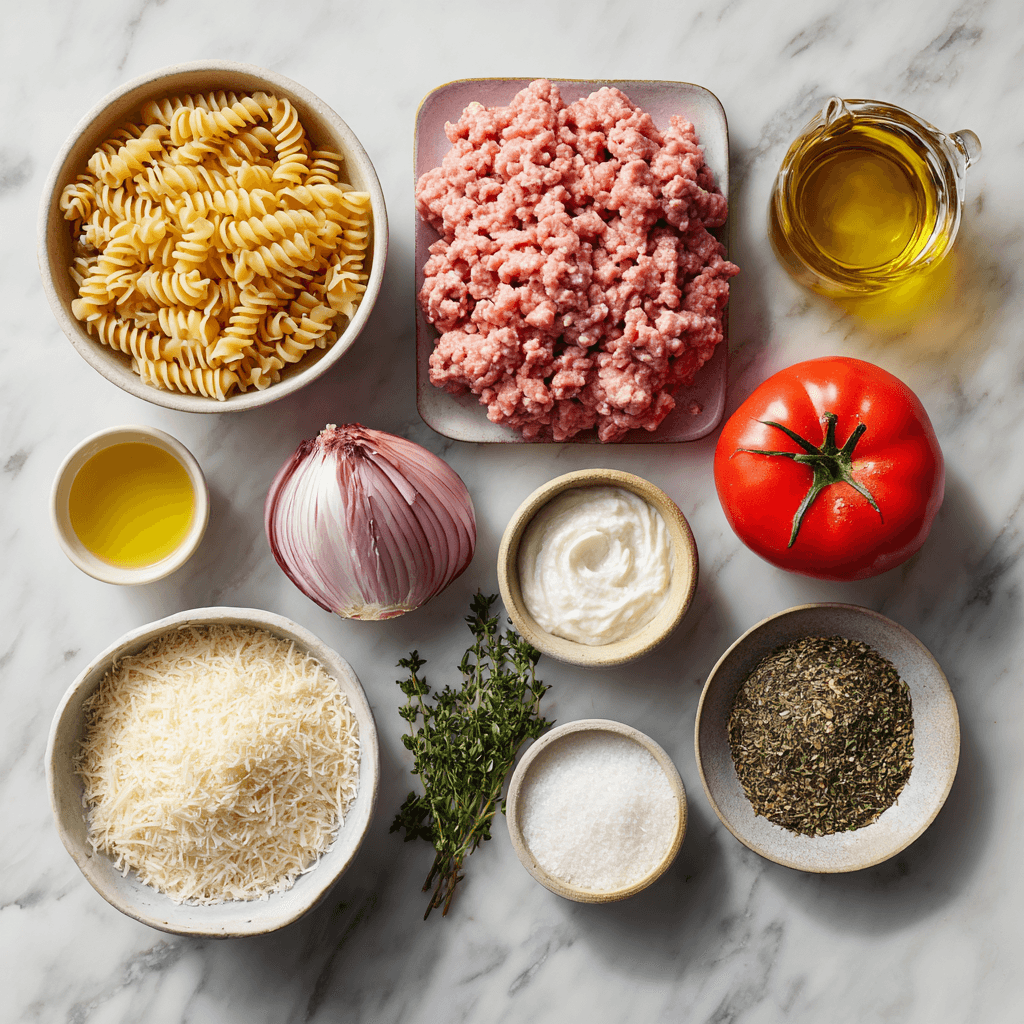
Ingredients That Actually Matter for Gordon Ramsay Ground Turkey Pasta
Not all ingredients are created equal, and when you’re working with mild ground turkey for Gordon Ramsay Ground Turkey Pasta, quality becomes even more important. Here’s what I’ve learned makes the difference between amateur and professional results:
Ground Turkey: Choose 93/7 lean-to-fat ratio. Anything leaner becomes dry and flavorless, anything fattier loses the health benefits that make turkey attractive in the first place. Bring it to room temperature before cooking – cold meat doesn’t brown properly.
Pasta: Use a sturdy shape like penne or rigatoni that can hold the sauce. The ridges and hollow centers trap the turkey and sauce, creating better flavor distribution in every bite.
Tomatoes: High-quality crushed tomatoes make a noticeable difference. I prefer San Marzano or similar varieties that have better acidity balance and fewer additives.
Olive Oil: Extra virgin for cooking and finishing. The fruity, peppery notes complement the turkey without competing with it.
This approach to ingredient selection mirrors the philosophy found in Gordon Ramsay’s favorite pasta dishes, where quality ingredients are the foundation of exceptional results.
Step-by-Step Instructions for Perfect Gordon Ramsay Ground Turkey Pasta
Equipment Needed: Large pot, large skillet, wooden spoon, colander
Prepare Pasta Water: Bring a large pot of water to boil. Add 1 tablespoon salt per quart – this seasons the pasta from the inside out.
Season Turkey: Mix ground turkey with 1 teaspoon salt, black pepper, and oregano. Let rest 10 minutes while other prep is done.
Start Cooking: Heat olive oil in large skillet over medium-high heat. Add seasoned turkey, breaking up gently with wooden spoon. Cook 6-8 minutes until browned.
Build Base: Add diced onion, cook 3-4 minutes until softened. Add garlic and red pepper flakes, cook 1 minute until fragrant.
Add Tomatoes: Pour in crushed tomatoes with remaining seasonings. Simmer 10-12 minutes, stirring occasionally.
Cook Pasta: Add pasta to boiling water, cook 1 minute less than package directions. Reserve 1/2 cup pasta water before draining.
Combine: Add drained pasta to turkey sauce. Toss with pasta water as needed. Remove from heat, stir in basil and Parmesan.
For more advanced pasta techniques, check out this guide on avoiding common pasta cooking mistakes that can elevate your cooking to professional standards.
Pro Tips for Restaurant-Quality Gordon Ramsay Ground Turkey Pasta
Don’t Overcrowd: If doubling the Gordon Ramsay Ground Turkey Pasta recipe, use two pans. Overcrowded turkey steams instead of browns, resulting in gray, flavorless meat.
Taste and Adjust: Season in stages and taste constantly. Turkey’s mild flavor means you need to be more aggressive with seasoning than you might expect for Gordon Ramsay Ground Turkey Pasta.
Pasta Water Magic: That starchy pasta water isn’t just for consistency – it helps emulsify the sauce and creates a silky finish that coats every piece of pasta.
Fresh vs. Dried Herbs: Dried herbs go in during cooking for deeper integration. Fresh herbs go in at the end to preserve their bright flavor.
Storage and Leftovers
Store leftover Gordon Ramsay Ground Turkey Pasta in the refrigerator for up to 3 days. The pasta will absorb sauce over time, so add a splash of chicken broth or pasta water when reheating to restore proper consistency.
For best results, reheat your Gordon Ramsay Ground Turkey Pasta gently in a skillet rather than the microwave. This allows you to control the moisture level and prevents the pasta from becoming mushy.
According to FDA food safety guidelines, ground turkey dishes should be consumed within 3-4 days of preparation when properly refrigerated.
The Gordon Ramsay Ground Turkey Pasta freezes reasonably well for up to 2 months, though the pasta texture will be slightly different after thawing. For meal prep purposes, consider freezing just the turkey sauce and preparing fresh pasta when ready to serve.
Frequently Asked Questions
Is pasta with ground turkey healthy?
Yes, when prepared properly. Gordon Ramsay Ground Turkey Pasta uses lean protein with less saturated fat than beef. Combined with whole grain pasta and tomato-based sauce, it creates a balanced meal with good nutritional value.
Is ground turkey good with alfredo?
Absolutely. The mild flavor of properly seasoned ground turkey pairs excellently with cream-based sauces. The key is ensuring the turkey is well-seasoned since alfredo sauce is rich but not particularly flavorful on its own.
Final Thoughts
That first disastrous attempt at Gordon Ramsay Ground Turkey Pasta taught me that confidence without technique is just arrogance in disguise. But once I understood the principles – proper seasoning, building layers of flavor, and respecting the ingredients – this Gordon Ramsay Ground Turkey Pasta became one of my family’s favorites.
The beauty of this Gordon Ramsay Ground Turkey Pasta recipe isn’t just in the final result, but in understanding why each step matters. That knowledge transfers to other dishes, making you a better cook overall rather than just someone who can follow a recipe.
Take your time, taste as you go, and don’t be afraid to adjust seasonings. Cooking is a skill that improves with practice, and every mistake is just data for the next attempt.
Stay safe, Jack Sullivan
Jack Sullivan
Gordon Ramsay Ground Turkey Pasta
Learn Gordon Ramsay’s professional method for creating flavorful ground turkey pasta with expert seasoning techniques and proper cooking methods.
1️⃣ Bring a large pot of salted water to boil. Add 1 tablespoon salt per quart of water – this is crucial for properly seasoned pasta.
2️⃣ In a bowl, season ground turkey with 1 teaspoon salt, black pepper, and oregano. Mix gently with your hands – don’t overwork the meat.
3️⃣ Heat olive oil in large skillet over medium-high heat. Add seasoned turkey, breaking it up with wooden spoon. Cook 6-8 minutes until browned and cooked through.
4️⃣ Add diced onion to turkey, cook 3-4 minutes until softened. Add minced garlic and red pepper flakes, cook 1 minute until fragrant.
5️⃣ Pour in crushed tomatoes, remaining salt, and oregano. Simmer 10-12 minutes, stirring occasionally, until sauce thickens.
6️⃣ Add pasta to boiling water, cook according to package directions minus 1 minute for al dente texture. Reserve 1/2 cup pasta water before draining.
7️⃣ Add drained pasta to turkey sauce. Toss with pasta water as needed for proper consistency. Remove from heat, stir in fresh basil and Parmesan.
Don’t press down on turkey while cooking – this removes moisture and makes it dry.Save pasta water – the starch helps bind sauce to pasta for restaurant-quality results.Ground turkey must reach 165°F internal temperature for food safety.Fresh herbs added at the end preserve their bright flavor and color.Leftover pasta reheats best with a splash of chicken broth to restore moisture.
Three years ago, I was convinced gordon ramsay crab potato salad was impossible to recreate at home. I’d tasted it at one of his restaurants and thought, “There’s no way I can make something that elevated in my kitchen.” The combination of perfectly cooked potatoes with fresh crab meat seemed like restaurant magic that required professional equipment and years of training.
Boy, was I wrong. After countless attempts and some hard-learned lessons, I discovered that this gordon ramsay crab potato salad isn’t about complicated techniques—it’s about understanding the fundamentals and respecting each ingredient. According to the USDA’s seafood guidelines, the key to exceptional crab dishes lies in using the freshest possible seafood and proper handling techniques.
What makes this recipe special isn’t just the addition of crab meat—it’s Gordon’s methodical approach to building layers of flavor. This reminds me of my gordon ramsay egg salad ultimate recipe, where precision and quality ingredients transform a simple dish into something extraordinary.
How to Make Potato Salad Gordon Ramsay Style
Making gordon ramsay crab potato salad requires understanding the chef’s philosophy: every component must be perfect. This isn’t about shortcuts—it’s about mastering the fundamentals that separate restaurant-quality food from home cooking.
Start with the Right Potatoes Gordon always emphasizes using waxy potatoes like baby potatoes or fingerlings. These varieties hold their shape during cooking and won’t turn mushy when mixed with dressing. I learned this the hard way during my first attempt when I used russets and ended up with potato mash instead of a proper salad.
The Perfect Cooking Method The secret lies in starting with cold, salted water. This ensures even cooking throughout the potato, preventing that awful combination of overcooked exteriors and raw centers. According to Harvard Health research, proper potato preparation maximizes both nutritional value and digestibility.
Temperature Control is Everything Gordon’s technique involves cooking until fork-tender but still firm—about 15-20 minutes depending on size. The moment they’re done, shock them in cold water to stop the cooking process immediately. This step is crucial for maintaining that perfect bite texture.
Crab Selection and Preparation Fresh crab meat is non-negotiable. I always pick through it carefully, removing any shell pieces while being gentle enough not to break up the beautiful chunks. The crab should be the star, not hidden in an overly heavy dressing.
What Not to Do When Making Potato Salad
After years of firefighting, I’ve learned that preventing disasters is often more important than fixing them. The same principle applies to gordon ramsay crab potato salad—avoiding common mistakes will save you from starting over.
Never Add Hot Potatoes to Dressing This is the number one mistake I see home cooks make. Hot potatoes will cause mayonnaise to break and create an oily, separated mess. Always let your potatoes cool completely before mixing. I learned this lesson the hard way during a crew cookout when my impatience ruined an entire batch.
Don’t Overmix the Crab Crab meat is delicate and expensive. Treat it with respect. Fold it in gently at the very end, just enough to distribute evenly. Aggressive mixing will turn those beautiful chunks into stringy pieces that look more like cat food than premium seafood.
Avoid Under-seasoning Gordon always says to taste and adjust. Potatoes absorb a lot of flavor, so what seems adequately seasoned initially might taste bland after chilling. Season in layers: salt the cooking water, season the dressing, and taste before serving.
Don’t Skip the Resting Time This isn’t a dish you can serve immediately. The flavors need time to meld, and the potatoes need to absorb the dressing. Minimum two hours in the refrigerator—preferably overnight. Rush this step, and you’ll miss the magic that happens when everything comes together.
If you’re struggling with technique fundamentals, my gordon ramsay homemade pasta guide covers similar precision-based cooking methods that will improve your overall kitchen skills.
What Makes Potato Salad Taste Better
The difference between good and great gordon ramsay crab potato salad lies in the details that most people skip. These aren’t complicated techniques—they’re simple steps that create exponential flavor improvements.
Quality Mayonnaise Makes All the Difference Gordon never uses cheap mayonnaise. The base of your dressing is crucial because it coats every ingredient. I use a high-quality mayonnaise or make my own, and the difference is immediately noticeable. According to Mayo Clinic nutrition experts, the type of fats you choose significantly impacts both flavor and nutritional value.
Fresh Herbs Are Non-Negotiable Dried herbs have no place in this recipe. Fresh chives and dill provide brightness that cuts through the richness of the crab and mayonnaise. I always add them last to preserve their vibrant flavor and color.
Acid Balance is Key The touch of lemon juice and Dijon mustard isn’t just for flavor—it’s for balance. The acidity brightens the entire dish and prevents it from tasting heavy or one-dimensional. This principle applies to most of my recipes, including my gordon ramsay grilled salmon.
Temperature Serving Strategy Serve the salad slightly chilled, not ice-cold. Take it out of the refrigerator about 15 minutes before serving. This allows the flavors to open up while maintaining the proper texture. Cold deadens flavor, and room temperature makes mayonnaise-based salads unsafe.
Ingredients That Actually Matter for Gordon Ramsay Crab Potato Salad
Every ingredient in this gordon ramsay crab potato salad serves a specific purpose. There are no fillers or unnecessary additions—just perfectly balanced components that work together.
Baby Potatoes (2 lbs): Waxy texture holds up to mixing and dressing Fresh Crab Meat (1 lb): The star ingredient—use the best you can afford High-Quality Mayonnaise (1/2 cup): Creates the creamy base that binds everything Dijon Mustard (2 tbsp): Adds depth and slight sharpness Fresh Lemon Juice (1 tbsp): Provides acidity to balance richness Fresh Chives (2 tbsp): Mild onion flavor and beautiful color Fresh Dill (1 tbsp): Classic pairing with seafood Sea Salt (1 tsp): Enhances all other flavors White Pepper (1/2 tsp): Subtle heat without black specks
Step-by-Step Instructions
1. Prepare the Potatoes Place 2 lbs baby potatoes in a large pot with cold salted water. Bring to a boil and cook for 15-20 minutes until fork-tender but still firm. The key is testing with a fork—it should slide in easily without the potato falling apart.
2. Shock and Cool Immediately drain the potatoes and rinse with cold water to stop the cooking process. This prevents overcooking and maintains the perfect texture. Let them cool completely—about 30 minutes—then cut into 1-inch pieces.
3. Create the Dressing In a large mixing bowl, whisk together 1/2 cup mayonnaise, 2 tbsp Dijon mustard, 1 tbsp fresh lemon juice, 1 tsp sea salt, and 1/2 tsp white pepper until completely smooth. The dressing should be well-emulsified with no streaks.
4. Combine Potatoes and Dressing Gently fold the cooled potato pieces into the dressing, ensuring even coating without mashing the potatoes. Use a rubber spatula and fold rather than stir to maintain the potato integrity.
5. Add the Crab Carefully fold in 1 lb of fresh crab meat, being extremely gentle to preserve the chunks. This is where patience pays off—rushed mixing will destroy the visual appeal and texture.
6. Finish with Fresh Herbs Add 2 tbsp fresh chives and 1 tbsp fresh dill, folding just enough to distribute evenly. Taste and adjust seasoning as needed.
Pro Tips
Potato Selection: Choose potatoes of uniform size for even cooking. I always pick through them at the store to ensure consistency.
Crab Quality: Buy from a reputable fishmonger and use within 24 hours. Fresh crab smells like the ocean, not “fishy.”
Make-Ahead Strategy: This salad actually improves overnight as flavors meld. Make it the day before serving for best results.
Serving Temperature: Remove from refrigerator 15 minutes before serving to allow flavors to brighten.
Storage and Leftovers
Store gordon ramsay crab potato salad in the refrigerator for up to 3 days maximum. The FDA recommends keeping mayonnaise-based salads at 40°F or below and never leaving them at room temperature for more than 2 hours.
Always use clean utensils when serving to prevent contamination. I transfer portions to serving bowls rather than serving directly from the storage container.
Leftovers can be refreshed with a splash of lemon juice and fresh herbs, but the quality is best within the first 24 hours.
Frequently Asked Questions
Should you rinse potatoes in cold water after boiling for potato salad?
Yes, absolutely. Rinsing with cold water immediately stops the cooking process and prevents the potatoes from becoming mushy. It’s an essential step that many home cooks skip.
Is potato salad better with mayo or Miracle Whip?
For gordon ramsay crab potato salad, use high-quality mayonnaise. Miracle Whip is sweeter and has a different texture that doesn’t complement the delicate crab flavor. Real mayonnaise provides the neutral, creamy base that lets the crab shine.
This gordon ramsay crab potato salad represents everything I love about cooking—taking simple ingredients and treating them with respect to create something extraordinary. It’s not about complicated techniques or expensive equipment; it’s about understanding the fundamentals and executing them perfectly.
The next time you want to impress guests or treat yourself to something special, remember that restaurant-quality food isn’t magic—it’s method. And now you have the method. For the perfect finish to this elegant meal, try my gordon ramsay brownies for dessert.
Stay safe, Jack Sullivan
Gordon Ramsay Crab Potato Salad
Restaurant-quality crab potato salad with perfectly cooked potatoes, fresh crab meat, and Gordon Ramsay’s signature techniques for elevated flavor.
Use waxy potatoes for best texture that won’t fall apart.Always cool potatoes completely before mixing to prevent mayonnaise from breaking.Pick through crab meat carefully to remove any shell pieces.Chilling for at least 2 hours allows flavors to meld perfectly.Pairs beautifully with grilled fish, roasted chicken, or as elegant picnic fare.
There’s a reason people avoid making Gordon Ramsay chicken liver pate at home — I found out why during my first attempt fifteen years ago. After twenty years fighting fires and thinking I could handle any kitchen challenge, this elegant French appetizer nearly defeated me. The result? A bitter, grainy mess that my crew still brings up during station dinners.
But here’s what I learned: that bitterness is inherent in liver but made worse by overcooking. The secret isn’t avoiding liver altogether — it’s mastering Gordon Ramsay’s precise technique that transforms humble chicken livers into restaurant-quality pate.
Why This Gordon Ramsay Chicken Liver Pate Works (And Where Most Go Wrong)
After studying Ramsay’s approach and testing it dozens of times, I discovered the critical mistakes that create bitter, unappetizing pate. Gordon Ramsay’s signature brandy-based recipe creates a silky-smooth spread that rivals the finest French restaurants, but only when you follow his exact timing.
The biggest error? Overcooking the livers. Numerous outbreaks of illness associated with chicken liver have been reported in the United States, most linked to inadequately cooked chicken liver dishes, yet overcooking creates bitter, unpleasant taste. Ramsay’s method sears the livers quickly, keeping them pink inside to maintain their creamy texture and prevent bitterness.
Most recipes also skip the crucial straining step. Professional kitchens always pass their pate through a fine-mesh sieve, creating that signature silky texture that makes Gordon Ramsay chicken liver pate so luxurious.
Ingredients That Actually Matter for Gordon Ramsay Chicken Liver Pate
Quality ingredients make the difference between amateur and professional results. Here’s what you need for authentic Gordon Ramsay chicken liver pate:
Fresh chicken livers (1 pound) – The foundation of great pate. Look for livers that are deep red with no green tinges, which indicate freshness.
Unsalted butter (8 tablespoons) – Room temperature butter blends smoothly and adds richness without overwhelming saltiness.
Shallots (2 medium) – More delicate than onions, shallots provide sweetness without harsh bite.
Fresh garlic (3 cloves) – Minced fine to distribute evenly throughout the pate.
Quality brandy (3 tablespoons) – Don’t skimp here. Good brandy adds depth and helps deglaze the pan properly.
Heavy cream (1/4 cup) – Creates the silky texture that makes this Gordon Ramsay chicken liver pate so smooth.
Salt and white pepper – Season carefully, as liver can be naturally salty.
Step-by-Step Gordon Ramsay Chicken Liver Pate Instructions
Preparation (5 minutes)
Clean your chicken livers meticulously, removing any connective tissue or green spots. Pat them completely dry with paper towels — moisture creates steam that prevents proper searing. Season lightly with salt and pepper.
The Critical Sear (6 minutes)
Heat 2 tablespoons of butter in a heavy-bottomed pan over medium-high heat. When it starts foaming, add the livers in a single layer. Don’t overcrowd the pan, which drops the temperature and creates steam instead of searing.
Sear for exactly 2-3 minutes per side until golden brown but still pink inside. This timing is crucial for Gordon Ramsay chicken liver pate — overcooking creates the bitter taste that ruins the dish.
Building Flavor (3 minutes)
Add chopped shallots and garlic to the same pan. Cook for just 1 minute until fragrant but not browned. Remove the pan from heat before adding brandy to prevent flare-ups.
Return to heat and cook until the alcohol evaporates, about 2 minutes. The brandy deglazes the pan, capturing all those caramelized flavors.
Creating Silky Texture (10 minutes)
Let the mixture cool for 10 minutes — hot ingredients don’t blend smoothly. Transfer everything to a food processor with the remaining butter, cream, and thyme leaves.
Process for 2-3 minutes until completely smooth. The mixture should be pale and creamy, with no visible lumps.
Professional Finishing (5 minutes)
Pass the pate through a fine-mesh sieve, pressing with a spoon to extract every bit of smooth mixture. This step separates amateur from professional Gordon Ramsay chicken liver pate.
Divide into ramekins and smooth the tops. Cover with plastic wrap pressed directly onto the surface to prevent a skin from forming.
Pro Tips for Perfect Gordon Ramsay Chicken Liver Pate
Temperature control is everything. Use a heavy-bottomed pan that maintains consistent heat. Thin pans create hot spots that overcook the livers unevenly.
Don’t skip the straining. Even the smoothest food processor leaves tiny lumps. Professional kitchens always strain their pate for that signature silky texture.
Timing matters more than technique. Gordon Ramsay chicken liver pate relies on precise cooking times. Set a timer and stick to it religiously.
Quality over quantity. Fresh livers make dramatically better pate than frozen ones. The difference in texture and flavor is immediately noticeable.
For an elevated presentation, float a thin layer of clarified butter on top of each ramekin. This classic French technique preserves the pate and adds professional appeal, similar to the precision found in Gordon Ramsay’s signature dishes.
Storage and Serving Your Gordon Ramsay Chicken Liver Pate
Properly stored Gordon Ramsay chicken liver pate keeps in the refrigerator for up to one week. The flavors actually improve after 24 hours as the ingredients meld together.
Serve at room temperature for the best texture and flavor. Remove from the refrigerator 30 minutes before serving to let the pate soften slightly.
Classic accompaniments include toasted baguette slices, water crackers, or cornichons. The acidity of pickles cuts through the rich pate beautifully.
For entertaining, portion into individual ramekins and garnish with fresh thyme sprigs. This presentation shows the care you’ve taken with Gordon Ramsay’s technique.
Frequently Asked Questions
Why does my chicken liver pate taste bitter?
Mild bitterness is generally not a safety concern, but excessive bitterness usually results from overcooking. Follow Gordon Ramsay’s timing exactly — livers should remain pink inside to prevent bitter flavors from developing. The USDA Food Safety and Inspection Service provides guidelines for safe chicken liver preparation.
How do I make simple chicken liver pate?
Gordon Ramsay’s method is actually quite simple: sear fresh livers briefly, add aromatics and brandy, then blend with butter and cream. The key is not overcooking the livers and straining for smooth texture. This technique also works beautifully in Gordon Ramsay’s stuffed chicken legs for similar rich flavors.
Is chicken liver pate healthy for you?
Due to its high vitamin A content, limit chicken liver pate to once or twice per week. The rich nature of Gordon Ramsay chicken liver pate makes it perfect as an occasional indulgent appetizer rather than a daily food.
How often should you eat chicken liver pate?
Due to its high vitamin A content, limit chicken liver pate to once or twice per week. The rich nature of Gordon Ramsay chicken liver pate makes it perfect as an occasional indulgent appetizer rather than a daily food.
Is chicken liver good for the gut?
Chicken liver contains beneficial nutrients that support digestive health, including B vitamins that aid metabolism. However, the rich, fatty nature of pate might not agree with sensitive stomachs. For those who enjoy rich dishes, Gordon Ramsay’s chicken cacciatore offers another flavorful option.
Master Gordon Ramsay’s Technique
Creating restaurant-quality Gordon Ramsay chicken liver pate at home requires patience and precision, but the results justify the effort. The combination of proper searing technique, quality ingredients, and professional finishing creates a luxurious appetizer that impresses every time.
Remember: the difference between bitter disappointment and silky success lies in timing. Keep those livers pink inside, strain for smoothness, and you’ll understand why Gordon Ramsay chicken liver pate has earned its reputation as one of the finest appetizers in French cuisine.
Master this technique, and you’ll have a signature dish that elevates any dinner party. Your guests will never guess how simple the method actually is — they’ll just taste the professional results.
Stay safe, Jack Sullivan
Gordon Ramsay Chicken Liver Pate
A silky, restaurant-quality chicken liver pate that eliminates bitter taste through proper technique and premium ingredients.
For best results, use the freshest chicken livers possible. The key to avoiding bitterness is not overcooking – livers should remain slightly pink inside.Serve with toasted baguette slices or crackers.Store covered in refrigerator for up to one week.Can be made 2 days ahead for better flavor development.Pairs beautifully with champagne or crisp white wine.
The first time I attempted Gordon Ramsay pan seared halibut, I thought it would be simple. After all, how hard could it be to cook fish in a pan? I’d been fighting fires for fifteen years, surely I could handle some seafood. That overconfidence nearly cost me a beautiful piece of halibut and taught me why Gordon Ramsay’s techniques deserve serious respect.
Standing in my kitchen that evening, watching my expensive halibut fillet stick to the pan and fall apart, I realized I had no idea what I was doing. The skin wasn’t crispy, the flesh was overcooked on one side and raw on the other, and my kitchen smelled like disappointment. That disaster sent me on a mission to master the real Gordon Ramsay pan seared halibut technique.
Why This Gordon Ramsay Pan Seared Halibut Works (And Where Most Go Wrong)
After studying Ramsay’s methods and practicing this technique dozens of times, I’ve identified the critical elements that separate restaurant-quality results from kitchen disasters. The Gordon Ramsay approach to seafood focuses on precise temperature control, proper seasoning timing, and understanding how fish behaves under heat.
Most home cooks make three fatal mistakes with Gordon Ramsay pan seared halibut. First, they don’t let the fish come to room temperature, creating uneven cooking. Second, they move the fish too early, preventing the crucial Maillard reaction that creates that golden crust. Third, they cook over too high heat, burning the outside while leaving the center raw.
The science behind Gordon Ramsay’s technique involves protein denaturation and moisture management. When halibut hits the hot pan, the proteins on the surface coagulate rapidly, creating a barrier that seals in moisture. This reaction only works properly when the pan is at the right temperature and the fish is properly prepared. According to USDA guidelines for fish safety, halibut should reach an internal temperature of 145°F for safe consumption.
Ingredients That Actually Matter for Gordon Ramsay Pan Seared Halibut
Quality ingredients make the difference between mediocre and exceptional Gordon Ramsay pan seared halibut. I’ve learned this the hard way through countless attempts and grocery store disappointments.
Fresh halibut fillets are non-negotiable. Look for firm, translucent flesh with a clean ocean smell. Avoid any fish with a strong “fishy” odor or slimy texture. The Harvard T.H. Chan School of Public Health recommends choosing fish from reputable sources for both safety and quality.
Sea salt provides better flavor control than table salt. Its larger crystals dissolve more slowly, giving you better seasoning distribution. I use about half a teaspoon per fillet, applied 20 minutes before cooking to allow proper penetration.
High-quality olive oil with a smoke point above 375°F prevents burning during the searing process. Extra virgin works perfectly for this Gordon Ramsay pan seared halibut technique. Cheap oils will smoke and impart bitter flavors that ruin the delicate fish.
Unsalted butter added during the final stages creates the signature Gordon Ramsay basting technique. The milk solids brown slightly, adding nutty complexity while keeping the fish moist. Room temperature butter incorporates more easily than cold.
Step-by-Step Gordon Ramsay Pan Seared Halibut Instructions
Preparation Phase
Remove your halibut from the refrigerator 20 minutes before cooking. This step, often overlooked by home cooks, ensures even cooking throughout the fillet. Pat each piece completely dry with paper towels – moisture is the enemy of proper searing.
Season both sides generously with sea salt and freshly cracked black pepper. Press the seasoning gently into the flesh to ensure adhesion. This Gordon Ramsay pan seared halibut technique relies on proper seasoning penetration for maximum flavor.
The Searing Process
Heat your cast iron skillet over medium-high heat for 3-4 minutes. The pan should be hot but not smoking – I test this by dropping a small amount of water that should sizzle and evaporate immediately. Add olive oil and swirl to coat evenly.
Place the halibut skin-side down in the hot pan. Here’s where discipline matters: do not move the fish for 4-5 minutes. You’ll hear the initial sizzle, then it will quiet down as the proteins set. Resist the urge to peek or adjust – this is when the magic happens.
The skin should release naturally when properly seared. If it sticks, it needs more time. Once you can slide a thin spatula under the fish easily, it’s ready to flip.
The Gordon Ramsay Finish
Carefully flip the halibut using a fish spatula. Immediately add butter and fresh thyme to the pan. Tilt the pan slightly and use a spoon to baste the fish with the foaming butter continuously for 2-3 minutes.
This basting technique, signature to Gordon Ramsay’s style, keeps the fish moist while building complex flavors. The internal temperature should reach 145°F – use an instant-read thermometer inserted into the thickest part for accuracy.
Pro Tips for Perfect Gordon Ramsay Pan Seared Halibut
Temperature control separates good from great results. Medium-high heat provides the Maillard reaction without burning. If your pan starts smoking, reduce heat immediately.
Patience with the flip cannot be overstated. The fish will tell you when it’s ready by releasing from the pan naturally. Forcing it will tear the flesh and ruin the presentation.
Basting technique requires active attention. Keep the butter moving with your spoon, tilting the pan to pool the fat. This prevents burning while adding incredible flavor to your Gordon Ramsay pan seared halibut.
For variety, try the principles from Gordon Ramsay’s swordfish preparation – the fundamental techniques translate beautifully between different fish varieties.
Storage and Leftover Guidelines
Properly stored Gordon Ramsay pan seared halibut keeps in the refrigerator for up to two days. Wrap tightly in plastic wrap or store in an airtight container to prevent moisture loss and odor absorption.
Reheating requires gentle methods to preserve texture. I prefer warming leftover halibut in a 300°F oven for 8-10 minutes rather than microwaving, which creates rubbery results. The crispy skin won’t be recoverable, but the fish remains delicious.
For meal prep, cook the Gordon Ramsay pan seared halibut fully but slightly underdone, then finish reheating just before serving. This method works well with Gordon Ramsay’s fondant potatoes as an elegant make-ahead dinner option.
Frequently Asked Questions
How do you pan sear halibut without it sticking?
The key to non-stick Gordon Ramsay pan seared halibut is proper pan temperature and patience. Heat your pan adequately, use enough oil, and don’t move the fish until the proteins have set and released naturally from the surface.
What is the best method to cook halibut?
Pan searing using Gordon Ramsay’s technique provides the best combination of crispy exterior and moist interior. The high-heat searing followed by butter basting creates restaurant-quality results that other cooking methods can’t match.
How do you cook halibut in a cast iron skillet?
Gordon Ramsay’s technique involves high-heat searing skin-side down first, then flipping and basting with butter and herbs. The key is not moving the fish until it releases naturally, creating that signature golden crust.
What temperature should halibut be cooked to?
According to FDA guidelines, halibut should reach an internal temperature of 145°F for safe consumption. Use an instant-read thermometer for accuracy with your Gordon Ramsay pan seared halibut.
How do you cook halibut in a cast iron skillet?
Cast iron provides excellent heat retention for Gordon Ramsay pan seared halibut. Preheat the skillet thoroughly, use adequate oil, and control temperature carefully to prevent hotspots that can burn the fish.
How to sear fish in a cast iron skillet?
Success with Gordon Ramsay pan seared halibut in cast iron requires proper preheating, adequate fat, and temperature control. The heavy pan retains heat well but can create hotspots, so medium-high heat works better than maximum temperature.
The transformation from my first disastrous attempt to consistently perfect Gordon Ramsay pan seared halibut took practice and patience. But once you understand the fundamentals – proper preparation, temperature control, and timing – this technique becomes second nature. The reward is restaurant-quality fish that impresses every time.
Whether you’re cooking for family dinner or entertaining guests, mastering Gordon Ramsay pan seared halibut gives you a sophisticated dish that’s surprisingly achievable. The key is respecting the process and letting the technique work rather than rushing through the steps.
Stay safe, Jack Sullivan
Gordon Ramsay Pan Seared Halibut
Master Gordon Ramsay’s technique for perfectly pan seared halibut with crispy skin and tender, flaky interior. Restaurant-quality results in just 15 minutes.
For best results, choose halibut fillets of uniform thickness. The skin should be crispy and golden when properly seared. Internal temperature should reach 145°F for food safety.

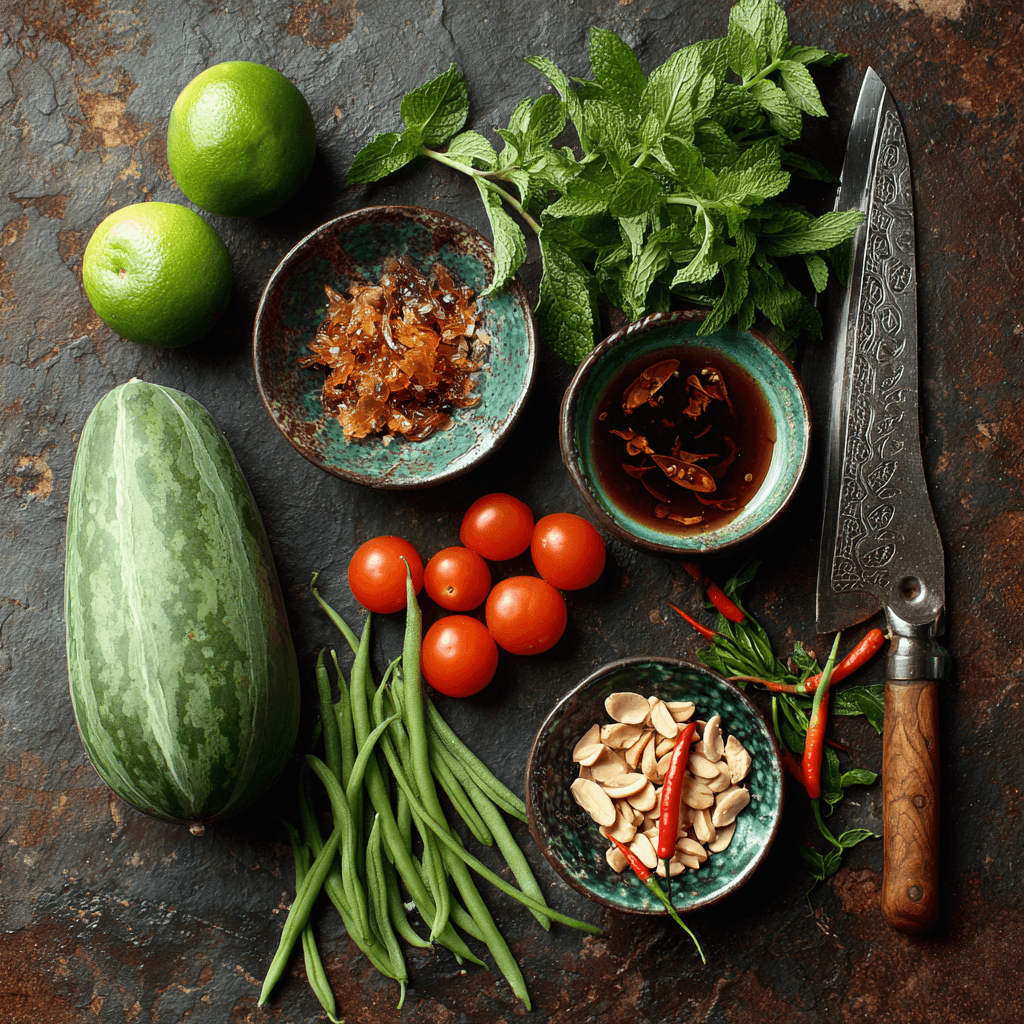
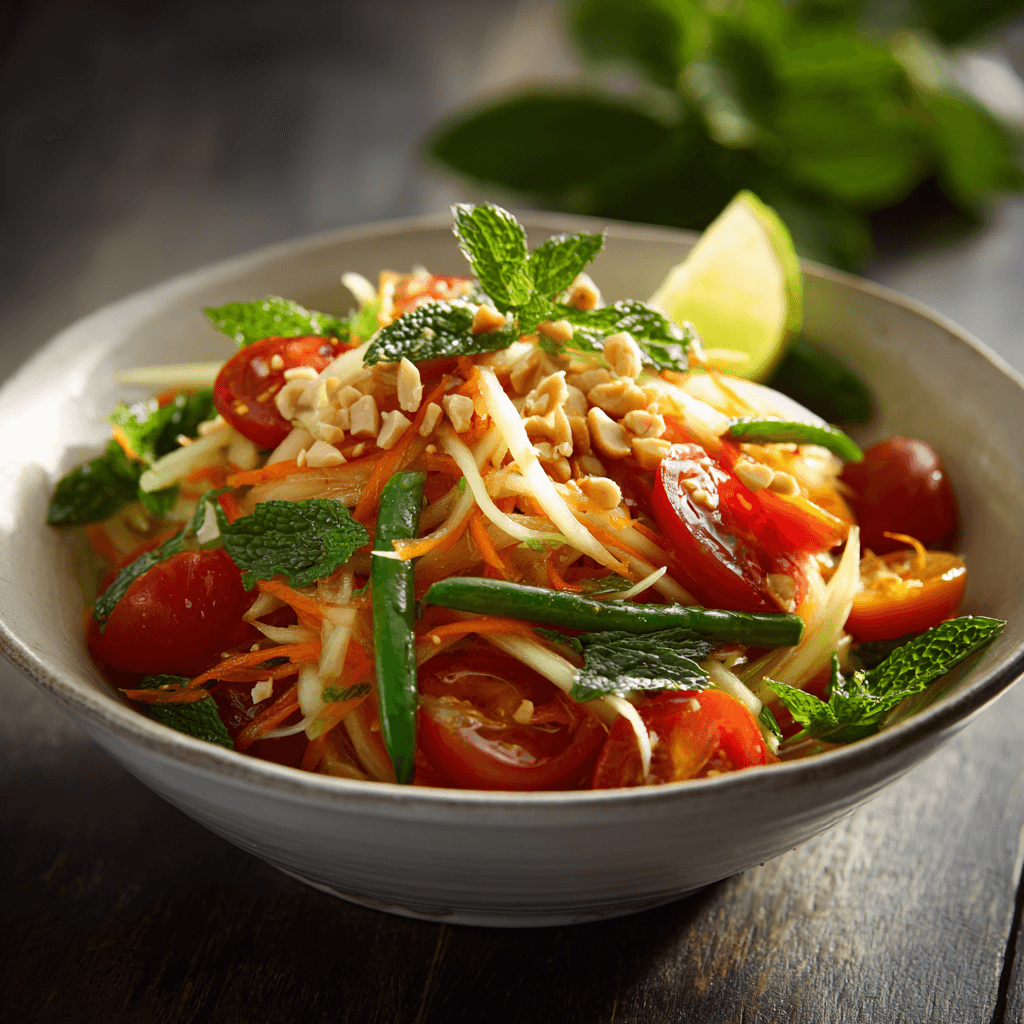

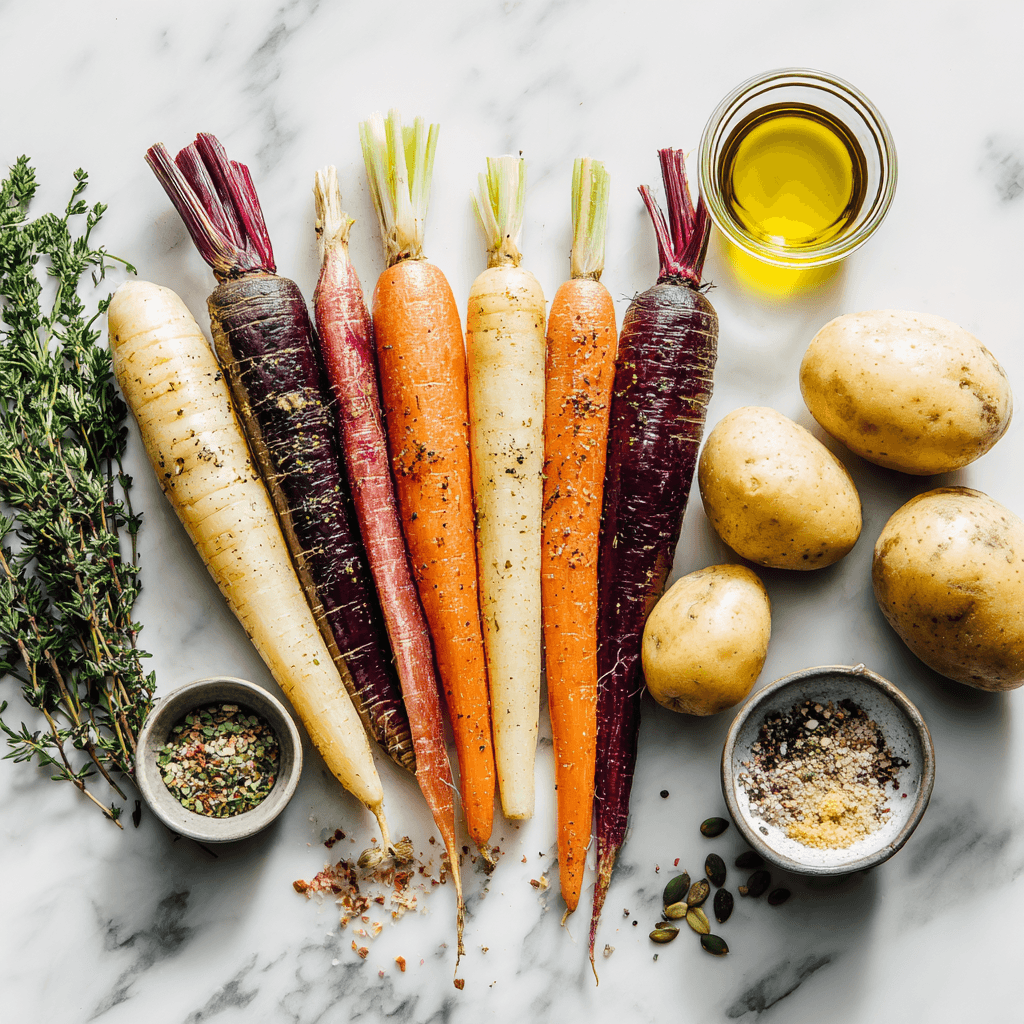

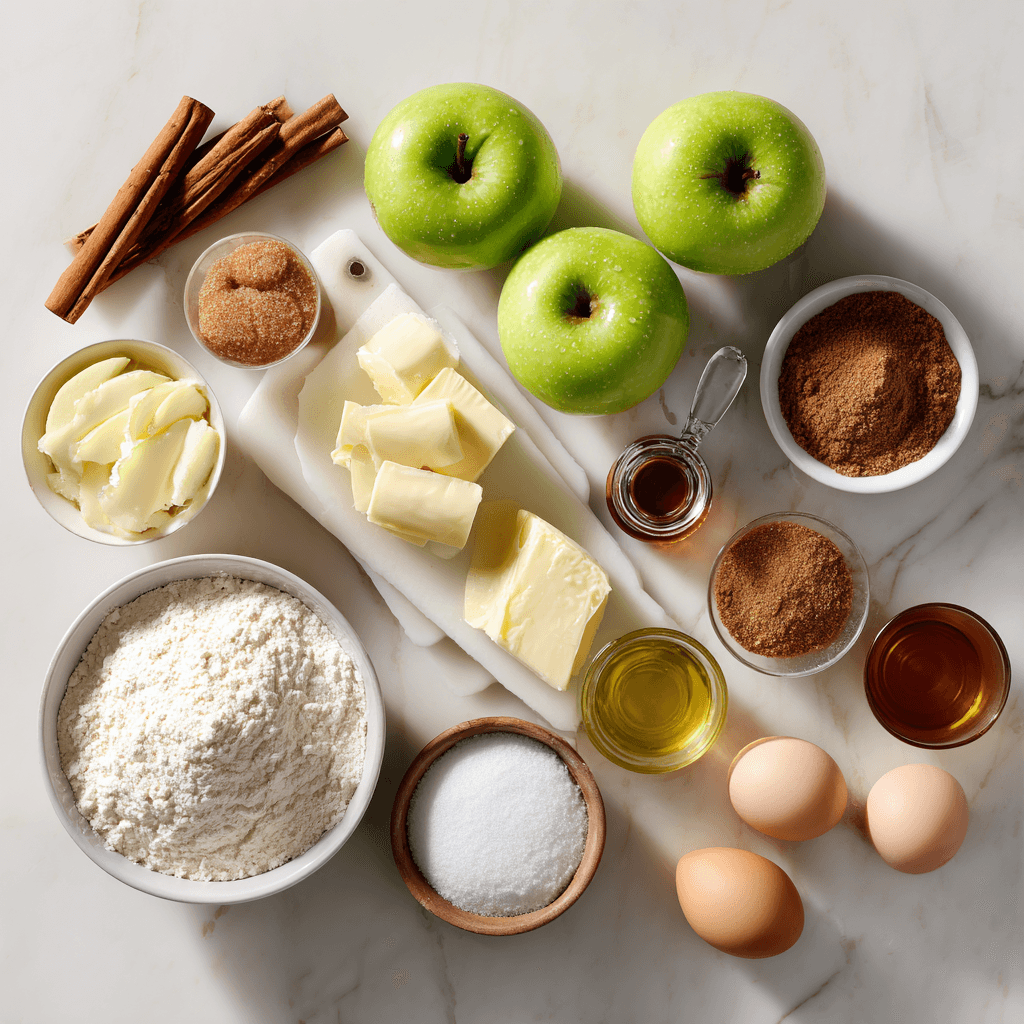

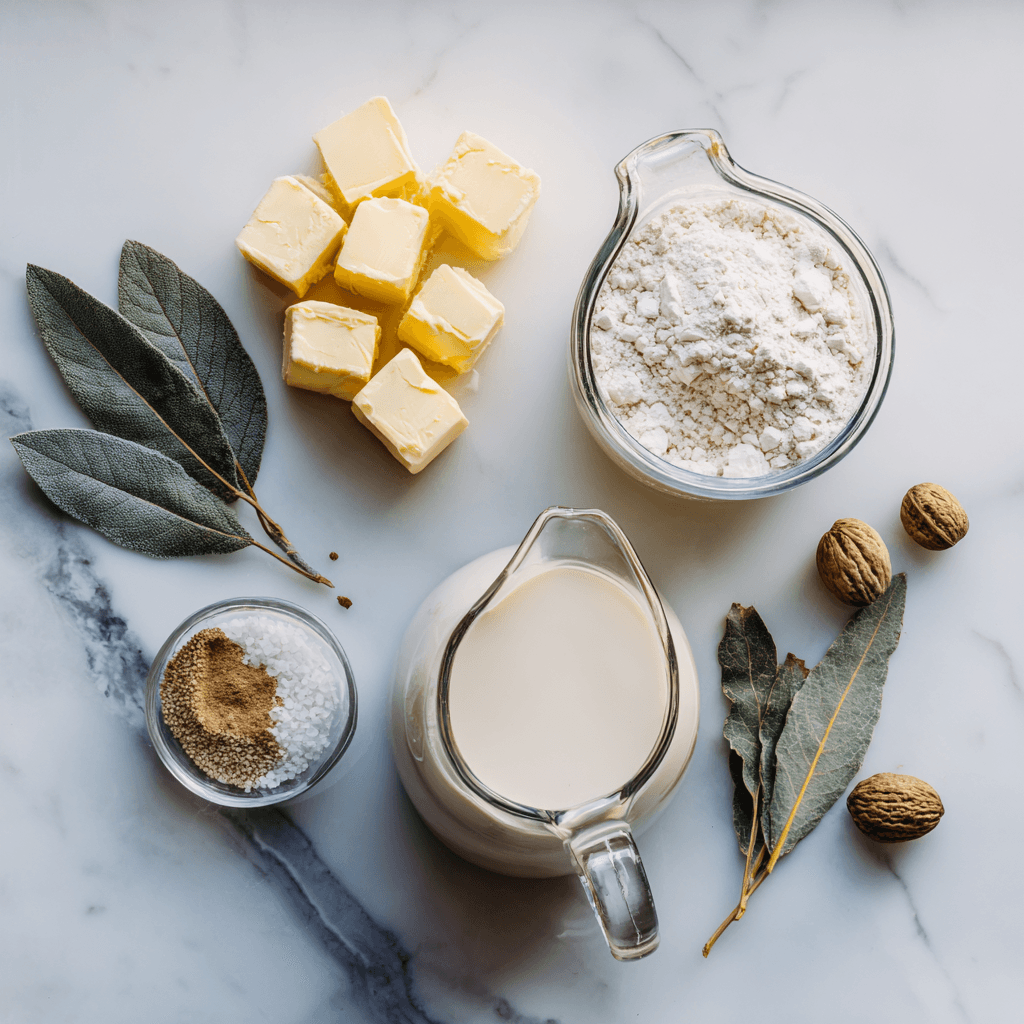

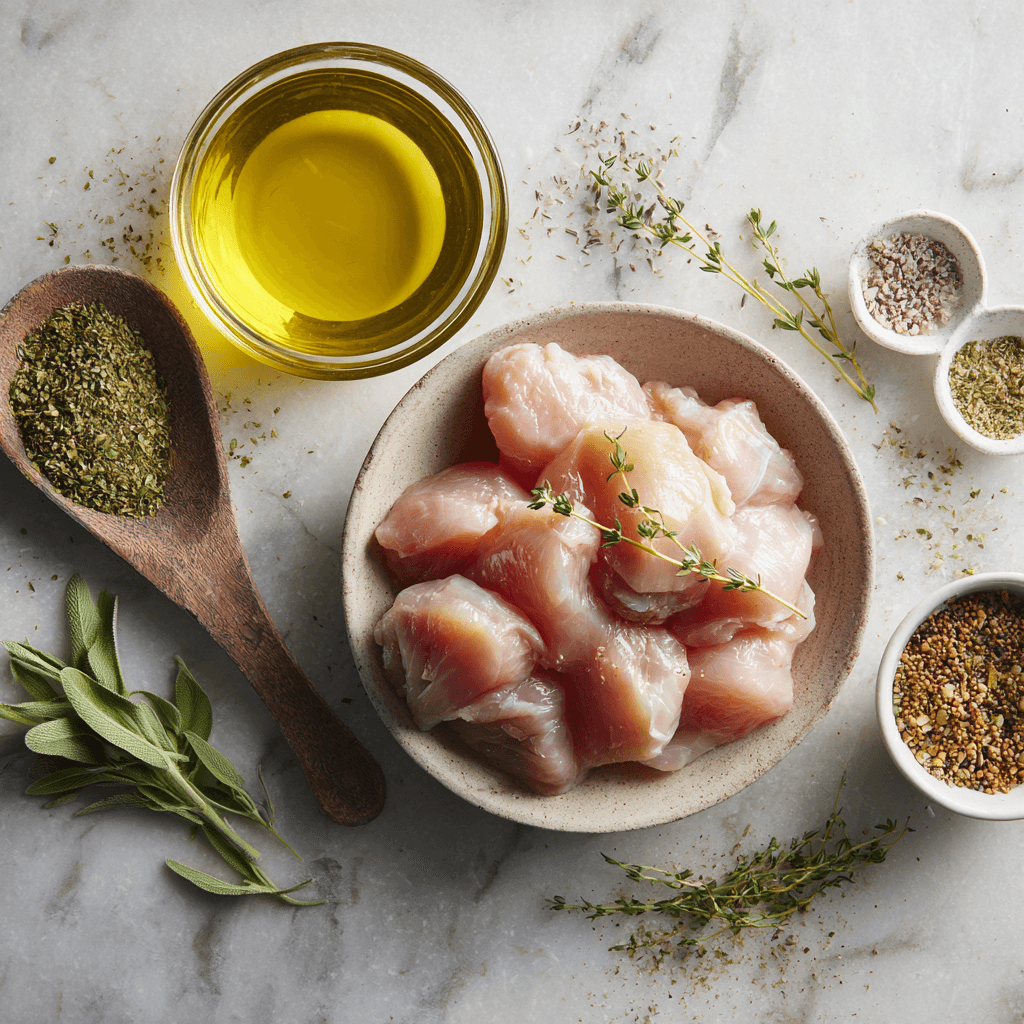

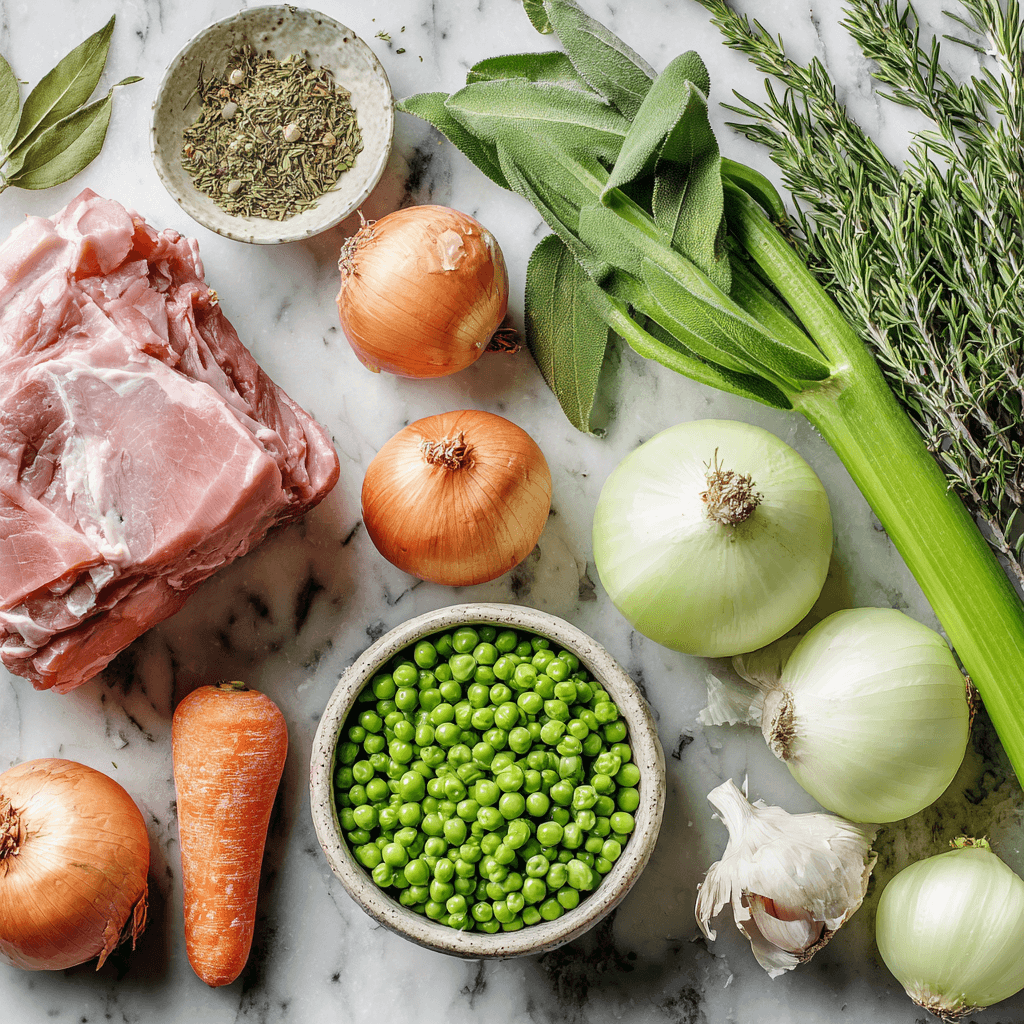
")