When people ask about Gordon Ramsay signature dishes, they’re usually thinking of the impossibly complex creations they’ve seen on Hell’s Kitchen or MasterChef. But here’s the truth I’ve learned after years of studying his techniques: the most famous Gordon Ramsay signature dishes are actually built on fundamental techniques that any dedicated home cook can master.
As a former firefighter who’s spent countless hours perfecting these recipes, I can tell you that Gordon’s genius isn’t in unnecessary complexity – it’s in executing simple techniques flawlessly. Just like mastering the perfect Gordon Ramsay white bread recipe, these five Gordon Ramsay signature dishes represent the pinnacle of his culinary philosophy: respect for ingredients, precise technique, and bold flavors.
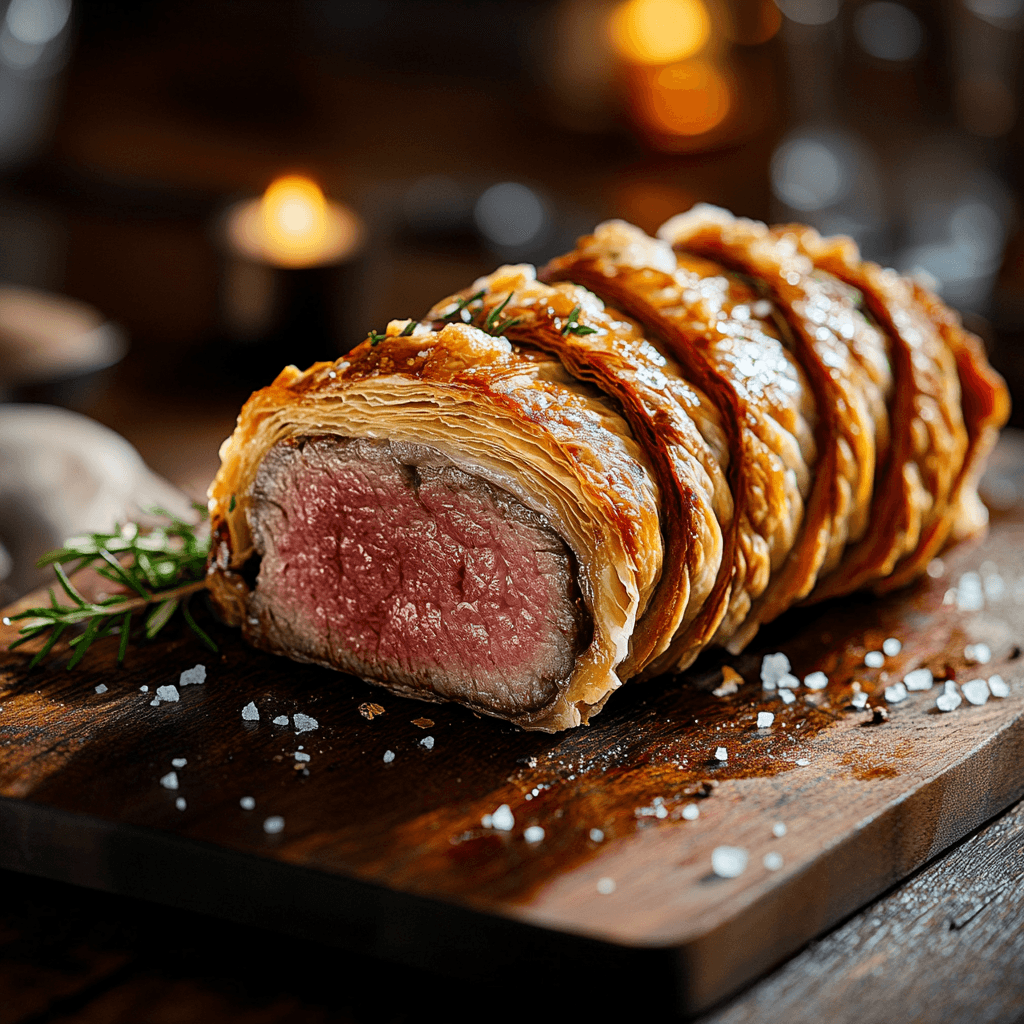
The Crown Jewel: Beef Wellington
Gordon Ramsay Venison Wellington
Beef Wellington stands as Gordon Ramsay’s most famous signature dish, and for good reason. This isn’t just wrapped beef – it’s a masterclass in timing, temperature control, and flavor layering. The key to success lies in properly sealing the beef, creating a moisture barrier with the mushroom duxelles, and achieving that perfect pink interior while maintaining a golden, crispy pastry exterior.
According to culinary experts at the CIA, the technique requires understanding how different cooking methods affect protein structure. The initial searing creates the Maillard reaction for flavor, while the pastry provides even heat distribution during the final bake.
What makes Gordon’s version special is his emphasis on English mustard as a flavor bridge and his specific mushroom duxelles technique that removes every bit of moisture – preventing the dreaded soggy bottom that ruins most amateur attempts. The same attention to moisture control applies to professional bread making secrets used in restaurant kitchens.
Among Gordon Ramsay signature dishes, sticky toffee pudding showcases his ability to elevate humble comfort food to restaurant-quality excellence. This dessert demonstrates perfect technique in date preparation, batter consistency, and sauce emulsification.
The secret lies in properly blooming the dates with baking soda, which breaks down their fiber structure and creates that distinctive moist, almost fudgy texture. Gordon’s toffee sauce technique involves precise temperature control to achieve the perfect consistency that clings to the pudding without being too thick or thin.
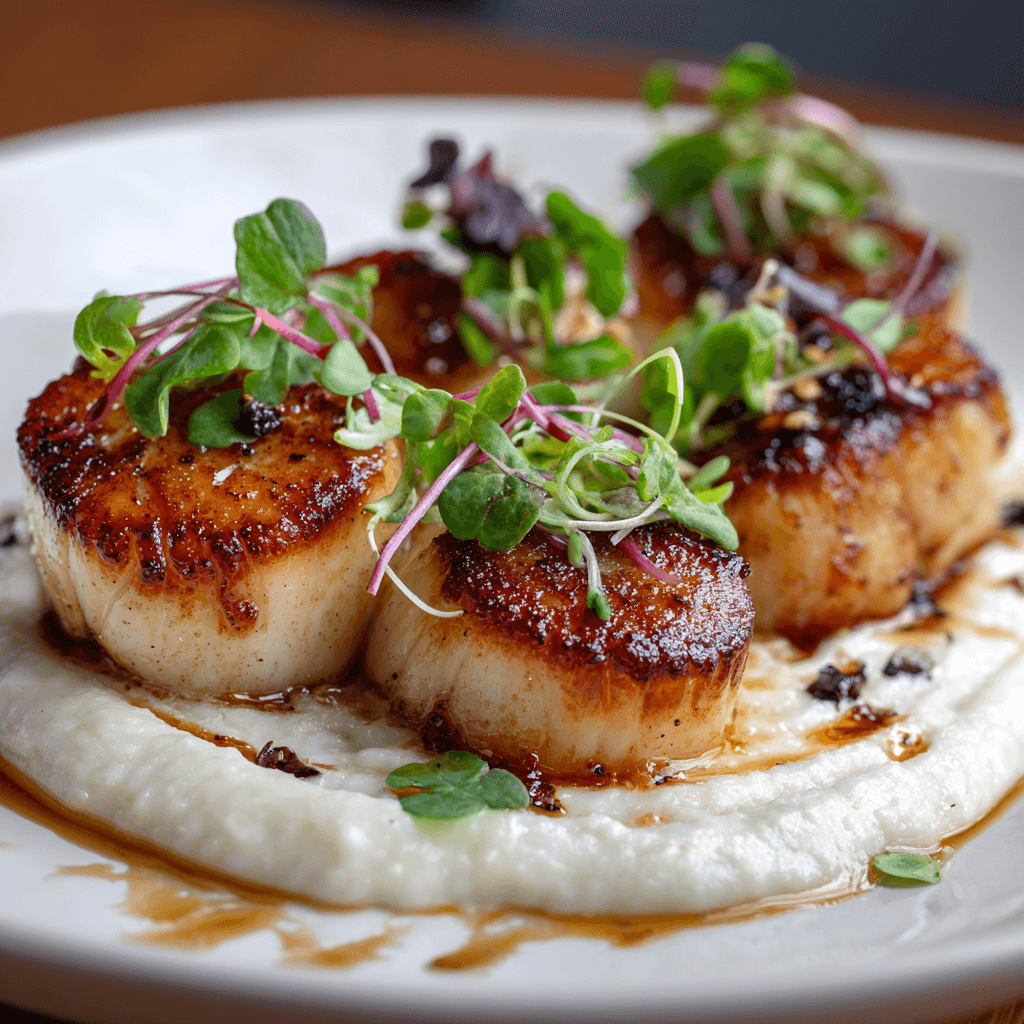
Gordon’s scallop technique has become legendary, representing one of his most teachable Gordon Ramsay signature dishes. The method focuses on achieving that perfect golden crust while maintaining a translucent, creamy center.
Success depends on three critical factors: properly dried scallops, a screaming hot pan, and the discipline not to move them once they hit the surface. Gordon’s cauliflower purée accompaniment isn’t just garnish – it’s a temperature and texture contrast that elevates the entire dish.
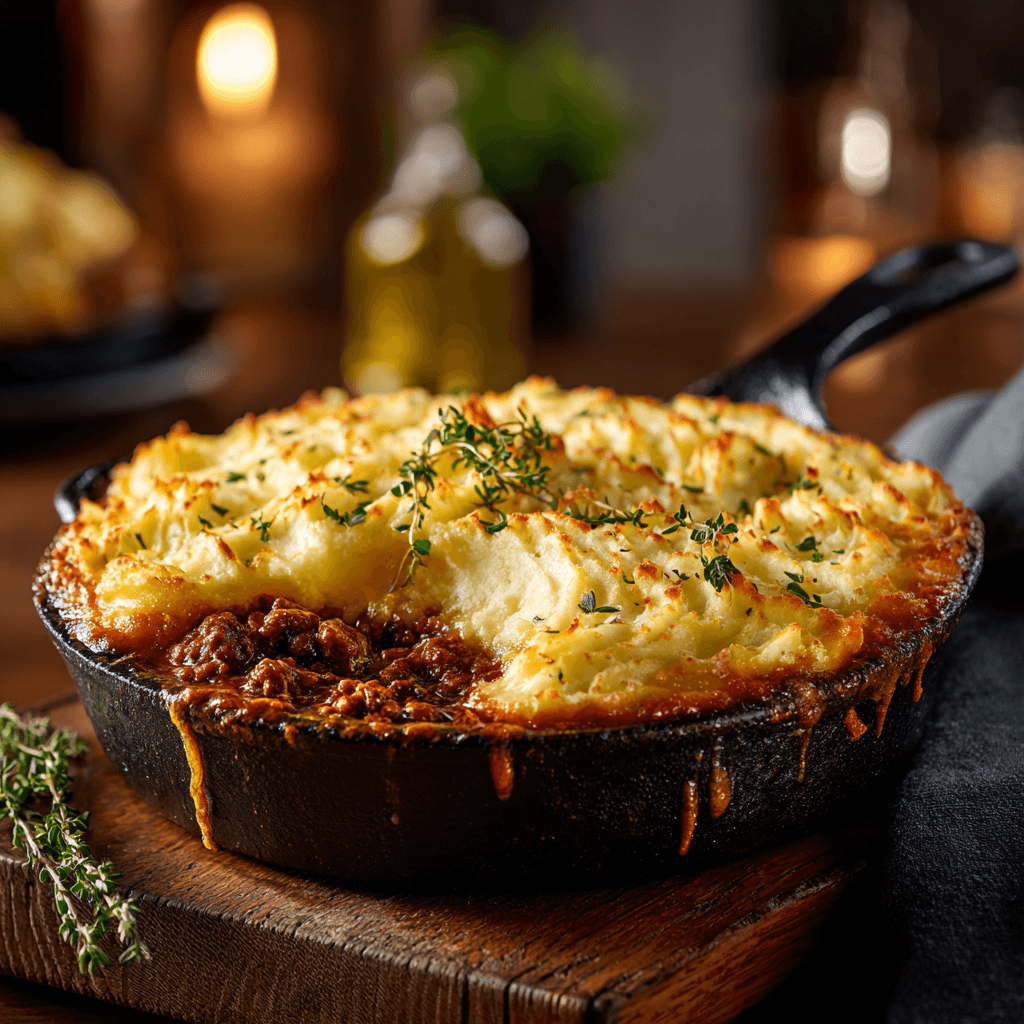
This Gordon Ramsay signature dish proves that elevated technique can transform the most basic comfort food. His version focuses on proper lamb preparation, vegetable mise en place, and potato technique that creates the perfect golden-brown top.
The key innovation is his two-stage potato preparation: initial boiling for fluffiness, followed by careful mashing technique that creates the ideal texture for browning under the broiler.
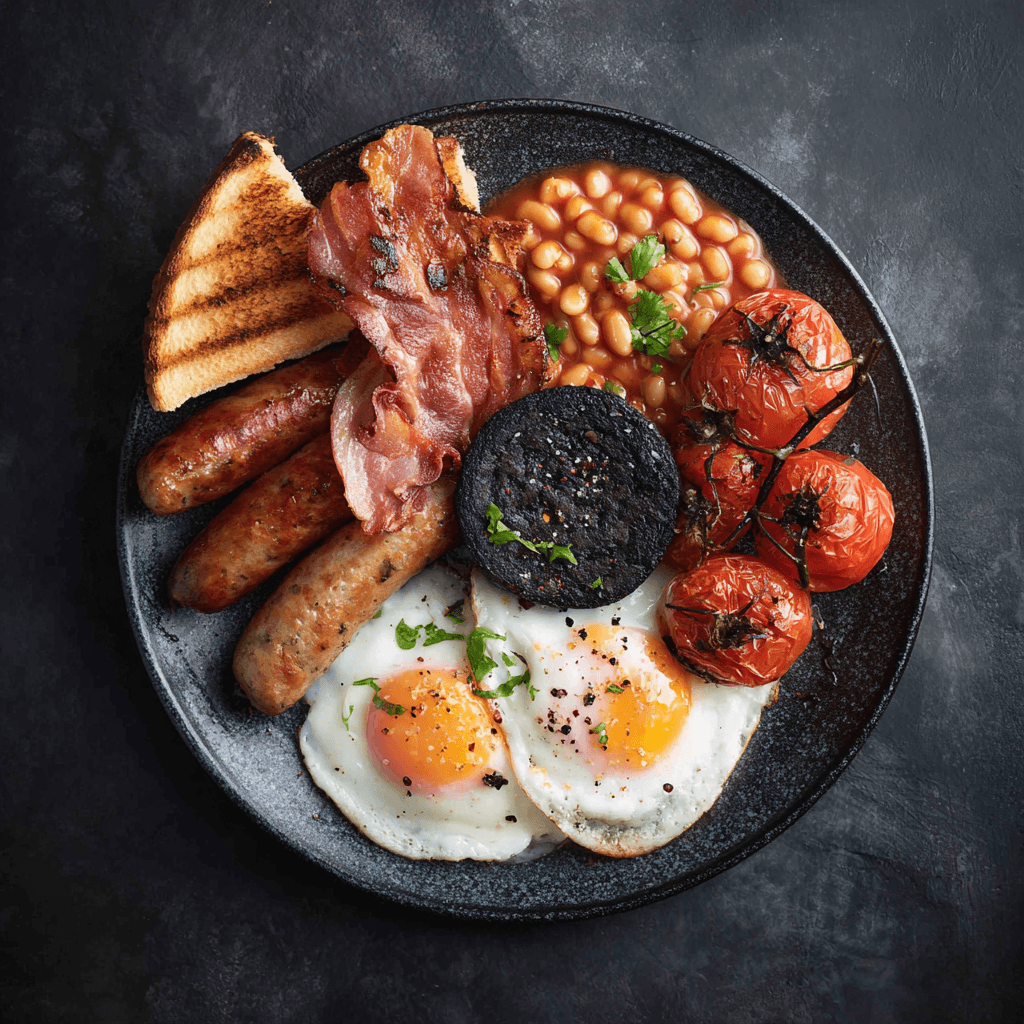
Perhaps the most accessible of all Gordon Ramsay signature dishes, his Full English Breakfast demonstrates how proper technique transforms simple ingredients into something extraordinary. Every component requires specific timing and technique to achieve simultaneous perfection.
Gordon’s black pudding preparation, his specific bacon cooking method, and his temperature-controlled scrambled eggs show how attention to detail elevates even the most basic meal to signature status. These same principles of precision and timing apply to creating perfect homemade bread that rivals restaurant quality.
Working in professional kitchens taught me that the gap between home baking and restaurant-quality bread isn’t talent – it’s knowledge. These professional bread making secrets separate amateur loaves from the exceptional bread that keeps customers coming back.
After years of learning from master bakers and perfecting these techniques in my own kitchen, including developing the perfect Gordon Ramsay white bread recipe, I can tell you that most professional bread making secrets aren’t complex – they’re just precise. These insider techniques will transform your bread from good to extraordinary.
Secret #1: Temperature Mapping Your Kitchen
Professional bakers don’t guess at temperatures – they measure everything. Your kitchen has microclimates that dramatically affect fermentation. The top of your refrigerator might be 78°F while your counter stays at 72°F.
Professional bread making secrets include creating temperature maps of your kitchen to find the perfect spot for each rise stage. I use multiple thermometers placed around my kitchen to track these variations throughout the day.
Secret #2: The Autolyse Technique
This professional bread making secret involves mixing flour and water 20-60 minutes before adding yeast and salt. This pre-fermentation period allows flour proteins to hydrate fully, developing gluten structure with minimal kneading.
According to baking science experts, autolyse improves dough extensibility and flavor development while reducing mixing time – exactly what professional bakers need for consistency.
Secret #3: Restaurant-Quality Butter Selection
Professional kitchens use European-style butter with 82-84% fat content (compared to standard American butter’s 80%). This higher fat content creates superior flavor and texture in bread applications.
The lower water content prevents gluten interference while providing richer taste. Many professionals also clarify butter for specific applications, removing milk solids that can cause burning during high-heat baking.
Secret #4: Steam Injection Systems
Professional ovens include steam injection, but you can replicate this at home. Place a cast iron pan on your oven floor and add boiling water when you load the bread. The steam delays crust formation, allowing maximum oven spring and creating that thick, chewy crust professionals achieve.
Secret #5: Precise Hydration Control
Professional bread making secrets include calculating exact hydration percentages rather than using volume measurements. Water temperature, flour absorption rates, and ambient humidity all affect final dough consistency.
Professionals adjust water content based on these variables, sometimes varying by 5-10% from the base recipe to maintain consistent results.
Secret #6: Pre-ferment Flavor Development
Poolish, biga, or levain pre-ferments are professional bread making secrets that add complexity without extra ingredients. These overnight fermentations develop acids and esters that create depth of flavor impossible to achieve with straight dough methods.
Even a simple overnight poolish using 25% of your total flour creates dramatic flavor improvements in the final bread.
Secret #7: Proofing Box Temperature Control
Professional bakeries use proofing boxes maintaining exact temperature and humidity. You can create this environment using your oven’s proofing setting or by placing dough near (not on) a warm radiator with a bowl of water for humidity control.
Secret #8: Bench Rest Timing
Professional bakers never skip bench rest periods during shaping. This 15-20 minute relaxation allows gluten to reorganize, making final shaping easier and preventing tearing that creates dense spots in finished bread.
Secret #9: Internal Temperature Mastery
Professional bread making secrets include knowing exact internal temperatures for different bread styles. White bread finishes at 190°F, enriched breads at 185°F, and rustic breads at 205°F. Professionals never guess – they measure.
Secret #10: Controlled Cooling Environments
Professional bakers control cooling conditions as carefully as baking. Rapid cooling in drafts creates tough crusts, while too-slow cooling in warm environments causes condensation that makes crusts soggy.
The ideal cooling environment maintains 65-70°F with moderate air circulation – conditions that preserve crust texture while allowing proper moisture redistribution throughout the crumb.
These professional bread making secrets require precision and patience, but they deliver results that rival the best commercial bakeries. Whether you’re perfecting classic white bread techniques or exploring signature restaurant dishes, these fundamentals separate amateur from professional results.
This Gordon Ramsay white bread recipe transformed my baking forever. I’ll never forget the first time I attempted to make white bread from scratch. As a former firefighter, I thought I could handle anything—but that sad, dense brick that emerged from my oven was more suitable for building construction than breakfast. The crust was pale, the interior was gummy, and frankly, it tasted like disappointment with a side of wasted flour.
That failure taught me something crucial: Gordon Ramsay white bread isn’t just about following a recipe—it’s about understanding the science behind each ingredient and technique. After years of perfecting this craft and studying Gordon Ramsay’s approach to bread making, I’ve discovered the seven secrets that transform ordinary ingredients into extraordinary Gordon Ramsay white bread.
Why This Gordon Ramsay White Bread Recipe Works (And Where Most Go Wrong)
The biggest mistake home bakers make with Gordon Ramsay white bread is treating it like a casual weekend project. Gordon Ramsay’s approach to bread making is methodical and precise—qualities that align perfectly with my firefighter background. Every ingredient serves a specific purpose, every temperature matters, and every timing decision impacts the final result.
Most failed Gordon Ramsay white bread attempts stem from three critical errors: using all-purpose flour instead of bread flour, rushing the rising process, and neglecting proper kneading technique. Bread flour contains 12-14% protein compared to all-purpose flour’s 8-11%, creating the gluten structure that gives Gordon Ramsay white bread its characteristic chewy texture and tall rise.
Understanding these fundamentals becomes even more important when you want to make white bread more flavorful – proper technique provides the foundation for advanced flavor-building methods.
The second common failure point is yeast activation. Too many home bakers either kill their yeast with water that’s too hot or fail to activate it with water that’s too cool. The sweet spot is 110°F (43°C)—warm enough to activate but not hot enough to destroy those living organisms that create the bread’s rise and flavor.
Temperature control extends beyond just the water. Your rising environment matters enormously. Bread dough needs consistent warmth to rise properly, ideally between 75-80°F (24-27°C). In cooler kitchens, I create a proofing environment by placing the dough near a warm (but turned off) oven or using the oven’s proofing setting if available.
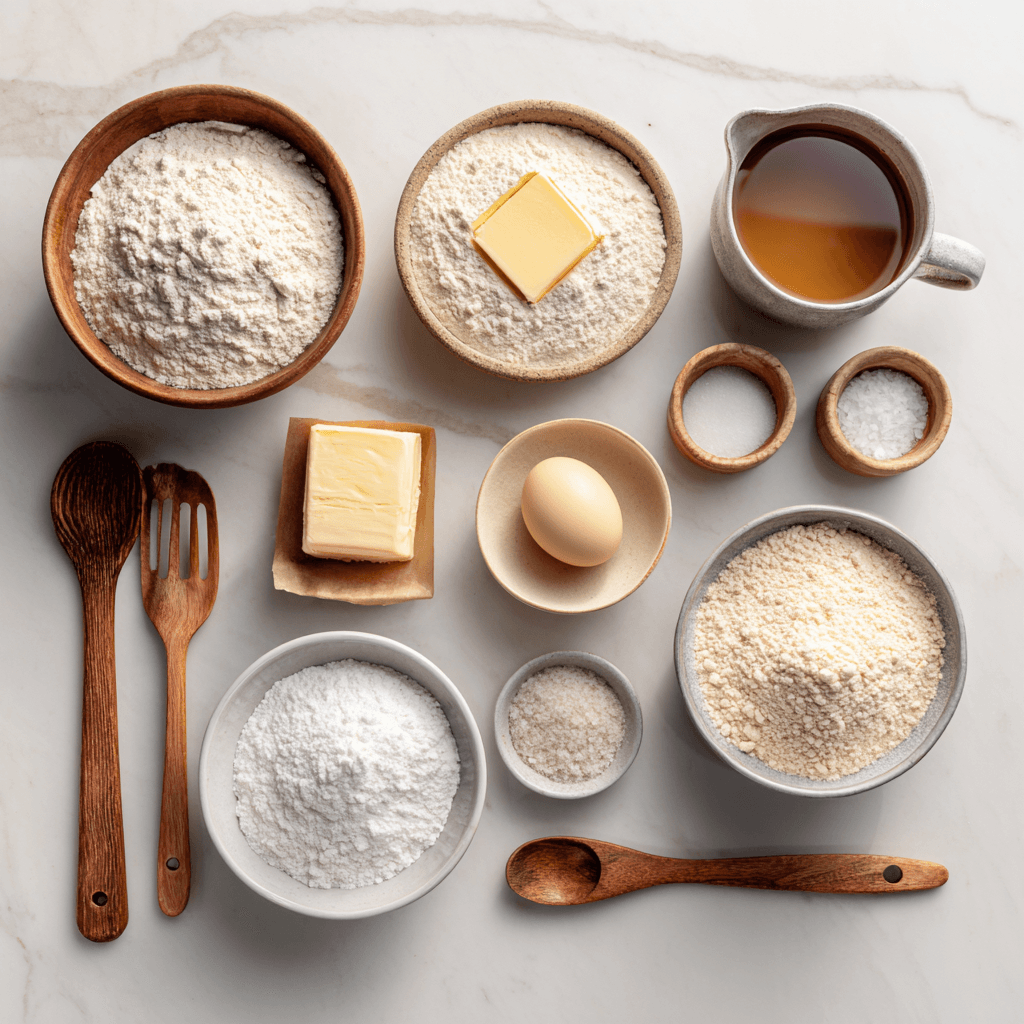
Gordon Ramsay White Bread: Ingredients That Actually Matter
When it comes to Gordon Ramsay white bread, ingredient quality directly impacts your results. Gordon Ramsay consistently emphasizes using the best ingredients available, and this Gordon Ramsay white bread recipe is no exception to this rule.
Bread flour is non-negotiable. The higher protein content creates stronger gluten networks, resulting in better texture and structure. King Arthur Bread Flour consistently delivers reliable results, containing 12.7% protein and creating that perfect balance of chewiness and tenderness.
Active dry yeast versus instant yeast makes a difference. While both work, active dry yeast requires proofing (dissolving and activating in warm water), which serves as a built-in quality check. If your yeast doesn’t foam and bubble within 5-10 minutes, you know it’s dead before you waste your flour.
Salt isn’t just for flavor—it’s a crucial structural component. Salt strengthens gluten bonds and controls yeast activity, preventing over-rising that leads to collapsed loaves. Use fine sea salt for even distribution throughout the dough.
Olive oil adds richness and improves texture. While some traditional white bread recipes omit fat entirely, a small amount of olive oil creates a more tender crumb and helps the bread stay fresh longer. The fat coats gluten strands, creating a softer texture while contributing subtle flavor complexity. If you’re curious about why butter makes bread taste better, the science behind fat’s impact on bread is fascinating and can help you make better ingredient choices.
The egg wash creates that bakery-quality golden crust. Brushing the shaped Gordon Ramsay white bread loaf with beaten egg before baking creates professional-looking color and shine. This step separates homemade bread that looks homemade from Gordon Ramsay white bread that looks bakery-quality.
Gordon Ramsay White Bread
Step-by-Step Instructions
Step 1: Activate Your Yeast Dissolve 7g active dry yeast and 12g sugar in 300ml warm water (110°F/43°C). Let stand 5-10 minutes until foamy and bubbly. Critical Warning: If your yeast doesn’t foam, it’s dead—start over with fresh yeast rather than proceeding with inactive yeast.
Step 2: Create Your Dough Base Combine 500g bread flour and 10g salt in a large mixing bowl. Create a well in the center using your fist or a large spoon. This well technique ensures even liquid distribution and prevents salt from directly contacting yeast before mixing.
Step 3: Combine Wet and Dry Ingredients Pour the foamy yeast mixture and 30ml olive oil into the flour well. Using a wooden spoon or your hand, mix from the center outward until a shaggy dough forms. The dough will look rough and uneven at this stage—that’s normal.
Step 4: Knead to Perfection Turn the dough onto a lightly floured surface and knead for 8-10 minutes until smooth and elastic. Proper kneading develops gluten, creating the structure that traps carbon dioxide and creates rise. The dough should feel slightly tacky but not sticky when properly kneaded.
Step 5: First Rise Place the kneaded dough in a greased bowl, turning to coat all sides. Cover with a damp towel and place in a warm, draft-free location. Rise for 1 hour until doubled in size. Critical Warning: Don’t rush this step—proper fermentation develops flavor and texture.
Step 6: Shape and Second Rise Punch down the risen dough to release gases, then shape into a loaf. Place in a greased 9×5 inch loaf pan. Cover and rise for 45 minutes until the dough crowns above the pan rim. This second rise creates the final texture and height.
Step 7: Bake to Golden Perfection Preheat your oven to 375°F (190°C). Brush the loaf top with beaten egg for that golden crust. Bake for 35-40 minutes until the crust is golden brown and the loaf sounds hollow when tapped on the bottom.
Pro-Tips That Change Your Gordon Ramsay White Bread Game
Use the windowpane test to check kneading completeness: Stretch a small piece of dough—if it stretches thin enough to see light through without tearing, gluten development is complete.
Create steam in your oven for a crustier exterior: Place a pan of hot water on the bottom oven rack during the first 15 minutes of baking.
Test doneness with a thermometer: Internal temperature should reach 190°F (88°C) for fully baked bread.
Cool completely before slicing: Resist the temptation to cut into warm bread—the crumb structure continues setting as it cools, and cutting too early results in gummy texture.
Score the top for professional appearance: Use a sharp knife to make a shallow cut down the center before baking for that artisanal bakery look.
Double-check your measurements with a kitchen scale: Bread making is more forgiving with weight measurements than volume measurements, especially for flour.
Storage & Leftovers Guidance
Fresh Gordon Ramsay white bread stays optimal for 2-3 days when stored properly at room temperature. Wrap cooled Gordon Ramsay white bread in plastic wrap or store in an airtight container to maintain moisture while preventing the crust from becoming soggy.
For longer storage, slice the bread and freeze in airtight bags for up to 3 months. Frozen slices can be toasted directly from the freezer, making them perfect for quick breakfast or sandwich needs.
Avoid refrigerating bread, as this actually accelerates staling through a process called retrogradation. The cold temperature causes starch molecules to recrystallize, creating that unpleasant tough texture associated with stale bread.
Day-old bread makes excellent toast, French toast, or bread pudding. The slightly drier texture actually improves these applications by absorbing flavors without becoming mushy. Speaking of bread applications, if you’re looking to expand your bread-making repertoire, learning to make Gordon Ramsay garlic bread is a perfect next step that builds on these white bread fundamentals.
Comprehensive FAQ Section
What flour is best for white bread?
Bread flour is the optimal choice for white bread due to its higher protein content (12-14%) compared to all-purpose flour (8-11%). The additional protein creates stronger gluten networks, resulting in better rise, texture, and structure. King Arthur Bread Flour consistently delivers reliable results for homemade white bread.
What is the secret ingredient in bread?
Time is the true secret ingredient in bread making. Proper fermentation time allows yeast to develop complex flavors while creating the ideal texture. Many home bakers rush the rising process, but allowing adequate time for both the first and second rise creates dramatically better results.
Why does homemade bread taste so much better?
Homemade bread tastes superior because you control every ingredient and process. Commercial bread contains preservatives and additives that extend shelf life but compromise flavor. Fresh homemade bread also lacks the staleness that develops during commercial distribution and storage.
What is the best yeast for bread making?
Active dry yeast is ideal for home bakers because it requires proofing, which serves as a quality check. If the yeast doesn’t foam and bubble within 5-10 minutes in warm water, you know it’s inactive before wasting other ingredients. Store yeast in the refrigerator and check expiration dates regularly.
Does bread taste better if you let it rise longer?
Yes, longer fermentation develops more complex flavors through the breakdown of starches and proteins. However, there’s a balance—over-proofing can cause the dough structure to collapse. The first rise should double the dough size, and the second rise should bring it just above the pan rim.
What does adding egg to bread dough do?
Eggs serve multiple purposes in bread making. They add richness, improve texture, and create a more tender crumb. Eggs also act as a natural preservative, helping bread stay fresh longer. The egg wash on top creates that beautiful golden, glossy crust that makes homemade bread look professional. For a deeper understanding of how different bread styles achieve their unique characteristics, you might find it interesting to learn about what makes Italian bread different from white bread.
Stay safe,
Jack Sullivan
Gordon Ramsay White Bread
A perfectly soft and flavorful homemade white bread inspired by Gordon Ramsay’s techniques, featuring a golden crust and pillowy interior.
Dissolve yeast and sugar in warm water, let stand 5-10 minutes until foamy
Combine flour and salt in large bowl, create well in center
Pour yeast mixture and olive oil into flour well
Mix until shaggy dough forms, then knead 8-10 minutes until smooth and elastic
Place in greased bowl, cover, rise in warm place 1 hour until doubled
Punch down, shape into loaf, place in greased 9×5 inch pan
Cover, rise 45 minutes until dough crowns above pan rim
Preheat oven to 375°F (190°C)
Brush top with beaten egg, score if desired
Bake 35-40 minutes until golden brown and hollow-sounding when tapped
Cool on wire rack 1 hour before slicing
Nutrition
Calories: 185kcal
Notes
Water temperature is critical – too hot kills yeast, too cool won’t activate
Bread flour creates better texture than all-purpose due to higher protein content
Dough should be slightly tacky but not sticky when properly kneaded
Internal temperature should reach 190°F (88°C) when fully baked
Store covered at room temperature up to 3 days
After mastering the classic technique, it’s time to push boundaries and explore what makes Gordon Ramsay’s approach to shrimp scampi so brilliant – his willingness to innovate while respecting the fundamentals. These variations maintain the core principles of proper technique while adding exciting flavor profiles that’ll keep your dinner guests talking. The same attention to detail that makes his signature garlic bread so exceptional applies here.
The Foundation Remains Sacred
Before we dive into variations, remember that all these builds start with the same fundamental technique: properly seared shrimp, gradually built emulsion, and careful temperature control. These aren’t shortcuts – they’re elevated versions of the master recipe.
5 Show-Stopping Variations
1. Spicy Calabrian Chili Scampi Replace red pepper flakes with Calabrian chili paste for deep, fruity heat. Add 1-2 teaspoons during the garlic stage, letting the oils bloom and infuse the entire dish with complex spice.
2. Lemon-Herb Cream Scampi After building your base sauce, whisk in 1/4 cup heavy cream and fresh thyme. The cream mellows the acidity while the thyme adds an earthy sophistication that pairs beautifully with seafood.
3. Sun-Dried Tomato and Basil Scampi Incorporate chopped sun-dried tomatoes (oil-packed) with the garlic, then finish with fresh basil ribbons. The tomatoes add umami richness while basil provides that essential bright note.
4. White Wine and Pancetta Scampi Start by rendering diced pancetta until crispy, then use that flavorful fat to cook your shrimp. The salty, porky richness creates an incredibly satisfying depth of flavor.
5. Champagne and Chive Scampi Substitute champagne for white wine and finish with finely chopped chives. This elegant variation is perfect for special occasions and adds a subtle effervescence to the sauce.
Pro Tips for Variation Success
Each variation requires slight timing adjustments, but the core technique from our master Gordon Ramsay Shrimp Scampi recipe remains your foundation. The key is understanding how each addition affects the sauce’s balance and adjusting accordingly.
Want to master the fundamentals first? Start with our complete Gordon Ramsay Shrimp Scampi guide to build your technique foundation, then return here to explore these exciting variations.
Nothing’s more disappointing than taking that first bite of homemade shrimp scampi only to discover it tastes like expensive cardboard swimming in butter-flavored water. I’ve been there – staring down at a pan of beautiful-looking shrimp wondering where all the flavor went. The good news? Bland shrimp scampi is completely fixable once you understand what went wrong.
The Root Causes of Flavorless Scampi
Most bland shrimp scampi failures stem from three core issues: underseasoning at every stage, using inferior ingredients, and failing to build layers of flavor. Many home cooks treat seasoning like an afterthought, sprinkling a little salt at the end and wondering why their dish tastes flat. This is the same mistake I see with other seafood dishes – the fundamentals matter whether you’re making scampi or attempting something more complex like Gordon Ramsay’s venison wellington.
7 Professional Solutions for Better Flavor
1. Season the Shrimp Aggressively Don’t just season the final dish – season the shrimp themselves 15 minutes before cooking. Use kosher salt and freshly cracked black pepper, letting them sit to draw out moisture and concentrate flavor.
2. Use Real Wine, Not Cooking Wine Cooking wine is loaded with sodium and preservatives that create harsh, metallic flavors. Use a dry white wine you’d actually drink – Pinot Grigio or Sauvignon Blanc work beautifully.
3. Build Your Garlic Base Properly Minced garlic should sizzle gently in the oil for 30 seconds, just until fragrant. Raw garlic is harsh, burnt garlic is bitter, but properly cooked garlic is pure gold.
4. Add Acid at the Right Moment Fresh lemon juice should go in near the end to maintain its bright acidity. Add it too early, and the heat will dull that crucial pop of flavor.
5. Don’t Skip the Pasta Water That starchy pasta water isn’t just for consistency – it carries flavor and helps marry all the elements together. Use it liberally.
6. Fresh Herbs Make All the Difference Dried parsley is basically green sawdust. Fresh parsley, added off the heat, provides the bright, grassy notes that make scampi sing.
7. Finish with High-Quality Butter European-style butter with higher fat content creates richer flavor and better sauce consistency than standard American butter.
When All Else Fails: Emergency Flavor Boosters
If your scampi is already cooked and tasting bland, try these last-minute saves: a splash of white wine vinegar for acidity, a pinch of red pepper flakes for heat, or a sprinkle of high-quality Parmesan cheese for umami depth.
Ready to master scampi that actually tastes like something? Head back to our Gordon Ramsay Shrimp Scampi guide for the complete, foolproof method that delivers restaurant-quality results every time.
I’ll never forget the first time I tried to recreate that perfect shrimp scampi I’d tasted at a high-end Italian restaurant. Picture this: me, a former firefighter who thought he could wing it in the kitchen, standing over a pan of what looked more like rubber bands swimming in greasy butter water. The shrimp were tough, the sauce was broken, and my wife took one bite before diplomatically suggesting we order pizza. That humbling moment taught me that even the simplest-looking dishes require technique, timing, and respect for the ingredients – the same precision I later applied when mastering Gordon Ramsay’s garlic bread. After years of perfecting this Gordon Ramsay-inspired approach, I can now deliver restaurant-quality shrimp scampi that’ll make your guests think you’ve been hiding a culinary degree.
Why This Recipe Works (And Where Most Go Wrong)
The magic of exceptional shrimp scampi lies in three critical principles that most home cooks completely miss. First, it’s all about temperature control – you need that perfect medium-high heat that sears the shrimp without turning them into bouncy erasers. Second, the sauce isn’t just melted butter with garlic thrown in; it’s a proper emulsion that requires pasta water and precise timing. Third, most people commit the cardinal sin of overcooking the shrimp, which happens in literally 90 seconds if you’re not paying attention.
The two biggest failure points I see repeatedly are sauce separation and overcooked shrimp. Sauce separation happens when people dump cold butter into hot garlic oil without gradually building the emulsion – a technique that professional chefs at Serious Eats have perfected through extensive testing. Overcooked shrimp occurs because people don’t realize that shrimp continue cooking even after you remove them from heat – they go from perfectly tender to rubbery in the blink of an eye.
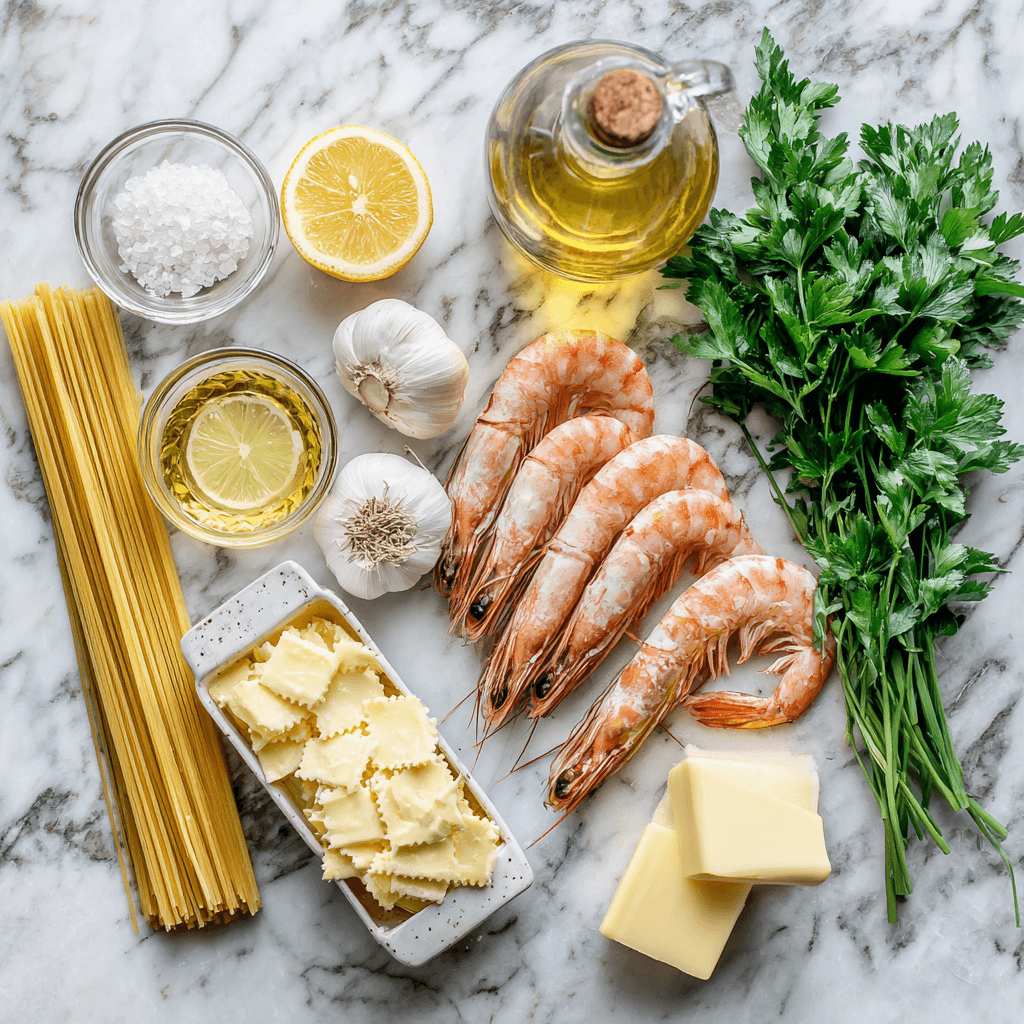
Ingredients That Actually Matter
For the Shrimp:
1.5 lbs large shrimp (16-20 count), peeled and deveined
2 tablespoons olive oil
4 tablespoons unsalted butter
6 cloves garlic, minced (not pressed – we want texture)
1/2 cup dry white wine (use something you’d actually drink)
1/4 cup fresh lemon juice
1/4 cup fresh parsley, chopped
1/2 teaspoon red pepper flakes
Salt and black pepper to taste
For the Pasta:
1 lb linguine or angel hair pasta
1 tablespoon kosher salt (for pasta water)
Let me explain why these specific choices matter. Large shrimp (16-20 count) are essential because smaller shrimp cook too quickly and become tough before you can properly develop the sauce. Use unsalted butter because you need to control the sodium levels – salted butter can make your final dish unbalanced. The white wine should be dry and drinkable; if you wouldn’t sip it, don’t cook with it. As Food Network’s classic preparation guide emphasizes, cheap cooking wine will give your scampi a harsh, acidic bite that ruins the entire dish.
GORDON RAMSAY SHRIMP SCAMPI
Core Recipe Instructions
Step 1: Prep Your Mise en Place Set up everything before you start cooking. This dish moves fast, and there’s no time to mince garlic while your shrimp are cooking. Pat the shrimp completely dry with paper towels and season with salt and pepper.
Step 2: Start the Pasta Water Bring a large pot of water to a rolling boil with 1 tablespoon kosher salt. The water should taste like mild seawater. Add pasta and cook according to package directions until al dente. CRITICAL WARNING: Reserve 1 cup of pasta water before draining – this starch-rich liquid is your sauce’s best friend.
Step 3: Sear the Shrimp Heat olive oil in a large skillet over medium-high heat until it shimmers. Add shrimp in a single layer – don’t overcrowd. Cook for 1-2 minutes per side until pink and just cooked through. CRITICAL WARNING: Do NOT move the shrimp around while they’re searing. Let them develop that golden crust, then flip once. Remove shrimp to a plate and set aside.
Step 4: Build the Sauce Base In the same skillet, reduce heat to medium. Add 2 tablespoons butter and let it melt. Add minced garlic and red pepper flakes, cooking for 30 seconds until fragrant but not brown. CRITICAL WARNING: Burnt garlic will make your entire dish bitter – if it starts browning, lower the heat immediately.
Step 5: Deglaze and Emulsify Pour in white wine and lemon juice, scraping up any browned bits from the bottom of the pan. Let it simmer for 2 minutes to cook off the alcohol. Gradually whisk in the remaining 2 tablespoons of cold butter, creating a glossy emulsion. If the sauce looks thin, add 2-3 tablespoons of pasta water and whisk vigorously.
Step 6: Bring It Together Return the cooked shrimp to the skillet along with the drained pasta. Toss everything together for 1 minute, adding more pasta water if needed to create a silky sauce that coats the pasta. Remove from heat and stir in fresh parsley.
Pro-Tips That Change the Game
The Cold Butter Trick: Always finish with cold butter pieces whisked in off the heat – this creates that restaurant-quality glossy finish that looks like liquid silk.
Pasta Water Gold: Don’t dump that pasta water down the drain like a rookie. The starch acts as a natural thickener and helps the sauce cling to every strand of pasta.
The Touch Test: Perfect shrimp should feel firm but not hard when you press them gently. If they feel squishy, they need more time. If they feel like rubber, you’ve gone too far – and you’ll need to understand how to fix bland shrimp scampi to salvage the dish.
Serve this immediately alongside some perfectly toasted homemade garlic bread for the ultimate Italian-American experience. If you’re short on time, even the best store-bought options can complement this dish beautifully.
Storage & Leftovers
Shrimp scampi is best enjoyed immediately, but if you have leftovers, store them in the refrigerator for up to 2 days. The biggest challenge with reheating is preventing the sauce from breaking and the shrimp from becoming tough.
To reheat properly, place the leftover scampi in a large skillet over low heat. Add 2-3 tablespoons of water or chicken broth and gently warm, stirring frequently. Don’t let it boil, or you’ll end up with separated sauce and rubber shrimp. If the sauce looks broken, whisk in a tablespoon of cold butter to bring it back together.
For best results, you can store the pasta and shrimp separately in the refrigerator, then recombine them in a fresh pan with a splash of wine and butter when reheating.
Comprehensive FAQ Section
Can I use frozen shrimp for this recipe?
Absolutely, but thaw them completely and pat them bone dry. Frozen shrimp often retain excess water, which will cause your oil to splatter and prevent proper searing. I actually prefer high-quality frozen shrimp over “fresh” shrimp that’s been sitting at the fish counter for days.
What can I substitute for white wine?
Chicken broth with a squeeze of lemon works in a pinch, but the wine adds crucial acidity and depth. If you’re avoiding alcohol, use a mix of chicken broth with white wine vinegar (1 tablespoon vinegar per 1/2 cup broth
My sauce always breaks – what am I doing wrong?
You’re probably adding cold ingredients to hot oil too fast. Build your emulsion gradually by whisking in cold butter one piece at a time while the pan is off the heat. If it breaks, add a tablespoon of hot pasta water and whisk like your life depends on it. If you’re consistently struggling with this issue, check out our detailed guide on fixing bland shrimp scampi for additional troubleshooting tips.
How do I know when the shrimp are perfectly cooked?
Look for the C-shape curve – perfectly cooked shrimp curl into a loose C. If they curl into a tight O, they’re overcooked. The flesh should be opaque pink with no translucent gray areas, and they should feel firm but yielding when pressed. Once you’ve mastered the basics, you might want to explore our creative Gordon Ramsay shrimp scampi variations to keep things exciting.
Stay safe, Jack Sullivan
Gordon Ramsay Shrimp Scampi
Restaurant-quality shrimp scampi with perfectly seared shrimp in a silky garlic butter sauce, ready in just 15 minutes
1.5lbslarge shrimp16-20 count, peeled and deveined
1lblinguine or angel hair pasta
4tablespoonsunsalted butterdivided
2tablespoonsolive oil
6clovesgarlicminced
1/2cupdry white wine
1/4cupfresh lemon juice
1/4cupfresh parsleychopped
1/2teaspoonred pepper flakes
1tablespoonkosher saltfor pasta water
Salt and black pepper to taste
Equipment
Large skillet or sauté pan
Large pot for pasta
Colander
Measuring cups and spoons
– Sharp knife
Cutting board
Tongs
Whisk
Method
Bring large pot of water to boil with 1 tablespoon kosher salt
Pat shrimp dry and season with salt and pepper
Cook pasta according to package directions until al dente, reserve 1 cup pasta water
Heat olive oil in large skillet over medium-high heat
Sear shrimp 1-2 minutes per side until pink, remove to plate
Reduce heat to medium, add 2 tablespoons butter to same pan
Add garlic and red pepper flakes, cook 30 seconds until fragrant
Add wine and lemon juice, simmer 2 minutes
Whisk in remaining cold butter off heat
Return shrimp and pasta to pan, toss with pasta water as needed
Remove from heat, stir in fresh parsley and serve immediately
Nutrition
Calories: 520kcal
Notes
Use large shrimp (16-20 count) for best texture
Don’t overcook shrimp – they continue cooking off heat
Reserve pasta water – the starch helps bind the sauce
Finish with cold butter for glossy, restaurant-quality sauce
Serve immediately for best results
In a perfect world, we’d all have time to make garlic bread from scratch. But in reality, we often rely on the convenience of the grocery store. The question is, what is the best store-bought garlic bread on the shelves today? As someone who has eaten more than his fair share of quick firehouse meals, I’ve tried them all. To settle the debate, I conducted a formal taste test of the most popular brands.
This guide will help you choose the best store-bought garlic bread for your next meal.
The Contenders & The Criteria
I tested four of the most popular and widely available brands in the US, focusing on the classic “loaf” style. They were all baked according to package directions.
Criteria:
Garlic Flavor: Does it taste like real garlic or artificial powder?
Butter Quality: Is it rich and buttery or oily and thin? . Bread Texture: Is the crust crispy and the inside soft?
Overall Impression: Is it a worthy side dish?
The Results
1. Pepperidge Farm Garlic Bread
Profile: This is the classic most of us grew up with. It’s reliable and widely available.
Verdict: A solid contender. The bread has a decent crust and a soft interior. The flavor is good, though it leans more towards garlic salt than fresh garlic. It’s a crowd-pleaser and a safe bet. A very good, but not the absolute best store-bought garlic bread.
2. Trader Joe’s Garlic Bread
Profile: Found in the freezer section, this one often comes with a blend of cheeses already on top.
Verdict: Very strong flavor. The use of both garlic powder and pieces of garlic gives it a bigger punch than most. The bread itself is on the softer side, which some people love. If you like a bold, cheesy garlic bread, this is a top-tier choice.
3. New York Bakery Texas Toast with Real Garlic
Profile: While not a loaf, their Texas Toast is a category leader. Thick, pre-sliced, and ready to toast.
Verdict: The texture is its greatest strength. The thick slices get incredibly crispy on the outside while staying soft and fluffy in the middle. The flavor is good and buttery. Excellent for dipping.
4. La Brea Bakery Take & Bake Garlic Loaf
Profile: Found in the bakery section, this is a partially baked loaf that you finish at home.
Verdict: The winner. The bread quality is exceptional, with a crackly, artisan-style crust and an airy crumb. The garlic butter is made with real butter and herbs and tastes the most like homemade. It requires a bit more effort, but the result is undeniably the best store-bought garlic bread I tested.
The Honest Conclusion
While La Brea Bakery took the top spot for its “like homemade” quality, brands like Pepperidge Farm and Trader Joe’s offer fantastic, convenient options.
Of course, the absolute best garlic bread is the one you make yourself. It’s surprisingly easy, and you can learn how with our from-scratch Gordon Ramsay Garlic Bread recipe. But for those busy nights, you now have a trusted guide to the best options in the freezer aisle. And if you want to make any of these even better, check out our guide onHow to Doctor Up Frozen Garlic Bread.
Garlic bread is a universally loved side dish, but figuring out what to serve with garlic bread can sometimes feel repetitive. While it’s a natural partner for pasta, this versatile side can complement a huge variety of meals. As a firefighter, I can tell you it was the go-to side for almost every big station dinner, no matter what we were cooking.
Whether you’re making a quick weeknight dinner or planning a feast, here are 15 perfect pairings that will never let you down.
The Classic Pairings
Spaghetti and Meatballs: The undisputed champion. Use the garlic bread to mop up every last bit of that delicious red sauce.
Lasagna: A rich, cheesy lasagna needs a simple, crusty side to cut through the richness. Garlic bread is the perfect tool for the job.
Chicken Alfredo: The creamy, cheesy sauce of a fettuccine alfredo is practically begging to be soaked up by a buttery piece of garlic bread.
Tomato Soup: The ultimate comfort food combo. Dipping warm garlic bread into a creamy tomato soup is a game-changer.
Caesar Salad: A big, crisp Caesar salad topped with grilled chicken becomes a complete and satisfying meal with a side of garlic bread.
Hearty and Comforting Meals
Chili: A thick, hearty beef or bean chili served with a cheesy slice of garlic bread is a perfect meal for a cold night.
French Onion Soup: Instead of a traditional crouton, serve a slice of garlic bread on the side for dipping into that savory, onion-packed broth.
Shepherd’s Pie: While not traditional, a slice of garlic bread is a fantastic companion to this comforting meat-and-potato classic.
Pot Roast: Use the garlic bread to soak up the rich, flavorful gravy from a slow-cooked pot roast.
Surprising & Creative Ideas
Shrimp Scampi: The garlic and butter flavors in the scampi are perfectly mirrored in the bread, making them a natural fit.
Steak Dinner: Instead of a baked potato, serve a thick slice of garlic bread alongside a perfectly cooked steak and some green beans.
Mussels in White Wine Sauce: The bread is essential for soaking up the incredible garlic and white wine broth at the bottom of the bowl.
As a Sandwich Base: Use two thick slices to make the ultimate grilled cheese or a meatball sub.
On a Charcuterie Board: Lightly toasted slices of garlic bread are a fantastic, flavorful addition to any meat and cheese platter.
With a Simple Marinara Dip: Sometimes, the best answer to what to serve with garlic bread is nothing at all. Just serve it hot from the oven with a small bowl of warm marinara sauce for dipping. It’s the perfect appetizer.
No matter how you serve it, a great homemade version makes all the difference. For the ultimate recipe, check out our Gordon Ramsay Garlic Bread.
Let’s be honest: sometimes life calls for a shortcut. In the firehouse, a box of frozen garlic bread was a lifesaver on busy nights. But just because it’s convenient doesn’t mean it has to be boring. Learning how to doctor up frozen garlic bread is the ultimate kitchen hack. With just a few simple additions, you can transform that standard frozen loaf into something that tastes impressively close to homemade. If you’re wondering which brand to start with, check out our [Honest Test of the Best Store-Bought Garlic Bread].
The Foundation: Start with a Good Base
This works best with a take-and-bake loaf or a frozen Texas toast. These provide a solid canvas for your upgrades. The first step is usually to thaw it slightly or open it up so you can add your ingredients.
Here are 5 pro-level ways to elevate your store-bought bread.
1. The Fresh Garlic & Herb Infusion
The “garlic” in most frozen garlic bread is garlic powder, which lacks the punch of the real thing. This is the single biggest upgrade you can make.
How to do it: In a small bowl, melt 2-3 tablespoons of real butter. Finely mince 1-2 fresh garlic cloves and a tablespoon of fresh parsley and mix them into the melted butter. Brush this mixture generously over the bread before baking. This is the core technique used in our from-scratchGordon Ramsay Garlic Bread recipe.
2. The Three-Cheese Method
Don’t settle for the sprinkle of parmesan dust that comes in the box. Adding real cheese creates a gooey, golden-brown crust that’s irresistible.
How to do it: During the last 5 minutes of baking, top the bread with a generous layer of shredded mozzarella and a sharp cheddar. For extra flavor, add a sprinkle of grated Parmesan cheese right as it comes out of the oven.
3. The Spice & Heat Kick
A little bit of spice can add surprising warmth and complexity, cutting through the richness of the butter.
How to do it: Before baking, lightly sprinkle the bread with smoked paprika for color and smoky flavor. For a bit of heat, add a pinch of red pepper flakes. This is a simple but effective way to answer the question of how to doctor up frozen garlic bread.
4. The Pesto & Tomato Topper
Give your garlic bread a vibrant, Italian bruschetta-style twist.
How to do it: Spread a thin layer of basil pesto on the bread before baking. For the last few minutes of cooking, top with finely diced fresh Roma tomatoes and a drizzle of balsamic glaze.
5. The “Everything Bagel” Crunch
For a savory, textural upgrade, look no further than the pantry staple: everything bagel seasoning.
How to do it: Brush the top of the bread with a little melted butter or olive oil and sprinkle generously with everything bagel seasoning before baking. The combination of sesame seeds, poppy seeds, dried onion, and garlic adds a fantastic crunch and savory flavor.
With these simple tricks, you’ll never look at a box of frozen garlic bread the same way again. Now you know how to doctor up frozen garlic bread like a pro.
In the firehouse, we had two kinds of garlic bread: the frozen kind you throw in the oven, and the kind that ended up burnt on top and somehow still cold in the middle. For years, I thought that was it. Then I saw how Gordon Ramsay approached it—not as an afterthought, but with technique and respect. The first time I tried his method of using a compound butter and a two-stage bake, the difference was breathtaking. This is more than just bread with garlic; this is a lesson in flavor infusion, and my first attempts were a masterclass in what not to do.
Why This Recipe Works (And Where Most Go Wrong)
The perfection of this Gordon Ramsay Garlic Bread lies in its brilliant temperature and moisture control. It’s a system, and once you understand it, you’ll never go back to just toasting buttered bread.
The Common Failure: Most people just smear cold, hard butter and raw garlic on bread and stick it under a broiler. This results in brutally harsh, burnt garlic, a greasy top, and a dry, disappointing interior.
The Science of Success:
The Compound Butter: By creaming softened butter with fresh, finely minced garlic and parsley, you create a compound butter, a perfect flavor delivery system. Fat is a solvent for garlic’s powerful flavor compounds (like allicin). The butter fat gently cooks the garlic, mellowing its harsh bite into a sweet, aromatic flavor that infuses deep into the bread.
The Foil Steaming Stage: Wrapping the loaf in foil for the first 15 minutes is the secret weapon. It creates a small convection-steam environment. This traps moisture, melting the compound butter slowly and allowing it to soak into the bread’s crumb, making the inside incredibly soft, moist, and saturated with flavor from crust to crust.
The Final Toasting Stage: Unwrapping the foil for the final 5-7 minutes is the crucial finishing step. With the inside perfectly steamed and buttery, you now expose the surface to direct heat. This allows the top to get perfectly golden-brown, crispy, and irresistible, creating that incredible texture contrast between the soft interior and the crunchy crust.
Ingredients That Actually Matter
A simple recipe lives or dies by the quality of its components. Using the right ingredients for this Gordon Ramsay Garlic Bread is non-negotiable.
The Bread
You need a quality loaf with two key features: a crisp, sturdy crust and an airy, open crumb. The crust needs to hold up to the butter, and the crumb needs holes to capture all that delicious garlic flavor.
Best Choices: A rustic Ciabatta or a classic French Baguette are top-tier options.
Good Alternative: A good sourdough loaf will also work beautifully and add a tangy complexity.
What to Avoid: Soft, pre-sliced sandwich bread. It will turn into a greasy, soggy mess.
The Butter
This is the soul of the dish. Use a high-quality European-style unsalted butter if you can find it. It has a higher butterfat content and a richer flavor, which makes a significant difference in a simple recipe like this. Using unsalted butter is a key professional technique; it gives you complete control over the final seasoning. And please, make sure it’s properly softened to room temperature, not melted.
The Garlic
Fresh garlic cloves are the only option for a true Gordon Ramsay Garlic Bread.
Critical Warning: Do NOT use the pre-minced garlic that comes in a jar. It is often packed in citric acid or other preservatives, which gives it a harsh, sour, and “off” flavor that will ruin your dish.
Preparation: How you mince affects the flavor. For a robust but smooth garlic flavor, finely mince it with a sharp knife. A garlic press can work, but it can sometimes crush the cells too aggressively, leading to a slightly more bitter taste.
The Herbs
Fresh parsley is classic for a reason. It adds a clean, bright, peppery note that cuts through the richness of the butter. Finely chopped chives are also an excellent addition for a subtle, fresh onion flavor.
The 5 Key Steps for a Perfect Gordon Ramsay Garlic Bread
This is the exact method, refined through trial and error, to create a perfect loaf every time.
(Instructions are detailed in the Recipe Schema above)
Common Mistakes to Avoid
I’ve made all of these mistakes so you don’t have to when you make your own Gordon Ramsay Garlic Bread.
Using Melted or Cold Butter: Cold butter won’t mix properly, leaving you with clumps of raw garlic. Melted butter separates and makes the bread greasy. The butter must be properly softened.
Slicing All the Way Through: If you cut completely through the bottom crust, all that glorious garlic butter will melt out onto your baking sheet.
Burning the Top: The final toasting step happens fast. Watch it like a hawk. A minute too long is the difference between golden-brown and black.
Using Bad Garlic: The quality of your garlic will define the final product. Using old, sprouting, or pre-minced jarred garlic is the fastest way to a disappointing Gordon Ramsay Garlic Bread.
Jack’s Pro-Tips That Change the Game
Score, Don’t Slice: When cutting the bread, leave the bottom crust intact. This holds the loaf together and allows the butter to melt into every crevice.
Add Cheese: For an extra layer of salty, umami flavor, mix a half-cup of freshly grated Parmesan cheese into your compound butter. This is a fantastic upgrade for your Gordon Ramsay Garlic Bread.
Rest for a Minute: Letting the bread sit for just 60 seconds after it comes out of the oven allows the molten butter to settle slightly, making it less messy to serve.
Tested Variations & Key Differences
Spicy Garlic Bread: Add a half-teaspoon of red pepper flakes to your compound butter for a gentle, warming heat that cuts through the richness.
Cheesy Pull-Apart Style: Add a cup of shredded low-moisture mozzarella along with the parmesan. When you spread the butter, tuck the mozzarella deep into the cuts. It will bake into a gloriously cheesy, shareable loaf.
Rosemary & Sea Salt: For a more rustic, earthy flavor, substitute the parsley with a tablespoon of finely chopped fresh rosemary.
The After-Action Report: Storage & Reheating
Storage: Store leftovers wrapped tightly at room temperature for up to 2 days.
Reheating: Reheat slices in a 180°C (350°F) oven or an air fryer for 3-5 minutes until warm and crisp. Avoid the microwave.
Freezing: You can freeze the prepared, unbaked loaf. Wrap it in foil, then in a freezer bag. Bake directly from frozen, adding about 10 minutes to the initial foiled baking time.
Frequently Asked Questions
Why cook garlic bread in foil?
The foil traps steam, which melts the garlic butter and allows it to soak into the bread, making the inside soft and moist. It prevents the outside from burning before the inside is heated through.
Can I make this ahead of time?
Absolutely. You can prepare the loaf with the compound butter, wrap it in foil, and refrigerate it for up to 24 hours before baking.
What is the best thing to eat with garlic bread?
It’s incredibly versatile. It’s a classic pairing with pasta and lasagna but also perfect for dipping in soups or serving alongside a big salad. We have a full guide on [What to Serve with Garlic Bread].
Is it okay to eat garlic bread every day?
While delicious, it’s a treat rich in butter and refined carbs. It’s best enjoyed in moderation as part of a balanced diet.
Stay safe,
Jack Sullivan
Gordon Ramsay Garlic Bread
An easy but elegant recipe for garlic bread inspired by Gordon Ramsay’s techniques, featuring a rich compound butter baked into a crusty loaf for a perfect texture contrast.
– 1 large loaf of crusty breadciabatta or baguette
– 1 cup225g unsalted butter, softened
– 4-6 cloves garlicfinely minced
– 1/2 cup fresh parsleyfinely chopped
– 1/2 tsp sea salt
– 1/4 tsp black pepper
–Optional 1/2 cup grated Parmesan cheese
Equipment
– Serrated bread knife
– Small bowl
– Aluminum foil
– Baking sheet
Method
Instructions:
Preheat oven to 180°C (350°F).
In a bowl, cream together the softened butter, minced garlic, parsley, salt, and pepper to create a compound butter.
Slice the bread diagonally in thick slices, but do not cut all the way through the bottom crust.
Generously spread the garlic butter mixture between each slice.
Wrap the entire loaf tightly in aluminum foil and bake for 15 minutes.
Unwrap the top of the foil and bake for another 5-7 minutes, until the top is golden brown and crispy.
Serve immediately.
Nutrition
Calories: 250kcal
Notes
– Using softened, room temperature butter is crucial for making a smooth, spreadable compound butter.
– Do not substitute fresh garlic with garlic powder; the flavor will not be the same.


")

")
")
")