Table of Contents
Gordon Ramsay Pear Tarte Tatin transforms ordinary pears into restaurant-quality magic, but here’s something most home cooks don’t realize: this upside-down French tart is actually a brilliant lesson in crisis management. Just like responding to kitchen fires during my firefighting days, timing and temperature control are everything. The beauty of this dessert lies in its controlled chaos – you’re essentially creating a controlled caramel fire that, when mastered, produces one of the most elegant desserts in French cuisine. According to Harvard Health, while desserts should be enjoyed in moderation, the satisfaction from a perfectly executed homemade tart often prevents overindulgence. If you’re building your dessert repertoire, this pairs beautifully with other classics like my Gordon Ramsay lemon tart for a complete French-inspired finale.
Why This Gordon Ramsay Pear Tarte Tatin Recipe Works (And Where Most Go Wrong)
The Gordon Ramsay Pear Tarte Tatin succeeds because it follows three fundamental principles that most home cooks overlook. First, it uses the direct caramel method – cooking sugar directly in the tart pan without adding water. This creates a deeper, more complex caramel flavor and eliminates the guesswork of candy thermometer readings.
Second, the pear arrangement follows a specific pattern that ensures even cooking and prevents the dreaded soggy bottom. Most people randomly place pears, but Ramsay’s technique involves overlapping them in a tight rosette pattern, which creates natural drainage channels for excess moisture.
Third, the pastry gets partially pre-baked on top of the fruit, creating a barrier that prevents moisture absorption. According to Serious Eats’ baking science guide, this reverse-baking method is crucial for achieving the proper texture contrast between crispy pastry and tender fruit.
The most common mistake? Rushing the caramel. Home cooks often panic when the sugar starts browning and remove it from heat too early, resulting in a pale, overly sweet caramel instead of the deep amber beauty that defines a proper tarte tatin.
Ingredients That Actually Matter for Gordon Ramsay Pear Tarte Tatin
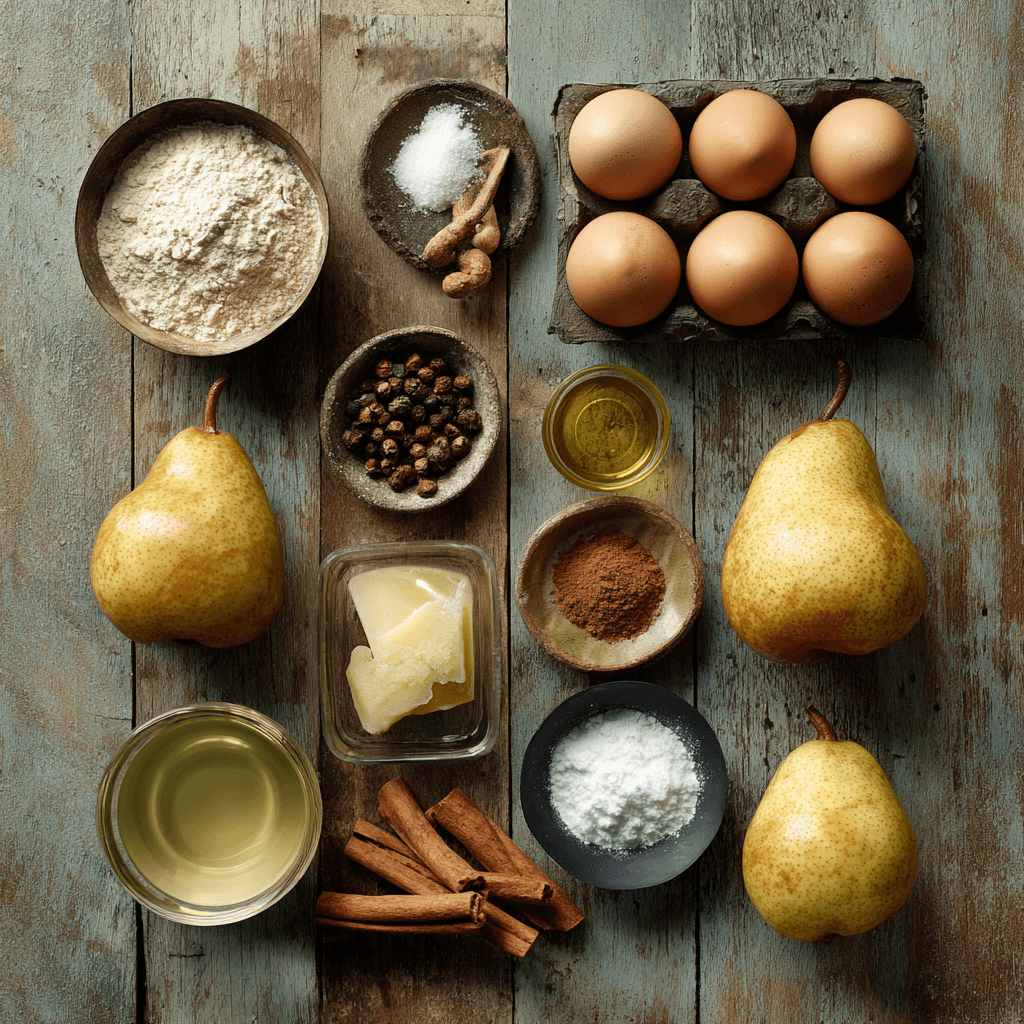
Not all ingredients in Gordon Ramsay Pear Tarte Tatin are created equal, and understanding their roles will transform your results. Pears are the star, but variety matters tremendously. Bosc or Anjou pears work best because they hold their shape under high heat while developing concentrated sweetness. Avoid Bartlett pears – they’re too soft and will turn to mush.
The sugar quality directly impacts your caramel’s flavor profile. Caster sugar (superfine) melts more evenly than granulated sugar, reducing the risk of crystallization. If you only have regular sugar, pulse it briefly in a food processor to break down the crystals.
Butter serves dual purposes: it adds richness to the caramel and helps prevent burning by lowering the overall temperature. European-style butter with higher fat content creates a smoother, more luxurious caramel than regular American butter.
For the pastry, all-butter puff pastry produces superior flavor and flakiness compared to margarine-based alternatives. If you’re making homemade pastry, maintaining cold ingredients is crucial – warm butter creates tough, chewy results instead of delicate layers. When shopping for store-bought options, look for brands listing butter as the first ingredient and avoid those containing hydrogenated oils. This attention to quality ingredients pairs well with the precision required in dishes like Gordon Ramsay crème brûlée.
Step-by-Step Instructions for Gordon Ramsay Pear Tarte Tatin
Preparing the Fruit Foundation
Preheat your oven to 200°C (400°F). Select 6-8 firm pears, peel them completely, and cut in half lengthwise. Using a melon baller or small spoon, remove the core completely – any remaining seeds will create bitter spots in your finished tart. Work quickly after peeling to prevent browning, or brush with lemon juice.
Creating the Perfect Caramel
In a 23cm (9-inch) oven-safe pan or tarte tatin dish, spread 150g caster sugar evenly across the bottom. Place over medium heat without stirring – this is crucial. The sugar will begin melting from the edges inward over 8-10 minutes. Never stir the sugar directly; instead, gently tilt the pan to distribute melting sugar evenly. When the caramel reaches deep amber color (like an old copper penny), immediately remove from heat and add 50g cold butter. The mixture will bubble violently – keep your face away and use a long-handled spoon.
Arranging and Cooking
Working quickly while the caramel is still warm, arrange pear halves cut-side up in a tight, overlapping pattern around the pan’s perimeter, then fill the center. The pears should fit snugly – this prevents shifting during baking. Roll out 250g puff pastry slightly larger than your pan. Drape over the pears and tuck edges down inside the pan, creating a sealed pocket. Prick the pastry surface 6-8 times with a fork to prevent dangerous steam buildup. Bake for 25-30 minutes until the pastry is golden brown and sounds hollow when tapped. The technique for achieving perfect pastry layers mirrors the precision needed in Gordon Ramsay apple pie.
The Critical Flip
Allow to cool for exactly 5 minutes – no longer or shorter. Run a knife around the edges to loosen any stuck bits. Place a large serving plate over the pan and, with confidence, flip both together in one swift motion. Use oven mitts and keep your arms away from your body – hot caramel may drip. Let gravity do the work for 30 seconds before lifting the pan. If any pears stick, simply rearrange them on the tart surface.
Pro-Tips That Change the Game
- Add a tablespoon of calvados or brandy to the caramel just before adding butter for restaurant-level depth of flavor
- Place a sheet of parchment under your tart pan before starting – caramel cleanup becomes effortless if any drips occur
- Test your caramel color by dropping a small amount onto a white plate – it should be the color of dark honey, not light amber
- Weigh down the pastry edges with a few dried beans during the first 15 minutes to prevent puffing away from the fruit
- Save any leftover caramel that sticks to the pan – reheat gently and drizzle over ice cream for an instant dessert sauce
- If your pears are very ripe, reduce baking time by 5 minutes and increase oven temperature to 220°C to prevent mushiness
Storage & Leftovers for Gordon Ramsay Pear Tarte Tatin
Store your Gordon Ramsay Pear Tarte Tatin at room temperature for up to 2 days, covered loosely with foil to prevent the pastry from becoming soggy. For longer storage, refrigerate for up to 5 days, though the pastry texture will soften considerably.
To restore crispness when reheating, place individual slices in a 180°C (350°F) oven for 5-7 minutes rather than using the microwave, which creates steam and ruins the pastry texture. Never reheat the entire tart – only warm the portions you plan to serve immediately.
The caramel will harden when cold but softens beautifully when brought back to room temperature. According to FDA food safety guidelines, fruit-based desserts should not be left at room temperature longer than 2 hours in warm weather to prevent bacterial growth.

Gordon Ramsay Pear Tarte Tatin
Ingredients
Equipment
Method
- 1️⃣ Preheat oven to 200°C (400°F). Peel pears completely, cut in half lengthwise, and remove cores with melon baller. Work quickly and brush with lemon juice to prevent browning.
- 2️⃣ Spread caster sugar evenly across bottom of 23cm oven-safe pan. Place over medium heat without stirring for 8-10 minutes until sugar melts from edges inward.
- 3️⃣ When caramel reaches deep amber color (like old copper penny), immediately remove from heat. Add cold butter – mixture will bubble violently, so keep face away and use long-handled spoon.
- 4️⃣ Working quickly while caramel is warm, arrange pear halves cut-side up in tight, overlapping pattern around pan perimeter, then fill center. Pears should fit snugly.
- 5️⃣ Roll out puff pastry slightly larger than pan. Drape over pears and tuck edges down inside pan, creating sealed pocket. Prick surface 6-8 times with fork.
- 6️⃣ Bake for 25-30 minutes until pastry is golden brown and sounds hollow when tapped.
- 7️⃣ Cool for exactly 5 minutes. Run knife around edges to loosen. Place large serving plate over pan and flip both together in one swift motion using oven mitts.
Nutrition
Notes
Tried this recipe?
Let us know how it was!Frequently Asked Questions About Gordon Ramsay Pear Tarte Tatin
Can I make Gordon Ramsay Pear Tarte Tatin ahead of time?
Yes, but with important timing considerations. Prepare the tart completely up to the baking stage, cover with plastic wrap, and refrigerate for up to 24 hours. Add 5-10 minutes to the baking time since you’re starting with cold ingredients. The Gordon Ramsay Pear Tarte Tatin is best flipped and served within an hour of baking for optimal texture contrast between crispy pastry and tender fruit.
Why did my caramel crystallize and turn grainy?
Crystallization occurs when sugar crystals form during cooking, usually from stirring too early or introducing moisture. Start over with clean, dry equipment and resist stirring until the sugar is completely melted. If crystals begin forming, add a tablespoon of water and start the melting process again. Professional kitchens prevent this by adding a small amount of glucose or corn syrup to the sugar.
What can I substitute for puff pastry in this Gordon Ramsay Pear Tarte Tatin?
Shortcrust pastry works well and provides a more rustic texture, though it won’t achieve the same flaky layers as puff pastry. Roll it slightly thicker (about 5mm) to prevent breaking. Phyllo pastry creates an interesting contemporary twist – use 4-5 sheets brushed with melted butter between layers. Avoid pie crusts designed for American-style pies, as they’re too sweet and soft for this application.
How do I know when the caramel is the right color?
Perfect caramel for Gordon Ramsay Pear Tarte Tatin should be deep amber, similar to the color of an old copper penny or dark honey. It should smell nutty and complex, not sweet. Test by dripping a small amount onto a white plate – it should hold its color and not appear pale yellow. Remember, the caramel continues cooking slightly from residual heat even after removing from flame.
Mastering this Gordon Ramsay Pear Tarte Tatin will give you the confidence to tackle any French dessert with the precision and respect it deserves. Remember, like fighting fires, it’s all about staying calm under pressure and trusting your training.
Stay safe,
Jack Sullivan