Author

Jack Sullivan

Browsing

Gordon Ramsay pizza sauce transforms ordinary home cooking into restaurant-quality masterpieces, and I learned this lesson the hard way during my firefighting days. After countless station house pizza nights where we’d argue over who made the best sauce, I finally discovered that the secret wasn’t in fancy ingredients—it was in technique. Most home cooks make the same critical mistakes that leave their sauce tasting flat, watery, or overwhelmingly acidic. According to the USDA dietary guidelines, tomatoes are packed with lycopene and essential nutrients, making a well-crafted pizza sauce both delicious and nutritious. Today, I’ll share the professional methods that separate amateur attempts from the Gordon Ramsay pizza sauce that rivals any Italian pizzeria, including the crucial safety steps that could prevent kitchen accidents. This isn’t just another recipe—it’s a masterclass in building layers of flavor while avoiding the common pitfalls that ruin most homemade pizza sauces.

Why This Gordon Ramsay Pizza Sauce Recipe Works (And Where Most Go Wrong)

The brilliance of Gordon Ramsay pizza sauce lies in three fundamental principles that most home cooks completely ignore. First, it’s all about ingredient timing—adding everything at once creates a muddy, indistinct flavor profile instead of the bright, complex taste you’re after. Second, temperature control is absolutely critical; too high heat destroys the delicate tomato flavor and creates bitter compounds, while too low heat never properly concentrates the flavors.

The Science Behind Perfect Sauce Consistency

The third principle involves moisture management, something I learned from watching too many kitchen fires start from overheated, spluttering sauces. According to culinary science experts, tomatoes contain natural enzymes that break down when exposed to proper heat levels, creating the ideal sauce texture. Most people make the mistake of adding sugar to combat acidity, but Gordon Ramsay pizza sauce achieves perfect balance through proper cooking technique and ingredient selection. The key is understanding that canned tomatoes vary dramatically in acidity levels, and your cooking method must adapt accordingly to create consistent results every single time.

Ingredients That Actually Matter for Gordon Ramsay Pizza Sauce

Fresh ingredients for making Gordon Ramsay Pizza Sauce arranged on wooden surface

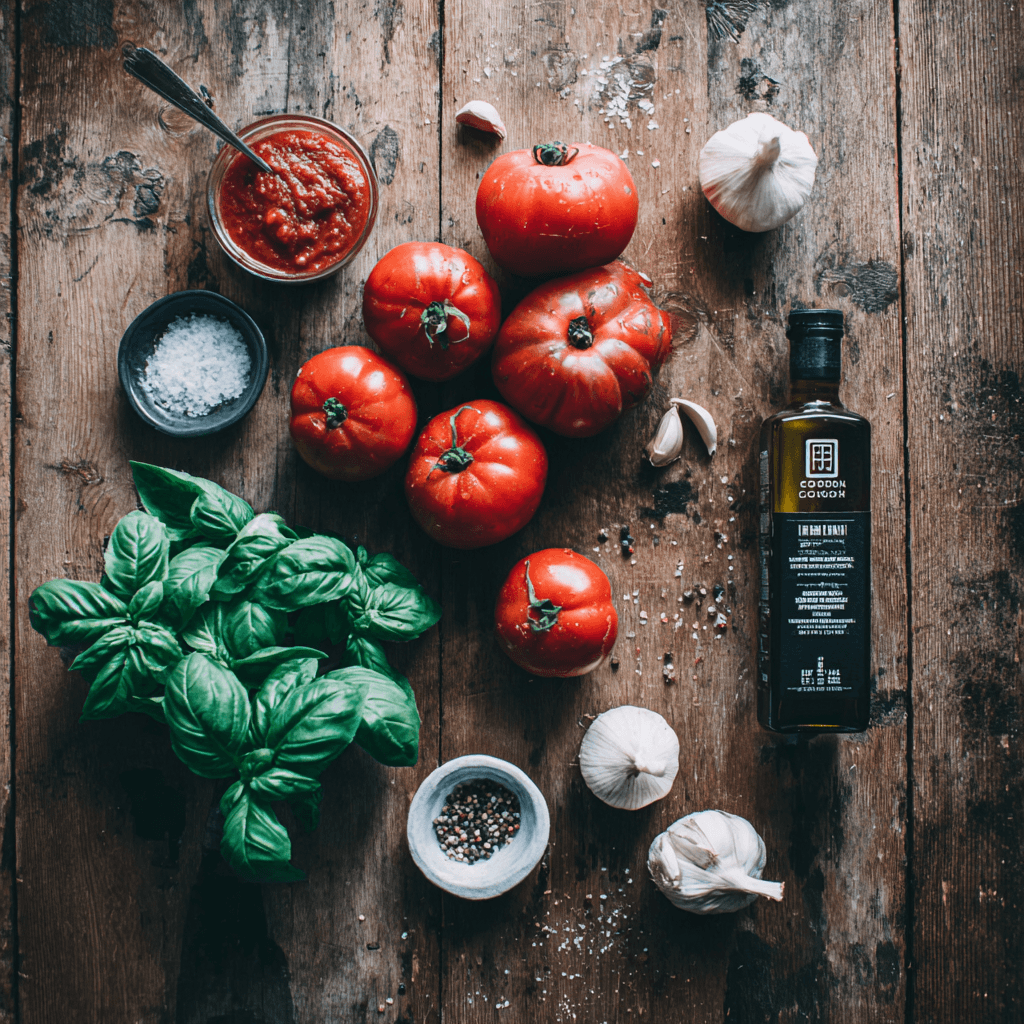
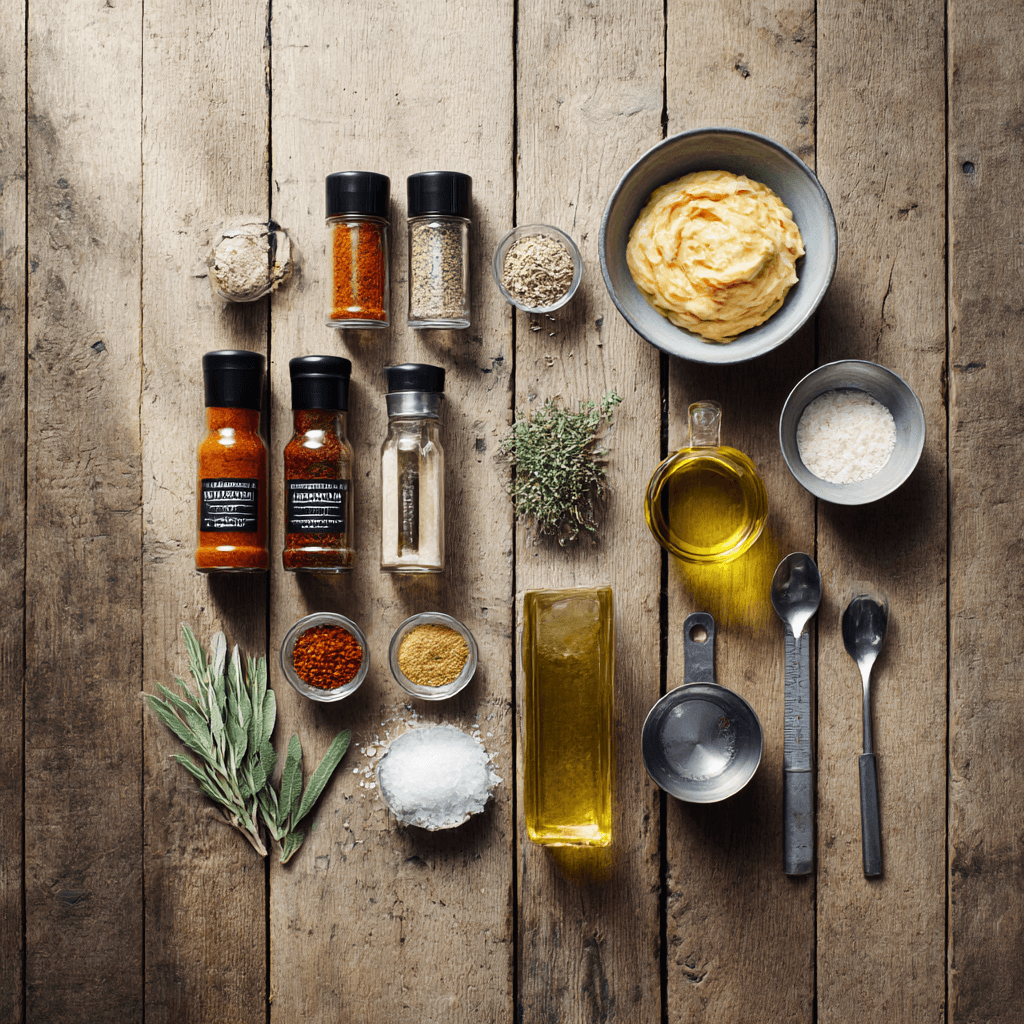
Quality ingredients make the difference between mediocre and exceptional Gordon Ramsay pizza sauce, but it’s not about buying the most expensive options. San Marzano tomatoes are the gold standard, but domestic alternatives like Muir Glen or Hunt’s whole tomatoes work beautifully when you know how to handle them properly. The critical factor is choosing whole tomatoes over crushed—whole tomatoes maintain better texture control and haven’t been pre-processed with additives that can throw off your flavor balance.

Fresh garlic is non-negotiable; pre-minced garlic from jars contains preservatives that create off-flavors when heated. Extra virgin olive oil provides the fat base that carries flavors, but avoid expensive finishing oils here—save those for drizzling after cooking. Fresh basil added at the end brightens the entire sauce, while dried oregano contributes earthy depth when bloomed in oil at the beginning. Salt preference matters too; kosher salt dissolves more evenly than table salt and won’t make your Gordon Ramsay pizza sauce taste overly processed. For those following our Italian herb seasoning guide, you’ll recognize how these individual herbs work together to create that signature restaurant flavor profile that makes this sauce so addictive.

Step-by-Step Instructions for Gordon Ramsay Pizza Sauce

Preparation Phase

Start by crushing 28 ounces of whole San Marzano tomatoes by hand in a large bowl—this messy but essential step gives you complete control over texture. **Always wear safety glasses when crushing tomatoes to protect your eyes from splashing acidic juice.** Remove any tough stem pieces and set the crushed tomatoes aside. Mince 4-6 fresh garlic cloves and measure out 2 tablespoons of extra virgin olive oil, 1 teaspoon of kosher salt, 1/2 teaspoon of dried oregano, and 1/4 teaspoon of red pepper flakes.

Building the Flavor Base

Heat your olive oil in a heavy-bottomed saucepan over medium-low heat—never high heat, which will scorch the garlic and ruin your Gordon Ramsay pizza sauce before it starts. **Keep a lid nearby to quickly cover the pan if oil begins to splatter.** Add minced garlic and oregano, stirring constantly for 30-45 seconds until fragrant but not browned. The oil should gently bubble around the garlic; if it’s aggressively sizzling, reduce heat immediately.

Sauce Development

Add your hand-crushed tomatoes carefully—they will bubble and potentially splatter. **Step back from the stove when adding tomatoes to avoid burns from hot oil splashing.** Stir in salt and red pepper flakes, then bring to a gentle simmer. Reduce heat to low and cook uncovered for 25-30 minutes, stirring every 5 minutes to prevent sticking. The sauce is ready when it coats a wooden spoon and has reduced by about one-third. Taste and adjust seasoning—this is where experience trumps recipes, as every batch of tomatoes behaves slightly differently. Remove from heat and stir in 8-10 fresh basil leaves, letting residual heat wilt them into the sauce. For additional techniques on building complex flavors, check our guide on fundamental tomato sauce methods that complement this Gordon Ramsay pizza sauce approach perfectly.

Pro-Tips That Change the Game

  • Always cook your Gordon Ramsay pizza sauce the day before using—overnight refrigeration allows flavors to meld and intensify dramatically
  • Add a small pinch of baking soda if your tomatoes are too acidic; it neutralizes excess acid without adding sweetness like sugar does
  • Use a wooden spoon for stirring—metal spoons can react with acidic tomatoes and create off-flavors in your sauce
  • Keep finished sauce slightly thicker than you think you need; it will thin out from steam when your pizza bakes in the oven
  • Never add cheese or meat to the base sauce—these additions belong on top of the pizza, not mixed into your Gordon Ramsay pizza sauce foundation
  • Freeze portions in ice cube trays for perfect individual pizza portions that thaw quickly and maintain restaurant-quality flavor

Storage & Leftovers for Gordon Ramsay Pizza Sauce

Proper storage maintains the quality and safety of your Gordon Ramsay pizza sauce for maximum enjoyment. Store cooled sauce in glass containers rather than plastic, which can absorb tomato acids and develop stains and odors. Refrigerated sauce keeps for up to one week, but always check for any signs of mold or off-smells before using. For longer storage, freeze in portion-sized containers for up to six months.

When reheating, use low heat and add a splash of water if the sauce has thickened too much during storage. Never reheat more than once, and always reheat to 165°F for food safety. The FDA recommends proper food handling practices including immediate refrigeration within two hours of cooking. Frozen sauce should be thawed overnight in the refrigerator, never at room temperature, to prevent bacterial growth that could cause foodborne illness.

Close-up of finished Gordon Ramsay Pizza Sauce in bowl ready to serve with fresh basil garnish
Jack Sullivan

Gordon Ramsay Pizza Sauce

Professional-quality pizza sauce using Gordon Ramsay’s techniques with hand-crushed San Marzano tomatoes, perfectly bloomed garlic and herbs, creating restaurant-level flavor through proper temperature control and timing.
Prep Time 10 minutes
Cook Time 30 minutes
Total Time 40 minutes
Servings: 8 servings
Course: sauce
Cuisine: Italian
Calories: 35

Ingredients
  

  • 28 oz whole San Marzano tomatoes hand-crushed
  • 4-6 cloves fresh garlic minced
  • 2 tablespoons extra virgin olive oil
  • 1 teaspoon kosher salt
  • 1/2 teaspoon dried oregano
  • 1/4 teaspoon red pepper flakes
  • 8-10 leaves fresh basil added at the end

Equipment

  • 1 Heavy-bottomed saucepan For even heat distribution
  • 1 – Large mixing bowl For crushing tomatoes
  • 1 Wooden spoon Prevents metallic taste with acidic tomatoes
  • 1 Safety glasses Protection when crushing tomatoes

Method
 

  1. 1️⃣ Crush 28 ounces of whole San Marzano tomatoes by hand in a large bowl, wearing safety glasses to protect eyes from splashing acidic juice. Remove any tough stem pieces and set aside.
  2. 2️⃣ Mince 4-6 fresh garlic cloves and measure out olive oil, salt, oregano, and red pepper flakes.
  3. 3️⃣ Heat olive oil in heavy-bottomed saucepan over medium-low heat. Keep a lid nearby to cover pan if oil begins to splatter.
  4. 4️⃣ Add minced garlic and oregano to oil, stirring constantly for 30-45 seconds until fragrant but not browned. Oil should gently bubble around garlic.
  5. 5️⃣ Carefully add hand-crushed tomatoes, stepping back from stove to avoid burns from hot oil splashing. Stir in salt and red pepper flakes.
  6. 6️⃣ Bring to gentle simmer, then reduce heat to low. Cook uncovered for 25-30 minutes, stirring every 5 minutes to prevent sticking.
  7. 7️⃣ Sauce is ready when it coats a wooden spoon and has reduced by about one-third. Taste and adjust seasoning.
  8. 8️⃣ Remove from heat and stir in fresh basil leaves, letting residual heat wilt them into the sauce.

Nutrition

Serving: 1gCalories: 35kcalCarbohydrates: 6gProtein: 1gFat: 2gMonounsaturated Fat: 1gSodium: 295mgPotassium: 285mgFiber: 1gSugar: 4gVitamin A: 12IUVitamin C: 15mgCalcium: 2mgIron: 4mg

Notes

Cook sauce the day before using for best flavor development. Add pinch of baking soda if tomatoes are too acidic. Keep sauce slightly thicker than needed as it will thin during pizza baking. Store in glass containers up to 1 week refrigerated or freeze up to 6 months.

Tried this recipe?

Let us know how it was!

Frequently Asked Questions About Gordon Ramsay Pizza Sauce

How to make pizza sauce Gordon Ramsay?

Gordon Ramsay pizza sauce starts with hand-crushed San Marzano tomatoes, bloomed garlic and oregano in olive oil, then simmered gently for 25-30 minutes until thickened. The key is low heat, constant stirring, and finishing with fresh basil off the heat. Never rush the process with high heat, which creates bitter, burnt flavors instead of the bright, concentrated taste that makes this sauce exceptional.

What are common pizza sauce mistakes?

The biggest mistakes include using high heat that scorches garlic and creates bitter flavors, adding sugar to combat acidity instead of using proper cooking technique, and over-processing tomatoes into a smooth puree rather than maintaining rustic texture. Many home cooks also skip the crucial step of blooming dried herbs in oil, missing the deep flavor development that separates professional-quality Gordon Ramsay pizza sauce from amateur attempts.

What is the highest rated pizza sauce?

Professional chefs consistently rate sauces made with San Marzano tomatoes and traditional Italian techniques as superior. The highest rated sauces balance bright acidity with deep umami flavors, achieve proper consistency without being too thick or thin, and use minimal ingredients handled with maximum skill. Gordon Ramsay pizza sauce exemplifies these qualities through technique-focused preparation rather than relying on numerous additives or shortcuts.

What makes pizza sauce different from tomato sauce?

Pizza sauce is typically thicker, less sweet, and designed to withstand high oven heat without making pizza crusts soggy. Unlike marinara or pasta sauce, pizza sauce often uses raw or minimally cooked tomatoes since it will cook further on the pizza. The seasoning profile focuses on herbs like oregano and basil that complement cheese and toppings, while maintaining a texture that spreads easily without running off the dough during baking.

Creating authentic Gordon Ramsay pizza sauce transforms your homemade pizzas from good to extraordinary, and the techniques you’ll master here apply to countless other cooking challenges. Remember that great cooking is about understanding principles, not just following recipes blindly.

Stay safe,
Jack Sullivan

Gordon Ramsay Texas Chili transforms humble ingredients into something extraordinary, and after twenty years in firehouses across the Southwest, I can tell you there’s nothing quite like the aroma of a properly made chili filling the kitchen. During my firefighting days, we’d often debate the finer points of chili-making during those long shifts, and I learned that the techniques behind this Gordon Ramsay Texas Chili recipe mirror the same attention to detail that keeps you safe in high-pressure situations. The USDA emphasizes proper food handling when working with ground meats, which is crucial for this recipe’s success.

Why This Gordon Ramsay Texas Chili Recipe Works (And Where Most Go Wrong)

The secret to mastering Gordon Ramsay Texas Chili lies in understanding three fundamental principles that separate amateur attempts from restaurant-quality results. First, the layering of flavors happens in stages, not all at once. Most home cooks dump everything into the pot simultaneously, missing the opportunity to build complex depth that defines authentic Texas chili.

Temperature Control Creates the Foundation

The second principle involves precise heat management. Proper browning techniques require maintaining consistent medium-high heat during the searing phase, allowing proteins to develop that crucial Maillard reaction without burning the aromatics.

Timing Determines Texture

Finally, the timing of ingredient additions makes or breaks the final product. Adding tomatoes too early can create acidity that prevents proper meat tenderization, while incorporating spices at the wrong moment results in either muddy flavors or harsh, unintegrated heat that overwhelms the dish.

Ingredients That Actually Matter for Gordon Ramsay Texas Chili

Fresh ingredients for making Gordon Ramsay Texas Chili

Quality ingredients form the backbone of exceptional Gordon Ramsay Texas Chili, and understanding why each component matters helps you make informed choices at the grocery store. Chuck roast, cut into half-inch cubes, provides the ideal fat-to-meat ratio for long, slow cooking. Look for well-marbled pieces with deep red coloring, avoiding pre-ground meat which lacks the texture contrast that defines authentic Texas chili.

Dried chiles create the foundation of flavor complexity that canned powder simply cannot match. Ancho, chipotle, and guajillo chiles each contribute distinct characteristics: ancho provides sweetness, chipotle adds smokiness, and guajillo delivers mild heat with fruity undertones. When selecting dried chiles, choose specimens that remain pliable rather than brittle, indicating proper storage and retained essential oils.

Quality beef stock elevates the entire dish beyond what water alone can achieve. Low-sodium varieties give you control over the final salt content, while bone broth adds gelatin that creates a luxurious mouthfeel. For those following my homemade beef stock guide, this recipe represents the perfect application for your efforts.

Step-by-Step Instructions for Gordon Ramsay Texas Chili

Creating authentic Gordon Ramsay Texas Chili requires methodical preparation and attention to safety protocols that I learned during my firefighting career.

Phase 1: Chile Preparation

Remove stems and seeds from 6 ancho chiles, 4 chipotle chiles, and 3 guajillo chiles. **Always wear gloves when handling chiles to prevent capsaicin burns, and never touch your face or eyes during this process.** Toast the chiles in a dry cast-iron skillet over medium heat for 2-3 minutes until fragrant. Cover with hot water and steep for 20 minutes until softened.

Phase 2: Building the Base

Pat 3 pounds of cubed chuck roast completely dry using paper towels. **Ensure your cooking oil reaches proper temperature before adding meat to prevent sticking and achieve proper searing.** Heat 2 tablespoons of vegetable oil in a heavy Dutch oven over medium-high heat until it shimmers. Brown the beef in batches, avoiding overcrowding, until all surfaces develop a deep golden crust.

Phase 3: Flavor Development

Remove meat and reduce heat to medium. Add 2 diced yellow onions, 6 minced garlic cloves, 2 tablespoons of cumin, and 1 tablespoon of oregano. **Keep aromatics moving constantly to prevent burning, which creates bitter flavors that cannot be corrected.** Cook for 3-4 minutes until onions turn translucent and spices become fragrant.

Phase 4: Assembly and Cooking

Blend the softened chiles with 2 cups of their soaking liquid until completely smooth. Strain the mixture through a fine-mesh sieve to remove any remaining skin fragments. Return the beef to the pot, add the chile mixture, 32 ounces of beef stock, 2 tablespoons of tomato paste, and 2 teaspoons of salt. Proper braising technique requires maintaining a gentle simmer rather than a rolling boil. Simmer uncovered for 2-3 hours, stirring occasionally, until the meat becomes fork-tender and the sauce reduces to coat the back of a spoon.

Pro-Tips That Change the Game

  • Add a square of dark chocolate during the final 30 minutes of cooking to enhance the chile flavors without creating sweetness
  • Reserve some chile soaking liquid to adjust consistency during cooking, as evaporation rates vary by altitude and humidity
  • Allow the chili to rest overnight before serving, as the flavors meld and intensify significantly during the cooling process
  • Freeze leftover chile paste in ice cube trays for quick flavor additions to future batches of Gordon Ramsay Texas Chili
  • Toast whole cumin seeds and grind them fresh rather than using pre-ground spices for maximum potency
  • Control heat levels by adjusting chipotle quantities rather than adding cayenne, which provides heat without complementary flavor

Storage & Leftovers for Gordon Ramsay Texas Chili

Proper storage techniques ensure your Gordon Ramsay Texas Chili maintains its quality and remains safe for consumption. Cool the chili to room temperature within 2 hours of cooking, then transfer to shallow containers for rapid cooling in the refrigerator. **Never store hot chili directly in the refrigerator, as this raises the internal temperature and creates food safety risks.** Properly stored chili remains fresh for 4-5 days refrigerated or up to 6 months frozen.

When reheating, bring the chili to 165°F internal temperature, stirring frequently to ensure even heating throughout. Add small amounts of beef stock if the consistency becomes too thick during storage. The FDA recommends reheating leftovers only once to maintain food safety standards.

Close-up of finished Gordon Ramsay Texas Chili plated and ready to serve
Jack Sullivan

Gordon Ramsay Texas Chili

This authentic Texas chili recipe transforms humble ingredients into something extraordinary through proper layering of flavors, precise heat management, and careful timing of ingredient additions. Built on dried chiles and tender chuck roast, it delivers restaurant-quality results through professional techniques adapted for home kitchens.
Prep Time 45 minutes
Cook Time 3 hours
Total Time 3 hours 45 minutes
Servings: 8 servings
Course: Main Course
Calories: 420

Ingredients
  

  • 6 ancho chiles stems and seeds removed
  • 4 chipotle chiles stems and seeds removed
  • 3 guajillo chiles stems and seeds removed
  • 3 pounds chuck roast cut into half-inch cubes
  • 2 tablespoons vegetable oil
  • 2 yellow onions diced
  • 6 cloves garlic minced
  • 2 tablespoons ground cumin
  • 1 tablespoon dried oregano
  • 32 ounces beef stock low-sodium
  • 2 tablespoons tomato paste
  • 2 teaspoons salt adjust to taste
  • 1 square dark chocolate added in final 30 minutes

Equipment

  • 1 Cast iron skillet For toasting chiles
  • 1 Heavy Dutch Oven For browning and braising
  • 1 High-powered blender For chile mixture
  • 1 Fine-mesh sieve For straining chile mixture

Method
 

  1. 1️⃣ Remove stems and seeds from 6 ancho chiles, 4 chipotle chiles, and 3 guajillo chiles. Toast the chiles in a dry cast-iron skillet over medium heat for 2-3 minutes until fragrant. Cover with hot water and steep for 20 minutes until softened.
  2. 2️⃣ Pat 3 pounds of cubed chuck roast completely dry using paper towels. Heat 2 tablespoons of vegetable oil in a heavy Dutch oven over medium-high heat until it shimmers. Brown the beef in batches, avoiding overcrowding, until all surfaces develop a deep golden crust.
  3. 3️⃣ Remove meat and reduce heat to medium. Add 2 diced yellow onions, 6 minced garlic cloves, 2 tablespoons of cumin, and 1 tablespoon of oregano. Cook for 3-4 minutes, stirring constantly, until onions turn translucent and spices become fragrant.
  4. 4️⃣ Blend the softened chiles with 2 cups of their soaking liquid until completely smooth. Strain the mixture through a fine-mesh sieve to remove any remaining skin fragments.
  5. 5️⃣ Return the beef to the pot, add the chile mixture, 32 ounces of beef stock, 2 tablespoons of tomato paste, and 2 teaspoons of salt. Simmer uncovered for 2-3 hours, stirring occasionally, until the meat becomes fork-tender and the sauce reduces to coat the back of a spoon.
  6. 6️⃣ Add a square of dark chocolate during the final 30 minutes of cooking to enhance the chile flavors. Allow the chili to rest overnight before serving for best flavor development.

Nutrition

Serving: 1gCalories: 420kcalCarbohydrates: 18gProtein: 45gFat: 22gSaturated Fat: 8gPolyunsaturated Fat: 2gMonounsaturated Fat: 10gCholesterol: 135mgSodium: 890mgPotassium: 1200mgFiber: 6gSugar: 8gVitamin A: 2400IUVitamin C: 45mgCalcium: 80mgIron: 6mg

Notes

Add a square of dark chocolate during the final 30 minutes of cooking to enhance the chile flavors without creating sweetness. Reserve some chile soaking liquid to adjust consistency during cooking, as evaporation rates vary by altitude and humidity. Allow the chili to rest overnight before serving, as the flavors meld and intensify significantly during the cooling process. Freeze leftover chile paste in ice cube trays for quick flavor additions to future batches.

Tried this recipe?

Let us know how it was!

Frequently Asked Questions About Gordon Ramsay Texas Chili

What is Gordon Ramsay diagnosed with?

Gordon Ramsay has been open about his arthritis diagnosis, which affects his hands and joints. Despite this condition, he continues to demonstrate precise knife skills and cooking techniques. This Gordon Ramsay Texas Chili recipe accommodates cooks with similar concerns by using larger ingredient pieces that require less intricate knife work while still delivering exceptional results.

Why did Gordon Ramsay apologize?

Ramsay has apologized for various controversial moments throughout his career, particularly regarding his intense kitchen management style. However, his commitment to culinary excellence remains unchanged. The techniques behind this Gordon Ramsay Texas Chili demonstrate his dedication to proper cooking methods, even when adapting traditional recipes to modern kitchens and safety standards.

What does Gordon Ramsay think of chilis?

Ramsay appreciates chili as a dish that showcases technique through simplicity, emphasizing proper ingredient preparation and flavor development. He advocates for building heat gradually rather than overwhelming the palate. This philosophy drives the balanced approach in this Gordon Ramsay Texas Chili, where each chile variety contributes specific characteristics rather than just adding indiscriminate heat.

Why was Gordon Ramsay stripped of Michelin stars?

Ramsay lost Michelin stars at various restaurants due to inconsistency in food quality and service standards, not personal failings. Michelin standards require absolute consistency, which inspired my approach to this recipe. Every batch of this authentic Mexican pozole and Gordon Ramsay Texas Chili should meet the same exacting standards through proper technique and attention to detail.

This Gordon Ramsay Texas Chili recipe brings professional techniques into your home kitchen, creating memorable meals that bring people together around the table.

Stay safe,
Jack Sullivan

Gordon Ramsay Chocolate Lava Cake isn’t just another dessert—it’s a testament to precision cooking that I learned to appreciate after years of following strict protocols in the firehouse kitchen. When you’re feeding a crew that’s just battled a five-alarm blaze, you need desserts that deliver both comfort and perfection. This iconic molten chocolate cake demands the same level of attention to detail as any emergency response. The difference between a spectacular dessert and a collapsed disappointment often comes down to timing and technique. According to the USDA food safety guidelines, proper baking temperatures are crucial for both safety and quality. I’ve also found that mastering this chocolate soufflé recipe helps build the foundational skills needed for lava cake success.

Why This Gordon Ramsay Chocolate Lava Cake Recipe Works (And Where Most Go Wrong)

After watching countless home cooks struggle with Gordon Ramsay Chocolate Lava Cake, I’ve identified three critical principles that separate success from disaster. First, temperature control is everything—your oven must be precisely calibrated and your ramekins need to be at room temperature before filling. I learned this lesson during my firefighting days when we had to maintain exact temperatures for equipment calibration.

The Butter-to-Chocolate Ratio

The most common mistake I see is using the wrong chocolate-to-butter ratio. Gordon’s technique requires equal parts high-quality dark chocolate and unsalted butter, creating the perfect viscosity for that signature molten center. Too much butter makes it greasy; too little makes it seize.

Timing Is Non-Negotiable

The second principle involves precise timing. Unlike a firehouse chili that can simmer all day, Gordon Ramsay Chocolate Lava Cake requires exact baking times. Thirty seconds too long and you’ve got regular chocolate cake; thirty seconds too short and you’ve got soup. Serious Eats explains the science behind this delicate balance beautifully.

Ingredients That Actually Matter for Gordon Ramsay Chocolate Lava Cake

Fresh ingredients for making Gordon Ramsay Chocolate Lava Cake

Quality ingredients aren’t just chef snobbery—they’re the foundation of success with Gordon Ramsay Chocolate Lava Cake. I learned this principle in the firehouse, where subpar equipment could mean the difference between life and death. The same attention to quality applies here.

Dark chocolate with 70% cocoa content provides the intense flavor and proper melting characteristics you need. Cheaper chocolate contains stabilizers that prevent proper melting. European butter, with its higher fat content, creates the silky texture that makes this dessert restaurant-worthy. Fresh eggs are crucial—older eggs won’t incorporate properly and can cause the centers to collapse.

For the flour, use cake flour if possible. Its lower protein content prevents the tough, chewy texture that can ruin the delicate crumb structure. If you only have all-purpose flour, you can create a substitute by removing two tablespoons per cup and replacing with cornstarch. This technique also works well for other delicate baked goods like my vanilla bean panna cotta recipe.

Step-by-Step Instructions for Gordon Ramsay Chocolate Lava Cake

Preparation Phase

Preheat your oven to 425°F—this temperature is non-negotiable for Gordon Ramsay Chocolate Lava Cake success. Generously butter four 6-ounce ramekins, then dust with cocoa powder, tapping out excess. This creates a non-stick surface that also adds extra chocolate flavor.

Creating the Base

In a double boiler, melt 4 ounces of dark chocolate with 4 tablespoons of unsalted butter. Never let water touch the chocolate directly—even a single drop will cause it to seize and become unusable. Stir constantly until smooth, then remove from heat and let cool for 2 minutes.

Building the Batter

Whisk 2 whole eggs plus 2 egg yolks with 1/4 cup granulated sugar until thick and pale—about 3 minutes of vigorous whisking. The mixture should fall in ribbons when lifted. Slowly fold in the melted chocolate mixture, being careful not to deflate the eggs. Gently fold in 2 tablespoons of cake flour until just combined.

The Critical Baking Phase

Divide batter evenly among prepared ramekins—they should be about 3/4 full. Bake for exactly 12 minutes for a molten center, or 14 minutes for a slightly firmer center. The tops should be firm and the sides should be pulling away slightly from the ramekins. According to FDA safe food handling guidelines, internal temperature should reach at least 160°F for egg safety. You can find similar precision techniques in my crème brûlée recipe.

Pro-Tips That Change the Game

  • Make the batter up to 4 hours ahead and refrigerate—just add 2 extra minutes to baking time
  • Place a small square of additional chocolate in the center before baking for an extra molten surprise
  • Run a thin knife around edges immediately after baking to prevent sticking
  • Let rest for exactly 1 minute before inverting—this prevents collapse while ensuring easy release
  • Dust with powdered sugar through a fine mesh sieve for that professional presentation
  • Serve with a quenelle of vanilla ice cream or fresh berries for temperature contrast

Storage & Leftovers for Gordon Ramsay Chocolate Lava Cake

Gordon Ramsay Chocolate Lava Cake is best served immediately, but you can prepare the batter up to 4 hours in advance and refrigerate in the ramekins. Cover tightly with plastic wrap to prevent skin formation. If you have leftovers, they’ll keep refrigerated for up to 2 days, though the molten center will be lost.

To reheat, microwave for 20-30 seconds or place in a 350°F oven for 3-4 minutes. The texture won’t be identical to fresh, but it’s still delicious. From a food safety perspective, the FDA recommends consuming egg-based desserts within 2 days when properly refrigerated.

Close-up of finished Gordon Ramsay Chocolate Lava Cake plated and ready to serve
Jack Sullivan

Gordon Ramsay Chocolate Lava Cake

A testament to precision cooking that delivers comfort and perfection. This iconic molten chocolate cake demands attention to detail with exact timing and technique for that signature molten center.
Prep Time 15 minutes
Cook Time 12 minutes
Total Time 27 minutes
Servings: 4 servings
Course: Dessert
Cuisine: French
Calories: 385

Ingredients
  

  • 4 oz dark chocolate 70% cocoa content
  • 4 tbsp unsalted butter European butter preferred
  • 2 whole eggs fresh
  • 2 egg yolks
  • 1/4 cup granulated sugar
  • 2 tbsp cake flour
  • butter for greasing ramekins
  • cocoa powder for dusting ramekins

Equipment

  • 4 6-ounce ramekins
  • 1 Double boiler
  • 1 Whisk
  • 1 Fine-mesh sieve

Method
 

  1. 1️⃣ Preheat oven to 425°F. Generously butter four 6-ounce ramekins, then dust with cocoa powder, tapping out excess.
  2. 2️⃣ In a double boiler, melt 4 ounces of dark chocolate with 4 tablespoons of unsalted butter. Never let water touch the chocolate directly. Stir constantly until smooth, then remove from heat and let cool for 2 minutes.
  3. 3️⃣ Whisk 2 whole eggs plus 2 egg yolks with 1/4 cup granulated sugar until thick and pale—about 3 minutes of vigorous whisking. The mixture should fall in ribbons when lifted.
  4. 4️⃣ Slowly fold in the melted chocolate mixture, being careful not to deflate the eggs. Gently fold in 2 tablespoons of cake flour until just combined.
  5. 5️⃣ Divide batter evenly among prepared ramekins—they should be about 3/4 full. Bake for exactly 12 minutes for a molten center, or 14 minutes for a slightly firmer center.
  6. 6️⃣ Run a thin knife around edges immediately after baking. Let rest for exactly 1 minute before inverting. Dust with powdered sugar and serve immediately.

Nutrition

Serving: 1gCalories: 385kcalCarbohydrates: 28gProtein: 8gFat: 28gSaturated Fat: 16gPolyunsaturated Fat: 1gMonounsaturated Fat: 8gCholesterol: 185mgSodium: 45mgPotassium: 220mgFiber: 4gSugar: 22gVitamin A: 15IUCalcium: 4mgIron: 12mg

Notes

Make the batter up to 4 hours ahead and refrigerate—just add 2 extra minutes to baking time. Place a small square of additional chocolate in the center before baking for an extra molten surprise. Serve with a quenelle of vanilla ice cream or fresh berries for temperature contrast. The difference between success and disaster comes down to timing and technique—thirty seconds too long and you’ve got regular chocolate cake; thirty seconds too short and you’ve got soup.

Tried this recipe?

Let us know how it was!

Frequently Asked Questions About Gordon Ramsay Chocolate Lava Cake

What is Gordon Ramsay’s signature dessert?

While Gordon Ramsay has many famous desserts, his chocolate lava cake is considered one of his signature creations due to its perfect balance of technique and indulgence. The dessert showcases his emphasis on precise timing and quality ingredients, making it a favorite in his restaurants worldwide.

Is chocolate lava cake not just undercooked chocolate cake?

Absolutely not—Gordon Ramsay Chocolate Lava Cake is specifically engineered for its molten center through careful ratios and timing. Regular chocolate cake batter would either be unsafe if undercooked or would fully set if properly baked. The lava cake uses specific egg and chocolate ratios to create a custard-like center that’s food-safe.

What is the fancy name for chocolate lava cake?

The formal French name is “moelleux au chocolat” or “fondant au chocolat,” meaning “soft chocolate” or “melting chocolate.” In fine dining establishments, it’s often called “chocolate coulant” or “molten chocolate cake.” Gordon Ramsay Chocolate Lava Cake represents the refined version of this classic French dessert.

Mastering Gordon Ramsay Chocolate Lava Cake takes practice, but the reward of that perfect molten center makes every attempt worthwhile. Remember, cooking is about patience, precision, and learning from each experience—principles that served me well both in the firehouse and the kitchen.

Stay safe,
Jack Sullivan

Gordon Ramsay Cucumber Salad mastery starts with understanding one critical truth that most home cooks miss completely. After 15 years fighting fires and countless hours perfecting kitchen techniques, I’ve learned that the difference between a soggy mess and a restaurant-quality salad lies in proper preparation and timing. Chef Ramsay’s approach to this seemingly simple dish reveals the same precision and attention to detail that makes his restaurants legendary. According to the USDA’s dietary guidelines, incorporating fresh vegetables like cucumbers into our daily meals provides essential nutrients and hydration. This Gordon Ramsay Cucumber Salad technique transforms an ordinary side dish into something truly spectacular, and I’m excited to share the professional secrets that will elevate your cooking game.

Why This Gordon Ramsay Cucumber Salad Recipe Works (And Where Most Go Wrong)

The genius behind Gordon Ramsay’s approach to cucumber salad lies in three fundamental principles that separate amateur attempts from professional results. First, proper moisture extraction is absolutely critical – most home cooks skip the salting step or don’t give it enough time, resulting in a watery disaster that dilutes all the flavors. Second, the balance of acidity and fat creates a harmonious flavor profile that makes each bite memorable rather than forgettable. According to Serious Eats’ Food Lab, the science behind cucumber preparation directly impacts the final texture and taste.

The third principle involves timing – this Gordon Ramsay Cucumber Salad requires strategic preparation where each component is added at the precise moment for maximum impact. Most people throw everything together at once, but professional chefs understand that layering flavors and controlling moisture happens in stages. The common mistakes I see repeatedly include using the wrong cucumber variety, inadequate salting time, over-dressing the salad, and serving it at the wrong temperature.

Ingredients That Actually Matter for Gordon Ramsay Cucumber Salad

Fresh ingredients for making Gordon Ramsay Cucumber Salad

English cucumbers are your best choice for this Gordon Ramsay Cucumber Salad because they contain fewer seeds and have a thinner, less bitter skin that doesn’t require peeling. Look for firm cucumbers without soft spots or yellowing – fresh cucumbers should feel heavy for their size and have a bright green color. The skin should have a slight shine without any wrinkled areas.

Kosher salt or sea salt works better than table salt for the initial moisture extraction process because the larger crystals draw out water more effectively. For the dressing, high-quality rice vinegar provides the perfect acidity level without overwhelming the delicate cucumber flavor. Extra virgin olive oil adds richness, while fresh dill brings that signature brightness that makes this salad memorable. White or yellow onion, sliced paper-thin, contributes a sharp bite that complements the cool cucumbers perfectly.

If you can’t find English cucumbers, regular cucumbers work as substitutions, but you’ll need to peel them and remove the seeds to avoid bitterness. Rice vinegar can be replaced with white wine vinegar in a pinch, though you might want to add a tiny pinch of sugar to balance the acidity. For more ingredient guidance, check out this comprehensive ingredient selection guide that covers quality indicators for fresh produce.

Step-by-Step Instructions for Gordon Ramsay Cucumber Salad

Phase 1: Cucumber Preparation

Start by washing 2-3 English cucumbers thoroughly under cold running water. Using a sharp knife, slice the cucumbers into thin rounds, approximately 1/8-inch thick – consistency is key for even flavor distribution. **Always use a sharp knife when slicing to prevent slipping and potential cuts.** Place the sliced cucumbers in a large colander set over a bowl.

Sprinkle 2 tablespoons of kosher salt evenly over the cucumber slices, then toss gently with your hands to ensure every piece is coated. Let the salted cucumbers sit for exactly 30 minutes – this timing is crucial for proper moisture extraction without over-salting. You’ll notice water pooling in the bowl beneath, which is exactly what we want.

Phase 2: Rinsing and Drying

After 30 minutes, rinse the cucumber slices thoroughly under cold running water for at least 60 seconds, tossing them with your hands to remove all salt residue. **Taste a piece to ensure no residual saltiness remains before proceeding.** Pat the cucumbers completely dry using clean kitchen towels or paper towels – any remaining moisture will dilute your dressing.

Phase 3: Assembly and Dressing

In a large mixing bowl, combine the dried cucumber slices with 1/2 small onion, sliced paper-thin. For the dressing, whisk together 3 tablespoons rice vinegar, 2 tablespoons extra virgin olive oil, 1 teaspoon sugar, and 1/4 teaspoon freshly ground black pepper. Pour the dressing over the cucumbers and onions, then add 2 tablespoons fresh chopped dill. Toss everything gently but thoroughly to coat evenly. This Gordon Ramsay Cucumber Salad technique ensures every bite has balanced flavor. For more knife skills guidance, reference this knife safety and techniques guide.

Pro-Tips That Change the Game

  • Chill your serving bowl in the refrigerator for 15 minutes before assembling – cold bowls help maintain the salad’s crisp texture longer
  • Add the dressing in two stages: half immediately after assembly, then the remaining half just before serving to prevent over-wilting
  • Use a mandoline slicer for perfectly uniform cucumber thickness, but **always use the hand guard to prevent serious cuts**
  • Reserve some fresh dill for garnishing just before serving – it adds visual appeal and aromatic impact
  • Taste and adjust seasoning after 10 minutes of marinating, as flavors develop and you might need a touch more vinegar or pepper
  • Serve this Gordon Ramsay Cucumber Salad within 2 hours of assembly for optimal texture and flavor balance

Storage & Leftovers for Gordon Ramsay Cucumber Salad

Store any leftover Gordon Ramsay Cucumber Salad in an airtight container in the refrigerator for up to 24 hours maximum. Beyond this timeframe, the cucumbers will become too soft and lose their appealing crunch. Before serving leftovers, drain any accumulated liquid at the bottom of the container and add a sprinkle of fresh dill to refresh the flavors.

This salad doesn’t freeze well due to the high water content in cucumbers, which creates ice crystals that destroy the texture completely. For food safety, always keep the salad refrigerated at 40°F or below, and never leave it at room temperature for more than 2 hours. The FDA’s safe food handling guidelines emphasize the importance of proper temperature control for fresh vegetable dishes.

Close-up of finished Gordon Ramsay Cucumber Salad plated and ready to serve
Jack Sullivan

Gordon Ramsay Cucumber Salad

Professional chef technique for cucumber salad featuring proper moisture extraction, perfect flavor balance, and restaurant-quality results. Master the three fundamental principles that separate amateur attempts from professional results.
Prep Time 45 minutes
Total Time 45 minutes
Servings: 6 servings
Course: Salad
Cuisine: british
Calories: 45

Ingredients
  

  • 2-3 large English cucumbers sliced into 1/8-inch rounds
  • 2 tablespoons kosher salt for moisture extraction
  • 1/2 small onion sliced paper-thin
  • 3 tablespoons rice vinegar
  • 2 tablespoons extra virgin olive oil
  • 1 teaspoon sugar
  • 1/4 teaspoon freshly ground black pepper
  • 2 tablespoons fresh dill chopped, plus extra for garnish

Equipment

  • 1 – Sharp knife For uniform slicing
  • 1 Large colander Set over bowl
  • 1 – Large mixing bowl Chill for 15 minutes
  • 1 Whisk For dressing

Method
 

  1. 1️⃣ Wash 2-3 English cucumbers thoroughly under cold running water. Using a sharp knife, slice cucumbers into thin rounds, approximately 1/8-inch thick for consistent flavor distribution.
  2. 2️⃣ Place sliced cucumbers in a large colander set over a bowl. Sprinkle 2 tablespoons kosher salt evenly over cucumber slices and toss gently to coat every piece.
  3. 3️⃣ Let salted cucumbers sit for exactly 30 minutes for proper moisture extraction. You’ll notice water pooling in the bowl beneath, which is exactly what we want.
  4. 4️⃣ After 30 minutes, rinse cucumber slices thoroughly under cold running water for at least 60 seconds, tossing with hands to remove all salt residue. Taste a piece to ensure no residual saltiness remains.
  5. 5️⃣ Pat cucumbers completely dry using clean kitchen towels or paper towels. Any remaining moisture will dilute your dressing.
  6. 6️⃣ In a large mixing bowl (chilled for 15 minutes), combine dried cucumber slices with 1/2 small onion, sliced paper-thin.
  7. 7️⃣ For the dressing, whisk together rice vinegar, olive oil, sugar, and freshly ground black pepper until well combined.
  8. 8️⃣ Pour dressing over cucumbers and onions, add chopped fresh dill, and toss everything gently but thoroughly to coat evenly. Serve within 2 hours for optimal texture.

Nutrition

Serving: 1gCalories: 45kcalCarbohydrates: 8gProtein: 1gFat: 5gSaturated Fat: 1gMonounsaturated Fat: 3gSodium: 95mgPotassium: 195mgFiber: 2gSugar: 6gVitamin A: 2IUVitamin C: 8mgCalcium: 25mg

Notes

Chill your serving bowl for 15 minutes before assembling for longer-lasting crispness. Add dressing in two stages for best results. Use a mandoline slicer for uniform thickness but always use the hand guard for safety. Reserve some fresh dill for garnishing just before serving. Taste and adjust seasoning after 10 minutes of marinating as flavors develop.

Tried this recipe?

Let us know how it was!

Frequently Asked Questions About Gordon Ramsay Cucumber Salad

What are 5 interesting facts about Gordon Ramsay?

Gordon Ramsay originally trained as a professional soccer player before his knee injury led him to culinary arts. He holds 16 Michelin stars across his restaurant empire and has completed multiple marathons and Ironman competitions. Ramsay served as a volunteer firefighter in his early career, which resonates with my own firefighting background. He’s appeared in over 20 television shows worldwide and owns more than 35 restaurants globally, making him one of the most successful celebrity chefs in history.

How to stop cucumber salad from going soggy?

The key to preventing soggy Gordon Ramsay Cucumber Salad is proper salt treatment and timing. Salt the sliced cucumbers for exactly 30 minutes to extract excess moisture, then rinse thoroughly and pat completely dry. Add dressing in stages rather than all at once, and serve within 2 hours of assembly. Using English cucumbers instead of regular ones also helps maintain crispness longer due to their lower water content and fewer seeds.

What is Gordon Ramsay’s most famous dish?

Gordon Ramsay’s Beef Wellington is widely considered his signature dish and the one that built his culinary reputation. This complex dish features beef tenderloin coated with mushroom duxelles and wrapped in puff pastry. However, his perfectly scrambled eggs technique and this refreshing Gordon Ramsay Cucumber Salad demonstrate his mastery extends far beyond elaborate entrees to simple, perfectly executed basics that showcase fundamental cooking skills.

Why soak cucumbers in salt water before making cucumber salad?

Salting cucumbers draws out excess water through osmosis, preventing the salad from becoming watery and diluted. This process, called maceration, concentrates the cucumber’s natural flavors while creating space for the dressing to penetrate properly. Without this crucial step, your Gordon Ramsay Cucumber Salad will lack the crisp texture and vibrant taste that makes it restaurant-quality. The 30-minute salting time is optimal for moisture removal without over-processing.

This Gordon Ramsay Cucumber Salad recipe proves that simple doesn’t mean easy – it requires technique, timing, and attention to detail. Master these fundamentals, and you’ll create a side dish that rivals any high-end restaurant.

Stay safe,
Jack Sullivan

Gordon Ramsay Lemon Tart represents the pinnacle of pastry precision—something I learned the hard way when I tried replicating it after watching Hell’s Kitchen reruns during my firefighting days. Back then, between 24-hour shifts, I’d experiment with elaborate desserts, thinking my steady hands from emergency work would translate perfectly to delicate pastries. I was wrong. My first attempt looked more like scrambled lemon eggs in a burnt shell. But here’s what I discovered: this isn’t just about following steps—it’s about understanding the science behind each component. According to the FDA’s food safety guidelines, proper temperature control is crucial for custard-based desserts, and this classic French custard technique demands respect for both tradition and food safety.

Why This Gordon Ramsay Lemon Tart Recipe Works (And Where Most Go Wrong)

The Gordon Ramsay Lemon Tart succeeds because it balances three critical elements that most home bakers overlook. First, temperature control throughout every stage—from the pastry cream to the final bake—prevents the dreaded split that ruins countless tarts. Most people rush this process, but professional kitchens know that patience creates perfection.

The Pastry Foundation Principle

Gordon’s approach starts with a proper pâte sucrée that’s blind-baked to golden perfection. The common mistake? Under-baking the shell, which leads to a soggy bottom that can’t support the lemon filling. According to Serious Eats’ pastry science research, proper gluten development and moisture control are essential for structural integrity.

The Emulsion Mastery

The second principle involves creating a stable emulsion between eggs, butter, and lemon juice. When this fails, you get that grainy, separated texture that screams amateur hour. Professional technique demands adding hot ingredients gradually while whisking constantly—a lesson I learned after ruining several batches in my early cooking adventures.

Ingredients That Actually Matter for Gordon Ramsay Lemon Tart

Fresh ingredients for making Gordon Ramsay Lemon Tart

Quality ingredients make the difference between restaurant-worthy Gordon Ramsay Lemon Tart and a disappointing dessert. Fresh lemons are non-negotiable—you need both zest and juice, and bottled simply won’t deliver the bright, complex flavor profile this recipe demands. Look for lemons that feel heavy for their size with smooth, unblemished skin.

European-style butter with higher fat content creates the silky texture Gordon’s known for. The extra butterfat helps create that luxurious mouthfeel that separates professional desserts from home versions. Free-range eggs with deep orange yolks provide richness and help achieve that beautiful golden color that makes this tart so visually appealing.

Your pastry flour choice matters too. I recommend using a combination of all-purpose and pastry flour for the shell, which creates the perfect balance of structure and tenderness. For the filling, superfine sugar dissolves more readily than granulated, preventing any grittiness in your final product. If you can’t find superfine sugar, pulse regular sugar in a food processor until finely ground—a technique I picked up from this comprehensive professional pastry fundamentals guide.

Step-by-Step Instructions for Gordon Ramsay Lemon Tart

Preparing the Pastry Shell

Begin by combining 200g plain flour, 100g butter (cold and cubed), 50g caster sugar, and one egg yolk in a food processor. Pulse until the mixture resembles breadcrumbs, then add 2-3 tablespoons of cold water gradually until dough forms. **Warning: Overworking the dough will create a tough crust—pulse only until ingredients just come together.** Wrap in plastic and refrigerate for at least 30 minutes.

Blind Baking to Perfection

Roll the chilled dough between parchment sheets to prevent sticking. Line a 23cm tart tin, trim excess, and prick the base with a fork. Line with parchment and fill with baking beans. **Critical safety note: Always use oven mitts when handling hot baking beans—they retain extreme heat and can cause serious burns.** Bake at 200°C for 15 minutes, remove beans and parchment, then continue baking for 8-10 minutes until golden. This technique ensures a crisp base that won’t become soggy.

Creating the Lemon Filling

For the Gordon Ramsay Lemon Tart filling, whisk 4 large eggs with 200g caster sugar until pale. Add the zest of 4 lemons and 150ml fresh lemon juice—this ratio provides the perfect balance of tartness and sweetness. Gradually whisk in 200ml double cream, ensuring smooth incorporation. **Essential technique: Strain the mixture through a fine sieve to remove any lumps or zest pieces that could create texture issues.**

The Final Assembly

Pour the strained filling into your pre-baked shell while it’s still warm—this helps prevent the dreaded soggy bottom. Reduce oven temperature to 140°C and bake for 25-30 minutes until the center has a slight wobble when gently shaken. **Temperature precision is crucial here—too hot and the filling will curdle; too cool and it won’t set properly.** For detailed temperature techniques, reference this precision baking temperature guide.

Pro-Tips That Change the Game

  • Use a kitchen torch to caramelize the surface lightly after cooling—Gordon’s signature technique for added visual appeal and slight textural contrast
  • Chill your mixing bowl and whisk for 15 minutes before making the filling; this prevents premature curdling when combining ingredients
  • Test lemon acidity by tasting—some lemons are more acidic than others, and you may need to adjust sugar accordingly
  • Place the tart tin on a preheated baking sheet during the final bake to ensure even bottom heat distribution
  • Let the tart cool at room temperature for exactly 2 hours before refrigerating—this prevents condensation from forming on the surface
  • Score serving portions with a sharp knife while the filling is still slightly warm for clean cuts later

Storage & Leftovers for Gordon Ramsay Lemon Tart

Store your Gordon Ramsay Lemon Tart covered in the refrigerator for up to 3 days maximum. The pastry shell will gradually lose its crispness, but proper storage helps maintain quality. Use a cake dome or loose plastic wrap—avoid tight coverings that can create moisture buildup and ruin the surface texture.

Never leave this tart at room temperature for more than 2 hours due to the egg-based filling, which can harbor dangerous bacteria in the temperature danger zone. According to FDA food safety guidelines, dairy and egg-based desserts require consistent refrigeration. For best results, remove from refrigeration 15 minutes before serving to take the chill off the filling while maintaining food safety standards.

Close-up of finished Gordon Ramsay Lemon Tart plated and ready to serve
Jack Sullivan

Gordon Ramsay Lemon Tart

A restaurant-quality lemon tart that balances three critical elements: proper temperature control, perfect pastry foundation, and stable emulsion technique. This recipe transforms an intimidating dessert into an achievable home kitchen masterpiece.
Prep Time 45 minutes
Cook Time 55 minutes
Total Time 1 hour 40 minutes
Servings: 8 servings
Course: Dessert
Cuisine: French
Calories: 385

Ingredients
  

  • 200 g plain flour
  • 100 g butter cold and cubed
  • 50 g caster sugar
  • 1 egg yolk
  • 2-3 tablespoons cold water
  • 4 large eggs
  • 200 g caster sugar
  • 4 lemons zested
  • 150 ml fresh lemon juice
  • 200 ml double cream

Equipment

  • 1 23cm tart tin
  • 1 Food processor
  • 1 fine sieve
  • 1 baking beans
  • 1 Kitchen torch optional for caramelizing

Method
 

  1. 1️⃣ Combine 200g plain flour, 100g cold cubed butter, 50g caster sugar, and one egg yolk in a food processor. Pulse until mixture resembles breadcrumbs, then gradually add 2-3 tablespoons cold water until dough forms. Wrap in plastic and refrigerate for at least 30 minutes.
  2. 2️⃣ Roll chilled dough between parchment sheets. Line a 23cm tart tin, trim excess, and prick the base with a fork. Line with parchment and fill with baking beans.
  3. 3️⃣ Bake at 200°C for 15 minutes, remove beans and parchment, then continue baking for 8-10 minutes until golden. Use oven mitts when handling hot baking beans.
  4. 4️⃣ Whisk 4 large eggs with 200g caster sugar until pale. Add zest of 4 lemons and 150ml fresh lemon juice. Gradually whisk in 200ml double cream.
  5. 5️⃣ Strain the filling mixture through a fine sieve to remove lumps or zest pieces that could create texture issues.
  6. 6️⃣ Pour strained filling into the warm pre-baked shell. Reduce oven temperature to 140°C and bake for 25-30 minutes until center has slight wobble when gently shaken.
  7. 7️⃣ Cool at room temperature for exactly 2 hours before refrigerating. Optionally, use kitchen torch to lightly caramelize surface before serving.

Nutrition

Serving: 1gCalories: 385kcalCarbohydrates: 45gProtein: 8gFat: 20gSaturated Fat: 12gPolyunsaturated Fat: 1gMonounsaturated Fat: 5gCholesterol: 165mgSodium: 85mgPotassium: 125mgFiber: 1gSugar: 35gVitamin A: 185IUVitamin C: 15mgCalcium: 65mgIron: 2mg

Notes

Use a kitchen torch to caramelize the surface lightly after cooling for added visual appeal. Chill mixing bowl and whisk for 15 minutes before making filling to prevent curdling. Test lemon acidity and adjust sugar accordingly. Place tart tin on preheated baking sheet during final bake for even heat distribution. Score serving portions while filling is slightly warm for clean cuts.

Tried this recipe?

Let us know how it was!

Frequently Asked Questions About Gordon Ramsay Lemon Tart

How long does it take for a lemon tart to cool?

A properly made Gordon Ramsay Lemon Tart needs exactly 2 hours at room temperature to cool completely before refrigeration. This timing allows the filling to set properly without creating condensation. Rushing this process by refrigerating too early will result in a weepy surface that ruins the presentation and texture.

Why does lemon tart split?

Lemon tart filling splits when proteins coagulate too quickly due to excessive heat or temperature shock. This happens when you add hot ingredients too rapidly to eggs, or when the oven temperature exceeds 150°C during the final bake. Gradual temperature changes and constant whisking prevent this common disaster.

How long does a lemon tart take to cook?

The complete Gordon Ramsay Lemon Tart requires 23-25 minutes for blind baking the shell, plus an additional 25-30 minutes for the filled tart at 140°C. Total active baking time is approximately 50-55 minutes, not including cooling periods. Proper timing ensures both crisp pastry and perfectly set filling.

Who invented the lemon tart?

While lemon tarts have French origins dating to the 17th century, Gordon Ramsay’s version represents a modern refinement of classic techniques. Traditional French pâtissiers developed the foundation, but contemporary chefs like Ramsay elevated the recipe through precise temperature control and refined ingredient ratios that create superior texture and flavor balance.

This Gordon Ramsay Lemon Tart recipe transforms what seems like an intimidating restaurant dessert into something achievable in your home kitchen. With attention to temperature, timing, and technique, you’ll create a dessert that rivals any high-end establishment.

Stay safe,
Jack Sullivan

Gordon Ramsay Crab linguine transforms an ordinary Tuesday dinner into something that would make your neighbors peek over the fence wondering what smells so incredible. After 20 years of feeding hungry firefighters who could smell a mediocre meal from three stations away, I’ve learned that this particular dish separates the confident cooks from those still afraid of their own kitchen. The combination of sweet crab meat, perfectly al dente pasta, and that signature Ramsay technique creates a restaurant-quality experience that’s surprisingly achievable at home. According to the FDA’s seafood safety guidelines, fresh crab is not only delicious but packed with lean protein and essential minerals. I first attempted this Gordon Ramsay recipe after watching him demonstrate it with the kind of precision we used to maintain our equipment at the station.

Why This Gordon Ramsay Crab linguine Recipe Works (And Where Most Go Wrong)

The genius behind Gordon Ramsay Crab linguine lies in three fundamental principles that most home cooks completely overlook. First, the pasta water becomes a crucial ingredient rather than something you dump down the drain. Ramsay’s technique involves reserving that starchy, salty water to create a silky emulsion that binds everything together. Second, the crab meat gets added at precisely the right moment – too early and it becomes rubbery, too late and it doesn’t integrate with the other flavors.

The Temperature Control Factor

Most people massacre this dish by cranking the heat too high, which turns delicate crab meat into expensive rubber bands. The secret is maintaining medium heat throughout the sauce-building process, allowing the flavors to develop gradually. This controlled approach, similar to techniques explained by culinary science experts, ensures the proteins don’t seize up. Third, the timing coordination between pasta cooking and sauce preparation requires the same split-second precision we needed during emergency calls – everything must come together simultaneously for optimal results.

Ingredients That Actually Matter for Gordon Ramsay Crab linguine

Fresh ingredients for making Gordon Ramsay Crab linguine

Quality ingredients make the difference between impressive Gordon Ramsay Crab linguine and something that tastes like it came from a tourist trap restaurant. Fresh crab meat should smell like clean ocean water, never fishy or ammonia-like. Look for meat that’s firm to the touch with a sweet, briny aroma. Dungeness or blue crab work beautifully, but avoid imitation crab which lacks the delicate texture this dish demands.

The linguine itself needs enough surface area to hold the sauce – cheap, thin pasta turns mushy and won’t support the weight of the crab and aromatics. Bronze-cut pasta varieties provide the perfect rough texture for sauce adherence. Fresh garlic, quality olive oil, and real Italian white wine create the flavor foundation. Don’t substitute cooking wine; you need something you’d actually drink. Fresh parsley, lemon, and a touch of red pepper flakes complete the flavor profile. For wine pairing guidance and complementary dishes, check out this comprehensive seafood pasta guide that covers various preparation methods.

Step-by-Step Instructions for Gordon Ramsay Crab linguine

Preparation Phase

Start by bringing a large pot of water to boil – and I mean large, at least 6 quarts for a pound of pasta. Salt it generously until it tastes like mild seawater. Pick through your crab meat carefully, removing any shell fragments while keeping the pieces as large as possible. Mince 4 cloves of fresh garlic, chop a handful of flat-leaf parsley, and have everything within arm’s reach.

The Pasta Cooking Process

Never add oil to your pasta water – this prevents sauce adhesion and ruins the final dish. Drop the linguine into the boiling water and cook for exactly 2 minutes less than the package directions suggest. This ensures it finishes cooking in the sauce, absorbing maximum flavor. Reserve 2 cups of pasta water before draining – this starchy liquid becomes your secret weapon for sauce consistency.

Building the Sauce

Heat 3 tablespoons olive oil in a large skillet over medium heat. Add minced garlic and cook for 30 seconds until fragrant but not brown. Burned garlic will make the entire dish bitter – keep the heat moderate and watch constantly. Pour in ½ cup white wine, letting it reduce by half. The alcohol needs to cook off completely, which takes about 2-3 minutes of active bubbling.

The Final Assembly

Add the drained linguine directly to the skillet with sauce. Toss vigorously while gradually adding pasta water, creating a glossy emulsion that coats each strand. Gently fold in the crab meat, fresh parsley, lemon zest, and a pinch of red pepper flakes. Do not stir aggressively at this point – rough handling will break apart the delicate crab meat. The entire finishing process should take no more than 2 minutes to prevent overcooking the seafood. For additional seafood preparation techniques, reference this detailed seafood cooking guide that covers various shellfish handling methods.

Pro-Tips That Change the Game

  • Warm your serving bowls in a 200°F oven for 5 minutes – hot pasta deserves hot plates, and this keeps the dish at optimal temperature
  • Add a tablespoon of butter at the very end for restaurant-level glossiness and richness that makes the sauce cling perfectly
  • Toast the garlic slices instead of mincing for a nuttier, more complex flavor profile that won’t overpower the delicate crab
  • Use kitchen tongs to toss the pasta – they provide better control than spoons and prevent breaking the linguine strands
  • Finish with a drizzle of high-quality extra virgin olive oil for aromatic complexity that elevates the entire dish
  • Serve immediately on warmed plates – this dish waits for no one and tastes best within 2 minutes of plating

Storage & Leftovers for Gordon Ramsay Crab linguine

Unfortunately, Gordon Ramsay Crab linguine doesn’t store well due to the delicate nature of both pasta and crab meat. The linguine continues absorbing moisture and becomes mushy, while the crab meat can develop an unpleasant texture when reheated. If you absolutely must store leftovers, refrigerate them immediately in airtight containers for no more than 24 hours.

For reheating, add a splash of white wine or seafood stock to a cold skillet, add the leftover pasta, and warm gently over low heat while stirring constantly. Never microwave this dish – it will turn the crab rubbery and create uneven heating. According to FDA food safety guidelines, seafood dishes should be consumed within one day of preparation for optimal safety and quality.

Close-up of finished Gordon Ramsay Crab linguine plated and ready to serve
Jack Sullivan

Gordon Ramsay Crab linguine

Gordon Ramsay Crab linguine transforms an ordinary Tuesday dinner into something that would make your neighbors peek over the fence wondering what smells so incredible. The combination of sweet crab meat, perfectly al dente pasta, and that signature Ramsay technique creates a restaurant-quality experience that’s surprisingly achievable at home.
Prep Time 15 minutes
Cook Time 20 minutes
Total Time 35 minutes
Servings: 4 servings
Course: Main Course
Cuisine: Italian
Calories: 485

Ingredients
  

  • 1 lb linguine pasta bronze-cut preferred
  • 1 lb fresh crab meat picked through for shells
  • 4 cloves fresh garlic minced
  • 3 tbsp olive oil extra virgin
  • 1/2 cup white wine dry, drinking quality
  • 1 handful fresh parsley flat-leaf, chopped
  • 1 lemon lemon zest freshly grated
  • 1 pinch red pepper flakes
  • 1 tbsp butter for finishing
  • to taste salt for pasta water

Equipment

  • 1 Large Pot for boiling pasta
  • 1 Large Skillet for sauce
  • 1 Kitchen tongs for tossing pasta

Method
 

  1. 1️⃣ Bring a large pot of water (at least 6 quarts) to boil and salt generously until it tastes like mild seawater. Pick through crab meat carefully, removing any shell fragments while keeping pieces as large as possible.
  2. 2️⃣ Mince 4 cloves of fresh garlic, chop parsley, and have all ingredients within arm’s reach. Warm serving bowls in a 200°F oven for 5 minutes.
  3. 3️⃣ Drop linguine into boiling water and cook for exactly 2 minutes less than package directions suggest. Reserve 2 cups of pasta water before draining.
  4. 4️⃣ Heat 3 tablespoons olive oil in a large skillet over medium heat. Add minced garlic and cook for 30 seconds until fragrant but not brown – burned garlic will make the dish bitter.
  5. 5️⃣ Pour in white wine, letting it reduce by half (about 2-3 minutes of active bubbling). The alcohol needs to cook off completely.
  6. 6️⃣ Add drained linguine directly to the skillet with sauce. Toss vigorously while gradually adding pasta water, creating a glossy emulsion that coats each strand.
  7. 7️⃣ Gently fold in crab meat, fresh parsley, lemon zest, and red pepper flakes. Do not stir aggressively – rough handling will break apart the delicate crab meat.
  8. 8️⃣ Add butter at the very end for restaurant-level glossiness. The entire finishing process should take no more than 2 minutes. Serve immediately on warmed plates.

Nutrition

Serving: 1gCalories: 485kcalCarbohydrates: 58gProtein: 32gFat: 12gSaturated Fat: 3gPolyunsaturated Fat: 2gMonounsaturated Fat: 6gCholesterol: 95mgSodium: 680mgPotassium: 420mgFiber: 3gSugar: 2gVitamin A: 8IUVitamin C: 12mgCalcium: 85mgIron: 2mg

Notes

Keep heat moderate throughout cooking to prevent burning garlic or making crab rubbery. Use kitchen tongs for better pasta control and serve immediately on warmed plates. This dish doesn’t store well due to delicate seafood and pasta texture.

Tried this recipe?

Let us know how it was!

Frequently Asked Questions About Gordon Ramsay Crab linguine

How to cook crab linguine?

Cook Gordon Ramsay Crab linguine by preparing pasta al dente, building a white wine and garlic sauce in a large skillet, then combining everything with gentle tossing. The key is adding crab meat at the very end to prevent overcooking, using pasta water to create proper sauce consistency, and serving immediately while hot.

What is Gordon Ramsay’s most famous dish?

While Gordon Ramsay is renowned for his Beef Wellington, his crab linguine represents his mastery of delicate seafood preparation. This dish showcases his ability to balance simple ingredients with precise technique, creating restaurant-quality results that home cooks can actually achieve with proper guidance and attention to timing.

What to have with crab linguine?

Serve Gordon Ramsay Crab linguine with a crisp white wine like Pinot Grigio or Sauvignon Blanc, a simple arugula salad with lemon vinaigrette, and crusty bread for soaking up any remaining sauce. Keep sides light to let the delicate crab flavors shine through without overwhelming the palate. Consider this Italian appetizer collection for starter ideas.

What are 5 interesting facts about Gordon Ramsay?

Gordon Ramsay earned 16 Michelin stars throughout his career, originally trained as a footballer before knee injury led him to culinary arts, completed his first marathon at age 40, speaks French fluently from training in France, and owns over 35 restaurants worldwide. His perfectionist approach to Gordon Ramsay Crab linguine reflects his demanding professional standards.

This dish reminds me why cooking became such a passion after years of station house meals – when technique meets quality ingredients, magic happens right in your own kitchen.

Stay safe,
Jack Sullivan

Gordon Ramsay Chicken Broccoli Rice Noodles transformed how I think about weeknight cooking after spending years in firehouses where quick, nutritious meals meant the difference between eating well and grabbing whatever was fastest. This dish combines Chef Ramsay’s high-heat techniques with practical home cooking wisdom, creating a stir-fry that delivers restaurant-quality flavors in under 20 minutes. The secret lies in understanding proper wok hei – that distinctive smoky flavor achieved through high-temperature cooking – which the USDA recommends balancing with plenty of vegetables for optimal nutrition. Just like maintaining equipment at the firehouse, this recipe succeeds through preparation and timing. I’ve adapted this Asian-inspired stir-fry technique for home kitchens, ensuring you get that perfect balance of tender chicken, crisp broccoli, and silky rice noodles every single time.

Why This Gordon Ramsay Chicken Broccoli Rice Noodles Recipe Works (And Where Most Go Wrong)

The genius of Gordon Ramsay Chicken Broccoli Rice Noodles lies in three fundamental principles that most home cooks overlook. First, velvet the chicken – a Chinese technique where you coat thin chicken slices in cornstarch and egg white, then briefly blanch them in oil or water. This creates an incredibly tender texture that stays juicy even under high heat. Second, cook each component separately before combining. I’ve seen countless home cooks throw everything in the pan at once, resulting in overcooked vegetables and rubbery chicken.

The third principle is controlling moisture levels. Rice noodles absorb liquid rapidly, so timing your sauce addition becomes critical. Food science shows that excess moisture is the enemy of proper stir-frying, preventing the Maillard reaction that creates those deep, caramelized flavors. Most failures happen because people add wet ingredients too early or don’t prepare their mise en place properly. In firefighting, we say “slow is smooth, smooth is fast” – the same applies here. Rushing leads to soggy noodles and unevenly cooked ingredients.

Ingredients That Actually Matter for Gordon Ramsay Chicken Broccoli Rice Noodles

Gordon Ramsay Chicken Broccoli Rice Noodles

The foundation of exceptional Gordon Ramsay Chicken Broccoli Rice Noodles starts with selecting the right rice noodles. Fresh rice noodles from Asian markets are ideal – they’re more pliable and absorb flavors better than dried versions. If using dried, choose flat rice stick noodles (bánh phở) around 1/4-inch wide. Avoid the ultra-thin varieties that break easily under high heat.

For chicken, boneless thighs work better than breasts because they contain more fat and connective tissue, staying moist during the velveting process. Cut against the grain into thin strips for maximum tenderness. Your broccoli should have tight, dark green florets with no yellowing – this indicates freshness and ensures it maintains that perfect crisp-tender bite. The stems are equally important; peel and slice them thin for added crunch and nutrition.

Oyster sauce serves as your flavor backbone – invest in a premium brand like Lee Kum Kee for depth and complexity. Light soy sauce adds saltiness without darkening the dish, while dark soy contributes color and subtle sweetness. Fresh ginger and garlic are non-negotiable; their volatile oils create the aromatic base that defines this classic stir-fry profile. Cornstarch acts as both a velveting agent for the chicken and a thickening agent for the sauce – keep it handy throughout cooking.

Step-by-Step Instructions for Gordon Ramsay Chicken Broccoli Rice Noodles

Preparation Phase

Begin by soaking 8 ounces of dried rice noodles in warm water until pliable, about 15 minutes. Meanwhile, slice 1 pound of chicken thighs against the grain into thin strips. In a bowl, combine the chicken with 1 tablespoon cornstarch, 1 egg white, and 1 teaspoon salt. Mix thoroughly and let marinate for 10 minutes. Cut 1 large head of broccoli into uniform florets, peeling and slicing the stems thin. Always keep raw chicken separate from other ingredients and wash hands thoroughly after handling.

Sauce Preparation

Whisk together 3 tablespoons oyster sauce, 2 tablespoons light soy sauce, 1 tablespoon dark soy sauce, 1 teaspoon sugar, and 1/2 cup chicken stock. This sauce mixture should taste slightly oversalted at this stage because it will dilute when combined with the noodles. Mince 3 cloves garlic and 1 inch of fresh ginger, keeping them together on your cutting board for quick addition to the wok.

Cooking Phase

Heat your wok or largest skillet over high heat until smoking. Add 2 tablespoons neutral oil with a high smoke point like peanut or vegetable oil. Never leave hot oil unattended – it can ignite quickly at these temperatures. Add the velveted chicken in a single layer, letting it sear for 2 minutes without moving. Stir-fry for another 2 minutes until just cooked through, then remove to a plate.

Add another tablespoon of oil to the wok and immediately add the broccoli. Stir-fry for 2 minutes until bright green and crisp-tender. Push broccoli to one side and add the garlic and ginger to the empty space, cooking for 30 seconds until fragrant. This technique prevents burning the aromatics while ensuring even cooking. Return the chicken to the wok, add the drained rice noodles, and toss everything together. Pour the sauce around the edges of the wok (not directly on the noodles) and toss rapidly for 2-3 minutes until the noodles absorb the sauce and develop a glossy appearance. Proper wok technique ensures even heat distribution and prevents sticking.

Pro-Tips That Change the Game

  • Use two woks or pans simultaneously when cooking for more than four people – overcrowding drops the temperature and creates steam instead of searing
  • Keep a small bowl of cornstarch slurry (1 tablespoon cornstarch mixed with 2 tablespoons cold water) nearby to thicken the sauce if it seems too thin
  • Add a splash of Shaoxing wine or dry sherry just before the sauce for authentic restaurant depth – the alcohol cooks off quickly at high heat
  • Blanch broccoli stems separately for 30 seconds in boiling water if they’re particularly thick – this ensures even cooking throughout the dish
  • Finish with a drizzle of sesame oil and white pepper instead of black pepper for authentic flavor profiles that complement the oyster sauce
  • Test rice noodle doneness by biting – they should be tender but still have slight resistance, similar to pasta al dente

Storage & Leftovers for Gordon Ramsay Chicken Broccoli Rice Noodles

Store leftover Gordon Ramsay Chicken Broccoli Rice Noodles in airtight containers in the refrigerator for up to 3 days. The rice noodles will absorb more sauce and soften slightly, but the dish remains delicious. When reheating, add a splash of chicken broth or water to loosen the noodles, then heat in a large skillet over medium heat, tossing frequently to prevent sticking.

Avoid microwaving if possible, as it creates uneven heating and can make the chicken rubbery. For food safety, ensure leftovers reach an internal temperature of 165°F when reheating. The FDA recommends consuming refrigerated leftovers within 3-4 days and never leaving cooked food at room temperature for more than 2 hours. Freeze portions in freezer-safe containers for up to 2 months, though the texture of rice noodles may change slightly after thawing.

Close-up of finished Gordon Ramsay Chicken Broccoli Rice Noodles plated and ready to serve
Jack Sullivan

Gordon Ramsay Chicken Broccoli Rice Noodles

This dish combines Chef Ramsay’s high-heat techniques with practical home cooking wisdom, creating a stir-fry that delivers restaurant-quality flavors in under 20 minutes. The secret lies in understanding proper wok hei and velveting the chicken for incredible tenderness.
Prep Time 15 minutes
Cook Time 10 minutes
Total Time 25 minutes
Servings: 4 servings
Course: Main Course
Cuisine: asian
Calories: 485

Ingredients
  

  • 8 ounces dried rice noodles flat rice stick noodles (bánh phở)
  • 1 pound chicken thighs boneless, sliced against grain
  • 1 large head broccoli cut into uniform florets, stems peeled and sliced
  • 3 tablespoons oyster sauce
  • 2 tablespoons light soy sauce
  • 1 tablespoon dark soy sauce
  • 1/2 cup chicken stock
  • 3 cloves garlic minced
  • 1 inch fresh ginger minced
  • 2 tablespoons cornstarch divided
  • 1 egg white
  • 3 tablespoons neutral oil peanut or vegetable oil
  • 1 teaspoon sugar
  • 1 teaspoon salt
  • 1 teaspoon sesame oil for finishing

Equipment

  • 1 wok or large skillet for high-heat cooking
  • 2 Mixing bowls for marinating and sauce preparation

Method
 

  1. 1️⃣ Soak 8 ounces of dried rice noodles in warm water until pliable, about 15 minutes.
  2. 2️⃣ Slice chicken thighs against the grain into thin strips. In a bowl, combine chicken with 1 tablespoon cornstarch, egg white, and salt. Mix thoroughly and marinate for 10 minutes.
  3. 3️⃣ Cut broccoli into uniform florets, peel and slice stems thin. Keep raw chicken separate and wash hands thoroughly after handling.
  4. 4️⃣ Whisk together oyster sauce, light soy sauce, dark soy sauce, sugar, and chicken stock for the sauce. Mince garlic and ginger together.
  5. 5️⃣ Heat wok or large skillet over high heat until smoking. Add 2 tablespoons oil and add velveted chicken in single layer. Sear for 2 minutes without moving, then stir-fry 2 minutes until cooked through. Remove to plate.
  6. 6️⃣ Add remaining oil to wok and add broccoli. Stir-fry for 2 minutes until bright green and crisp-tender.
  7. 7️⃣ Push broccoli to one side and add garlic and ginger to empty space, cooking 30 seconds until fragrant.
  8. 8️⃣ Return chicken to wok, add drained rice noodles, and toss everything together. Pour sauce around edges of wok and toss rapidly for 2-3 minutes until noodles absorb sauce and become glossy.
  9. 9️⃣ Finish with a drizzle of sesame oil and serve immediately while hot.

Nutrition

Serving: 1gCalories: 485kcalCarbohydrates: 52gProtein: 28gFat: 18gSaturated Fat: 4gPolyunsaturated Fat: 6gMonounsaturated Fat: 7gCholesterol: 95mgSodium: 1250mgPotassium: 650mgFiber: 4gSugar: 8gVitamin A: 12IUVitamin C: 135mgCalcium: 85mgIron: 3mg

Notes

Use two woks or pans simultaneously when cooking for more than four people. Keep a cornstarch slurry nearby to thicken sauce if needed. Add splash of Shaoxing wine before sauce for restaurant depth. Finish with sesame oil and white pepper for authentic flavor.

Tried this recipe?

Let us know how it was!

Frequently Asked Questions About Gordon Ramsay Chicken Broccoli Rice Noodles

What are the ingredients in Gordon Ramsay’s chicken stir-fry?

The essential ingredients for Gordon Ramsay Chicken Broccoli Rice Noodles include chicken thighs, fresh rice noodles, broccoli florets, oyster sauce, light and dark soy sauce, fresh ginger, garlic, cornstarch for velveting, and high-heat cooking oil. Premium oyster sauce and properly velveted chicken make the biggest difference in achieving restaurant-quality results at home.

How does Ramsay make chicken so juicy?

Ramsay’s secret lies in the velveting technique – coating thin chicken strips in cornstarch and egg white, then briefly cooking them at high temperature. This creates a protective barrier that seals in moisture while the proteins cook quickly and evenly. Using chicken thighs instead of breasts also contributes to juiciness due to their higher fat content.

What vegetables pair well with rice noodles?

Besides broccoli, excellent vegetables for rice noodle stir-fries include snap peas, bell peppers, bok choy, mushrooms, and bean sprouts. Choose vegetables that maintain some crunch after stir-frying and complement the savory-sweet flavor profile. This versatility makes the Gordon Ramsay Chicken Broccoli Rice Noodles recipe easily adaptable to seasonal produce availability.

What’s the best substitute for oyster sauce?

Hoisin sauce mixed with soy sauce makes an acceptable substitute, though it’s sweeter and less umami-rich than oyster sauce. For vegetarian versions, try mushroom sauce or a mixture of soy sauce, brown sugar, and cornstarch. However, authentic oyster sauce really makes this dish shine with its unique depth and complexity.

This Gordon Ramsay Chicken Broccoli Rice Noodles recipe brings professional techniques to your home kitchen, creating meals that rival your favorite restaurant. With proper preparation and attention to timing, you’ll master this versatile dish that feeds both body and soul.

Stay safe,
Jack Sullivan

Gordon Ramsay KFC Sauce recreates that legendary finger-lickin’ flavor right in your home kitchen. During my years as a firefighter, late-night shifts often meant quick runs to KFC, and I became obsessed with reverse-engineering their signature sauce blend. After studying Ramsay’s approach to sauce-making and conducting countless kitchen experiments, I’ve cracked the code to this iconic condiment. According to the FDA’s food additive guidelines, understanding ingredient interactions is crucial for consistent sauce results. This recipe delivers that perfect balance of tangy, sweet, and savory notes that makes KFC’s sauce so addictive, plus I’ll share the safety techniques that prevent common sauce-making disasters.

Why This Gordon Ramsay KFC Sauce Recipe Works (And Where Most Go Wrong)

Most home cooks fail at Gordon Ramsay KFC Sauce because they rush the emulsification process and ignore temperature control. The secret lies in three critical principles that separate amateur attempts from professional results.

Temperature Precision Prevents Breaking

KFC’s sauce achieves its signature consistency through careful temperature management. Too hot, and your emulsion breaks into an oily mess. Too cold, and ingredients won’t properly incorporate. The sweet spot is maintaining everything between 65-70°F during initial mixing.

Sequential Addition Creates Stability

Gordon Ramsay’s sauce techniques emphasize building flavors in layers. Adding all ingredients at once creates an unstable mixture that separates within hours. The proper sequence allows each component to bind before introducing the next element.

Quality Ratios Matter More Than Quantity

The magic isn’t in exotic ingredients—it’s in precise ratios. According to culinary science research, emulsion stability depends on maintaining proper oil-to-acid ratios, which most home recipes completely ignore.

Ingredients That Actually Matter for Gordon Ramsay KFC Sauce

Fresh ingredients for making Gordon Ramsay KFC Sauce

Every component in Gordon Ramsay KFC Sauce serves a specific purpose beyond flavor. Understanding why each ingredient matters helps you make smart substitutions and achieve consistent results every batch.

Mayonnaise forms the creamy base and provides essential lecithin for emulsion stability. Choose full-fat varieties like Hellmann’s or Duke’s—low-fat versions contain stabilizers that interfere with the final texture. The eggs in quality mayo also contribute to the sauce’s characteristic richness.

Apple cider vinegar delivers the signature tang while helping preserve the sauce naturally. White vinegar works but lacks the subtle fruit notes that complement KFC’s flavor profile. Rice vinegar is too mild and won’t provide sufficient acidity for proper preservation.

Honey balances the vinegar’s sharpness and creates that glossy finish. Corn syrup approximates the commercial sweetness, but honey adds complexity. Avoid artificial honey blends—pure honey contains enzymes that actually improve the sauce’s shelf stability.

Garlic powder and onion powder provide savory depth without adding moisture that could destabilize the emulsion. Fresh alternatives introduce water content that dilutes flavor and reduces storage life. For more garlic powder techniques, proper storage maintains potency.

Sweet paprika contributes color and mild pepper flavor. Smoked paprika adds depth but can overpower the delicate balance. Hungarian paprika offers the best color-to-flavor ratio for authentic results.

Step-by-Step Instructions for Gordon Ramsay KFC Sauce

Phase 1: Temperature and Equipment Prep

Remove all ingredients from refrigeration 30 minutes before starting. Cold ingredients resist proper mixing and can cause separation. Use a clean, dry mixing bowl—any water residue will break your emulsion. **Safety warning: Ensure all utensils are completely dry to prevent bacterial growth in the finished sauce.**

Phase 2: Base Construction

Measure 1 cup high-quality mayonnaise into your bowl. Add 2 tablespoons apple cider vinegar drop by drop while whisking constantly. This gradual addition prevents the base from breaking. The mixture should remain smooth and glossy throughout this process.

Incorporate 3 tablespoons honey in a thin stream while continuing to whisk. The sauce will lighten in color and develop a silky consistency. If it appears grainy, the temperature is too cold—let it warm slightly before proceeding.

Phase 3: Spice Integration

Combine 1 teaspoon garlic powder, 1 teaspoon onion powder, 2 teaspoons sweet paprika, 1/2 teaspoon white pepper, and 1/4 teaspoon cayenne pepper in a small bowl. Mix thoroughly to eliminate clumps. **Safety warning: Always combine dry spices separately before adding to wet ingredients to prevent uneven distribution and potential hot spots.**

Sprinkle the spice mixture over the sauce base while folding gently with a rubber spatula. Avoid vigorous mixing at this stage—you want even distribution without breaking the delicate emulsion you’ve created.

Phase 4: Final Adjustments

Taste and adjust seasoning gradually. Add salt in 1/4 teaspoon increments until flavors balance. The sauce should taste slightly more intense than desired—flavors mellow during storage. For additional tang, add vinegar in 1/2 teaspoon increments. This professional sauce balancing technique ensures consistent results.

Transfer Gordon Ramsay KFC Sauce to a clean jar or squeeze bottle. The consistency should coat a spoon but flow freely. If too thick, thin with additional vinegar. If too thin, refrigerate for 2 hours to allow natural thickening.

Pro-Tips That Change the Game

  • Make Gordon Ramsay KFC Sauce 24 hours before serving—flavors develop significantly overnight as ingredients marry and mellow
  • Store sauce in squeeze bottles for easy application and professional presentation, just like restaurant kitchens
  • Double the batch and freeze half in ice cube trays for individual portions that thaw perfectly in 30 minutes
  • Add 1/4 teaspoon MSG (if available) to replicate the exact umami depth of commercial KFC sauce
  • Strain the finished sauce through fine mesh to remove any spice clumps for ultra-smooth restaurant texture
  • Keep a small portion at room temperature for 15 minutes before serving—cold sauce doesn’t release flavors as effectively

Storage & Leftovers for Gordon Ramsay KFC Sauce

Proper storage extends Gordon Ramsay KFC Sauce shelf life to 3-4 weeks while maintaining peak flavor and safety. Transfer sauce to clean glass jars or squeeze bottles with tight-fitting lids immediately after preparation. **Always refrigerate at 40°F or below within 2 hours of making.**

The sauce doesn’t require reheating—in fact, heat can break the emulsion and create an unappetizing separated texture. Simply remove from refrigeration 10-15 minutes before serving to take the chill off and allow flavors to brighten.

Watch for separation or off-odors as signs of spoilage. According to FDA safe food handling guidelines, mayonnaise-based sauces require careful temperature management throughout storage. Never leave at room temperature longer than 2 hours, or 1 hour if ambient temperature exceeds 90°F.

Close-up of finished Gordon Ramsay KFC Sauce in bowl ready to serve
Jack Sullivan

Gordon Ramsay KFC Sauce

Recreates that legendary finger-lickin’ KFC flavor with perfect balance of tangy, sweet, and savory notes. This recipe delivers restaurant-quality results using professional emulsification techniques and precise ingredient ratios.
Prep Time 10 minutes
Total Time 10 minutes
Servings: 16 servings
Course: sauce
Cuisine: American
Calories: 95

Ingredients
  

  • 1 cup mayonnaise high-quality, full-fat
  • 2 tablespoons apple cider vinegar
  • 3 tablespoons honey pure honey
  • 1 teaspoon garlic powder
  • 1 teaspoon onion powder
  • 2 teaspoons sweet paprika
  • 1/2 teaspoon white pepper
  • 1/4 teaspoon cayenne pepper
  • 1/4 teaspoon salt or to taste

Equipment

  • 1 Mixing Bowl Clean and dry
  • 1 Whisk
  • 1 Rubber spatula
  • 1 – Small bowl For spices

Method
 

  1. 1️⃣ Remove all ingredients from refrigeration 30 minutes before starting. Use a clean, dry mixing bowl and ensure all utensils are completely dry to prevent bacterial growth.
  2. 2️⃣ Measure 1 cup mayonnaise into the bowl. Add apple cider vinegar drop by drop while whisking constantly to prevent the base from breaking. The mixture should remain smooth and glossy.
  3. 3️⃣ Incorporate honey in a thin stream while continuing to whisk. The sauce will lighten in color and develop a silky consistency. If it appears grainy, let it warm slightly before proceeding.
  4. 4️⃣ Combine garlic powder, onion powder, sweet paprika, white pepper, and cayenne pepper in a small bowl. Mix thoroughly to eliminate clumps before adding to wet ingredients.
  5. 5️⃣ Sprinkle the spice mixture over the sauce base while folding gently with a rubber spatula. Avoid vigorous mixing to prevent breaking the delicate emulsion.
  6. 6️⃣ Taste and adjust seasoning gradually. Add salt in 1/4 teaspoon increments until flavors balance. The sauce should taste slightly more intense than desired as flavors mellow during storage.
  7. 7️⃣ Transfer to a clean jar or squeeze bottle. The consistency should coat a spoon but flow freely. If too thick, thin with additional vinegar. If too thin, refrigerate for 2 hours to allow natural thickening.

Nutrition

Serving: 1gCalories: 95kcalCarbohydrates: 4gFat: 9gSaturated Fat: 1gPolyunsaturated Fat: 5gMonounsaturated Fat: 2gCholesterol: 5mgSodium: 115mgPotassium: 15mgSugar: 3gVitamin A: 8IUVitamin C: 1mgCalcium: 2mgIron: 1mg

Notes

Make sauce 24 hours before serving for best flavor development. Store in squeeze bottles for professional presentation. Double the batch and freeze portions in ice cube trays. Add 1/4 teaspoon MSG if available for authentic umami depth. Strain through fine mesh for ultra-smooth restaurant texture. Keep at room temperature 15 minutes before serving for optimal flavor release.

Tried this recipe?

Let us know how it was!

Frequently Asked Questions About Gordon Ramsay KFC Sauce

What makes KFC’s comeback sauce unique?

KFC’s comeback sauce combines mayonnaise, honey, and apple cider vinegar in specific ratios that create a perfect sweet-tangy balance. The addition of garlic powder, onion powder, and paprika provides savory depth, while white pepper adds subtle heat without overwhelming the other flavors. This Gordon Ramsay KFC Sauce recipe replicates those exact flavor profiles using restaurant-quality techniques.

Did Gordon Ramsay ever apologize?

While Gordon Ramsay has apologized for various incidents throughout his career, this question seems unrelated to sauce-making. However, Ramsay consistently emphasizes learning from mistakes in the kitchen. When making Gordon Ramsay KFC Sauce, don’t apologize for imperfect first attempts—each batch teaches valuable lessons about emulsion stability and flavor balance.

What type of sauce is KFC sauce?

KFC sauce is classified as a mayonnaise-based condiment sauce, similar to thousand island or comeback sauce. It belongs to the emulsion family, where oil-based mayonnaise provides the creamy foundation while acidic ingredients like vinegar add tang. The addition of honey creates a sweet-savory profile that complements fried foods perfectly.

What dishes pair best with this sauce?

This versatile sauce complements fried chicken, fish, and vegetables perfectly. Try it as a dipping sauce for homemade fried chicken, drizzled over coleslaw, or as a spread for chicken sandwiches. The balanced flavor profile works equally well with grilled meats and roasted vegetables.

Creating restaurant-quality Gordon Ramsay KFC Sauce at home isn’t just about following a recipe—it’s about understanding the science behind emulsification and flavor balance. With these professional techniques and safety guidelines, you’ll consistently produce sauce that rivals any commercial version.

Stay safe,
Jack Sullivan

Gordon Ramsay Salmon Smashed Potatoes represent the perfect marriage of crispy comfort and elegant protein that I’ve been perfecting since my firefighting days. Back at the station, we’d often debate the best way to prepare salmon – some guys would char it to death, others left it barely warmed through. It wasn’t until I started studying Ramsay’s techniques that I understood the precise balance of heat, timing, and texture that makes this dish exceptional. According to the FDA’s seafood safety guidelines, properly cooked salmon should reach 145°F internal temperature while maintaining its moisture – something this recipe achieves beautifully. The combination of golden, crispy-edged smashed potatoes with perfectly seared salmon creates a restaurant-quality meal that’s surprisingly achievable at home, and I’ve found that mastering this Gordon Ramsay-inspired technique builds confidence for tackling other challenging recipes.

Why This Gordon Ramsay Salmon Smashed Potatoes Recipe Works (And Where Most Go Wrong)

The genius behind Gordon Ramsay Salmon Smashed Potatoes lies in three fundamental principles that most home cooks overlook. First, the two-stage cooking process for potatoes creates maximum surface area for crisping while maintaining fluffy interiors. During my years responding to kitchen fires, I noticed many home cooks tried to rush this step, leading to either burnt exteriors or soggy centers.

The Science of Perfect Timing

Second, the synchronized cooking timing ensures both components finish simultaneously at peak quality. The biggest mistake I see is preparing one element completely before starting the other, resulting in lukewarm food by serving time. According to Serious Eats’ cooking science research, protein continues cooking from residual heat even after removal from the pan, which is why resting periods are crucial.

Temperature Control Mastery

Third, precise temperature control prevents the salmon from overcooking while developing that coveted golden crust. Most home cooks use insufficient heat initially, then panic and crank it too high, leading to uneven cooking and dry fish.

Ingredients That Actually Matter for Gordon Ramsay Salmon Smashed Potatoes

Fresh ingredients for making Gordon Ramsay Salmon Smashed Potatoes

Quality ingredients make the difference between good and exceptional Gordon Ramsay Salmon Smashed Potatoes. For the salmon, choose center-cut fillets that are uniform in thickness – this ensures even cooking throughout. Look for fish with firm flesh, bright color, and no fishy odor. Wild-caught salmon typically has better flavor and texture than farmed, though both work well with proper technique.

Small waxy potatoes like baby potatoes, fingerlings, or small Yukon Golds are essential for proper smashing. Starchy russets will fall apart and won’t hold their shape after smashing. The potatoes should be similar in size for even cooking – aim for golf ball sized or slightly smaller. Fresh herbs like rosemary and thyme provide aromatic depth, while good quality olive oil creates the crispy edges we’re after.

For seasoning, use flaky sea salt rather than table salt for better texture and flavor distribution. Black pepper should be freshly ground, and lemon must be fresh – bottled lemon juice lacks the bright acidity needed to balance the rich salmon. If you can’t find fresh herbs, dried herbs work but use half the amount and add them earlier in the cooking process. For those following our Gordon Ramsay breakfast techniques, these same ingredient quality principles apply across all his recipes.

Step-by-Step Instructions for Gordon Ramsay Salmon Smashed Potatoes

Preparing the Potatoes (20 minutes)

Start by washing 1.5 pounds of small potatoes thoroughly, leaving skins on. Place them in a large pot and cover with cold, salted water by 2 inches. Bring to a rolling boil over high heat, then reduce to medium-high and cook for 12-15 minutes until fork-tender. Warning: Do not overcook the potatoes as they’ll become mushy and won’t smash properly. Drain thoroughly and let cool for 5 minutes until safe to handle.

Creating the Smashed Potatoes (10 minutes)

Preheat your oven to 450°F. On a large baking sheet, drizzle 3 tablespoons olive oil. Using a potato masher or large fork, gently press down on each potato to flatten it to about ½-inch thick – they should split open but hold together. Safety note: Press firmly but don’t smash aggressively, as hot potato pieces can splatter. Season generously with salt, pepper, and chopped fresh rosemary. Roast for 20-25 minutes until edges are golden and crispy, following techniques similar to those in our roasted vegetable guide.

Preparing the Salmon (8 minutes)

While potatoes roast, pat four 6-ounce salmon fillets completely dry with paper towels. Season both sides with salt and pepper 5 minutes before cooking – this allows the seasoning to penetrate. Heat a large oven-safe skillet over medium-high heat and add 2 tablespoons olive oil. When oil shimmers, carefully place salmon skin-side up. Critical safety warning: Do not move the fish for the first 3-4 minutes to prevent sticking and ensure proper searing.

Final Assembly and Serving

Cook salmon for 4 minutes, then flip and cook another 2-3 minutes for medium doneness. The internal temperature should reach 125°F for medium-rare or 135°F for medium. Remove from heat and add a squeeze of fresh lemon juice and butter to the pan. Serve immediately over the crispy Gordon Ramsay Salmon Smashed Potatoes, garnished with fresh herbs and lemon wedges. According to USDA guidelines, fish should reach 145°F for food safety, though many chefs prefer slightly lower temperatures for optimal texture.

Pro-Tips That Change the Game

  • Pat the salmon completely dry and let it come to room temperature for 15 minutes before cooking – this prevents temperature shock and ensures even cooking
  • Use a fish spatula or thin metal spatula for flipping – it’s flexible enough to slide under delicate fish without breaking it
  • Preheat your baking sheet in the oven before adding the smashed potatoes for extra crispiness on the bottom
  • Save some fresh herb sprigs to throw in the salmon pan during the last minute for aromatic oil infusion
  • Test potato doneness by piercing with a knife – it should slide through with no resistance, just like we taught rookie firefighters to test equipment reliability
  • If your salmon fillets vary in thickness, start the thicker pieces 30-60 seconds earlier to ensure they all finish simultaneously

Storage & Leftovers for Gordon Ramsay Salmon Smashed Potatoes

Store leftover Gordon Ramsay Salmon Smashed Potatoes in the refrigerator within 2 hours of cooking. Place salmon and potatoes in separate airtight containers – they’ll keep for up to 3 days. For best results, reheat the potatoes in a 400°F oven for 8-10 minutes to restore crispiness, while gently warming the salmon in a 275°F oven for 5-7 minutes to prevent overcooking.

Avoid microwaving if possible, as it makes potatoes soggy and salmon rubbery. If you must use a microwave, use 50% power and heat in 30-second intervals. The FDA recommends reheating all leftovers to 165°F internal temperature for safety, though this will result in well-done salmon. For meal prep, consider preparing components separately and combining when ready to serve.

Close-up of finished Gordon Ramsay Salmon Smashed Potatoes plated and ready to serve
Jack Sullivan

Gordon Ramsay Salmon Smashed Potatoes

Perfect marriage of crispy comfort and elegant protein featuring golden, crispy-edged smashed potatoes with perfectly seared salmon. This restaurant-quality meal achieves the precise balance of heat, timing, and texture using Gordon Ramsay’s professional techniques.
Prep Time 15 minutes
Cook Time 30 minutes
Total Time 45 minutes
Servings: 4 servings
Course: Main Course
Cuisine: british
Calories: 485

Ingredients
  

  • 1.5 pounds small potatoes baby potatoes, fingerlings, or small Yukon Golds
  • 4 salmon fillets 6-ounce center-cut, uniform thickness
  • 5 tablespoons olive oil divided
  • 2 tablespoons fresh rosemary chopped
  • 1 tablespoon fresh thyme chopped
  • 1 fresh lemon juiced and cut into wedges
  • 2 tablespoons butter
  • flaky sea salt to taste
  • freshly ground black pepper to taste

Equipment

  • 1 Large Pot for boiling potatoes
  • 1 Large baking sheet for roasting potatoes
  • 1 Large oven-safe skillet for searing salmon
  • 1 Potato masher or large fork for smashing potatoes
  • 1 Fish Spatula for flipping salmon

Method
 

  1. 1️⃣ Wash 1.5 pounds small potatoes thoroughly, leaving skins on. Place in large pot and cover with cold, salted water by 2 inches. Bring to rolling boil over high heat, then reduce to medium-high and cook 12-15 minutes until fork-tender. Drain thoroughly and let cool 5 minutes.
  2. 2️⃣ Preheat oven to 450°F. Drizzle 3 tablespoons olive oil on large baking sheet. Using potato masher or large fork, gently press each potato to flatten to ½-inch thick – they should split open but hold together. Season generously with salt, pepper, and chopped rosemary.
  3. 3️⃣ Roast potatoes for 20-25 minutes until edges are golden and crispy. While potatoes roast, pat salmon fillets completely dry with paper towels. Season both sides with salt and pepper 5 minutes before cooking.
  4. 4️⃣ Heat large oven-safe skillet over medium-high heat and add 2 tablespoons olive oil. When oil shimmers, carefully place salmon skin-side up. Do not move fish for first 3-4 minutes to prevent sticking and ensure proper searing.
  5. 5️⃣ Cook salmon 4 minutes, then flip and cook another 2-3 minutes for medium doneness. Internal temperature should reach 125°F for medium-rare or 135°F for medium. Remove from heat and add squeeze of fresh lemon juice and butter to pan.
  6. 6️⃣ Serve immediately by placing salmon over crispy smashed potatoes. Garnish with fresh thyme and lemon wedges. Drizzle with any pan juices for extra flavor.

Nutrition

Serving: 1gCalories: 485kcalCarbohydrates: 32gProtein: 38gFat: 24gSaturated Fat: 5gPolyunsaturated Fat: 3gMonounsaturated Fat: 14gCholesterol: 95mgSodium: 380mgPotassium: 1125mgFiber: 4gSugar: 2gVitamin A: 285IUVitamin C: 45mgCalcium: 85mgIron: 2.5mg

Notes

Pat salmon completely dry and let come to room temperature 15 minutes before cooking. Use fish spatula for flipping. Preheat baking sheet for extra crispy potatoes. Save herb sprigs for aromatic oil infusion. Test potato doneness with knife – should slide through with no resistance.

Tried this recipe?

Let us know how it was!

Frequently Asked Questions About Gordon Ramsay Salmon Smashed Potatoes

How does Gordon Ramsay cook salmon perfectly?

Ramsay emphasizes starting with room temperature, dry salmon fillets and cooking them skin-side up first in a hot pan with oil. He advocates for high initial heat to develop the crust, then finishing gently. The key is not moving the fish during the first few minutes of cooking, allowing proper searing. This same principle applies beautifully to Gordon Ramsay Salmon Smashed Potatoes, where the searing creates texture contrast with the crispy potatoes.

What does Gordon Ramsay put in his mashed potatoes?

While this recipe uses smashed rather than mashed potatoes, Ramsay’s potato philosophy emphasizes butter, cream, and proper seasoning. For smashed potatoes, he focuses on olive oil, fresh herbs, and coarse salt to create crispy edges while maintaining fluffy interiors. The technique differs from traditional mashing but achieves similar comfort-food satisfaction in Gordon Ramsay Salmon Smashed Potatoes.

How does Gordon Ramsay make roast potatoes crispy?

Ramsay achieves crispy potatoes through high-heat roasting, proper oil coverage, and creating maximum surface area through scoring or smashing. He preheats the baking sheet and uses sufficient fat for proper browning. These exact principles make the potatoes in Gordon Ramsay Salmon Smashed Potatoes so exceptional – the smashing increases surface area while high-heat roasting creates those coveted crispy edges.

How to do smashed new potatoes?

Start by boiling small new potatoes until fork-tender, then drain thoroughly. While still warm, gently press each potato to flatten it while keeping it intact. Drizzle with olive oil, season generously, and roast at high heat until golden. The key is achieving the right balance between crispy exterior and fluffy interior, which makes them perfect companions for salmon in this restaurant-style preparation.

This Gordon Ramsay Salmon Smashed Potatoes recipe combines professional techniques with home kitchen practicality, creating a meal that’s both impressive and achievable. The key is respecting each component’s cooking requirements while orchestrating the timing for a synchronized finish that would make any chef proud.

Stay safe,
Jack Sullivan

Gordon Ramsay Frittata Sausage mastery begins with understanding that this isn’t just scrambled eggs with meat thrown in. During my firefighting days, we’d often make breakfast for the whole crew, and I learned that a proper frittata requires the same precision as managing a controlled burn – timing, temperature, and technique matter immensely. This Italian-inspired dish combines the robust flavors that Ramsay champions with foolproof methods that deliver restaurant-quality results every time. The key lies in treating each component with respect: properly browning the sausage for maximum flavor development, achieving that perfect custard-like egg texture, and mastering the stovetop-to-oven transition that separates amateur cooks from professionals. According to the FDA’s safe food handling guidelines, proper egg cooking techniques are essential for both safety and quality, making this Italian sausage recipe a valuable addition to any home cook’s repertoire.

Why This Gordon Ramsay Frittata Sausage Recipe Works (And Where Most Go Wrong)

The magic of Gordon Ramsay Frittata Sausage lies in three fundamental principles that most home cooks overlook. First, sausage fat becomes your flavor foundation – never drain it completely. I’ve seen countless cooks dump this liquid gold down the drain, then wonder why their frittata tastes bland. Ramsay understands that rendered sausage fat carries concentrated flavors that infuse every bite of egg.

Second, temperature control separates professionals from amateurs. Most people blast their eggs on high heat, creating rubbery, overcooked disasters. The Gordon Ramsay approach demands patience – low, steady heat creates that silky, custard-like texture that makes his frittatas legendary. Third, the stovetop-to-oven technique ensures even cooking throughout. Many home cooks try to finish everything on the stovetop, resulting in burnt bottoms and raw centers. This scientific approach to egg cookery explains why controlled heat application produces superior results every time.

Ingredients That Actually Matter for Gordon Ramsay Frittata Sausage

Fresh ingredients for making Gordon Ramsay Frittata Sausage

Quality ingredients make the difference between mediocre and magnificent Gordon Ramsay Frittata Sausage. Start with Italian sausage that contains at least 20% fat content – lean sausage won’t provide enough rendered fat for proper flavor development. Look for sausages with natural casings that snap when you bite them, indicating freshness and proper texture.

Farm-fresh eggs with bright orange yolks deliver superior flavor and color. The protein structure in fresh eggs creates better binding, resulting in that signature creamy texture Ramsay demands. Room temperature eggs incorporate more smoothly than cold ones, preventing streaky, uneven mixing. Heavy cream adds richness, but whole milk works if you prefer lighter results – just avoid low-fat dairy that can make your frittata watery.

Parmigiano-Reggiano cheese provides nutty complexity that complements the sausage perfectly. Pre-grated cheese contains anti-caking agents that affect melting, so invest in a wedge and grate it fresh. Fresh herbs like basil or oregano brighten the rich flavors, while quality olive oil ensures your frittata releases cleanly from the pan. These cheese selection principles apply to most Italian-inspired dishes requiring optimal melting characteristics.

Step-by-Step Instructions for Gordon Ramsay Frittata Sausage

Preparing Your Sausage Base

Remove 1 pound of Italian sausage from casings and break into bite-sized chunks. Heat a 10-inch oven-safe skillet over medium heat – **never use high heat as this will cause uneven cooking and potential splattering burns**. Add sausage pieces and cook for 6-8 minutes, stirring occasionally to ensure even browning. The sausage should develop a golden-brown crust while releasing aromatic fat. Reserve 2 tablespoons of rendered fat in the pan and remove excess if needed.

Creating the Perfect Egg Mixture

Crack 8 large eggs into a mixing bowl and whisk vigorously for 30 seconds until completely smooth. Add ½ cup heavy cream, ½ cup freshly grated Parmigiano-Reggiano, 1 teaspoon salt, and ½ teaspoon freshly ground black pepper. **Whisk mixture until completely homogeneous – streaky eggs create uneven texture**. This Gordon Ramsay Frittata Sausage technique ensures every bite contains balanced flavors.

The Critical Cooking Phase

Preheat your oven to 375°F while finishing stovetop preparation. Return cooked sausage to the skillet with reserved fat and reduce heat to medium-low. Pour egg mixture over sausage, gently stirring once to distribute ingredients evenly. **Do not continuously stir – this prevents proper setting**. Cook undisturbed for 4-5 minutes until edges begin setting but center remains liquid. The bottom should be golden but not brown.

Finishing in the Oven

Transfer skillet immediately to preheated oven – **use oven mitts and announce “hot pan” if others are in the kitchen to prevent burns**. Bake for 12-15 minutes until center springs back when lightly touched. The Gordon Ramsay Frittata Sausage should be golden on top with no liquid egg visible. Allow to rest 5 minutes before slicing, as residual heat completes the cooking process. This balanced approach to protein and vegetables aligns with nutritional best practices for satisfying meals.

Pro-Tips That Change the Game

  • Use a well-seasoned cast iron or non-stick oven-safe pan – carbon steel works excellently too and develops better flavor over time
  • Let eggs come to room temperature 30 minutes before cooking for smoother incorporation and even cooking
  • Add fresh herbs in the last 2 minutes of stovetop cooking to preserve their bright flavors and prevent wilting
  • Test doneness by gently shaking the pan – the center should jiggle slightly but not slosh like liquid
  • Save some cheese for sprinkling on top during the last 3 minutes of oven time for an appealing golden crust
  • Never flip a frittata – the oven finish eliminates this risky maneuver that often results in broken, messy disasters

Storage & Leftovers for Gordon Ramsay Frittata Sausage

Store leftover Gordon Ramsay Frittata Sausage in the refrigerator for up to 4 days in an airtight container. The eggs and sausage combination requires temperatures below 40°F to prevent bacterial growth. Reheat individual portions in a 300°F oven for 8-10 minutes to restore the proper texture – microwaving creates rubbery, uneven results.

For longer storage, wrap cooled frittata wedges individually in plastic wrap and freeze for up to 2 months. Thaw overnight in the refrigerator before reheating. The texture will be slightly different from fresh, but the flavors remain excellent. Always ensure reheated portions reach 165°F internal temperature for safety. Follow FDA refrigeration guidelines for optimal food safety practices with egg-based dishes.

Close-up of finished Gordon Ramsay Frittata Sausage plated and ready to serve
Jack Sullivan

Gordon Ramsay Frittata Sausage

This Italian-inspired dish combines robust flavors with foolproof methods that deliver restaurant-quality results. The key lies in properly browning the sausage for maximum flavor development, achieving perfect custard-like egg texture, and mastering the stovetop-to-oven transition.
Prep Time 15 minutes
Cook Time 20 minutes
Total Time 35 minutes
Servings: 6 servings
Course: Breakfast
Cuisine: Italian
Calories: 385

Ingredients
  

  • 1 pound Italian sausage casings removed, broken into chunks
  • 8 large eggs room temperature
  • 1/2 cup heavy cream
  • 1/2 cup Parmigiano-Reggiano cheese freshly grated
  • 1 teaspoon salt
  • 1/2 teaspoon black pepper freshly ground

Equipment

  • 1 10-inch oven-safe skillet Cast iron or non-stick preferred
  • 1 Mixing Bowl Large enough for whisking eggs
  • 1 Whisk For smooth egg mixture

Method
 

  1. 1️⃣ Preheat oven to 375°F. Remove sausage from casings and break into bite-sized chunks.
  2. 2️⃣ Heat 10-inch oven-safe skillet over medium heat. Add sausage pieces and cook 6-8 minutes, stirring occasionally until golden-brown. Reserve 2 tablespoons rendered fat in pan.
  3. 3️⃣ In mixing bowl, whisk eggs vigorously for 30 seconds until smooth. Add heavy cream, grated cheese, salt, and pepper. Whisk until completely homogeneous.
  4. 4️⃣ Return cooked sausage to skillet with reserved fat. Reduce heat to medium-low. Pour egg mixture over sausage, stirring once gently to distribute.
  5. 5️⃣ Cook undisturbed 4-5 minutes until edges set but center remains liquid. Bottom should be golden but not brown.
  6. 6️⃣ Transfer skillet to preheated oven. Bake 12-15 minutes until center springs back when lightly touched.
  7. 7️⃣ Allow to rest 5 minutes before slicing. Serve warm or at room temperature.

Nutrition

Serving: 1gCalories: 385kcalCarbohydrates: 3gProtein: 24gFat: 30gSaturated Fat: 12gPolyunsaturated Fat: 3gMonounsaturated Fat: 12gCholesterol: 285mgSodium: 850mgPotassium: 320mgSugar: 2gVitamin A: 15IUVitamin C: 2mgCalcium: 18mgIron: 12mg

Notes

Use well-seasoned cast iron or non-stick oven-safe pan. Let eggs come to room temperature 30 minutes before cooking. Add fresh herbs in last 2 minutes of stovetop cooking. Test doneness by gently shaking pan – center should jiggle slightly but not slosh. Save some cheese for sprinkling on top during last 3 minutes of oven time.

Tried this recipe?

Let us know how it was!

Frequently Asked Questions About Gordon Ramsay Frittata Sausage

How does Gordon Ramsay cook sausages?

Ramsay cooks sausages over medium heat to render fat slowly and develop deep browning without burning. He never pierces the casings, which releases flavorful juices. For Gordon Ramsay Frittata Sausage, he removes casings and breaks the meat into chunks for better distribution throughout the eggs.

What makes Gordon Ramsay’s sausage rice unique?

While this Gordon Ramsay Frittata Sausage recipe doesn’t include rice, Ramsay’s sausage rice typically features the same principle of using rendered sausage fat to cook the rice, creating layers of flavor. The fat coats each grain, preventing mushiness while infusing savory taste throughout.

How to make a frittata taste good?

The key to delicious Gordon Ramsay Frittata Sausage is building flavor layers: properly browning proteins, using their rendered fats, incorporating quality cheese, and finishing with fresh herbs. Temperature control prevents rubbery texture, while the stovetop-to-oven method ensures even cooking throughout.

What kind of sausage does Ramsay use?

Ramsay typically uses Italian sausage with natural casings for frittatas. He prefers sweet or mild Italian varieties over spicy ones for egg dishes, as they complement rather than overpower the delicate egg flavors. Quality sausages with higher fat content provide better flavor development in this breakfast sausage preparation.

This Gordon Ramsay Frittata Sausage recipe transforms simple ingredients into restaurant-quality results through proper technique and attention to detail. Master these fundamentals, and you’ll create impressive meals that satisfy any crowd.

Stay safe,
Jack Sullivan