Author

Jack Sullivan

Browsing

Gordon Ramsay Butternut Squash Soup transforms a humble autumn vegetable into liquid gold, but most home cooks miss the crucial steps that separate restaurant-quality from ordinary. After twenty years fighting fires and another decade perfecting comfort food recipes, I’ve learned that the difference between good and extraordinary often lies in the details most people skip. This isn’t just another soup recipe—it’s a masterclass in building layers of flavor while maintaining the safety standards that keep your kitchen running smoothly. The FDA emphasizes proper produce handling when working with winter squashes, and that attention to food safety translates directly into better-tasting results.

Why This Gordon Ramsay Butternut Squash Soup Recipe Works (And Where Most Go Wrong)

The secret to exceptional Gordon Ramsay Butternut Squash Soup lies in three fundamental principles that most home cooks overlook. First, proper caramelization of the squash creates the foundation of flavor—not just roasting, but achieving that golden-brown edge that develops natural sugars. Second, the aromatic base must be built in layers, with each ingredient added at precisely the right moment to maximize its contribution. Third, temperature control during blending prevents the soup from breaking while achieving that signature silky texture.

Most people fail because they rush the roasting process, add all aromatics simultaneously, and blend while too hot. These shortcuts result in flat, one-dimensional soup with grainy texture. Gordon’s approach demands patience, but the payoff is transformative. The Maillard reaction during proper roasting creates complex flavors that simply cannot be replicated through shortcuts.

Ingredients That Actually Matter for Gordon Ramsay Butternut Squash Soup

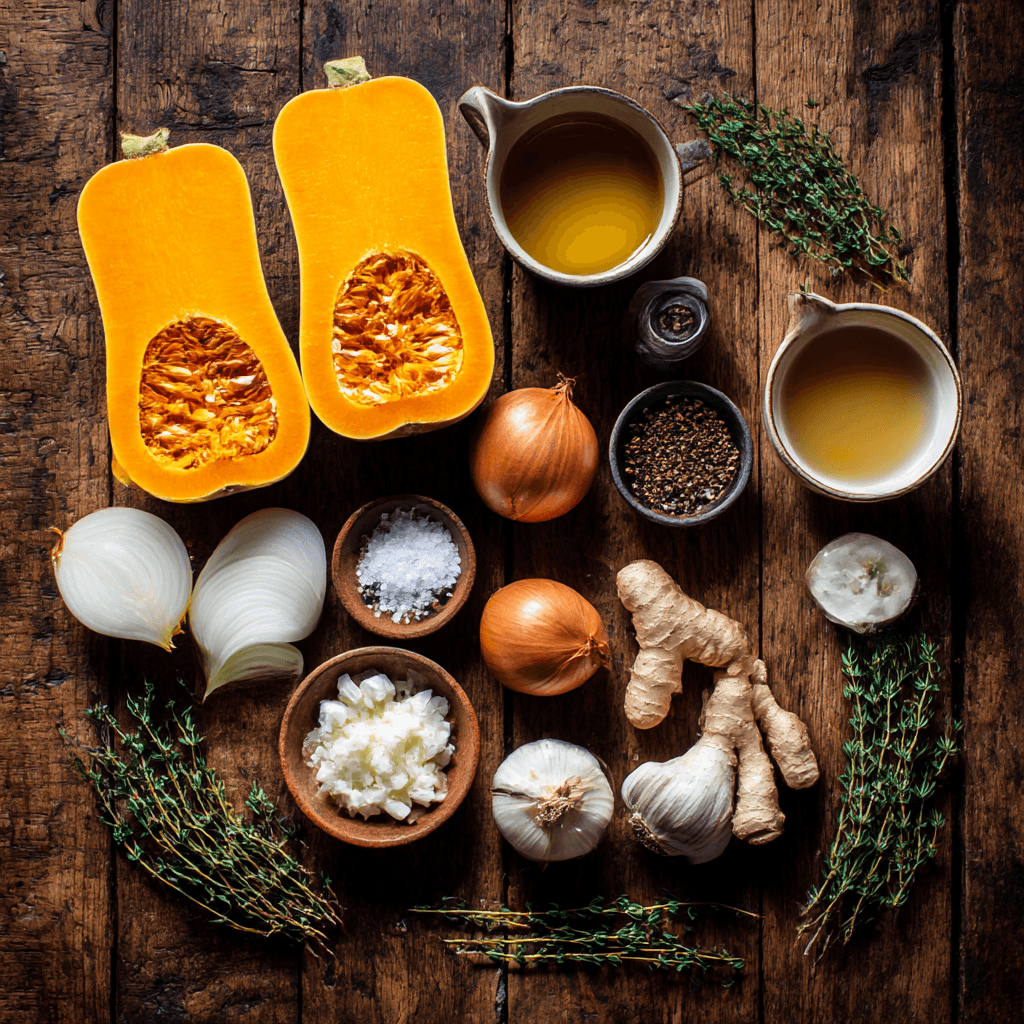
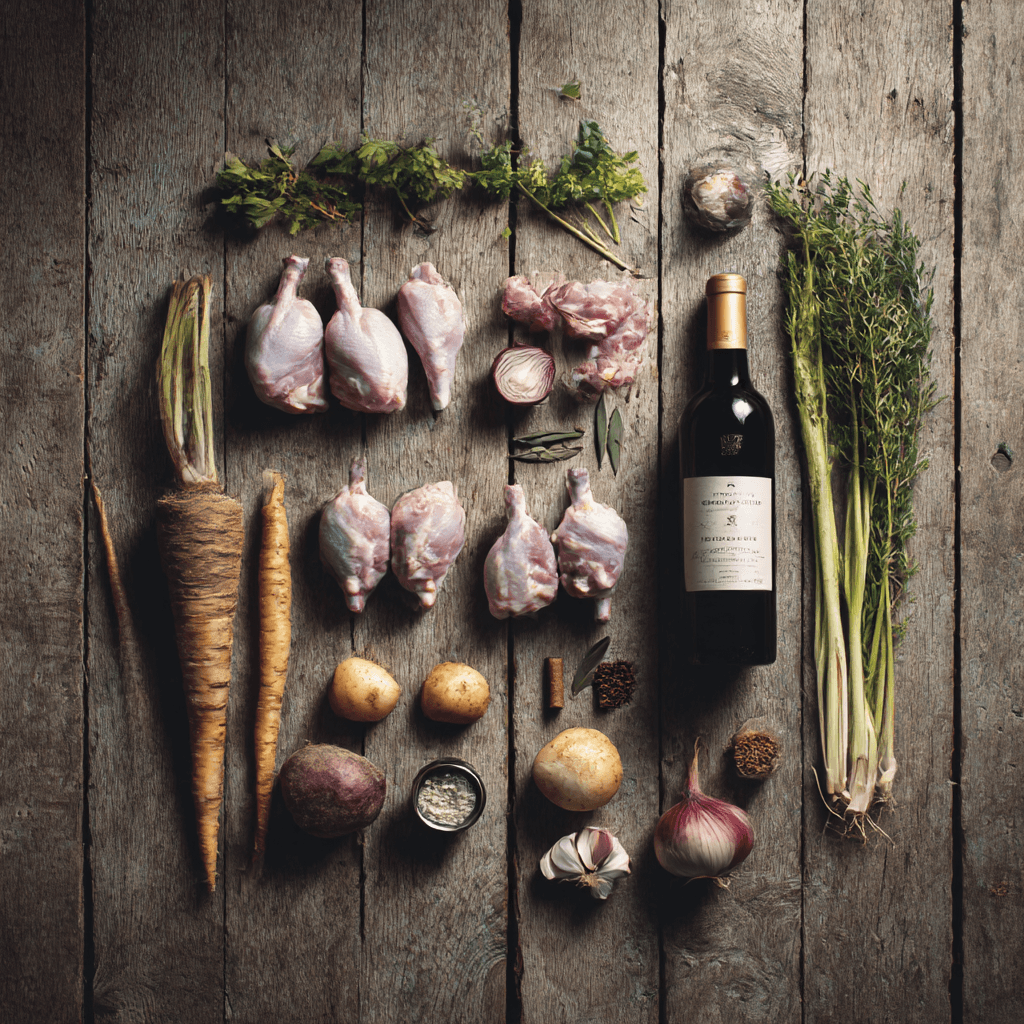
Quality ingredients make the difference between good and extraordinary Gordon Ramsay Butternut Squash Soup. Choose butternut squash that feels heavy for its size with unblemished, tan-colored skin—avoid any with soft spots or green tinges. The flesh should yield slightly to pressure at the blossom end, indicating proper ripeness. Fresh ginger root with tight, unwrinkled skin provides more punch than pre-ground powder, while whole nutmeg grated fresh delivers aromatic oils that disappear in pre-ground versions.

Yellow onions caramelize better than white varieties, creating deeper flavor foundations. Heavy cream with at least 35% fat content won’t curdle under heat, unlike lighter alternatives. Unsalted butter allows you to control sodium levels precisely. For stock, homemade vegetable or chicken stock provides superior flavor, but if using store-bought, choose low-sodium versions to prevent over-salting. Quality matters because each ingredient plays a starring role rather than hiding in the background. Check out this homemade vegetable stock recipe for the perfect base.

Step-by-Step Instructions for Gordon Ramsay Butternut Squash Soup

Preparing and Roasting the Squash

Preheat your oven to 425°F (220°C). **Always use a sharp chef’s knife and stable cutting board when handling butternut squash to prevent slipping and injury.** Cut the squash lengthwise, then scoop out seeds and strings with a large spoon. Cut into 2-inch chunks, leaving the skin on for easier handling—it peels off effortlessly after roasting. Toss with olive oil and season generously with salt and black pepper. Arrange in a single layer on a rimmed baking sheet, ensuring pieces don’t overcrowd.

Building the Aromatic Base

While squash roasts for 35-40 minutes until fork-tender and caramelized edges appear, prepare your aromatics. Heat 2 tablespoons butter in a large, heavy-bottomed pot over medium heat. Add diced onions and cook for 8-10 minutes until translucent and lightly golden. **Never leave aromatics unattended—burned onions will ruin the entire soup.** Add minced fresh ginger and garlic, cooking for another minute until fragrant but not browned.

Combining and Simmering

Remove roasted squash from oven and let cool for 5 minutes. **Use tongs or a spatula to transfer hot squash—never use bare hands.** Peel off skins and add flesh to the pot with aromatics. Pour in 4 cups of warm stock gradually, scraping up any browned bits from the pot bottom. Add bay leaves, fresh thyme, and a pinch of nutmeg. Bring to a gentle simmer and cook for 20 minutes, allowing flavors to meld. This professional soup-making technique ensures proper flavor development.

Blending to Perfection

Remove bay leaves and thyme stems. **Allow soup to cool for 10 minutes before blending to prevent dangerous splattering and achieve smoother texture.** Using an immersion blender, puree until completely smooth, or transfer in batches to a regular blender. Return to pot, stir in heavy cream, and season with salt, pepper, and fresh lemon juice to brighten flavors. Warm gently before serving—don’t boil after adding cream.

Pro-Tips That Change the Game

  • Roast squash cut-side down first, then flip halfway through for even caramelization and maximum flavor development
  • Add a splash of apple cider vinegar during cooking to balance sweetness and enhance the squash’s natural flavors
  • Save some roasted squash pieces before blending to fold back in for textural contrast and visual appeal
  • Warm your serving bowls in a 200°F oven for 5 minutes—hot soup in cold bowls loses temperature immediately
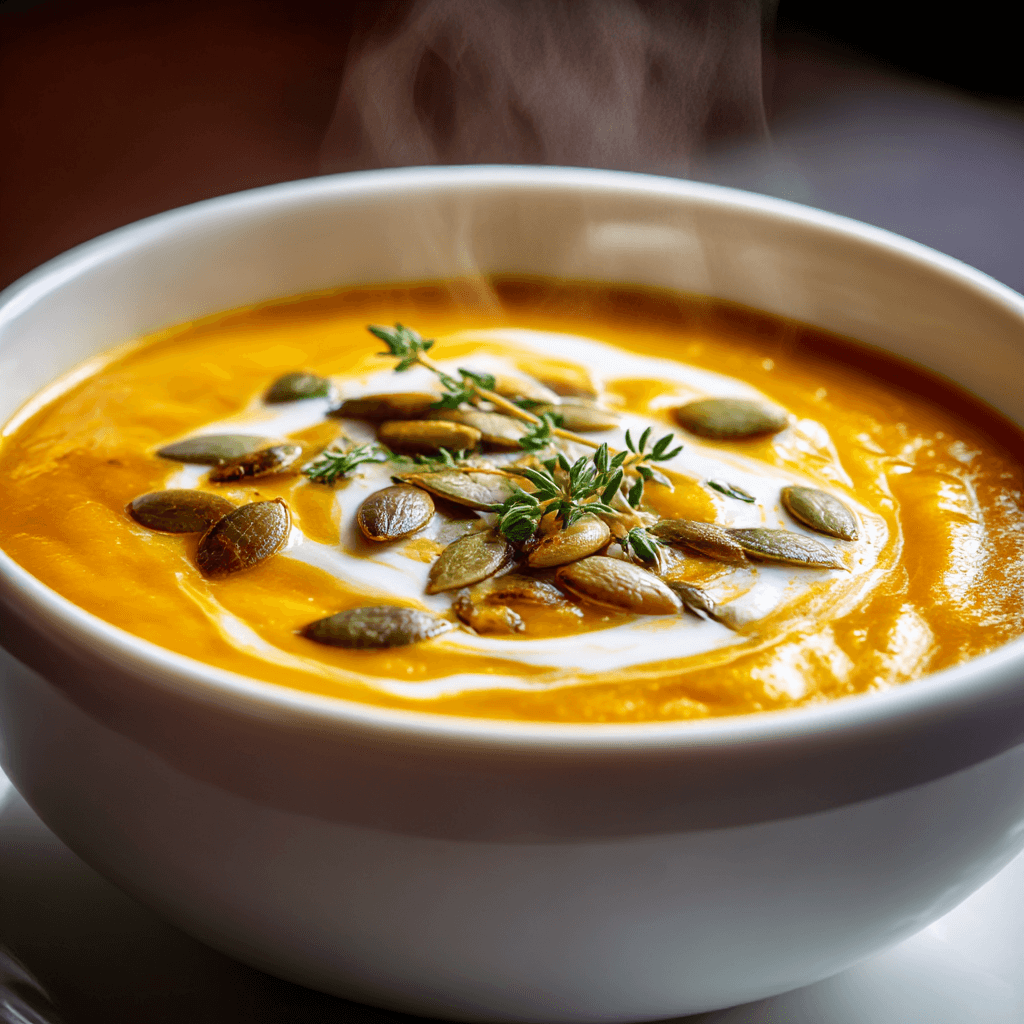
  • Finish with a drizzle of good olive oil and toasted pumpkin seeds for restaurant-style presentation
  • Make a double batch—the soup freezes beautifully for up to 3 months and tastes even better after flavors meld

Storage & Leftovers for Gordon Ramsay Butternut Squash Soup

Store Gordon Ramsay Butternut Squash Soup in the refrigerator for up to 4 days in airtight containers, leaving some headspace for expansion. Cool completely before refrigerating to prevent condensation that could lead to spoilage. For reheating, warm gently over medium-low heat, stirring frequently to prevent scorching. Add a splash of stock or cream if the soup has thickened during storage.

For longer storage, freeze in portion-sized containers for up to 3 months. The cream base may separate slightly after thawing, but gentle reheating and whisking will restore the smooth texture. **Never reheat soup more than once—bacteria multiply rapidly in the temperature danger zone.** Follow FDA food safety guidelines for proper cooling and reheating procedures.

Close-up of finished Gordon Ramsay Butternut Squash Soup plated and ready to serve with cream swirl and garnish
Jack Sullivan

Gordon Ramsay Butternut Squash Soup

Transform a humble autumn vegetable into liquid gold with Gordon Ramsay’s technique for butternut squash soup. This masterclass recipe builds layers of flavor through proper caramelization, precise aromatic timing, and temperature control for restaurant-quality results at home.
Prep Time 20 minutes
Cook Time 1 hour
Total Time 1 hour 20 minutes
Servings: 6 servings
Course: Soup
Cuisine: british
Calories: 185

Ingredients
  

  • 3 lbs butternut squash cut into 2-inch chunks
  • 3 tbsp olive oil for roasting
  • 2 tbsp unsalted butter
  • 1 large yellow onion diced
  • 2 tbsp fresh ginger minced
  • 3 cloves garlic minced
  • 4 cups vegetable stock warm, low-sodium
  • 2 bay leaves
  • 2 sprigs fresh thyme
  • 1/4 tsp fresh nutmeg grated
  • 1/2 cup heavy cream 35% fat content
  • 1 tbsp fresh lemon juice
  • salt and black pepper to taste
  • 1 tsp apple cider vinegar optional, for balance

Equipment

  • 1 Sharp chef’s knife For safely cutting butternut squash
  • 1 Rimmed baking sheet For roasting squash
  • 1 Large heavy-bottomed pot For building aromatic base
  • 1 Immersion blender Or regular blender for pureeing

Method
 

  1. 1️⃣ Preheat oven to 425°F (220°C). Using a sharp chef’s knife and stable cutting board, cut butternut squash lengthwise and scoop out seeds. Cut into 2-inch chunks, leaving skin on. Toss with olive oil, salt, and pepper. Arrange in single layer on rimmed baking sheet.
  2. 2️⃣ Roast squash for 35-40 minutes until fork-tender with caramelized edges, flipping halfway through for even browning.
  3. 3️⃣ While squash roasts, heat butter in large heavy-bottomed pot over medium heat. Add diced onions and cook 8-10 minutes until translucent and lightly golden. Never leave unattended.
  4. 4️⃣ Add minced ginger and garlic to pot, cooking 1 minute until fragrant but not browned.
  5. 5️⃣ Remove roasted squash from oven and cool 5 minutes. Using tongs, transfer squash to pot after peeling off skins. Add warm stock gradually, scraping up browned bits.
  6. 6️⃣ Add bay leaves, thyme, and nutmeg. Bring to gentle simmer and cook 20 minutes for flavors to meld.
  7. 7️⃣ Remove bay leaves and thyme stems. Cool soup 10 minutes before blending to prevent splattering. Puree with immersion blender until completely smooth.
  8. 8️⃣ Return to pot, stir in heavy cream, and season with salt, pepper, lemon juice, and apple cider vinegar if using. Warm gently before serving – don’t boil after adding cream.

Nutrition

Serving: 1gCalories: 185kcalCarbohydrates: 28gProtein: 4gFat: 8gSaturated Fat: 5gPolyunsaturated Fat: 1gMonounsaturated Fat: 2gCholesterol: 25mgSodium: 380mgPotassium: 580mgFiber: 6gSugar: 8gVitamin A: 450IUVitamin C: 25mgCalcium: 85mgIron: 2mg

Notes

Roast squash cut-side down first, then flip halfway through for even caramelization. Save some roasted squash pieces before blending for textural contrast. Warm serving bowls in 200°F oven for 5 minutes. Finish with good olive oil and toasted pumpkin seeds. Makes excellent leftovers and freezes beautifully for up to 3 months.

Tried this recipe?

Let us know how it was!

Frequently Asked Questions About Gordon Ramsay Butternut Squash Soup

What to add to butternut squash soup to make it taste better?

Fresh ginger, apple cider vinegar, and a touch of maple syrup transform bland Gordon Ramsay Butternut Squash Soup into something spectacular. Roasted garlic adds depth, while a splash of white wine during cooking creates complexity. Fresh herbs like thyme or sage, and finishing with high-quality olive oil and toasted nuts elevates the presentation and flavor profile significantly.

What makes Gordon Ramsay’s soup unique?

Gordon Ramsay Butternut Squash Soup stands apart through meticulous technique—proper caramelization of vegetables, building flavors in layers, and precise seasoning at each stage. His method emphasizes roasting the squash until deeply golden, creating a sweet-savory base that cheap shortcuts cannot replicate. The addition of fresh aromatics and careful temperature control during blending ensures restaurant-quality results.

What main course goes well with butternut squash soup?

Rich Gordon Ramsay Butternut Squash Soup pairs beautifully with lighter proteins like herb-crusted chicken, pan-seared fish, or roasted pork tenderloin. For vegetarian options, try it with quinoa salad or grilled portobello mushrooms. The soup’s creamy richness balances well with acidic or spicy dishes. Consider this herb-crusted chicken recipe for an elegant pairing.

How to take bitterness out of butternut squash soup?

Remove bitterness from Gordon Ramsay Butternut Squash Soup by adding a teaspoon of maple syrup or honey, which balances harsh flavors without making it dessert-like. A splash of apple cider vinegar brightens the overall taste, while a pinch of salt enhances natural sweetness. Ensure you’re using ripe squash—underripe varieties contribute unwanted bitterness that seasoning cannot fully mask.

This Gordon Ramsay Butternut Squash Soup recipe brings professional techniques into your home kitchen, transforming simple ingredients into something truly special. Take your time with each step, trust the process, and enjoy the incredible results that patience and proper technique deliver.

Stay safe,
Jack Sullivan

Gordon Ramsay Chicken Madras transforms your kitchen into a professional curry house with one critical difference—most home cooks skip the spice tempering step that creates the deep, complex flavors this dish is famous for. During my firefighting days, I learned that rushed preparation leads to disasters, whether you’re battling flames or crafting the perfect curry. The same principle applies to this incredible dish that originated in the bustling kitchens of British-Indian restaurants. According to the Harvard Health Publishing, the spices in curry dishes like Madras provide significant anti-inflammatory benefits, making this recipe as healthy as it is delicious. If you’re looking to expand your curry repertoire, you’ll also love this Gordon Ramsay Thai Red Curry for another authentic Asian-inspired dish.

Why This Gordon Ramsay Chicken Madras Recipe Works (And Where Most Go Wrong)

The Gordon Ramsay Chicken Madras succeeds because it follows three fundamental principles that most home cooks overlook. First, the spices must be bloomed in oil at the right temperature—too hot and they burn, too cool and they remain raw and bitter. I’ve seen countless curry disasters because people dump cold spices into screaming hot oil. Second, the chicken needs proper marination time, not the five-minute shortcuts that leave you with tough, flavorless meat. Finally, the sauce requires proper reduction to concentrate flavors, something that takes patience but delivers restaurant-quality results.

The biggest mistake I see is rushing the aromatics stage. Those onions need to cook until they’re golden and sweet, which takes a solid 8-10 minutes. Skip this step, and your Gordon Ramsay Chicken Madras will taste flat and one-dimensional. According to Serious Eats’ food science research, proper caramelization of onions creates over 150 different flavor compounds that form the backbone of any great curry.

Ingredients That Actually Matter for Gordon Ramsay Chicken Madras

Overhead flat lay photograph of ingredients needed for Gordon Ramsay Chicken Madras, arranged aesthetically on rustic wooden surface, natural window lighting from top-left, minimalist composition, individual ingredients clearly visible and separated including chicken pieces, curry powder, garam masala, onions, garlic, ginger, tomatoes, coconut milk, neutral background, food styling, editorial quality

Quality ingredients make the difference between mediocre and magnificent Gordon Ramsay Chicken Madras. Start with chicken thighs instead of breasts—the extra fat content keeps the meat tender during the long cooking process. Look for thighs with skin on, even though you’ll remove it, as this indicates fresher meat. For the spice blend, freshness is everything. Madras curry powder should smell vibrant and pungent, not dusty or bland. If your curry powder has been sitting in the cabinet for over a year, replace it.

Coconut milk quality varies dramatically between brands. Choose full-fat coconut milk with no stabilizers or emulsifiers—the ingredient list should only show coconut and water. Thai brands typically offer the richest consistency. Fresh ginger and garlic are non-negotiable; the pre-minced jarred versions lack the volatile oils that create depth. For tomatoes, canned whole tomatoes that you crush yourself work better than pre-diced versions, which often contain calcium chloride that prevents proper breakdown. If you’re interested in perfecting other sauce-based dishes, check out this Gordon Ramsay Tomato Butter Sauce guide.

Step-by-Step Instructions for Gordon Ramsay Chicken Madras

Prepare and Marinate the Chicken

Cut 2 pounds of chicken thighs into bite-sized pieces, removing excess fat but leaving some for flavor. In a large bowl, combine the chicken with 1 teaspoon salt, 1/2 teaspoon turmeric, and 2 tablespoons plain yogurt. Mix thoroughly and let marinate for at least 30 minutes, or up to 4 hours in the refrigerator. This step tenderizes the meat and infuses it with base flavors that complement the Madras spices.

Build the Aromatic Base

Heat 3 tablespoons vegetable oil in a heavy-bottomed pot over medium heat. Add 2 large diced onions and cook for 8-10 minutes until golden brown, stirring regularly. **Never leave the onions unattended during this stage—burnt onions will ruin the entire dish.** Add 4 minced garlic cloves and 1 tablespoon freshly grated ginger, cooking for another minute until fragrant. The kitchen should smell incredible at this point.

Toast and Bloom the Spices

Reduce heat to medium-low and add 3 tablespoons Madras curry powder, 1 teaspoon ground coriander, 1/2 teaspoon cayenne pepper, and 1/4 teaspoon cinnamon. **Keep the spices moving constantly for 30-60 seconds—burned spices create irreparable bitterness.** You’ll know they’re ready when the mixture becomes fragrant and the spices darken slightly. This technique, explained in detail at Food Network’s spice blooming guide, is crucial for developing complex curry flavors.

Add Liquid and Simmer

Pour in one 14-ounce can of crushed tomatoes and scrape up any browned bits from the bottom of the pot. Add the marinated chicken along with any accumulated juices, stirring to coat with the spice mixture. Pour in 1 cup coconut milk and 1/2 cup chicken broth, bringing the mixture to a gentle simmer. Reduce heat to low, cover partially, and simmer for 25-30 minutes until the chicken is tender and the sauce has thickened. Taste and adjust seasoning with salt, sugar, and additional cayenne as needed.

The Gordon Ramsay Chicken Madras should have a rich, deep red color and coat the back of a spoon when finished. If you’re looking for complementary dishes, this Gordon Ramsay White Chicken Chili offers another excellent chicken-based comfort food option.

Pro-Tips That Change the Game

  • Toast whole spices like cardamom pods and cinnamon sticks in the oil before adding ground spices for extra depth
  • Add a tablespoon of tomato paste after the onions for richer color and concentrated umami flavor
  • Finish with a splash of cream or additional coconut milk for restaurant-style richness
  • Let the curry rest for 10 minutes off heat before serving—flavors continue developing and melding
  • Garnish with fresh cilantro and a dollop of cooling yogurt to balance the heat
  • Make it a day ahead—Gordon Ramsay Chicken Madras tastes even better after overnight refrigeration

Storage & Leftovers for Gordon Ramsay Chicken Madras

Store leftover Gordon Ramsay Chicken Madras in the refrigerator for up to 4 days in airtight containers. The flavors actually improve with time as the spices continue to meld. For reheating, use low heat on the stovetop, adding a splash of coconut milk or broth if the sauce has thickened too much. **Never reheat curry at high heat as it can cause the coconut milk to separate and the chicken to become tough.**

This curry freezes beautifully for up to 3 months. Thaw overnight in the refrigerator before reheating. According to FDA food safety guidelines, always reheat leftovers to an internal temperature of 165°F to ensure food safety. The curry is properly reheated when it’s steaming hot throughout.

Close-up of finished Gordon Ramsay Chicken Madras plated and ready to serve

Gordon Ramsay Chicken Madras

A fiery and flavorful South Indian-inspired curry with tender chicken pieces in a rich, spicy tomato-based sauce. This Gordon Ramsay version delivers authentic restaurant-quality heat and depth of flavor.
Prep Time 15 minutes
Cook Time 45 minutes
Total Time 1 hour
Servings: 4 servings
Course: Main Course
Cuisine: british, Indian
Calories: 385

Ingredients
  

Chicken
  • 1.5 lbs chicken thighs boneless, skinless, cut into chunks
  • 1 tsp salt
  • 1/2 tsp turmeric
Curry Base
  • 3 tbsp vegetable oil
  • 2 large onions finely chopped
  • 4 cloves garlic minced
  • 2 inch fresh ginger grated
  • 3 green chilies slit lengthwise
  • 3 tbsp tomato paste
  • 1 can diced tomatoes 14 oz
Madras Spice Mix
  • 2 tbsp madras curry powder
  • 2 tsp ground coriander
  • 2 tsp ground cumin
  • 2 tsp chili powder
  • 1 tsp cayenne pepper
  • 1 tsp paprika
  • 1 tsp garam masala
Liquid and Finishing
  • 1.5 cups chicken stock
  • 1/2 cup coconut milk optional, for milder heat
  • 2 tbsp lemon juice fresh
  • 2 tbsp fresh cilantro chopped, for garnish
  • salt to taste

Equipment

  • Large heavy-bottomed pan
  • Wooden spoon
  • Cutting board

Method
 

  1. Season the chicken chunks with salt and turmeric. Set aside.
  2. Heat the vegetable oil in a large heavy-bottomed pan over medium-high heat. Add the chicken and brown on all sides, about 5-6 minutes. Remove and set aside.
  3. In the same pan, add the chopped onions and cook until golden brown and caramelized, about 10-12 minutes. Stir frequently to prevent burning.
  4. Add the garlic, ginger, and green chilies. Cook for 2 minutes until fragrant, stirring constantly.
  5. Stir in the tomato paste and cook for 1 minute.
  6. Add all the spices: madras curry powder, coriander, cumin, chili powder, cayenne pepper, paprika, and garam masala. Toast the spices for 2 minutes, stirring constantly to prevent burning.
  7. Add the diced tomatoes and cook for 5 minutes, breaking them down with a wooden spoon until you have a thick paste.
  8. Return the chicken to the pan and stir to coat in the spice mixture.
  9. Pour in the chicken stock and bring to a boil. Reduce heat to medium-low, cover, and simmer for 25-30 minutes until the chicken is cooked through and tender.
  10. If using coconut milk, stir it in during the last 5 minutes of cooking. This will slightly reduce the heat level.
  11. Stir in the lemon juice and season with salt to taste.
  12. Garnish with fresh cilantro and serve hot with basmati rice, naan bread, or poppadoms.

Nutrition

Calories: 385kcalCarbohydrates: 22gProtein: 32gFat: 19gSaturated Fat: 5gCholesterol: 125mgSodium: 890mgPotassium: 780mgFiber: 5gSugar: 10gVitamin A: 1680IUVitamin C: 35mgCalcium: 8mgIron: 3.8mg

Notes

Madras curry is traditionally one of the hotter curries, so adjust the chili powder and cayenne pepper to your heat preference. For an even spicier version, add more green chilies or keep the seeds in. The longer you cook the onions until they’re well caramelized, the richer and deeper the curry flavor will be. This curry can be made ahead and tastes even better the next day. Store in the refrigerator for up to 3 days or freeze for up to 3 months.

Tried this recipe?

Let us know how it was!

Frequently Asked Questions About Gordon Ramsay Chicken Madras

What are common mistakes when making chicken curry?

The biggest mistakes include burning the spices by using too high heat, not cooking onions long enough to develop sweetness, using old spices that lack potency, and rushing the simmering process. Many home cooks also skip the marination step, resulting in tough, flavorless chicken. Taking time with each step ensures your Gordon Ramsay Chicken Madras develops proper depth and complexity.

Why is it called chicken madras?

Chicken Madras gets its name from the former name of Chennai, a city in South India. However, the dish as we know it was actually created in British curry houses, not in Madras itself. It represents the British interpretation of South Indian flavors, typically featuring a tomato-based sauce with moderate heat levels and aromatic spices that appeal to Western palates.

This Gordon Ramsay Chicken Madras brings professional-quality curry to your home kitchen with techniques that ensure success every time. Take your time with each step, respect the ingredients, and you’ll be rewarded with a dish that rivals any restaurant.

Stay safe,
Jack Sullivan

Gordon Ramsay Creme Brulee represents the pinnacle of French dessert craftsmanship, yet most home cooks stumble on the same critical mistakes. During my firefighting days, I learned that precision under pressure separates professionals from amateurs—and nothing demonstrates this better than crafting the perfect crème brûlée. This elegant custard dessert demands respect for temperature, timing, and technique. When done right, you’ll crack through that golden caramelized sugar to reveal silky vanilla custard beneath. The FDA emphasizes proper handling of dairy and eggs when preparing custard-based desserts. If you’re looking to master other impressive Ramsay desserts, check out our Gordon Ramsay sticky toffee pudding guide.

Why This Gordon Ramsay Creme Brulee Recipe Works (And Where Most Go Wrong)

The magic of Gordon Ramsay Creme Brulee lies in understanding three fundamental principles that separate restaurant-quality results from grainy disappointments. First, temperature control throughout the entire process prevents the eggs from scrambling—a mistake that ruins countless attempts. Second, the cream-to-egg ratio creates that perfect custard consistency that holds its shape yet melts on your tongue. Third, the water bath (bain-marie) ensures even, gentle cooking that prevents curdling.

The Temperature Trap

Most home cooks rush the heating process, causing the cream mixture to become too hot before adding eggs. This instant scrambling creates a grainy texture that no amount of straining can fix. According to culinary science experts, eggs begin coagulating at 140°F, so maintaining control below this threshold is crucial.

The Ratio Reality

Gordon Ramsay’s approach uses a specific cream-to-yolk ratio that creates richness without heaviness. Many recipes call for whole eggs, but using only yolks eliminates the proteins that cause rubbery texture while maximizing that luxurious mouthfeel.

Ingredients That Actually Matter for Gordon Ramsay Creme Brulee

Fresh ingredients for making Gordon Ramsay Creme Brulee laid out on wooden surface

Every ingredient in Gordon Ramsay Creme Brulee serves a specific purpose, and quality directly impacts your final result. Heavy cream with at least 35% fat content provides the rich base—anything less won’t achieve that signature texture. Fresh egg yolks from pasture-raised chickens offer superior flavor and color compared to conventional eggs. Real vanilla beans, not extract, infuse those distinctive black specks and complex vanilla notes that define restaurant-quality crème brûlée.

Sugar plays dual roles: fine granulated sugar sweetens the custard base, while superfine or caster sugar creates the best caramelized top. The finer crystals melt more evenly under the torch, preventing bitter burnt spots. When shopping, look for cream that hasn’t been ultra-pasteurized, as this process can prevent proper thickening. For vanilla beans, Madagascar varieties offer classic sweet notes, while Tahitian beans provide floral complexity. If vanilla beans aren’t available, use high-quality pure vanilla extract—about 2 teaspoons per recipe. Learn more about ingredient quality in our Gordon Ramsay signature dishes guide.

Step-by-Step Instructions for Gordon Ramsay Creme Brulee

Creating perfect Gordon Ramsay Creme Brulee requires methodical execution and careful attention to visual and aromatic cues throughout the process.

Phase 1: Preparing the Custard Base

Preheat your oven to 325°F and place six 4-ounce ramekins in a large roasting pan. In a heavy-bottomed saucepan, combine 2 cups heavy cream with 1 split vanilla bean (seeds scraped). Heat over medium-low flame until you see steam rising and small bubbles forming around the edges—never let it boil. **Safety warning: Keep constant watch during heating, as cream can foam over suddenly and cause severe burns.**

Phase 2: Tempering the Eggs

While cream heats, whisk 6 large egg yolks with ⅓ cup granulated sugar in a mixing bowl until pale yellow. Remove vanilla bean from hot cream. **Critical step: Add hot cream to egg mixture in a thin, steady stream while whisking constantly to prevent scrambling.** This tempering process should take 2-3 minutes. Strain mixture through fine-mesh sieve to remove any lumps. The proper egg handling techniques we use here apply to many professional preparations.

Phase 3: Baking the Custards

Divide custard evenly among ramekins, filling each about ¾ full. Place roasting pan in oven, then carefully pour hot water halfway up sides of ramekins. **Safety warning: Use oven mitts and pour slowly to avoid splashing hot water.** Bake 35-40 minutes until centers jiggle slightly when gently shaken. The custard should feel set but not firm. Remove from water bath immediately and cool to room temperature before refrigerating at least 4 hours or overnight.

Phase 4: The Signature Caramelized Top

Just before serving, remove custards from refrigerator and let stand 10 minutes. Sprinkle 1-2 teaspoons superfine sugar evenly over each surface. Using a kitchen torch held 4-5 inches away, move in circular motions until sugar melts and caramelizes to deep amber. **Safety warning: Keep torch moving constantly to prevent burning, and never leave unattended.** Allow caramelized sugar to harden for 2-3 minutes before serving.

Pro-Tips That Change the Game

  • Use a kitchen scale to measure cream—2 cups should weigh exactly 16 ounces for consistent results every time
  • Test doneness by gently tapping the side of one ramekin; properly set custard will have a slight jiggle in the center only
  • Chill your mixing bowl and whisk in the freezer for 15 minutes before whisking yolks—this prevents premature heating
  • Save vanilla bean pods after scraping; rinse, dry, and store in sugar for homemade vanilla sugar
  • If you don’t own a torch, place ramekins under broiler for 1-2 minutes, watching constantly to prevent burning
  • Room temperature eggs incorporate more smoothly than cold ones—take them out 30 minutes before cooking

Storage & Leftovers for Gordon Ramsay Creme Brulee

Properly stored Gordon Ramsay Creme Brulee maintains quality for up to three days in the refrigerator. Cover each ramekin tightly with plastic wrap, ensuring the wrap doesn’t touch the custard surface. The caramelized sugar top will soften during storage, so plan to re-torch before serving leftovers. Never freeze crème brûlée, as the custard will separate and become grainy when thawed. For food safety, the USDA recommends consuming egg-based custards within 3-4 days of preparation. Store at 40°F or below, and always check for any off odors or appearance changes before consuming.

Fresh ingredients for making Gordon Ramsay Creme Brulee laid out on wooden surface

Gordon Ramsay Crème Brûlée

A classic French dessert with a rich, creamy custard base and a perfectly caramelized sugar topping. This is Gordon Ramsay’s signature version that delivers restaurant-quality results at home.
Prep Time 15 minutes
Cook Time 40 minutes
Chilling Time 4 hours
Total Time 4 hours 55 minutes
Servings: 6 ramekins
Course: Dessert
Cuisine: French
Calories: 385

Ingredients
  

Custard Base
  • 2 cups heavy cream
  • 1 vanilla bean split and seeds scraped
  • 5 egg yolks large
  • 1/2 cup granulated sugar divided
Topping
  • 6 tbsp superfine sugar or caster sugar

Equipment

  • Ramekins
  • Baking dish
  • Kitchen torch
  • Fine mesh strainer

Method
 

  1. Preheat the oven to 325°F (160°C).
  2. Pour the heavy cream into a saucepan. Add the vanilla bean pod and seeds. Heat gently until it just comes to a simmer, then remove from heat and let infuse for 10 minutes.
  3. In a bowl, whisk the egg yolks and 1/4 cup of sugar until pale and thick.
  4. Remove the vanilla pod from the cream. Gradually pour the warm cream into the egg mixture while whisking continuously.
  5. Strain the mixture through a fine mesh strainer into a pouring jug to remove any lumps.
  6. Pour the custard into 6 ramekins. Place the ramekins in a deep baking dish and fill the dish with hot water until it reaches halfway up the sides of the ramekins.
  7. Bake for 35-40 minutes until the custards are set but still have a slight wobble in the center.
  8. Remove from the water bath and let cool to room temperature. Then refrigerate for at least 4 hours or overnight.
  9. Just before serving, sprinkle 1 tablespoon of superfine sugar evenly over each custard. Use a kitchen torch to caramelize the sugar until golden and crispy.
  10. Let the sugar harden for a minute before serving.

Nutrition

Calories: 385kcalCarbohydrates: 28gProtein: 4gFat: 29gSaturated Fat: 17gCholesterol: 285mgSodium: 35mgPotassium: 95mgSugar: 27gVitamin A: 950IUCalcium: 8mgIron: 0.5mg

Notes

For the best results, use a real vanilla bean rather than extract. The custard can be made a day ahead and kept covered in the refrigerator. Only caramelize the sugar topping just before serving to maintain the crispy texture. If you don’t have a kitchen torch, you can place the ramekins under a very hot broiler, but watch carefully to prevent burning.

Tried this recipe?

Let us know how it was!

Frequently Asked Questions About Gordon Ramsay Creme Brulee

What are some fun facts about crème brûlée?

Crème brûlée originated in 17th century France, though similar desserts appeared across Europe. The name literally means “burnt cream,” referring to the caramelized sugar top. Trinity College, Cambridge claims to have invented a nearly identical dessert called “Trinity Cream” decades before the French version appeared. The dessert gained massive popularity in American restaurants during the 1980s fine dining boom.

Mastering Gordon Ramsay Creme Brulee takes patience and practice, but the reward—that satisfying crack of caramelized sugar giving way to silky custard—makes every careful step worthwhile. Remember, cooking is about building confidence through repetition, so don’t be discouraged if your first attempt isn’t perfect.

Stay safe,
Jack Sullivan

Gordon Ramsay Broccoli And Stilton soup transforms a simple vegetable into liquid gold with three critical techniques that most home cooks overlook completely. After twenty years responding to kitchen fires as a firefighter, I’ve seen what happens when people rush soup-making – burned pans, curdled dairy, and smoke alarms that shouldn’t be going off. This recipe eliminates those risks while delivering the creamy, sophisticated flavor that made this soup a signature dish in Ramsay’s restaurants. The key lies in understanding how heat, timing, and proper ingredient handling work together, much like coordinating a successful emergency response. According to the USDA food safety guidelines, proper temperature control during dairy integration prevents both foodborne illness and texture disasters. When paired with Gordon Ramsay’s cauliflower soup, you’ll have a complete repertoire of professional-grade cream soups.

Why This Gordon Ramsay Broccoli And Stilton soup Recipe Works (And Where Most Go Wrong)

The magic behind Gordon Ramsay Broccoli And Stilton soup lies in three fundamental principles that separate restaurant-quality results from disappointing home attempts. Most people fail because they treat soup-making like a casual weekend project instead of the precision cooking it demands.

Temperature Control Prevents Cheese Separation

The biggest mistake I see is adding Stilton cheese to boiling liquid. When cheese hits temperatures above 180°F, the proteins seize up and create that grainy, separated texture that ruins the entire bowl. Professional kitchens maintain strict temperature zones, and so should you. The secret is reducing heat to barely simmering before any dairy touches the pot.

Proper Broccoli Processing Eliminates Bitterness

Gordon Ramsay Broccoli And Stilton soup depends on extracting maximum sweetness from the broccoli while avoiding the bitter compounds in overcooked stems. The stems contain the most fiber and nutrients, but they require different treatment than the delicate florets. Separating these components and cooking them at different intervals creates depth without harshness.

Building Flavor Layers Before Liquid Addition

Amateur cooks dump everything into the pot simultaneously, creating flat, one-dimensional soup. Professional technique builds flavor in stages – aromatics first, then vegetables, then liquid. Each layer needs time to develop before the next addition. This methodical approach, similar to how we approached complex emergency situations, ensures every element contributes to the final result. Understanding soup science reveals why timing matters more than expensive ingredients.

Ingredients That Actually Matter for Gordon Ramsay Broccoli And Stilton soup

Fresh ingredients for making Gordon Ramsay Broccoli And Stilton soup arranged on wooden surface

Quality ingredients make the difference between acceptable soup and restaurant-caliber Gordon Ramsay Broccoli And Stilton soup. Each component serves a specific purpose, and substitutions require understanding why the original works.

Fresh broccoli beats frozen every time because it retains better texture and contains less excess water that dilutes flavor. Look for tight, dark green florets with firm stems – any yellowing indicates age and increased bitterness. The stems should feel solid, not spongy or hollow.

Authentic Stilton cheese provides the signature sharp, creamy tang that defines this soup. Stilton’s unique aging process creates complex flavors that generic blue cheese cannot match. The cheese should be creamy white with even blue-green veining – avoid any with brown spots or ammonia smell. If Stilton proves unavailable, Roquefort works as a substitute, though it’s saltier and requires adjustment.

Good chicken or vegetable stock forms the foundation. Homemade stock always wins, but quality store-bought versions work if you choose low-sodium options. The salt content needs your control, not the manufacturer’s. Avoid any stock with artificial flavors or excessive preservatives – they compete with the delicate cheese flavors. High-quality stock should gel slightly when refrigerated, indicating proper collagen extraction. For vegetable stock preparation techniques, check out this leek and potato soup guide that demonstrates proper stock building.

Step-by-Step Instructions for Gordon Ramsay Broccoli And Stilton soup

Creating perfect Gordon Ramsay Broccoli And Stilton soup requires methodical execution and constant attention to temperature. Rush any step, and you’ll compromise the final result.

Preparation Phase

Cut 2 pounds fresh broccoli, separating florets from stems. **Never discard the stems** – they contain concentrated flavor and nutrients. Peel tough outer skin from stems and dice into small, uniform pieces. This ensures even cooking and prevents texture inconsistencies. Dice one large onion and mince 3 garlic cloves. Having everything prepared before heating begins prevents overcooking during the cooking process.

Building the Base

Heat 2 tablespoons butter in a heavy-bottomed pot over medium heat. **Avoid high heat** – it will brown the butter and create bitter undertones. Add diced onion and cook for 5 minutes until translucent but not browned. Add minced garlic and cook 30 seconds until fragrant. The garlic should sizzle gently – if it browns, the temperature is too high.

Vegetable Integration

Add diced broccoli stems first and cook 3 minutes to soften. These tougher pieces need extra time to reach the same tenderness as florets. Pour in 6 cups quality stock and bring to a gentle boil. **Monitor temperature carefully** – violent boiling breaks down vegetable cell walls and creates mushy texture. Reduce to simmer and cook 10 minutes until stems pierce easily with a knife.

Finishing with Dairy

Add broccoli florets and simmer 5 minutes until bright green and tender. Remove from heat – this is critical for successful cheese integration. **Never add cheese to hot, boiling soup** – it will separate immediately. Stir in 1/2 cup heavy cream, then gradually crumble in 6 ounces Stilton cheese, stirring constantly. The residual heat will melt the cheese smoothly. Taste and adjust seasoning with salt and white pepper. For similar cheese integration techniques, reference Gordon Ramsay’s cauliflower cheese method.

Pro-Tips That Change the Game

  • Reserve some small broccoli florets before cooking and blanch separately for 2 minutes – add to finished soup for texture contrast and visual appeal
  • Grate fresh nutmeg directly into the soup just before serving – pre-ground nutmeg lacks the aromatic oils that complement Stilton
  • Warm serving bowls in a 200°F oven for 5 minutes – cold bowls will drop soup temperature and cause cheese to congeal on contact
  • Add a splash of dry sherry to each serving bowl before ladling soup – it enhances the Stilton’s complex flavors without overwhelming
  • Blend only half the soup for optimal texture – completely smooth soup lacks character, while completely chunky soup feels rustic rather than refined
  • Finish with a drizzle of good olive oil and cracked black pepper – the oil carries flavor compounds to your nose while eating

Storage & Leftovers for Gordon Ramsay Broccoli And Stilton soup

Proper storage maintains food safety and preserves the delicate texture of Gordon Ramsay Broccoli And Stilton soup. Cool soup completely before refrigerating – placing hot soup in the refrigerator raises the internal temperature and compromises other stored foods. Store in airtight containers for up to 3 days maximum.

Reheating requires gentle warming over low heat with frequent stirring. **Never microwave cheese-based soups** – the uneven heating will separate the dairy components. Add a splash of cream or stock if the soup thickens during storage. The cheese may separate slightly during reheating, but gentle whisking will restore smoothness. According to FDA safe food handling guidelines, dairy-based soups should never exceed 4 days refrigerated storage, and freezing is not recommended due to texture degradation.

Close-up of finished Gordon Ramsay Broccoli And Stilton soup plated and ready to serve with stilton garnish
Jack Sullivan

Gordon Ramsay Broccoli And Stilton soup

Gordon Ramsay Broccoli And Stilton soup transforms a simple vegetable into liquid gold with three critical techniques: proper temperature control, correct broccoli processing, and methodical flavor building. This restaurant-quality recipe delivers creamy, sophisticated flavor while avoiding common mistakes like cheese separation and bitter vegetables.
Prep Time 15 minutes
Cook Time 25 minutes
Total Time 40 minutes
Servings: 6 servings
Course: Soup
Cuisine: british
Calories: 285

Ingredients
  

  • 2 pounds fresh broccoli stems and florets separated
  • 1 large onion diced
  • 3 cloves garlic minced
  • 2 tablespoons butter
  • 6 cups quality chicken or vegetable stock low-sodium
  • 6 ounces Stilton cheese crumbled
  • 1/2 cup heavy cream
  • salt and white pepper to taste
  • fresh nutmeg for garnish

Equipment

  • 1 Heavy-bottomed pot For even heat distribution
  • 1 – Sharp knife For cutting broccoli and onions
  • 1 Cutting board For prep work

Method
 

  1. 1️⃣ Cut 2 pounds fresh broccoli, separating florets from stems. Peel tough outer skin from stems and dice into small, uniform pieces. Dice one large onion and mince 3 garlic cloves.
  2. 2️⃣ Heat 2 tablespoons butter in a heavy-bottomed pot over medium heat. Add diced onion and cook for 5 minutes until translucent but not browned. Add minced garlic and cook 30 seconds until fragrant.
  3. 3️⃣ Add diced broccoli stems first and cook 3 minutes to soften. Pour in 6 cups quality stock and bring to a gentle boil. Reduce to simmer and cook 10 minutes until stems pierce easily with a knife.
  4. 4️⃣ Add broccoli florets and simmer 5 minutes until bright green and tender. Remove from heat – this is critical for successful cheese integration.
  5. 5️⃣ Stir in 1/2 cup heavy cream, then gradually crumble in 6 ounces Stilton cheese, stirring constantly. The residual heat will melt the cheese smoothly. Taste and adjust seasoning with salt and white pepper.
  6. 6️⃣ Serve immediately in warmed bowls, garnished with freshly grated nutmeg and cracked black pepper.

Nutrition

Serving: 1gCalories: 285kcalCarbohydrates: 12gProtein: 15gFat: 22gSaturated Fat: 14gPolyunsaturated Fat: 1gMonounsaturated Fat: 6gCholesterol: 65mgSodium: 850mgPotassium: 420mgFiber: 4gSugar: 6gVitamin A: 1250IUVitamin C: 85mgCalcium: 280mgIron: 2mg

Notes

Reserve some small broccoli florets before cooking and blanch separately for 2 minutes – add to finished soup for texture contrast. Warm serving bowls in a 200°F oven for 5 minutes to prevent cheese from congealing. Never add cheese to boiling liquid as it will separate immediately. Blend only half the soup for optimal texture balance.

Tried this recipe?

Let us know how it was!

Frequently Asked Questions About Gordon Ramsay Broccoli And Stilton soup

What are common mistakes making broccoli soup?

The most frequent errors include adding cheese to boiling liquid, which causes separation, overcooking broccoli until it becomes mushy and bitter, and using poor-quality stock that lacks body. Temperature control is crucial – Gordon Ramsay Broccoli And Stilton soup requires gentle heat throughout the dairy integration phase.

What makes Gordon Ramsay’s soup unique?

Ramsay’s approach emphasizes proper technique over exotic ingredients. He builds flavor layers systematically, treats each ingredient according to its specific needs, and maintains strict temperature control. The Gordon Ramsay Broccoli And Stilton soup stands out because of precision timing and understanding how cheese behaves under different heat conditions.

How to make the perfect broccoli and stilton soup?

Perfect Gordon Ramsay Broccoli And Stilton soup requires fresh ingredients, methodical preparation, and patience with temperature management. Cook stems longer than florets, remove from heat before adding cheese, and taste constantly for seasoning balance. The Stilton should melt smoothly without grittiness if you follow proper technique.

What pairs well with broccoli and Stilton soup?

Crusty bread, crisp white wine, or a light salad complement the rich, creamy nature of this Gordon Ramsay Broccoli And Stilton soup. Avoid competing flavors – the Stilton provides enough complexity on its own. Consider serving with Gordon Ramsay’s garlic bread for a complete meal.

This soup embodies everything I love about professional cooking – it demands respect for technique while rewarding you with extraordinary results. Master these principles, and you’ll understand why Gordon Ramsay built his reputation on fundamentals rather than flash.

Stay safe,
Jack Sullivan

Gordon Ramsay Beef Curry delivers the kind of deep, complex flavors that separate professional kitchens from home cooking disasters. After twenty years fighting fires and another decade perfecting recipes, I’ve learned that most home cooks rush this dish, ending up with tough meat swimming in watery sauce. The secret lies in understanding how heat transforms tough cuts into silky perfection, much like how controlled burns create stronger forests. According to the USDA’s guidelines on meat safety, proper cooking technique not only enhances flavor but ensures food safety. This Gordon Ramsay Beef Curry recipe will teach you the professional methods that create restaurant-quality results in your own kitchen, paired perfectly with dishes like Gordon Ramsay’s garlic bread.

Why This Gordon Ramsay Beef Curry Recipe Works (And Where Most Go Wrong)

The brilliance of Gordon Ramsay Beef Curry lies in three fundamental principles that most home cooks completely ignore. First, the meat must be seared at extremely high heat to create the Maillard reaction, which generates those deep, complex flavors that define professional cooking. Most people crowd the pan or use insufficient heat, essentially steaming the beef instead of searing it.

The Temperature Control Principle

Professional kitchens maintain precise temperature control throughout the cooking process. The initial sear happens at 400°F or higher, while the braising phase drops to a gentle 325°F. This dramatic temperature shift allows the tough connective tissues to break down slowly while preserving the meat’s integrity. Home cooks often maintain one temperature throughout, resulting in either burnt exteriors with raw centers or uniformly overcooked, rubbery meat.

The Spice Blooming Technique

Gordon Ramsay’s approach involves blooming whole spices in hot oil before adding ground spices, a technique supported by food science research on volatile compounds. This two-stage spicing creates layers of flavor that penetrate the meat during the long braising process, rather than sitting on the surface like makeup on a mannequin.

Ingredients That Actually Matter for Gordon Ramsay Beef Curry

Fresh ingredients for making Gordon Ramsay Beef Curry arranged on wooden surface

The success of Gordon Ramsay Beef Curry depends entirely on ingredient quality and selection. Chuck roast or beef short ribs work best because their high collagen content breaks down into gelatin during slow cooking, creating that signature silky sauce texture. Avoid lean cuts like sirloin, which become tough and stringy no matter how carefully you cook them.

Fresh ginger and garlic form the aromatic foundation, but here’s the critical detail: they must be grated, not chopped. Grating releases more essential oils and creates better integration with the sauce. For spices, whole cumin seeds, coriander seeds, and cardamom pods provide superior flavor compared to pre-ground alternatives, which lose potency within months of grinding.

Coconut milk quality varies dramatically between brands. Full-fat coconut milk from Thailand or Sri Lanka contains higher cream content, essential for the rich mouthfeel that defines restaurant-quality curry. The cheap alternatives often contain stabilizers that prevent proper sauce reduction. Quality tomatoes, either San Marzano canned or peak-season fresh, provide the acidity needed to balance the rich coconut base. Understanding these ingredient fundamentals will elevate your cooking beyond basic recipes like simple slow cooker curries.

Step-by-Step Instructions for Gordon Ramsay Beef Curry

Preparation and Searing Phase

Cut 2 pounds of chuck roast into 2-inch cubes, ensuring uniform size for even cooking. Pat completely dry with paper towels and season generously with salt 30 minutes before cooking. Heat 2 tablespoons of neutral oil in a heavy-bottomed Dutch oven over high heat until smoking. Never add wet meat to hot oil as it will splatter violently and cause severe burns. Sear beef cubes in batches, avoiding overcrowding, until each piece develops a deep brown crust on all sides, approximately 3-4 minutes per side.

Building the Aromatic Base

Remove seared beef and reduce heat to medium. Add 1 tablespoon each of whole cumin seeds, coriander seeds, and 4-5 cardamom pods to the same pan. Toast for 30-45 seconds until fragrant, then add 2 diced onions. Cook until golden brown, about 8-10 minutes. Add 2 tablespoons each of grated ginger and garlic, cooking for another minute until fragrant. Watch carefully during this stage as garlic burns quickly and creates bitter flavors that cannot be removed.

Spice Integration and Braising

Add 2 tablespoons curry powder, 1 tablespoon garam masala, and 1 teaspoon each of turmeric and cayenne pepper. Stir constantly for 30 seconds to prevent burning, then add 1 can of diced tomatoes and 1 can of full-fat coconut milk. Return seared beef to the pot along with any accumulated juices. The liquid should just cover the meat; add beef stock if needed. Bring to a gentle simmer, cover, and transfer to a 325°F oven for 2-2.5 hours until fork-tender. This technique mirrors the principles used in Gordon Ramsay’s beef brisket for achieving perfect texture.

Pro-Tips That Change the Game

  • Toast whole spices in a dry pan before grinding for maximum flavor impact – this technique releases volatile oils that pre-ground spices have already lost
  • Add a tablespoon of tomato paste after the onions to create deeper color and umami depth, cooking it out for 2 minutes to eliminate raw paste flavor
  • Finish with a splash of coconut cream and fresh cilantro off the heat to brighten the rich, heavy flavors
  • Let the curry rest for 15 minutes before serving to allow flavors to marry and the sauce to thicken naturally
  • Save some fresh grated ginger to add at the end for a bright ginger note that contrasts with the mellow cooked ginger
  • Use a mixture of beef cuts – chuck roast for tenderness and short ribs for extra richness from the bone marrow

Storage & Leftovers for Gordon Ramsay Beef Curry

Store Gordon Ramsay Beef Curry in the refrigerator for up to 4 days in airtight containers, ensuring the internal temperature drops below 40°F within 2 hours of cooking. The flavors actually improve overnight as the spices continue to penetrate the meat. For reheating, use low heat on the stovetop, adding a splash of beef broth or coconut milk if the sauce becomes too thick.

This curry freezes beautifully for up to 3 months in freezer-safe containers, leaving 1 inch of headspace for expansion. Thaw overnight in the refrigerator before reheating. According to FDA food safety guidelines, never refreeze previously frozen and thawed curry, and always reheat to an internal temperature of 165°F before serving.

Close-up of finished Gordon Ramsay Beef Curry plated and ready to serve with garnish

Gordon Ramsay Beef Curry

A rich and aromatic beef curry with tender chunks of beef in a flavorful sauce. This Gordon Ramsay recipe combines traditional Indian spices with his signature cooking techniques for an unforgettable curry.
Prep Time 20 minutes
Cook Time 2 hours
Total Time 2 hours 20 minutes
Servings: 6 servings
Course: Main Course
Cuisine: british, Indian
Calories: 465

Ingredients
  

Beef and Marinade
  • 2 lbs beef chuck cut into 1-inch cubes
  • 1/2 cup plain yogurt
  • 2 tbsp garam masala
  • 1 tsp turmeric
Curry Base
  • 3 tbsp vegetable oil
  • 2 large onions finely chopped
  • 4 cloves garlic minced
  • 2 inch fresh ginger grated
  • 2 green chilies finely chopped
  • 2 tbsp tomato paste
  • 1 can diced tomatoes 14 oz
Spices and Seasoning
  • 2 tsp ground coriander
  • 2 tsp ground cumin
  • 1 tsp chili powder
  • 1 tsp paprika
  • salt to taste
  • black pepper to taste
Liquid and Finishing
  • 2 cups beef stock
  • 1 cup coconut milk
  • 2 tbsp fresh cilantro chopped, for garnish
  • 1 tbsp lime juice fresh

Equipment

  • Large heavy-bottomed pan
  • Dutch Oven
  • Wooden spoon

Method
 

  1. In a large bowl, combine the beef cubes with yogurt, garam masala, and turmeric. Mix well to coat and marinate for at least 30 minutes, or up to 2 hours in the refrigerator.
  2. Heat the vegetable oil in a large heavy-bottomed pan or Dutch oven over medium-high heat. Remove beef from marinade (reserve marinade) and brown the beef in batches, about 3-4 minutes per batch. Set aside.
  3. In the same pan, add the chopped onions and cook until softened and golden brown, about 8-10 minutes.
  4. Add the garlic, ginger, and green chilies. Cook for 2 minutes until fragrant, stirring constantly.
  5. Stir in the tomato paste, coriander, cumin, chili powder, and paprika. Cook for 2 minutes to toast the spices.
  6. Add the diced tomatoes and cook for 5 minutes, breaking them down with a wooden spoon.
  7. Return the beef to the pan along with the reserved marinade. Pour in the beef stock and bring to a boil.
  8. Reduce heat to low, cover, and simmer for 1.5 to 2 hours until the beef is tender and the sauce has thickened. Stir occasionally.
  9. Stir in the coconut milk and simmer uncovered for another 10 minutes.
  10. Season with salt and pepper to taste. Add lime juice and stir well.
  11. Garnish with fresh cilantro and serve hot with basmati rice or naan bread.

Nutrition

Calories: 465kcalCarbohydrates: 18gProtein: 35gFat: 28gSaturated Fat: 12gCholesterol: 95mgSodium: 680mgPotassium: 850mgFiber: 4gSugar: 9gVitamin A: 1250IUVitamin C: 28mgCalcium: 9mgIron: 4.2mg

Notes

For a richer curry, you can add more coconut milk. The beef can be substituted with lamb for a different flavor profile. If you prefer a spicier curry, add more chili powder or fresh chilies. This curry tastes even better the next day as the flavors develop further. Store in an airtight container in the refrigerator for up to 3 days or freeze for up to 3 months.

Tried this recipe?

Let us know how it was!

Frequently Asked Questions About Gordon Ramsay Beef Curry

Did Gordon Ramsay ever apologize?

Yes, Gordon Ramsay has apologized several times throughout his career, notably for harsh comments about Indian cuisine early in his career. He later acknowledged his respect for traditional Indian cooking techniques, which influenced his approach to dishes like Gordon Ramsay Beef Curry, incorporating authentic spice layering methods he initially dismissed.

What are 5 interesting facts about Gordon Ramsay?

Gordon Ramsay was originally training to be a professional soccer player before a knee injury ended his athletic career. He holds 16 Michelin stars across his restaurants worldwide. He’s completed multiple Ironman triathlons despite his demanding schedule. Ramsay earned a black belt in karate, and his precision with knife skills rivals professional sushi chefs. His Gordon Ramsay Beef Curry recipe reflects his meticulous attention to technique and timing.

What are the ingredients in Gordon Ramsay’s curry in a hurry recipe?

Gordon Ramsay’s quick curry typically includes chicken thighs, coconut milk, curry paste, ginger, garlic, onions, and fresh herbs. However, his Gordon Ramsay Beef Curry requires more time and uses chuck roast, whole spices like cumin and coriander seeds, cardamom pods, tomatoes, and full-fat coconut milk for deeper flavor development than his faster weeknight versions.

Can I make this curry spicier without overwhelming the other flavors?

Add heat gradually through fresh chilies rather than increasing cayenne pepper, which can create harsh heat. Thai bird’s eye chilies or serrano peppers added during the aromatic base cooking provide clean heat that complements rather than masks the complex spice profile. Try our Gordon Ramsay Thai Red Curry for comparison on balancing heat levels.

This Gordon Ramsay Beef Curry represents everything I love about cooking – patience, technique, and the transformation of simple ingredients into something extraordinary. Take your time with each step, respect the process, and you’ll create something that rivals any restaurant.

Stay safe,
Jack Sullivan

Gordon Ramsay Duck Confit transforms tough duck legs into silky, restaurant-quality perfection through an ancient French technique that many home cooks find intimidating. After years of responding to kitchen fires caused by improper fat handling, I’ve learned that this slow-cooking method is actually one of the safest ways to prepare duck—when done correctly. The key lies in understanding temperature control and proper curing, techniques that the FDA emphasizes for safe food preparation. This method produces incredibly tender meat with crispy skin that rivals any high-end restaurant, and pairs beautifully with dishes like Gordon Ramsay’s fondant potatoes for an elegant dinner.

Why This Gordon Ramsay Duck Confit Recipe Works (And Where Most Go Wrong)

The genius of Gordon Ramsay Duck Confit lies in three fundamental principles that separate success from soggy disappointment. First, proper curing draws out moisture while infusing flavor deep into the meat fibers. Most home cooks rush this step, but the 24-hour cure is non-negotiable for authentic results.

Low-Temperature Precision Prevents Tough Meat

The second principle involves maintaining steady low heat between 200-225°F. Higher temperatures break down collagen too quickly, creating stringy texture instead of silky tenderness. Culinary science confirms that slow collagen breakdown at precise temperatures creates the signature melt-in-your-mouth texture.

Fat Quality Determines Final Flavor

The third crucial element is using high-quality duck fat, not shortcuts like vegetable oil. Real duck fat creates an oxygen barrier that preserves the meat while adding rich, complex flavors impossible to achieve otherwise. Many recipes fail because they compromise on this essential ingredient.

Ingredients That Actually Matter for Gordon Ramsay Duck Confit

Fresh ingredients for making Gordon Ramsay Duck Confit

Quality ingredients make the difference between amateur attempts and professional Gordon Ramsay Duck Confit results. Start with duck legs from birds weighing 4-5 pounds—smaller ducks produce tough, stringy meat even with perfect technique. Look for legs with thick fat layers and avoid any with tears in the skin.

Coarse sea salt or kosher salt works better than table salt for curing because larger crystals draw moisture more effectively without over-salting. Fresh thyme, bay leaves, and garlic are non-negotiable aromatics that infuse subtle complexity during the long cooking process. Dried herbs won’t penetrate the meat properly and create bitter notes.

Duck fat is the make-or-break ingredient—you’ll need about 4 cups for proper coverage. Quality duck fat from specialty food stores or rendered from duck breasts creates far superior results than generic cooking fats. The fat becomes part of your cooking arsenal afterward, perfect for roasted root vegetables or potatoes. Black peppercorns should be freshly cracked, not pre-ground powder that loses essential oils during storage.

Step-by-Step Instructions for Gordon Ramsay Duck Confit

Begin your Gordon Ramsay Duck Confit by scoring the duck skin in a crosshatch pattern, cutting just through the fat layer without piercing the meat. This prevents the skin from shrinking and allows fat to render properly during cooking.

The Critical 24-Hour Cure

Combine 2 tablespoons coarse salt, 4 crushed garlic cloves, 6 fresh thyme sprigs, 3 bay leaves, and 1 teaspoon freshly cracked black pepper. Rub this mixture thoroughly into 4 duck legs, ensuring every surface is coated. **Never skip the overnight curing step—insufficient curing creates unsafe conditions and poor texture.** Wrap in plastic and refrigerate for exactly 24 hours.

Preparation and Fat Rendering

Remove duck legs from refrigerator and rinse off all cure mixture under cold water. Pat completely dry with paper towels—any residual moisture will cause dangerous fat splattering. Heat oven to 200°F and warm 4 cups duck fat in a heavy Dutch oven until just melted, not bubbling.

The Slow Confit Process

Submerge duck legs completely in the warm duck fat, ensuring no part remains exposed to air. **Maintain temperature between 200-225°F throughout cooking—higher temperatures create tough, chewy results and potential safety hazards.** Cook for 2.5 to 3 hours, testing doneness by gently pulling at the drumette bone. When properly cooked, it should move freely without resistance.

For final service, remove legs from fat and pat dry. **Allow fat to cool before handling—hot duck fat causes severe burns.** Heat a cast iron skillet over medium-high heat and crisp the skin side for 2-3 minutes until golden and crackling. This technique also works beautifully with pan-seared proteins that benefit from perfect browning.

Pro-Tips That Change the Game

  • Save the rendered duck fat in the refrigerator for up to 6 months—it’s liquid gold for roasting potatoes and vegetables with incredible flavor
  • Test fat temperature with an instant-read thermometer rather than guessing—precision prevents tough, overcooked meat every time
  • Add a strip of orange zest during the last hour of cooking for subtle citrus notes that complement the rich duck perfectly
  • Let duck legs rest at room temperature for 30 minutes before final crisping to ensure even heating and perfect texture contrast
  • Score the skin in 1/4-inch intervals for maximum fat rendering and crispier final results without sacrificing moisture
  • Use the leftover seasoned fat for confit vegetables like garlic or shallots—they keep for weeks and add gourmet flavor to any dish

Storage & Leftovers for Gordon Ramsay Duck Confit

Store Gordon Ramsay Duck Confit properly by keeping the legs completely submerged in their cooking fat in airtight containers. Refrigerated confit lasts up to 2 weeks when properly sealed, making it perfect for meal prep or entertaining preparation. The fat creates a natural preservation barrier that prevents spoilage when maintained correctly.

For reheating, remove legs from fat and allow to reach room temperature before crisping in a hot skillet. Never microwave confit duck—it destroys the carefully developed texture and makes the meat tough. USDA guidelines recommend proper storage temperatures below 40°F and discarding any confit showing signs of spoilage or off-odors. The reserved duck fat can be strained and reused multiple times for cooking other dishes.

Close-up of finished Gordon Ramsay Duck Confit plated and ready to serve
Jack Sullivan

Gordon Ramsay Duck Confit

Transform tough duck legs into silky, restaurant-quality perfection through an ancient French technique. This slow-cooking method produces incredibly tender meat with crispy skin when done correctly.
Prep Time 30 minutes
Cook Time 3 hours
Curing Time 1 day
Total Time 3 hours 30 minutes
Servings: 4 servings
Course: Main Course
Cuisine: French
Calories: 485

Ingredients
  

  • 4 pieces duck legs from 4-5 pound ducks
  • 2 tablespoons coarse sea salt
  • 4 cloves garlic crushed
  • 6 sprigs fresh thyme
  • 3 leaves bay leaves
  • 1 teaspoon black peppercorns freshly cracked
  • 4 cups duck fat high quality

Equipment

  • 1 Heavy Dutch Oven For even heat distribution
  • 1 Instant-read thermometer For temperature precision
  • 1 Cast iron skillet For final crisping

Method
 

  1. 1️⃣ Score the duck skin in a crosshatch pattern, cutting just through the fat layer without piercing the meat. This prevents shrinking and allows proper fat rendering.
  2. 2️⃣ Combine 2 tablespoons coarse salt, 4 crushed garlic cloves, 6 fresh thyme sprigs, 3 bay leaves, and 1 teaspoon freshly cracked black pepper. Rub this mixture thoroughly into duck legs, coating every surface.
  3. 3️⃣ Wrap duck legs in plastic and refrigerate for exactly 24 hours. Never skip this critical curing step for proper texture and food safety.
  4. 4️⃣ Remove duck legs from refrigerator and rinse off all cure mixture under cold water. Pat completely dry with paper towels to prevent dangerous fat splattering.
  5. 5️⃣ Heat oven to 200°F. Warm 4 cups duck fat in heavy Dutch oven until just melted, not bubbling.
  6. 6️⃣ Submerge duck legs completely in warm duck fat, ensuring no part remains exposed to air. Maintain temperature between 200-225°F throughout cooking.
  7. 7️⃣ Cook for 2.5 to 3 hours, testing doneness by gently pulling at the drumette bone. When properly cooked, it should move freely without resistance.
  8. 8️⃣ Remove legs from fat and pat dry. Allow fat to cool before handling to prevent burns. Heat cast iron skillet over medium-high heat and crisp skin side for 2-3 minutes until golden and crackling.

Nutrition

Serving: 1gCalories: 485kcalCarbohydrates: 2gProtein: 35gFat: 38gSaturated Fat: 12gPolyunsaturated Fat: 5gMonounsaturated Fat: 18gCholesterol: 165mgSodium: 890mgPotassium: 285mgVitamin A: 180IUVitamin C: 2mgCalcium: 25mgIron: 4mg

Notes

Save the rendered duck fat in the refrigerator for up to 6 months—it’s liquid gold for roasting potatoes and vegetables. Test fat temperature with an instant-read thermometer for precision. Add orange zest during the last hour for subtle citrus notes. Let duck legs rest at room temperature for 30 minutes before final crisping for even heating.

Tried this recipe?

Let us know how it was!

Frequently Asked Questions About Gordon Ramsay Duck Confit

What are the fun facts about duck confit?

Duck confit originated as a preservation method in medieval France, allowing meat to last months without refrigeration. The technique was developed in Gascony region where duck fat was abundant. Traditionally, entire ducks were preserved this way for winter months, and the fat was reused for cooking throughout the season. Modern Gordon Ramsay Duck Confit maintains these traditional principles while adapting for contemporary kitchens and safety standards.

What are common mistakes when cooking duck?

The biggest mistake is rushing the curing process or cooking at too high temperatures, which creates tough, chewy meat instead of silky confit texture. Many cooks also fail to properly submerge the duck in fat, leading to uneven cooking and potential spoilage. Using insufficient fat or the wrong type of fat compromises both flavor and preservation. Temperature control is critical—fluctuations ruin the gentle cooking process that makes confit special.

How to know when duck confit is ready?

Properly cooked Gordon Ramsay Duck Confit should be fork-tender with meat that easily pulls away from the bone. The drumette bone will move freely when gently twisted, and the meat should have a silky, not stringy texture. Internal temperature should reach 165°F, but texture is the better indicator. The skin should render most of its fat during cooking, appearing translucent rather than thick and white. Total cooking time ranges from 2.5-3 hours at proper temperature.

What does duck confit go well with?

Gordon Ramsay Duck Confit pairs beautifully with roasted root vegetables, crispy potatoes, or braised cabbage that can absorb the rich duck fat flavors. Classic accompaniments include lentils du Puy, which complement the richness with earthy flavors, or simple salads with acidic vinaigrettes to cut through the fat. The dish works wonderfully alongside butternut squash puree or other seasonal vegetables that benefit from the rendered duck fat for roasting.

This Gordon Ramsay Duck Confit recipe transforms an intimidating French technique into an achievable home cooking triumph. The slow, gentle process rewards patience with restaurant-quality results that will impress any dinner guest and give you confidence to tackle other advanced cooking challenges.

Stay safe,
Jack Sullivan

Gordon Ramsay Duck Orange Sauce transforms an ordinary meal into something extraordinary, but most home cooks struggle with achieving that perfect balance of sweet, tangy, and rich flavors that makes restaurant versions so memorable. After years of cooking in high-pressure environments as a firefighter, I’ve learned that precision and technique matter just as much in the kitchen as they do in emergency situations. This sauce requires the same attention to detail – one wrong move and you’ll end up with bitter, broken, or overly sweet results. The USDA emphasizes proper food handling when working with duck and citrus preparations. If you’re looking to elevate your poultry game further, check out this pan-seared halibut technique that uses similar precision methods.

Why This Gordon Ramsay Duck Orange Sauce Recipe Works (And Where Most Go Wrong)

The magic of Gordon Ramsay Duck Orange Sauce lies in three fundamental principles that separate professional results from amateur attempts. First, proper caramelization of the sugar creates depth and complexity rather than simple sweetness. Most home cooks rush this step, resulting in a sauce that tastes like orange-flavored syrup instead of the sophisticated reduction restaurants serve.

Second, the timing of citrus addition determines whether you get bright, fresh orange notes or bitter, harsh flavors. Adding orange juice too early causes the natural acids to break down and turn acrid. The science behind caramelization shows that controlled heat application creates hundreds of flavor compounds that simply can’t be rushed.

Third, temperature control prevents the sauce from breaking. Duck fat and citrus don’t naturally want to stay together, so maintaining the right heat while slowly whisking creates a stable emulsion. I’ve seen too many firefighters try to rush this process during station cooking – it never works. Patience and steady hands win every time with Gordon Ramsay Duck Orange Sauce.

Ingredients That Actually Matter for Gordon Ramsay Duck Orange Sauce

Fresh ingredients for making Gordon Ramsay Duck Orange Sauce

Quality ingredients make the difference between good and exceptional Gordon Ramsay Duck Orange Sauce. Fresh orange juice is non-negotiable – bottled juice lacks the bright acidity and natural oils found in freshly squeezed oranges. Look for oranges that feel heavy for their size with tight, unblemished skin. Valencia or blood oranges work particularly well due to their balanced sweet-tart profile.

Duck or chicken stock provides the foundation, but homemade stock elevates this sauce dramatically. Store-bought alternatives should be low-sodium and free from artificial flavors. The stock’s gelatin content helps create that glossy, restaurant-quality finish that clings beautifully to meat.

Brandy or Grand Marnier adds complexity, but don’t skip the alcohol cook-off step. Raw alcohol creates harsh notes that overpower the delicate orange flavors. Butter finishing is crucial – use high-quality European butter for the richest mouthfeel. If you’re interested in mastering other sauce fundamentals, this Mornay sauce guide covers similar emulsification techniques that apply here.

Step-by-Step Instructions for Gordon Ramsay Duck Orange Sauce

Initial Caramelization Phase

Heat a heavy-bottomed saucepan over medium heat and add 2 tablespoons of granulated sugar. Never leave caramelizing sugar unattended – it can go from perfect to burnt in seconds. Swirl the pan gently as the sugar melts and turns golden amber, about 3-4 minutes. The color should resemble dark honey, not light caramel.

Building the Base

Immediately add 1/4 cup of brandy or Grand Marnier to deglaze. Stand back when adding alcohol to hot caramel as it will bubble violently. Stir constantly for 30 seconds to cook off the raw alcohol. Pour in 1 cup of duck or chicken stock slowly, whisking continuously. The mixture will bubble and steam aggressively initially.

Citrus Integration

Add the zest of 2 oranges and 1/2 cup fresh orange juice. Add citrus only after the alcohol has cooked off to prevent curdling. Bring to a gentle simmer and reduce heat to low. Simmer for 8-10 minutes until the sauce coats the back of a spoon. For more advanced sauce techniques, check out this green peppercorn sauce method that uses similar reduction principles.

Final Enrichment

Remove from heat and whisk in 2 tablespoons of cold butter, one piece at a time. This creates the glossy, restaurant-quality finish that defines proper Gordon Ramsay Duck Orange Sauce. Season with salt and white pepper to taste. Never boil the sauce after adding butter or it will break and separate. The Food Network’s guide to pan sauces explains why temperature control matters so much in the final stages.

Pro-Tips That Change the Game

  • Strain the finished sauce through a fine-mesh sieve for silky, professional texture that removes any bits of zest or impurities
  • Make the sauce base ahead and finish with butter just before serving – this prevents last-minute stress during dinner parties
  • Add a pinch of cayenne pepper to balance sweetness and enhance the orange flavors without obvious heat
  • Keep the sauce warm in a double boiler rather than direct heat to prevent breaking if you need to hold it
  • Reserve some fresh orange zest to garnish the plate – the aromatic oils provide an extra burst of citrus when the dish arrives
  • Taste and adjust acidity with a splash of white wine vinegar if the sauce becomes too sweet during reduction

Storage & Leftovers for Gordon Ramsay Duck Orange Sauce

Store Gordon Ramsay Duck Orange Sauce in the refrigerator for up to 3 days in an airtight container. The sauce will thicken considerably when cold due to the natural gelatin in the stock. To reheat, warm gently in a small saucepan over low heat, whisking frequently to restore the smooth consistency.

Avoid microwaving as the uneven heating will cause the emulsion to break. If the sauce appears separated after reheating, whisk in a tablespoon of cold butter to re-establish the emulsion. The FDA’s food handling guidelines recommend never leaving dairy-enriched sauces at room temperature for more than 2 hours to prevent bacterial growth.

Close-up of finished Gordon Ramsay Duck Orange Sauce plated and ready to serve
Jack Sullivan

Gordon Ramsay Duck Orange Sauce

Transform an ordinary meal into something extraordinary with this restaurant-quality duck orange sauce featuring perfect caramelization, fresh citrus notes, and a glossy finish that elevates any poultry dish.
Prep Time 10 minutes
Cook Time 15 minutes
Total Time 25 minutes
Servings: 4 servings
Course: Main Course
Cuisine: French
Calories: 120

Ingredients
  

  • 2 tablespoons granulated sugar for caramelization
  • 1/4 cup brandy or Grand Marnier for deglazing
  • 1 cup duck or chicken stock preferably homemade
  • 2 oranges zested, Valencia or blood oranges preferred
  • 1/2 cup fresh orange juice from the zested oranges
  • 2 tablespoons cold European butter for finishing
  • 1 pinch cayenne pepper to taste
  • salt and white pepper to taste

Equipment

  • 1 Heavy-bottomed saucepan For even heat distribution during caramelization
  • 1 Whisk For smooth emulsion
  • 1 Fine-mesh sieve For straining the finished sauce

Method
 

  1. 1️⃣ Heat heavy-bottomed saucepan over medium heat and add 2 tablespoons granulated sugar. Swirl pan gently as sugar melts and turns golden amber, about 3-4 minutes. Never leave caramelizing sugar unattended – it can go from perfect to burnt in seconds.
  2. 2️⃣ Stand back and immediately add 1/4 cup brandy or Grand Marnier to deglaze. Stir constantly for 30 seconds to cook off raw alcohol. The mixture will bubble violently initially.
  3. 3️⃣ Pour in 1 cup duck or chicken stock slowly, whisking continuously. The mixture will bubble and steam aggressively initially. Continue whisking until smooth.
  4. 4️⃣ Add zest of 2 oranges and 1/2 cup fresh orange juice. Only add citrus after alcohol has cooked off to prevent curdling. Bring to gentle simmer and reduce heat to low.
  5. 5️⃣ Simmer for 8-10 minutes until sauce coats the back of a spoon. The sauce should reduce by about half and have a glossy appearance.
  6. 6️⃣ Remove from heat and whisk in 2 tablespoons cold butter, one piece at a time. This creates the glossy, restaurant-quality finish. Never boil after adding butter or it will break.
  7. 7️⃣ Season with salt, white pepper, and a pinch of cayenne. Strain through fine-mesh sieve for silky texture. Serve immediately while warm.

Nutrition

Serving: 1gCalories: 120kcalCarbohydrates: 8gProtein: 2gFat: 6gSaturated Fat: 4gMonounsaturated Fat: 1gCholesterol: 15mgSodium: 280mgPotassium: 150mgFiber: 1gSugar: 7gVitamin A: 8IUVitamin C: 45mgCalcium: 2mgIron: 1mg

Notes

Make the sauce base ahead and finish with butter just before serving to prevent last-minute stress. Keep warm in a double boiler rather than direct heat to prevent breaking. Reserve fresh orange zest for garnishing to provide an extra burst of citrus aroma when serving.

Tried this recipe?

Let us know how it was!

Frequently Asked Questions About Gordon Ramsay Duck Orange Sauce

What goes well with duck in orange sauce?

Classic pairings include roasted root vegetables, wild rice pilaf, and sautéed greens like spinach or Swiss chard. The rich, citrusy Gordon Ramsay Duck Orange Sauce also complements roasted Brussels sprouts, fondant potatoes, or a simple arugula salad. The key is balancing the sauce’s richness with lighter, slightly bitter vegetables that won’t compete with the orange flavors.

How to make orange sauce for duck?

Start by caramelizing sugar until amber, then deglaze with brandy and add stock. Reduce by half before adding fresh orange juice and zest. The secret to perfect Gordon Ramsay Duck Orange Sauce lies in controlling each temperature change and finishing with cold butter for glossy richness. Never rush the caramelization or add citrus too early.

What is the most popular Gordon Ramsay dish?

While Beef Wellington might be his signature dish, Gordon Ramsay Duck Orange Sauce appears frequently across his restaurants and shows. His approach emphasizes classic French techniques with modern precision. You can explore more of his signature dishes to understand his cooking philosophy better.

Is orange sauce the same thing as duck sauce?

No, they’re completely different. Duck sauce is a sweet and sour condiment served at Chinese restaurants, usually made with apricots, plums, or peaches. Gordon Ramsay Duck Orange Sauce is a French-inspired reduction featuring caramelized sugar, fresh orange juice, and stock. The only similarity is the name – the flavors, preparation methods, and uses are entirely different.

This Gordon Ramsay Duck Orange Sauce transforms any meal into a restaurant-worthy experience when you follow proper technique and timing. Remember, cooking is about patience and precision – qualities that served me well in firefighting and serve you well in the kitchen.

Stay safe,
Jack Sullivan

Gordon Ramsay Hollandaise Sauce transforms ordinary dishes into restaurant-quality masterpieces, but after years of fighting kitchen fires as a firefighter, I learned that this classic French sauce is just as temperamental as a backdraft if you don’t respect the fundamentals. Most home cooks struggle with broken emulsions and grainy textures because they rush the process—something that would get you in serious trouble in both the firehouse and professional kitchens. The FDA emphasizes proper temperature control when working with egg-based sauces, which is exactly what makes this Gordon Ramsay approach so reliable. Like our Gordon Ramsay scrambled eggs technique, patience and precise heat management are everything in achieving that silky, luxurious consistency that elevates eggs Benedict, steamed asparagus, or grilled salmon to fine-dining status.

Why This Gordon Ramsay Hollandaise Sauce Recipe Works (And Where Most Go Wrong)

The genius behind this Gordon Ramsay Hollandaise Sauce lies in three fundamental principles that most recipes completely ignore. First, temperature gradient control—Ramsay uses a double boiler method that maintains steady, gentle heat rather than direct flame contact that scrambles the eggs instantly. In my firefighting days, we learned that controlling heat zones prevents disasters, and the same principle applies here.

Controlled Emulsification Process

Second, the butter incorporation technique matters more than ingredient quality. Adding cold butter too quickly creates a broken sauce, while room temperature butter lacks the thermal contrast needed for proper emulsification. Ramsay’s method uses clarified butter at precisely the right temperature—warm enough to blend but not so hot it breaks the delicate egg proteins.

Acid Balance Timing

Third, the lemon juice timing is crucial. Adding acid too early can coagulate the egg yolks, while adding it too late won’t properly balance the richness. This Gordon Ramsay Hollandaise Sauce technique incorporates acid at the optimal moment when the emulsion is stable but still receptive to flavor adjustment. Professional cooking science shows that pH balance directly affects emulsion stability, which explains why timing matters so much.

Ingredients That Actually Matter for Gordon Ramsay Hollandaise Sauce

Fresh ingredients for making Gordon Ramsay Hollandaise Sauce arranged on wooden surface

Quality ingredients make the difference between restaurant-worthy Gordon Ramsay Hollandaise Sauce and disappointing yellow soup. Start with the freshest egg yolks possible—check for bright orange color and firm consistency when cracked. Older eggs produce weaker emulsions because the proteins have begun breaking down, making your sauce more likely to separate under heat stress.

Unsalted European-style butter with higher fat content (82% versus standard 80%) creates richer, more stable emulsions. The extra fat provides better binding power and smoother mouthfeel. For lemon juice, fresh-squeezed always beats bottled because the natural oils in fresh citrus contribute complexity beyond just acidity. Meyer lemons work beautifully if available, offering subtle sweetness that complements the butter richness.

White wine vinegar serves as the acidic base in the initial reduction, and quality matters here too. Cheap vinegars contain harsh compounds that create metallic off-flavors in delicate sauces. Cayenne pepper provides gentle heat without overpowering—start conservatively since you can always add more. Like perfecting our Gordon Ramsay herb butter recipe, ingredient quality directly translates to final flavor impact.

Step-by-Step Instructions for Gordon Ramsay Hollandaise Sauce

Create the Sabayon Base

Begin by combining 2 tablespoons white wine vinegar with 1 tablespoon water in a small saucepan. Add a pinch of salt and bring to a gentle simmer, reducing the liquid by half—this concentrates the flavors and removes harsh alcohol notes. Never allow this mixture to boil vigorously, as excessive heat will create bitter compounds that ruin the final sauce. Remove from heat and let cool for 2 minutes.

Prepare the Double Boiler Setup

Fill a medium saucepan with 2 inches of water and bring to a gentle simmer. Place a heatproof bowl on top, ensuring the bottom doesn’t touch the water surface. Water contact will create excessive heat and scramble your egg yolks instantly. The steam provides gentle, consistent warming that allows proper emulsification without protein coagulation.

Whisk the Egg Yolks

Add 3 large egg yolks to your cooled vinegar reduction in the double boiler bowl. Whisk continuously for 3-4 minutes until the mixture becomes pale yellow and slightly thickened—it should coat the whisk lightly when lifted. Stop immediately if you see any signs of scrambling or curdling, as overheated eggs cannot be salvaged. This sabayon stage creates the foundation for your emulsion, similar to the technique used in our Gordon Ramsay mayonnaise recipe.

Incorporate the Butter

Remove the bowl from heat and begin adding 8 ounces of warm clarified butter in a thin, steady stream while whisking constantly. Start with just a few drops, then increase to a pencil-thin stream as the emulsion forms. The sauce should become thick and glossy, coating a spoon heavily. If it appears too thick, whisk in a teaspoon of warm water to achieve proper consistency.

Season and Finish

Whisk in 2 tablespoons fresh lemon juice gradually, tasting as you go. Season with salt, white pepper, and a pinch of cayenne. Taste carefully for seasoning balance—oversalted hollandaise cannot be corrected. The finished Gordon Ramsay Hollandaise Sauce should be smooth, glossy, and coat a spoon without running off immediately. USDA guidelines recommend serving egg-based sauces immediately or keeping them warm at safe temperatures.

Pro-Tips That Change the Game

  • Keep a bowl of ice water nearby—if your sauce starts breaking, immediately plunge the bowl into ice water while whisking to stop the cooking process and save the emulsion
  • Strain the finished sauce through a fine-mesh sieve to remove any coagulated egg bits and achieve restaurant-smooth texture
  • Add butter at room temperature rather than hot—this gives you better control over emulsification and reduces breaking risk
  • Use a candy thermometer to monitor your double boiler water—keep it between 160-180°F for optimal gentle heating
  • Make clarified butter in advance and keep it warm in a thermos—this ensures consistent temperature throughout the incorporation process
  • Warm your serving dishes slightly before plating—cold plates will cause the Gordon Ramsay Hollandaise Sauce to thicken and lose its silky texture

Storage & Leftovers for Gordon Ramsay Hollandaise Sauce

Gordon Ramsay Hollandaise Sauce requires careful handling for food safety and quality maintenance. This sauce cannot be safely stored for extended periods due to the raw egg yolks and optimal serving temperature requirements. Ideally, prepare and serve immediately for best texture and safety.

If you must hold the sauce briefly, keep it in a warm water bath at 145°F maximum for no more than 2 hours. Never refrigerate and reheat hollandaise—the emulsion will break permanently and create food safety risks. FDA food safety guidelines specify that egg-based sauces should not remain in the temperature danger zone beyond 2 hours total.

For advance preparation, make the vinegar reduction and clarify your butter ahead of time, storing them separately in the refrigerator. The actual sauce assembly should happen within 30 minutes of serving for optimal results and safety compliance.

Close-up of finished Gordon Ramsay Hollandaise Sauce drizzled over eggs benedict and ready to serve
Jack Sullivan

Gordon Ramsay Hollandaise Sauce

This Gordon Ramsay Hollandaise Sauce transforms ordinary dishes into restaurant-quality masterpieces using controlled emulsification, precise temperature management, and proper acid balance timing for silky, luxurious consistency.
Prep Time 10 minutes
Cook Time 15 minutes
Total Time 25 minutes
Servings: 4 servings
Course: sauce
Cuisine: british
Calories: 365

Ingredients
  

  • 3 large egg yolks fresh, bright orange color
  • 8 ounces unsalted European butter clarified and warm
  • 2 tablespoons white wine vinegar quality vinegar
  • 1 tablespoon water
  • 2 tablespoons fresh lemon juice freshly squeezed
  • 1 pinch salt
  • 1 pinch white pepper
  • 1 pinch cayenne pepper

Equipment

  • 1 Double boiler or heatproof bowl For gentle heating
  • 1 Whisk For emulsification
  • 1 Small saucepan For vinegar reduction
  • 1 Fine-mesh sieve For straining

Method
 

  1. 1️⃣ Combine white wine vinegar and water in a small saucepan with a pinch of salt. Bring to gentle simmer and reduce by half. Remove from heat and cool for 2 minutes.
  2. 2️⃣ Set up double boiler with 2 inches of simmering water. Place heatproof bowl on top, ensuring bottom doesn’t touch water surface.
  3. 3️⃣ Add egg yolks to cooled vinegar reduction in the double boiler bowl. Whisk continuously for 3-4 minutes until pale yellow and slightly thickened.
  4. 4️⃣ Remove bowl from heat. Begin adding warm clarified butter in thin, steady stream while whisking constantly. Start with drops, then increase to pencil-thin stream as emulsion forms.
  5. 5️⃣ Whisk in fresh lemon juice gradually, tasting as you go. Season with salt, white pepper, and cayenne. Strain through fine-mesh sieve for restaurant-smooth texture.

Nutrition

Serving: 1gCalories: 365kcalCarbohydrates: 1gProtein: 3gFat: 40gSaturated Fat: 24gPolyunsaturated Fat: 2gMonounsaturated Fat: 11gCholesterol: 279mgSodium: 180mgPotassium: 25mgVitamin A: 1250IUVitamin C: 8mgCalcium: 28mgIron: 0.9mg

Notes

Keep ice water nearby in case emulsion starts breaking. Warm serving dishes slightly before plating. Never refrigerate and reheat – serve immediately for food safety and best texture. Make clarified butter in advance and keep warm for consistent temperature control.

Tried this recipe?

Let us know how it was!

Frequently Asked Questions About Gordon Ramsay Hollandaise Sauce

What makes hollandaise sauce unique from other sauces?

Hollandaise belongs to the mother sauce family and relies on emulsification rather than thickening agents like flour or cream. The Gordon Ramsay Hollandaise Sauce technique creates a stable suspension of butter in egg yolks through careful temperature control and whisking, producing a rich, velvety texture that coats food beautifully. Unlike cream-based sauces, hollandaise provides intense richness without heaviness.

What does Gordon Ramsay put in his tartar sauce?

While tartar sauce differs from hollandaise, Ramsay’s version typically includes mayonnaise, capers, gherkins, fresh herbs like dill and parsley, lemon juice, and sometimes anchovy essence. However, his Gordon Ramsay Hollandaise Sauce focuses purely on the classic French technique using egg yolks, butter, lemon juice, and seasoning without any additional mix-ins that might compromise the delicate emulsion.

Can hollandaise sauce be made ahead of time?

Gordon Ramsay Hollandaise Sauce cannot be successfully made far in advance due to emulsion instability and food safety concerns. The sauce must be served within 2 hours of preparation and cannot be refrigerated and reheated without breaking. You can prepare components like clarified butter and vinegar reduction ahead, but final assembly should happen close to serving time for optimal texture and safety.

What dishes pair best with hollandaise sauce?

Classic pairings include eggs Benedict, steamed asparagus, grilled salmon, and poached vegetables. The rich, buttery flavor complements our Gordon Ramsay pan-seared halibut beautifully, and it transforms simple steamed broccoli into an elegant side dish. The sauce works particularly well with dishes that have clean, simple flavors that won’t compete with its luxurious richness.

Remember that mastering this Gordon Ramsay Hollandaise Sauce technique takes practice, but the results transform ordinary meals into something truly special. Trust the process, respect the temperatures, and don’t rush—your patience will be rewarded with restaurant-quality results that impress every time.

Stay safe,
Jack Sullivan

Gordon Ramsay Lamb Kidney preparation intimidated me during my first year as a station cook, until I learned the chef’s precise technique that transforms this challenging organ meat into a restaurant-quality delicacy. After years of cooking under pressure in both professional kitchens and firehouses, I’ve discovered that kidney preparation follows the same principle as emergency response: proper preparation prevents poor performance. The USDA emphasizes the critical importance of proper organ meat handling, and this Gordon Ramsay-inspired approach ensures both safety and exceptional flavor. What makes kidneys tricky isn’t just their strong flavor profile, but their delicate texture that can turn rubbery in seconds if overcooked. This comprehensive guide will walk you through each step, from selecting quality kidneys to achieving that perfect tender bite that makes this traditional British breakfast component truly shine.

Why This Gordon Ramsay Lamb Kidney Recipe Works (And Where Most Go Wrong)

The genius behind Gordon Ramsay’s kidney technique lies in three fundamental principles that most home cooks overlook. First, proper soaking removes the strong ammonia-like compounds that give kidneys their off-putting taste. I’ve seen too many people skip this step and wonder why their dish tastes harsh. Second, precise temperature control prevents the proteins from seizing up and becoming tough. During my firefighting days, we learned that timing under pressure makes all the difference, and kidney cooking follows the same rule.

The Science Behind Kidney Preparation

Kidneys contain high levels of urea and other waste-filtering compounds. The food science experts at Serious Eats explain that proper soaking in acidulated water breaks down these compounds, while quick, high-heat cooking preserves the tender texture. The most common mistake I see is overcooking, which causes the proteins to contract violently, resulting in a texture resembling rubber.

Temperature and Timing Precision

Professional kitchens treat Gordon Ramsay Lamb Kidney like a delicate protein that requires split-second timing. The internal temperature should never exceed 140°F, and total cooking time rarely exceeds 3-4 minutes. This isn’t just technique; it’s kitchen science backed by years of professional experience.

Ingredients That Actually Matter for Gordon Ramsay Lamb Kidney

Fresh ingredients for making Gordon Ramsay Lamb Kidney

Quality starts at the butcher shop, and not all lamb kidneys are created equal. Look for kidneys that are pale pink to light brown in color, with no dark spots or strong ammonia smell. The kidney fat should be white and firm, not yellow or greasy. Fresh kidneys should feel firm to the touch and spring back when pressed gently. If you’re working with frozen kidneys, they need to thaw completely in the refrigerator for 24 hours before preparation.

The supporting ingredients play crucial roles beyond flavor. White wine vinegar or lemon juice creates the acidic environment necessary for proper soaking. Fresh herbs like thyme and rosemary complement the kidney’s mineral notes without overwhelming them. Button or cremini mushrooms provide textural contrast and absorb the rich pan juices beautifully. Quality butter, preferably European-style with higher fat content, creates the perfect cooking medium that won’t burn at high temperatures.

For seasoning, coarse sea salt draws out moisture and concentrates flavors, while freshly cracked black pepper adds aromatic heat. Many recipes call for flour for dusting, but I prefer potato starch when needed because it creates a lighter coating that doesn’t mask the kidney’s natural texture. If you can’t source lamb kidneys, beef kidneys work with extended soaking time, but avoid pork kidneys as they have a much stronger flavor profile that doesn’t suit this classic Gordon Ramsay technique.

Step-by-Step Instructions for Gordon Ramsay Lamb Kidney

Initial Preparation and Soaking

Begin by examining each kidney carefully under cold running water. **Remove any visible fat or connective tissue with a sharp paring knife, working slowly to avoid cutting into the kidney flesh.** Cut each kidney in half lengthwise, then use small kitchen shears to carefully remove the white core and any visible tubes or vessels. **This step requires patience and a steady hand to avoid accidents with sharp tools.**

Submerge the cleaned kidney pieces in cold water mixed with 2 tablespoons of white wine vinegar per cup of water. Soak for a minimum of 30 minutes, though I prefer 45 minutes for stronger-flavored kidneys. Change the water twice during soaking if it becomes cloudy or develops an odor. **Never skip the soaking step, as improperly prepared kidneys can cause digestive upset due to residual compounds.**

Cooking Process

Remove kidneys from soaking liquid and pat completely dry with paper towels. Any remaining moisture will cause dangerous splattering when they hit the hot pan. **Ensure your workspace is clear and have a lid nearby to cover the pan if needed.** Season the kidneys with salt and pepper just before cooking, never earlier, as salt draws out moisture we want to retain.

Heat a heavy-bottomed skillet over medium-high heat until it just begins to smoke. Add a tablespoon of butter and let it foam, then immediately add the kidney pieces in a single layer. **Do not move them for the first 90 seconds to allow proper searing, and never overcrowd the pan.** The kidneys should sizzle vigorously when they hit the butter. Cook for 2 minutes on the first side, then flip and cook for another 1-2 minutes maximum.

Finishing and Serving

Gordon Ramsay Lamb Kidney should feel slightly firm but yield to gentle pressure when properly cooked. Remove them immediately to a warm plate and tent with foil. Deglaze the pan with a splash of white wine or cognac if desired, scraping up any browned bits to create a simple pan sauce. **Allow the kidneys to rest for 2-3 minutes before serving to let the juices redistribute.** This technique, borrowed from steak cookery, ensures maximum tenderness and prevents the juices from running out when cut.

Pro-Tips That Change the Game

  • Always cook kidneys at room temperature, never straight from the refrigerator, to ensure even cooking throughout
  • Keep a bowl of ice water nearby when cleaning kidneys to immediately chill your hands if they become too warm from handling
  • Use a cast-iron or heavy stainless steel pan for even heat distribution and proper searing
  • If kidneys are browning too quickly, reduce heat immediately rather than moving them around the pan
  • Reserve some of the soaking liquid to add to gravies or sauces for extra depth of flavor
  • Never reheat cooked kidneys, as they become tough and lose their delicate texture completely

Storage & Leftovers for Gordon Ramsay Lamb Kidney

Cooked Gordon Ramsay Lamb Kidney should be consumed immediately for the best texture and food safety. If you must store leftovers, refrigerate them in a sealed container for no more than 24 hours. **Never leave cooked organ meat at room temperature for longer than 2 hours due to the risk of bacterial growth.** Raw kidneys should be used within 24 hours of purchase and kept at 40°F or below.

Unfortunately, kidneys don’t reheat well and become tough and rubbery when warmed up. If you have leftover cooked kidneys, consider chopping them finely and incorporating them into a hash or omelet where the texture change is less noticeable. The FDA recommends treating organ meats with extra caution due to their perishable nature and higher bacterial load compared to muscle meats.

Close-up of finished Gordon Ramsay Lamb Kidney plated and ready to serve
Jack Sullivan

Gordon Ramsay Lamb Kidney

Master Gordon Ramsay’s precise technique for transforming challenging lamb kidneys into restaurant-quality delicacy. This comprehensive guide covers proper soaking, temperature control, and timing to achieve tender, flavorful results every time.
Prep Time 45 minutes
Cook Time 4 minutes
Total Time 49 minutes
Servings: 2 servings
Course: Main Course
Cuisine: british
Calories: 185

Ingredients
  

  • 4 pieces lamb kidneys fresh, pale pink to light brown
  • 2 tablespoons white wine vinegar per cup of water for soaking
  • 1 tablespoon butter European-style preferred
  • to taste coarse sea salt
  • to taste freshly cracked black pepper
  • 2 sprigs fresh thyme or rosemary

Equipment

  • 1 Sharp paring knife for cleaning kidneys
  • 1 Kitchen shears for removing white core
  • 1 Heavy-bottomed skillet cast-iron or stainless steel preferred

Method
 

  1. 1️⃣ Examine each kidney under cold running water. Remove any visible fat or connective tissue with a sharp paring knife, working slowly and carefully.
  2. 2️⃣ Cut each kidney in half lengthwise, then use kitchen shears to carefully remove the white core and any visible tubes or vessels.
  3. 3️⃣ Submerge cleaned kidney pieces in cold water mixed with white wine vinegar (2 tablespoons per cup of water). Soak for 45 minutes, changing water twice if it becomes cloudy.
  4. 4️⃣ Remove kidneys from soaking liquid and pat completely dry with paper towels. Season with salt and pepper just before cooking.
  5. 5️⃣ Heat heavy-bottomed skillet over medium-high heat until it just begins to smoke. Add butter and let it foam.
  6. 6️⃣ Add kidney pieces in a single layer. Do not move them for the first 90 seconds. Cook for 2 minutes on first side, then flip and cook 1-2 minutes maximum.
  7. 7️⃣ Remove kidneys immediately to a warm plate and tent with foil. Allow to rest for 2-3 minutes before serving to let juices redistribute.

Nutrition

Serving: 1gCalories: 185kcalCarbohydrates: 2gProtein: 28gFat: 8gSaturated Fat: 4gPolyunsaturated Fat: 1gMonounsaturated Fat: 2gCholesterol: 565mgSodium: 180mgPotassium: 285mgVitamin A: 1250IUVitamin C: 12mgCalcium: 15mgIron: 8mg

Notes

Always cook kidneys at room temperature for even cooking. Keep internal temperature below 140°F and never exceed 3-4 minutes total cooking time. Use cast-iron or heavy stainless steel pan for proper searing. Never reheat cooked kidneys as they become tough and rubbery.

Tried this recipe?

Let us know how it was!

Frequently Asked Questions About Gordon Ramsay Lamb Kidney

How do you prepare lamb kidneys before cooking?

Proper preparation involves removing all visible fat and connective tissue, cutting the kidneys in half, and carefully removing the white core with kitchen shears. Soak the cleaned pieces in acidulated water for 30-45 minutes to remove strong flavors and compounds. Pat completely dry before seasoning and cooking. This Gordon Ramsay Lamb Kidney technique ensures clean flavor and proper texture.

How to tell if lamb kidneys are off?

Fresh kidneys should be pale pink to light brown with no dark spots or slimy texture. They should smell clean and slightly metallic, not strongly of ammonia or fish. Any green discoloration, strong odor, or slimy surface indicates spoilage. When in doubt, discard them, as organ meats spoil faster than regular cuts of meat.

Do I need to soak my kidneys before cooking?

Yes, soaking is absolutely essential for Gordon Ramsay Lamb Kidney preparation. The soaking process in acidulated water removes urea and other compounds that create harsh, unpleasant flavors. Without proper soaking, kidneys taste overly strong and can be off-putting even to adventurous eaters. This step cannot be skipped for quality results.

How to cook kidneys so they are soft?

The key to tender kidneys is high heat for a very short time, never exceeding 3-4 minutes total cooking time. Keep internal temperature below 140°F and remove them from heat as soon as they feel slightly firm to the touch. Overcooking causes proteins to seize up and become rubbery. Proper soaking beforehand also contributes to the final tender texture.

Mastering Gordon Ramsay Lamb Kidney takes practice, but the technique becomes second nature once you understand the principles behind proper preparation and cooking. Remember that confidence in the kitchen comes from understanding both the science and the safety aspects of what you’re cooking.

Stay safe,
Jack Sullivan

Gordon Ramsay Rabbit Stew transforms what many consider challenging game meat into an extraordinarily tender, flavorful masterpiece. After decades in professional kitchens and countless hours perfecting braising techniques during my firefighting days, I’ve discovered that most home cooks make three critical errors that turn this elegant dish into tough, gamey disappointment. The USDA recommends specific handling protocols for game meat that, when combined with Ramsay’s proven techniques, create restaurant-quality results. If you’re looking to expand your culinary repertoire beyond traditional comfort foods, this Gordon Ramsay Rabbit Stew pairs beautifully with Gordon Ramsay’s fondant potatoes for an impressive dinner party menu.

Why This Gordon Ramsay Rabbit Stew Recipe Works (And Where Most Go Wrong)

The success of Gordon Ramsay Rabbit Stew hinges on three fundamental principles that separate restaurant-quality results from disappointing home attempts. First, proper protein preparation removes the gamey taste that puts many people off rabbit. Most cooks skip the essential soaking step that draws out excess blood and impurities. Second, the sequential building of flavors through strategic browning creates the complex depth that defines professional stews.

Temperature Control Is Everything

Gordon Ramsay emphasizes maintaining consistent low heat throughout the braising process. The science behind slow braising shows that collagen breakdown occurs optimally between 160-180°F. Higher temperatures cause protein fibers to seize and become tough, regardless of cooking time. This is where many home cooks fail – rushing the process with excessive heat.

Proper Liquid Ratios Prevent Dryness

Unlike chicken or beef stews, rabbit requires specific liquid-to-meat ratios. The lean nature of rabbit meat means traditional braising liquids can actually leach moisture rather than preserve it. Ramsay’s technique incorporates wine reduction and stock in precise measurements that complement rather than overpower the delicate meat flavors.

Ingredients That Actually Matter for Gordon Ramsay Rabbit Stew

Fresh ingredients for making Gordon Ramsay Rabbit Stew arranged on wooden surface

Quality ingredients make the difference between good and exceptional Gordon Ramsay Rabbit Stew. Fresh rabbit should have pale pink flesh with no strong odor – avoid any meat with grayish color or slimy texture. Farm-raised rabbit typically offers more consistent flavor than wild varieties for home cooking. The prunes in this recipe aren’t just traditional garnish; their natural enzymes actually help tenderize the meat while adding subtle sweetness that balances rabbit’s natural earthiness.

Your wine selection significantly impacts the final flavor profile. Choose a dry white wine you’d actually drink – cooking wines contain excess sodium that can make the stew unpalatable. Pearl onions provide better texture than chopped yellow onions because they hold their shape during long braising. Fresh thyme and bay leaves are non-negotiable; dried herbs simply don’t provide the aromatic complexity this dish demands.

For the braising liquid, use genuine chicken or vegetable stock rather than bouillon cubes. The artificial flavor compounds in bouillon become concentrated during the reduction process, creating an overly salty, chemical taste. If you’re serious about elevating your cooking, consider making Gordon Ramsay’s mornay sauce as a complementary side – the techniques transfer beautifully between recipes.

Step-by-Step Instructions for Gordon Ramsay Rabbit Stew

Preparation Phase

Begin by cutting your rabbit into serving-sized portions – legs, shoulders, and saddle pieces work best. **Always use sharp knives when butchering meat to prevent slipping accidents.** Soak the rabbit pieces in cold salted water for 30 minutes to remove excess blood. Pat completely dry with paper towels before seasoning generously with salt and white pepper.

Building the Flavor Foundation

Heat 2 tablespoons of neutral oil in a heavy-bottomed Dutch oven over medium-high heat. **The oil should shimmer but not smoke – smoking oil creates bitter flavors.** Brown the rabbit pieces in batches, avoiding overcrowding. Each piece needs 3-4 minutes per side to develop proper color. Remove and set aside.

In the same pot, add pearl onions and cook until golden, about 5 minutes. Add minced garlic and cook for 30 seconds until fragrant. **Never let garlic burn – it becomes acrid and will ruin the entire dish.** Pour in 1 cup of dry white wine, scraping up any browned bits from the bottom.

The Braising Process

Return rabbit pieces to the pot and add enough stock to cover by 1 inch. Add bay leaves, fresh thyme sprigs, and pitted prunes. Bring to a gentle simmer – you should see tiny bubbles breaking the surface, not a rolling boil. **Cover and reduce heat to maintain this gentle simmer – aggressive boiling will toughen the meat.**

Cook for 1.5 to 2 hours, checking every 30 minutes. The meat is done when it easily pulls away from the bone with a fork. During the final 30 minutes, you can thicken the braising liquid by removing the lid and allowing some evaporation. This technique comes from my experience with Gordon Ramsay’s beef brisket – the principles of low, slow braising remain consistent across proteins.

Pro-Tips That Change the Game

  • Add a splash of brandy during the wine reduction phase for deeper complexity – the alcohol cooks off but leaves incredible flavor
  • Place a parchment paper lid directly on the stew surface before covering with the pot lid – this prevents surface drying
  • Save some fresh herbs to add during the last 10 minutes of cooking for bright flavor contrast
  • Let the finished stew rest for 15 minutes before serving – this allows the flavors to settle and meat to reabsorb juices
  • Strain and reduce the braising liquid separately if you want a more refined sauce consistency
  • Pre-soak the prunes in warm brandy for 20 minutes before adding – they’ll contribute more complex sweetness

Storage & Leftovers for Gordon Ramsay Rabbit Stew

Gordon Ramsay Rabbit Stew actually improves with time, making it perfect for meal preparation. Store cooled stew in airtight containers in the refrigerator for up to 4 days. The braising liquid will gel slightly when cold due to natural collagen – this is a sign of proper cooking technique, not spoilage.

For reheating, use gentle heat to maintain the meat’s tender texture. Add a splash of stock or water if the consistency seems too thick. FDA guidelines recommend reheating to 165°F internal temperature. Avoid microwaving if possible – stovetop or oven reheating preserves the texture better. The stew can be frozen for up to 3 months, though the prunes may become slightly softer after thawing.

Close-up of finished Gordon Ramsay Rabbit Stew plated and ready to serve with fresh herbs
Jack Sullivan

Gordon Ramsay Rabbit Stew

Transform challenging rabbit into a stunning centerpiece with professional techniques ensuring tender, flavorful results. This recipe respects rabbit’s delicate nature through low braising, proper searing, and strategic liquid management.
Prep Time 45 minutes
Cook Time 2 hours
Total Time 2 hours 45 minutes
Servings: 6 servings
Course: Main Course
Cuisine: british
Calories: 385

Ingredients
  

  • 1 whole rabbit cut into 8 pieces
  • 2 large carrots diced into half-inch pieces
  • 3 stalks celery sliced
  • 12 pearl onions peeled, scored on root end
  • 4 cloves garlic minced
  • 3 tablespoons neutral oil
  • 1 cup dry white wine
  • 4 cups chicken stock or rabbit stock
  • 3 sprigs fresh thyme
  • 2 bay leaves fresh
  • 1/2 cup dried prunes or apricots, optional
  • 1 tablespoon Dijon mustard
  • Salt and black pepper to taste

Equipment

  • 1 Heavy-bottomed Dutch oven Essential for even heat distribution
  • 1 Cutting board Dedicated for meat preparation

Method
 

  1. 1️⃣ Cut rabbit into 8 pieces and pat completely dry with paper towels. Season generously with salt and pepper, let come to room temperature for 30 minutes.
  2. 2️⃣ Prepare vegetables: dice carrots into half-inch pieces, slice celery, peel pearl onions (score X on root end), and mince garlic.
  3. 3️⃣ Heat oil in Dutch oven over medium-high heat until shimmering. Working in batches, sear rabbit pieces 3-4 minutes per side until golden brown. Remove and set aside.
  4. 4️⃣ Reduce heat to medium. Add carrots, celery, and pearl onions to the same pot. Cook 8-10 minutes until vegetables begin to caramelize.
  5. 5️⃣ Add minced garlic and cook 1 minute until fragrant. Do not add garlic earlier as it burns easily.
  6. 6️⃣ Deglaze with white wine, scraping up browned bits from bottom of pot. Return rabbit to pot and add enough stock to barely cover meat.
  7. 7️⃣ Add thyme sprigs and bay leaves. Bring to gentle simmer, cover, and transfer to 325°F oven. Cook 1.5-2 hours until meat pulls away from bone easily.
  8. 8️⃣ During last 30 minutes, add dried fruit if using. In final 10 minutes, stir in Dijon mustard for added depth.
  9. 9️⃣ Let stew rest 15 minutes before serving. Garnish with fresh herbs and drizzle of olive oil for restaurant presentation.

Nutrition

Serving: 1gCalories: 385kcalCarbohydrates: 12gProtein: 42gFat: 16gSaturated Fat: 4gPolyunsaturated Fat: 2gMonounsaturated Fat: 8gCholesterol: 125mgSodium: 680mgPotassium: 850mgFiber: 3gSugar: 8gVitamin A: 185IUVitamin C: 12mgCalcium: 45mgIron: 4mg

Notes

Reserve some braising liquid and reduce separately on stovetop for intensely flavored finishing sauce. Brown vegetables in the same pot after searing rabbit to capture every bit of flavor. Save rabbit bones for stock. Internal temperature should reach 160°F for food safety.

Tried this recipe?

Let us know how it was!

Frequently Asked Questions About Gordon Ramsay Rabbit Stew

What is Gordon Ramsay’s most famous dish?

While Gordon Ramsay Rabbit Stew showcases his classical French training, his most famous dish is Beef Wellington. This signature creation demonstrates his mastery of pastry and protein cooking. However, his rabbit dishes reveal the sophisticated technique that earned him Michelin stars. The braising methods used in Gordon Ramsay Rabbit Stew appear throughout his restaurant menus in various forms.

What dried fruit is used in rabbit stew?

Traditional Gordon Ramsay Rabbit Stew uses prunes (dried plums) as the primary dried fruit. Prunes provide natural enzymes that help tenderize the meat while adding subtle sweetness. Some regional variations include dried apricots or figs, but prunes remain the classic choice. The fruit should be added during the braising process to allow proper flavor integration.

How much hunger does rabbit stew heal?

In gaming contexts, rabbit stew typically restores significant hunger points due to its protein and vegetable content. However, real Gordon Ramsay Rabbit Stew provides substantial nutritional value – rabbit meat is lean, high in protein, and rich in vitamins B12 and selenium. A proper serving provides lasting satiety due to the protein density and complex flavors that satisfy both hunger and taste.

Can I substitute chicken for rabbit in this recipe?

While the braising techniques transfer to chicken, the cooking time reduces significantly. Chicken thighs work best and require only 45-60 minutes of braising. The prunes and wine pairing still works beautifully with poultry. However, you’ll miss the unique flavor profile that makes Gordon Ramsay Rabbit Stew special. Consider trying Gordon Ramsay’s chicken cacciatore for a similar braising technique with familiar protein.

This Gordon Ramsay Rabbit Stew represents the perfect marriage of classical French technique and approachable home cooking. The reward for your patience and attention to detail is a dish that rivals any fine dining establishment.

Stay safe,
Jack Sullivan