Table of Contents
Gordon Ramsay Corn Chowder transforms simple ingredients into restaurant-quality comfort food when you understand the science behind proper corn extraction and cream incorporation. After years of cooking for hungry firefighters at the station, I’ve learned that the difference between watery, bland chowder and the rich, velvety version Gordon creates lies in three critical techniques that most home cooks skip entirely. The FDA emphasizes proper temperature control when working with dairy-based soups, which becomes crucial when you’re building layers of flavor. This recipe delivers the same depth you’d expect from Gordon’s famous clam chowder, but with sweet corn taking center stage.
Why This Gordon Ramsay Corn Chowder Recipe Works (And Where Most Go Wrong)
The biggest mistake I see home cooks make with Gordon Ramsay Corn Chowder is treating corn like a simple add-in rather than the star ingredient that requires proper extraction techniques. Gordon’s approach focuses on three fundamental principles that separate amateur efforts from professional results.
Maximum Corn Flavor Extraction
Fresh corn kernels contain natural starches and sugars that need to be properly released through controlled cooking. Food science research shows that corn’s peak flavor compounds are water-soluble, meaning you need to extract them into your liquid base rather than simply adding kernels at the end.
Proper Cream Integration
Most failed chowders result from adding cream too quickly or at too high heat, causing separation and grittiness. Gordon’s technique involves tempering and gradual incorporation to create that signature silky texture.
Building Aromatic Foundation
The holy trinity of onions, celery, and carrots must be properly sweated to release their aromatic compounds before any liquid touches the pan. This creates the flavor foundation that makes Gordon Ramsay Corn Chowder memorable rather than merely adequate.
Ingredients That Actually Matter for Gordon Ramsay Corn Chowder
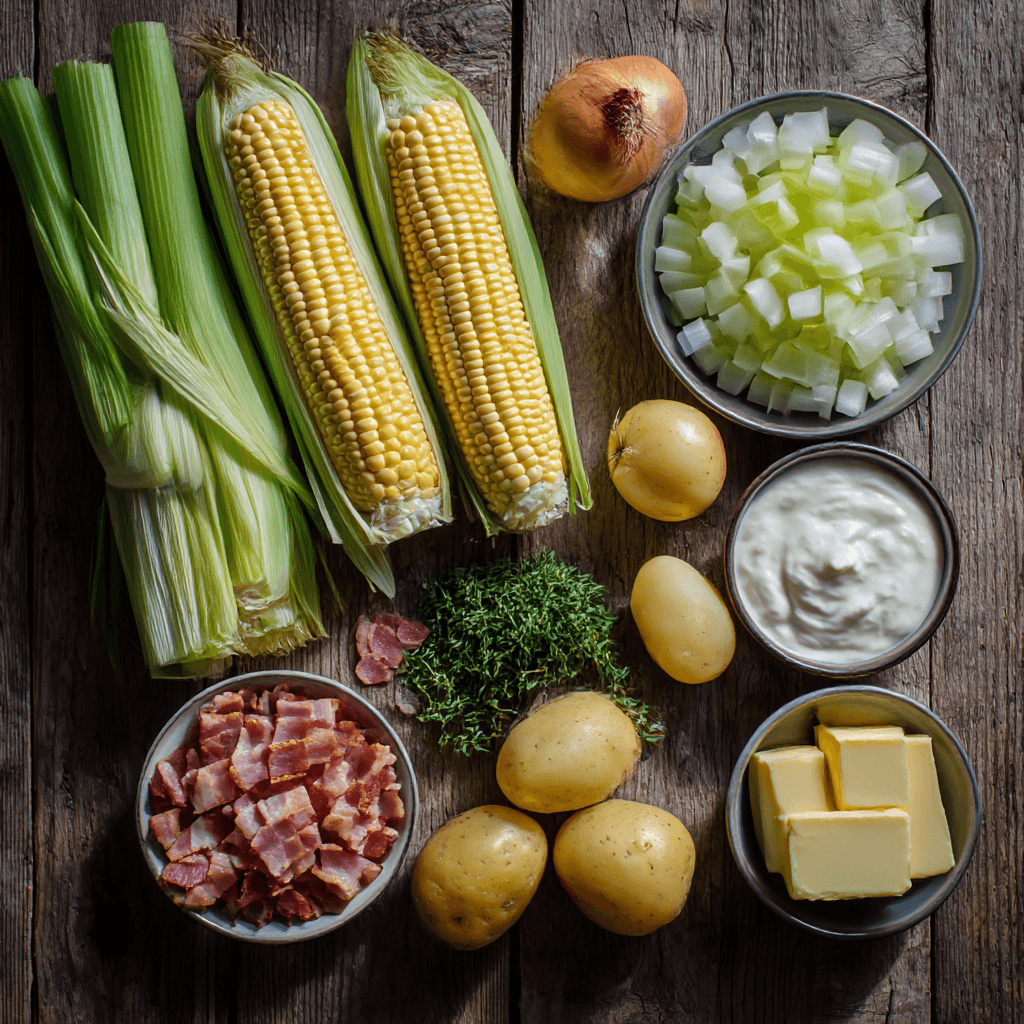
Quality ingredients make the difference between good and exceptional Gordon Ramsay Corn Chowder. Fresh corn is non-negotiable – frozen kernels lack the natural starches needed for proper thickening and miss the sweet, milky flavor that defines this dish. Look for ears with bright green husks, golden silk, and kernels that pop when pressed. Each ear should feel heavy for its size, indicating full moisture content.
Heavy cream with at least 35% fat content ensures proper emulsification without breaking under heat. Lower-fat alternatives will curdle and separate, destroying the chowder’s signature texture. For the potato component, waxy varieties like Yukon Gold hold their shape better than starchy russets, which can dissolve into the soup and create an unpleasant mealy texture.
Your bacon selection dramatically impacts the final flavor profile. Thick-cut, naturally smoked bacon provides the rendered fat needed for sautéing vegetables while contributing subtle smokiness. Avoid pre-cooked or thin bacon, which lacks sufficient fat content. Quality chicken or vegetable stock forms the flavor backbone – avoid high-sodium versions that can overpower the delicate corn sweetness. If you’re planning to serve this alongside Gordon’s garlic bread, ensure your seasoning remains balanced.
Step-by-Step Instructions for Gordon Ramsay Corn Chowder
Prepare Your Corn Foundation
Remove kernels from 6 fresh corn ears using a sharp knife, working over a large bowl to catch all kernels and natural juices. Keep your supporting hand away from the blade path and work slowly to maintain control. Reserve the stripped cobs – they contain concentrated corn flavor that will infuse your stock. In a large pot, combine the corn cobs with 6 cups of chicken stock and simmer for 20 minutes to extract maximum corn essence.
Build Your Aromatic Base
Cook 6 strips of thick-cut bacon in your chowder pot over medium heat until crispy, about 8-10 minutes. Remove bacon and reserve, leaving 3 tablespoons of rendered fat in the pot. Never pour bacon grease down the drain – it will solidify and cause blockages. Add diced onions (1 large), celery (2 stalks), and carrots (1 large) to the bacon fat. Sweat these vegetables for 5-7 minutes until softened but not browned, stirring frequently to prevent sticking.
Create Your Roux and Add Liquids
Sprinkle 3 tablespoons of all-purpose flour over your sweated vegetables, stirring constantly for 2 minutes to cook out the raw flour taste. This creates a blonde roux that will thicken your chowder. Gradually add your corn-infused stock while whisking continuously to prevent lumps. Remove the corn cobs and add diced potatoes (2 medium Yukon Gold). Maintain a gentle simmer throughout – boiling will cause potatoes to break apart and cloud your chowder.
Final Assembly and Finishing
Add your fresh corn kernels and simmer for 8-10 minutes until tender. In a separate bowl, temper 1 cup of heavy cream by slowly adding 2 ladles of hot chowder while whisking. This prevents the cream from curdling when added to the pot. Slowly stir the tempered cream mixture back into the chowder. Season with salt, white pepper, and fresh thyme. For enhanced depth, explore techniques from Gordon’s leek and potato soup for additional flavor layering.
Pro-Tips That Change the Game
- Char half your corn kernels in a dry cast-iron skillet before adding to create smoky depth without overwhelming the delicate corn flavor
- Reserve a handful of raw corn kernels to stir in during the last 2 minutes for textural contrast and bright corn taste
- Use corn silk (cleaned thoroughly) tied in cheesecloth as a natural thickener – it releases pectin that enhances body
- Add a splash of dry sherry just before serving to brighten flavors and add complexity
- Blend 1 cup of finished chowder and stir back in for improved consistency without losing texture
- Finish with a pat of butter swirled in off the heat for restaurant-style glossy appearance
Storage & Leftovers for Gordon Ramsay Corn Chowder
Store Gordon Ramsay Corn Chowder in the refrigerator for up to 3 days in airtight containers. Never leave dairy-based soups at room temperature for more than 2 hours to prevent bacterial growth. The FDA recommends cooling hot foods quickly by placing containers in ice baths before refrigeration.
When reheating, use low heat and stir frequently to prevent cream separation. Add small amounts of stock or milk if the chowder has thickened too much during storage. Avoid freezing cream-based chowders as they will separate and become grainy when thawed. For best results, consume within 24 hours of preparation when the corn flavors remain most vibrant.
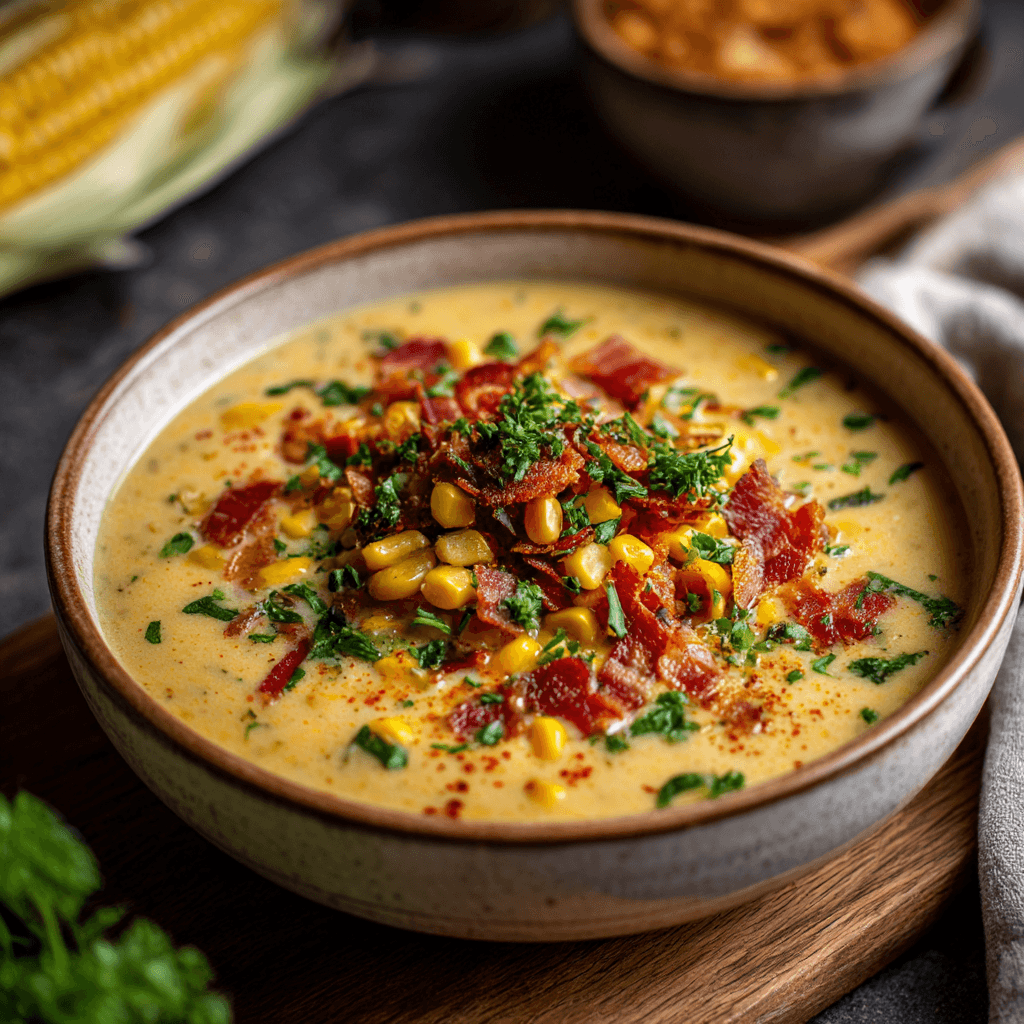
Gordon Ramsay Corn Chowder
Ingredients
Equipment
Method
- 1️⃣ Remove kernels from 6 fresh corn ears using a sharp knife, working over a large bowl to catch all kernels and natural juices. Reserve the stripped cobs. In a large pot, combine the corn cobs with 6 cups of chicken stock and simmer for 20 minutes to extract maximum corn essence.
- 2️⃣ Cook 6 strips of thick-cut bacon in your chowder pot over medium heat until crispy, about 8-10 minutes. Remove bacon and reserve, leaving 3 tablespoons of rendered fat in the pot. Add diced onions, celery, and carrots to the bacon fat. Sweat these vegetables for 5-7 minutes until softened but not browned, stirring frequently.
- 3️⃣ Sprinkle 3 tablespoons of all-purpose flour over your sweated vegetables, stirring constantly for 2 minutes to cook out the raw flour taste. This creates a blonde roux that will thicken your chowder. Gradually add your corn-infused stock while whisking continuously to prevent lumps.
- 4️⃣ Remove the corn cobs and add diced potatoes. Maintain a gentle simmer for 15 minutes until potatoes are tender. Add your fresh corn kernels and simmer for 8-10 minutes until tender.
- 5️⃣ In a separate bowl, temper 1 cup of heavy cream by slowly adding 2 ladles of hot chowder while whisking. This prevents the cream from curdling when added to the pot. Slowly stir the tempered cream mixture back into the chowder.
- 6️⃣ Season with salt, white pepper, and fresh thyme. Crumble reserved bacon back into the chowder. Serve immediately while hot, garnished with additional fresh herbs if desired.
Nutrition
Notes
Tried this recipe?
Let us know how it was!Frequently Asked Questions About Gordon Ramsay Corn Chowder
What three ingredients must a chowder have to be considered a chowder?
Traditional chowders require three essential elements: a dairy or cream base, diced vegetables (typically onions and celery), and a protein or main ingredient like corn. The cream base distinguishes chowder from regular soups, while the vegetable foundation provides aromatic depth. Gordon Ramsay Corn Chowder follows this classic structure while elevating each component through proper technique.
How to give corn chowder more flavor?
Build flavor layers by charring some corn kernels, using corn cobs to infuse your stock, and incorporating bacon fat for richness. Fresh herbs like thyme and chives add brightness, while a splash of white wine or sherry provides acidity to balance the cream. Proper seasoning with salt and white pepper enhances the natural corn sweetness without masking it.
What makes a good corn chowder?
Quality Gordon Ramsay Corn Chowder balances sweet corn flavor with creamy richness and textural variety. Fresh corn is essential – frozen lacks the natural starches needed for proper body. The consistency should coat a spoon without being thick like paste, achieved through proper roux technique and gradual cream incorporation. Each spoonful should contain distinct corn kernels, tender potatoes, and aromatic vegetables.
What’s the difference between corn chowder and corn bisque?
Corn chowder contains visible chunks of corn, potatoes, and vegetables in a cream-based broth, while bisque is completely smooth and pureed. Bisques typically use shellfish or are heavily strained, creating a velvety, uniform texture throughout. Chowders celebrate textural contrast with identifiable ingredients, making Gordon Ramsay Corn Chowder hearty and rustic compared to the refined elegance of bisque preparations like those found in Gordon’s asparagus soup.
This Gordon Ramsay Corn Chowder recipe brings restaurant-quality results to your home kitchen through proper technique and attention to detail. The combination of fresh ingredients and professional methods ensures every bowl delivers the comforting richness that makes chowder such a beloved comfort food.
Stay safe,
Jack Sullivan